We’ve all walked into our living rooms at some point, looked around, and thought, “This space needs a refresh.” Sometimes all it takes is a few DIY touches to breathe new life into a tired room without breaking the bank.
In this guide, we’ll explore practical, stylish, and budget-friendly DIY home decor ideas for your living room. From creating custom wall art to updating old furniture, these projects are designed to be approachable for beginners while still delivering impressive results. You’ll learn how to add personality to your space, maximize functionality, and make your living room feel like a true reflection of your style.
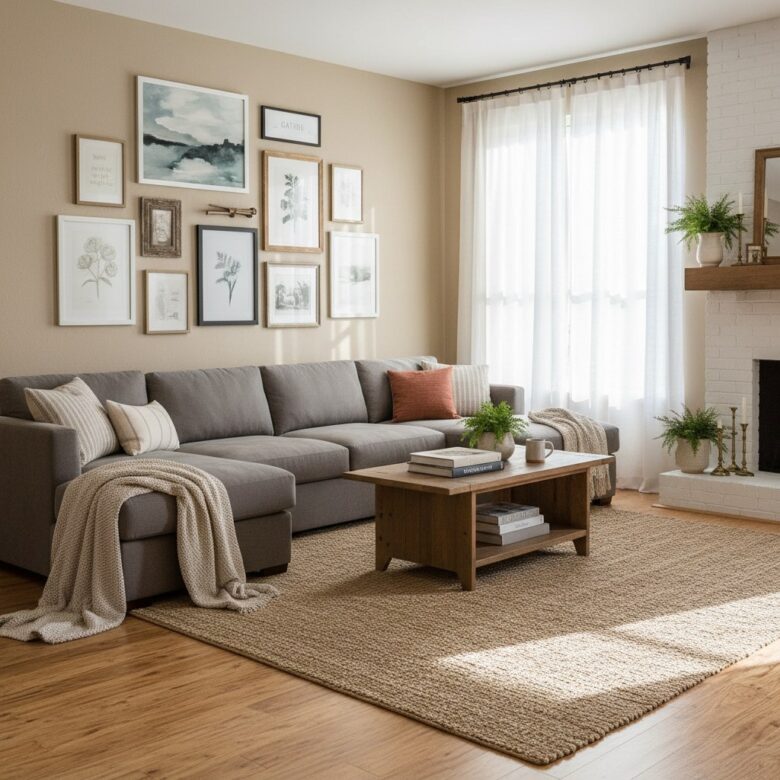
Create a Gallery Wall with Personality
Gallery walls are a fantastic way to fill empty wall space and showcase your creativity. The first time I tried this, I was intimidated by the idea of getting everything perfectly aligned, but I quickly learned that imperfection can add charm.
Start by gathering frames, artwork, and other wall decor items you already own. Mix and match sizes, shapes, and textures for visual interest. I like to include a combination of family photos, thrifted art, and DIY pieces like painted canvases or pressed botanical frames.
Lay everything out on the floor first to experiment with arrangements. A good rule of thumb is to start with one larger piece as the focal point and build around it. Once you’re happy with the layout, measure the total width and height to ensure it fits your wall.
Use painter’s tape to mark the edges on the wall before hanging. This trick saves you from unnecessary nail holes. When hanging, start with the center piece and work outward. If you’re worried about spacing, try using gallery wall hanging kits – they come with templates that make the process foolproof.
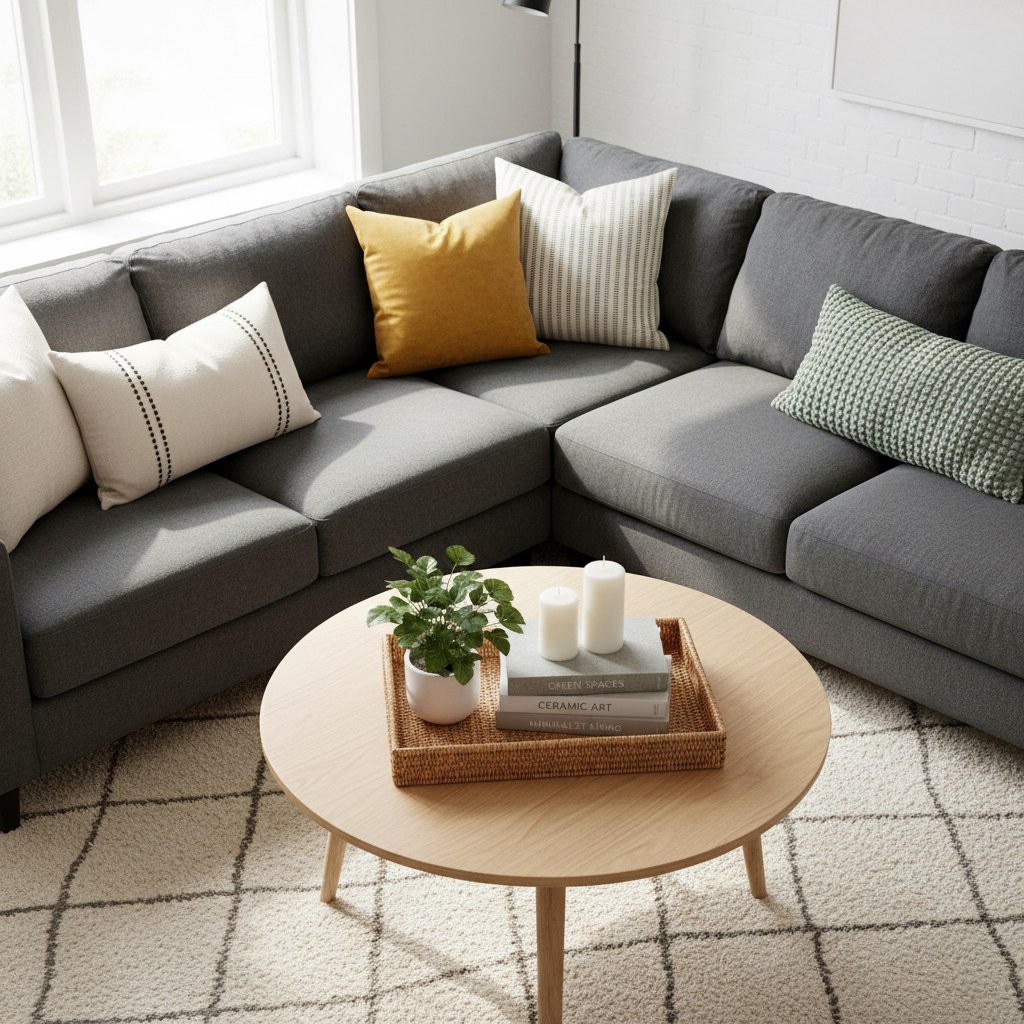
Update Your Coffee Table with a Creative Refresh
Your coffee table is often the centerpiece of the living room, so giving it a fresh look can completely transform the space. One of my favorite DIY projects is refinishing or repurposing an existing table.
If you have a wooden table, consider sanding it down and applying a new stain or paint color. For a modern look, try a matte black or white finish. If you’re feeling adventurous, add a pop of color with a bold hue like teal or mustard yellow.
Another idea is to add texture with a tabletop tray filled with decorative items like candles, books, or small plants. I found that using a woven rattan tray adds warmth and keeps everything organized.
For a quick weekend project, try stenciling a pattern onto the tabletop. Geometric designs or botanical prints work well. Use painter’s tape to create crisp lines and seal the design with a clear topcoat for durability.
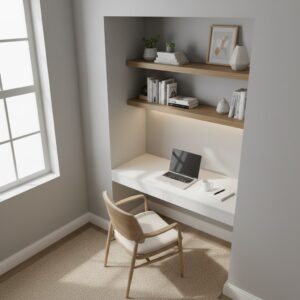
Build Custom Floating Shelves
Floating shelves are both functional and stylish, providing extra storage while keeping your living room clutter-free. Building your own allows you to customize the size and finish to perfectly match your decor.
Start by deciding where you want the shelves and how many you need. Common spots include above the sofa, beside the TV, or in an empty corner. Measure the space carefully, keeping in mind that shelves should be at least 10-12 inches deep for practicality.
For materials, I recommend using 1×12 pine boards for the shelves and 1×2 or 1×3 boards for the cleats (the part that attaches to the wall). You’ll also need brackets, screws, wood glue, and sandpaper.
Here’s a simple step-by-step guide:
- Cut the pine boards to your desired length using a saw.
- Sand the edges and surfaces until smooth.
- Attach the cleats to the wall studs using a level to ensure they’re straight.
- Slide the pine boards onto the cleats and secure with wood glue and screws.
- Apply your chosen finish – stain, paint, or a clear sealant.
For a modern look, paint the shelves a contrasting color to the wall. If you prefer a natural vibe, use a light wood stain to highlight the grain. Add decor items like small plants, books, or decorative objects to style the shelves.
Add Texture with a DIY Throw Pillow Refresh
Throw pillows are one of the easiest ways to update your living room’s look without spending a fortune. The first time I made my own pillow covers, I was shocked at how simple it was – and how much of a difference it made in the room.
Start by choosing fabric that complements your existing decor. I like to mix patterns and textures – maybe a velvet solid paired with a geometric print or a linen with subtle embroidery. For a standard 18×18 inch pillow, you’ll need a 20×20 inch piece of fabric to allow for seams.
Here’s how to make a simple envelope-style pillow cover:
- Lay the fabric face down and fold one edge over about 1 inch, pressing with an iron.
- Fold that same edge over again to create a clean hem (about 2 inches total) and sew along the edge.
- Place the fabric face down again, overlapping the hemmed edges in the middle (this creates the envelope closure).
- Sew along the other three sides, leaving a 1/2 inch seam allowance.
- Turn the cover right side out, insert your pillow form, and you’re done!
If sewing isn’t your thing, you can use fabric glue instead of stitching. Just fold and glue the edges following the same steps. This method works especially well with thicker fabrics like velvet.
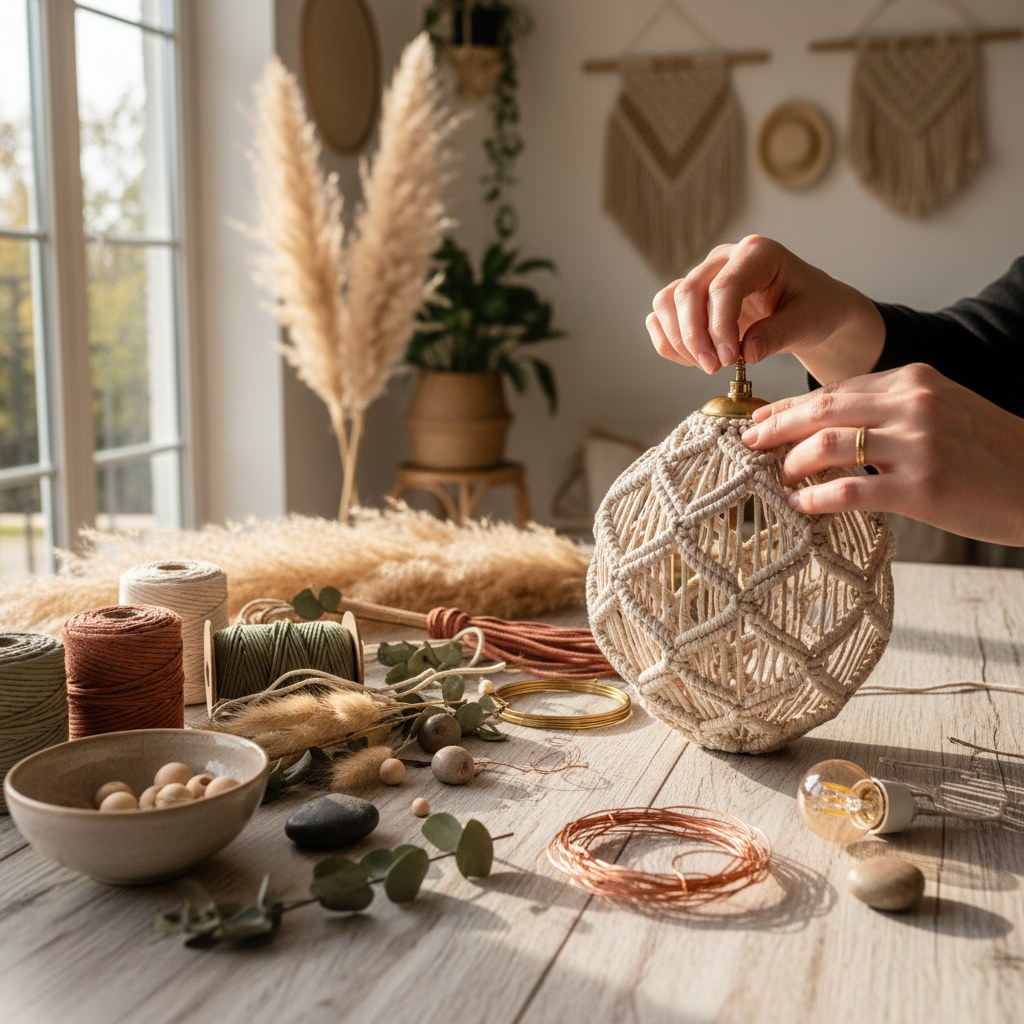
Craft a Statement Light Fixture
Lighting can dramatically change the ambiance of your living room, and creating your own unique fixture is easier than you might think. One of my favorite projects involves turning everyday items into stunning pendant lights.
For a boho-chic look, try making a macramé pendant light. You’ll need:
- A metal embroidery hoop (size depending on your desired light)
- Macramé cord (about 20 yards for a medium-sized fixture)
- A pendant light kit (available at most hardware stores)
- Scissors
- Measuring tape
Here’s the basic process:
- Cut your macramé cord into eight equal lengths (about 2.5 yards each).
- Fold each piece in half and loop them around the embroidery hoop using lark’s head knots.
- Create a series of square knots, alternating patterns as you work downward.
- When you reach your desired length, gather the cords at the bottom and secure with a final knot.
- Install the pendant light kit through the center of the hoop.
For a more modern look, try wrapping a simple wire frame with fairy lights. You can bend the wire into any shape – a sphere, triangle, or abstract form. I’ve found that using copper wire adds a nice warm touch.
Common Mistakes to Avoid
- Overcrowding your gallery wall
It’s tempting to fill every inch of wall space, but leaving some breathing room between pieces creates a more balanced look. Stick to a maximum of 2/3 wall coverage.
- Ignoring scale when choosing decor items
Small items on large shelves or tables can look lost, while oversized pieces can overwhelm the space. Always consider the proportions of your furniture and walls when selecting decor.
- Using only one type of lighting
Layered lighting creates depth and warmth. Combine overhead lights with table lamps and accent lighting for a cozy, inviting atmosphere.
- Forgetting to measure twice
Whether it’s hanging shelves or making pillow covers, accurate measurements prevent frustration and wasted materials. Always double-check before cutting or drilling.
- Being too matchy-matchy
While coordinating colors is important, everything doesn’t need to be perfectly matched. Mixing textures, patterns, and styles adds character and visual interest.
Transforming your living room doesn’t require a complete overhaul or a huge budget. With these DIY ideas, you can create a space that feels fresh, personal, and uniquely yours. Start small, have fun with it, and remember – it’s your creativity that makes it truly special.