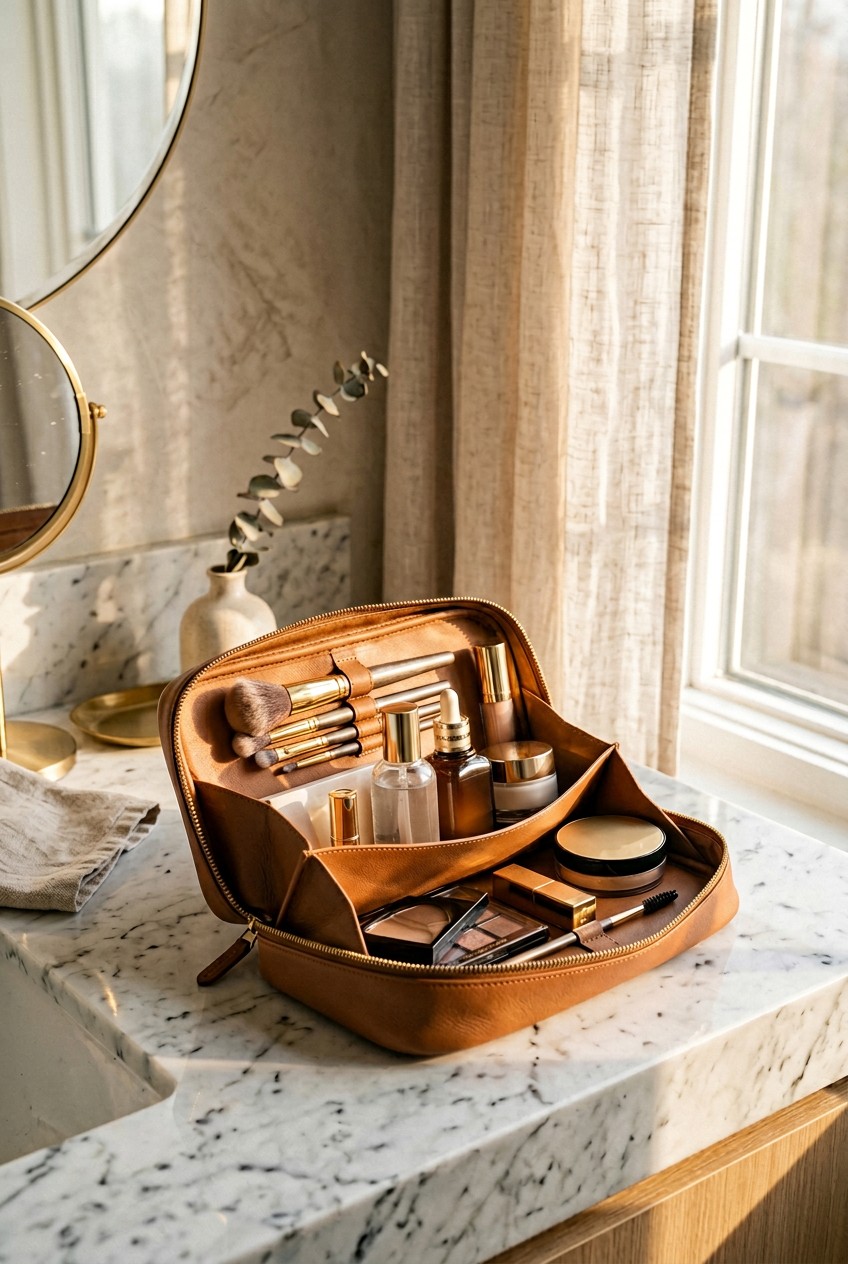
What’s Inside
- Start with a Ruthless Purge and Deep Clean
- Clear Bags for Ultimate Makeup Bag Organization
- Categorize by Product Type and Frequency of Use
- Protect Brushes with Dedicated Holders
- Utilize Small Pouches for Internal Compartmentalization
- Prevent Leaks with TSA-Approved Containers
- The Cotton Pad Hack for Fragile Compacts
- Maximize Space with Multi-Use Products
- Modular Acrylic Organizers for Your Home Base
- Store Makeup Vertically Whenever Possible
- Designate a Touch-Up Mini Bag
- Use Spice Racks for Home Makeup Bag Organization
- Implement a Monthly Maintenance Routine
Last Tuesday at Whole Foods, I had a total checkout disaster. I reached into my tote to find my debit card, grabbed my cosmetics pouch by mistake, and squeezed it too hard. A massive cloud of crushed bronzer exploded everywhere, ruining my white sweater. It smelled like old vanilla and dusty cocoa powder, and my fingers were instantly coated in sticky, shimmery brown residue. That mess forced me to finally master my makeup bag organization. If you’re tired of digging through a dark pit of sticky lip glosses and broken eyeliner pencils, I’m here to help. Proper makeup bag organization isn’t just about making things look pretty. It’s about saving your sanity, protecting your expensive products, and getting out the door faster. I’ve spent years testing every pouch, container, and packing hack out there. Most are useless. But a few tricks actually work. Let’s fix your chaotic cosmetics bag right now.
1. Start with a Ruthless Purge and Deep Clean

Before you buy a new container, dump everything out. I mean literally empty your entire pouch onto a brightly lit countertop. You’ll find things you haven’t used since last year. A few months ago, I found a half-empty tube of liquid blush in the bottom of my travel bag. It had separated into clear oil and thick pink sludge. It smelled like sour milk. I’d been carrying it for 18 months just because it was expensive. Don’t do this. The FDA warns against keeping products that show signs of separation or strange odors. Throw out anything that has changed texture or color. If you haven’t touched it in eight months, it belongs in the trash. Once your bag is empty, grab a 35-count canister of Clorox Disinfecting Wipes. You can get these at Target for $3.99. Scrub the inside corners vigorously. Those bottom seams trap a disgusting amount of loose powder and dead skin. Leave the bag unzipped and let it air dry for at least two hours. If you put things back while it’s damp, you’ll grow mildew. I ruined a beautiful canvas pouch this way once. It smelled like a wet dog for weeks. A clean slate is the only way to start fresh.
2. Clear Bags for Ultimate Makeup Bag Organization

I used to buy those opaque, patterned fabric bags. That was a mistake. When you’re running late, you don’t have time to blindly dig through a dark tunnel hoping your fingers brush against your eyeliner. You need visibility. Investing in a clear case with multiple sections changes everything. I swear by the Truffle Clarity Jetset Case. It costs $80, which feels steep, but it’s made from thick, durable TPU plastic instead of cheap PVC. It measures 7.5 inches long by 5.25 inches wide. The transparent sides mean I can spot my tiny 0.2 oz concealer instantly. Another option is the CALPAK Clear Cosmetics Case. It has a sturdy zipper that won’t snag. Clear bags also force you to stay tidy. When everyone can see inside, you’re less likely to leave smudged foundation everywhere. If you get a smudge, a damp paper towel wipes it away in three seconds. Skip the cheap dollar-store clear bags. The zippers break in a week, and the plastic turns a cloudy yellow after a few months. Spend the money on high-quality TPU. It’s worth every penny when you can find your exact shade of lip liner without dumping the entire contents onto your bathroom sink. Trust me.
3. Categorize by Product Type and Frequency of Use

Dumping all your clean products back into a single pile defeats the purpose. Professional organizers always sort items into logical, distinct categories. Group your complexion products like foundation and concealer together. Keep your eyeshadows and mascaras in another pile. Put blushes and bronzers in a third group. Finally, gather all your lip liners and glosses. Once you have these piles, be brutally honest about your daily routine. I used to carry an aggressive red lipstick every day. I told myself I’d wear it after work. I never did. One afternoon at Sprouts, I reached for my daily lip balm and grabbed the bright red lipstick instead. I applied it without looking in the mirror. I walked around the produce section looking like a clown before I realized my mistake. Now, I only keep my absolute daily essentials in my main bag. The special occasion items stay in a drawer at home. Prioritize the items you actually touch every morning. Your 1 fl oz daily foundation pump and your basic black mascara need to sit at the front. The heavy glitter palettes belong far in the back, or preferably, left at home. This simple sorting method cuts my morning routine in half because my hands instinctively know where to reach.

iDesign Laundry Detergent Holder
iDesign Laundry Detergent Holder punches above its price — 12 buyers rated it 4.5 stars. I would buy it again.
4. Protect Brushes with Dedicated Holders

Throwing loose makeup brushes into your main bag is a fantastic way to ruin them. I learned that the hard way. I used to toss my expensive fluffy powder brush next to my liquid eyeliner. Within a month, the bristles were bent at a 90-degree angle, and the tips were coated in sticky lip gloss residue. It’s unhygienic and destroys the tools you spent money on. You must use a dedicated brush holder. I recommend the BÉIS The Makeup Brush Pouch. It costs $28 and measures 8.6 inches high by 3.15 inches wide. The best part is that it stands upright on your counter. The interior is wipeable, so if a brush has residual blush on it, you won’t stain the fabric. If you want something more rigid, the Narrative Cosmetics Stand-Up Foldable Organizer runs about $25. It folds back on itself to convert into a sturdy brush cup while you’re getting ready. When you’re done, you flip the top up and zip it closed. Always store your brushes with the bristle end pointing up. If you’re washing your brushes weekly with a 2 oz bottle of gentle baby shampoo, keeping them in a dedicated holder ensures they stay clean and perfectly shaped. You might also like: 15 Gorgeous Hacks Home Organization to Inspire Your Next Project
5. Utilize Small Pouches for Internal Compartmentalization

Even if you buy a high-quality makeup bag, you still need internal boundaries. Think of it like a kitchen drawer. If you don’t use divider trays, all your forks and spoons just slide into a chaotic metal pile. The same thing happens with your cosmetics. You need smaller zippered pouches to act as internal compartments. I love using clear mesh pouches. They add zero weight but keep tiny items contained. Stoney Clover Lane makes incredible customizable mini pouches that start around $58. They measure 5 inches by 4 inches. I use one specifically for my lip products. I keep three 0.15 oz lipsticks and a small sharpener inside. Before I started doing this, my lip pencils would uncap themselves and draw red lines all over the interior lining of my main bag. It looked like a crime scene. Small pouches also make it easy to switch bags. If I’m going out for dinner and only want a tiny clutch, I just grab my lip pouch and toss it in. You can also use a small 4-inch mesh bag to hold your tweezers, a 0.5 oz tube of eyelash glue, and some spare cotton swabs. Keeping these micro-items corralled prevents them from sinking to the bottom. You might also like: 15 Inspiring Small Space Laundry Room Ideas to Steal Right Now
6. Prevent Leaks with TSA-Approved Containers

Liquid foundation leaks are the worst. Last year, I packed for a weekend trip and threw a 1 fl oz glass bottle of liquid highlighter into my bag. The pressure changes caused the pump to fail. When I unzipped my bag in my hotel room, everything was coated in a layer of shimmering gold liquid. It took me an hour to clean my brushes, and I had to throw the bag away. To prevent this, you need TSA-approved, leak-proof containers. Humangear GoToob+ silicone bottles are fantastic. You can get a 3-pack of the 1.7 oz size for $24.99. They have a locking cap mechanism that actually works. If you prefer small jars, Cadence Capsules start at $14 for a single magnetic honeycomb container. They hold 0.56 oz of product, which is perfect for a week’s worth of face cream. Here is a trick I learned that changed my routine. Before you screw the cap onto any liquid bottle, tear off a 2-inch square of plastic cling wrap. Place it over the opening of the bottle, then screw the cap on tightly over the wrap. I did this on a recent trip to Costco when I bought a 16 oz bottle of makeup remover. I transferred some into a small travel bottle, added the plastic wrap, and tossed it in my purse. It didn’t leak a single drop. You might also like: 15 Cozy Room Cleaning Tips Organizing Ideas to Steal Right Now

4 Pack Laundry Pods Container
Honestly, 4 Pack Laundry Pods Container surprised me — sturdier than it looks in the photos, and over 509 buyers gave it 4.5 stars.
7. The Cotton Pad Hack for Fragile Compacts

There is nothing more heartbreaking than opening your favorite expensive eyeshadow palette and finding a pile of shattered rubble. Powder compacts are fragile. The hinges are weak, and the pressed powder can’t handle any blunt force. A few months ago, I was walking out of Kroger with my groceries. My purse slipped off my shoulder and hit the pavement. When I checked my makeup bag, my new $45 bronzer was pulverized. I was furious. I tried the rubbing alcohol trick to press it back together, but it never applied the same way. To stop this, use the cotton pad hack. It’s free and takes two seconds. Take a standard 2-inch round cotton pad. You probably have a sleeve of these in your bathroom. Place the pad directly on top of the pressed powder inside the compact. Then, snap the lid shut. The cotton acts as a shock absorber. It fills the air gap between the powder and the lid. If you drop your bag, the cotton absorbs the impact. For larger rectangular palettes, use a flat, square cotton facial tissue folded in half. I do this every time I pack my bag now. It’s a tiny step that will save you hundreds of dollars in ruined cosmetics.
8. Maximize Space with Multi-Use Products

Carrying twenty different products in your daily bag is exhausting. You don’t need a separate primer, foundation, setting powder, and finishing spray just to touch up your face at 2 PM. Maximize your space by embracing multi-use products. I learned this while wandering the beauty aisles at Walmart. I bought the L’Oréal Paris Infallible Up to 24H Fresh Wear Foundation in a Powder. It costs $11.99 for a 0.31 oz compact. This single product acts as a medium-coverage foundation and a mattifying setting powder at the same time. It eliminated two bulky items from my bag instantly. Look for tinted balms that work on both lips and cheeks. A 0.15 oz stick of cream blush can double as a subtle lip tint. You just dab it on with your ring finger. I used to carry a massive contour palette, a highlighter, and a blush. It weighed three pounds and took up half my bag. Now, I carry one sleek cream stick that does all three jobs. When you force yourself to use multi-tasking products, your bag gets lighter, your routine gets faster, and you spend less time digging around. Stop buying gimmicks. Stick to versatile formulas that pull double duty.
9. Modular Acrylic Organizers for Your Home Base

You can’t maintain an organized travel bag if your bathroom counter is a disaster zone. Your daily pouch needs a home base. If you’re just dumping your products into a dark drawer every night, you’re going to lose things. You need modular acrylic organizers to keep your reserve stock visible. I recommend The Container Store’s Luxe Acrylic Modular Makeup System. The individual pieces range from $8.99 to $32.99. Buy exactly what you need. I use a 12-inch by 8-inch tray for my large eyeshadow palettes, and a stacked drawer unit for my backup lipsticks. Acrylic is superior to wood or opaque plastic because you can see exactly how much of a product you have left without opening a drawer. I used to keep my backup foundations in a woven basket. I forgot they were in there, and they expired before I opened them. That was a $100 mistake. With clear acrylic, nothing hides in the shadows. When your home base is compartmentalized, packing your daily bag takes thirty seconds. You just pull the 1 oz bottle you need from its slot and drop it in your pouch. It creates a flow that prevents clutter from piling up on your sink.

3-Tier Hanging Laundry Basket Organizer:Foldable Wire Shelf
3-Tier Hanging Laundry Basket Organizer:Foldable Wire Shelf Laundry Ro has been one of the most consistently praised picks in this category. 527 reviewers averaged 4.5/5.
10. Store Makeup Vertically Whenever Possible

Most people lay their makeup flat inside their bags. They stack palettes on top of compacts, then throw tubes of lip gloss horizontally across the top. This is the worst way to pack. When you stack horizontally, you have to dig through the top layers to reach anything at the bottom. It creates chaos. Professional organizers know that vertical storage is the secret to maximizing tight spaces. Stand your products up. Roll your brushes so the handles are down and the bristles are facing the ceiling. Store your liquid foundation bottles upright. Even your flat eyeshadow palettes should be filed vertically, like books on a library shelf. If your bag doesn’t have built-in dividers, use a thick elastic band. Wrap a rubber band around two or three slim palettes to bind them together. This creates a solid block that stands up on its own against the side of your pouch. I started doing this with my 0.3 oz concealer tubes. I bundle three together with a hair tie, and they stand straight in the corner of my bag. Storing items vertically means every product is visible the second you unzip the zipper. You just pinch the top of the tube you want and pull it out. It’s efficient.
11. Designate a Touch-Up Mini Bag

You don’t need to carry your entire morning routine to the grocery store. I used to lug a massive, heavy cosmetics case everywhere. One morning at Trader Joe’s, I was trying to find my car keys in my purse. My giant makeup bag was taking up so much room that I had to physically pull it out and balance it on my knee just to reach the bottom of my purse. It was ridiculous. Designate a smaller touch-up mini bag for your daily errands. Buy a tiny 4-inch by 3-inch canvas pouch. Inside, you only need three items. First, a 0.05 oz click-pen concealer to fix any midday redness. Second, a slim booklet of oil-absorbing blotting papers. I use the Clean & Clear ones that cost about $6.99 for 50 sheets. They instantly remove shine without adding heavy layers of powder. Finally, toss in a mini travel-size tube of your favorite neutral lipstick. That’s it. You don’t need full-size bronzers or massive setting sprays. If your makeup is applied correctly in the morning, these three items are all you need to look fresh at 3 PM. Keeping this micro-pouch in your purse prevents you from overstuffing your main bag and breaking your shoulder with unnecessary weight.
12. Use Spice Racks for Home Makeup Bag Organization

This is a hack that sounds crazy until you try it. Stop shopping exclusively in the beauty organization aisle. The kitchen organization aisle has better, cheaper solutions. You can use standard acrylic spice racks to store your thick foundation bottles and tall serums. The Container Store sells a 3-tier expandable acrylic spice rack for $14.99. It measures 10 inches wide and expands up to 20 inches. I place this rack right on my bathroom counter. The tiered, stadium-seating design is brilliant for makeup. I put my short, 0.5 oz pots of gel eyeliner on the front row. My medium 1 fl oz pump bottles of liquid foundation go on the second tier. My tall, skinny makeup setting sprays sit proudly on the top back row. Because every row is elevated, nothing blocks your view. If your bottles aren’t organized this way, you’re wasting time. I used to keep all my bottles clustered together in a flat tray. I’d constantly knock over the tall bottles in the front trying to reach a tiny jar in the back. It drove me insane. The tiered spice rack solves this. It turns a cluttered pile of glass bottles into a neat, visible display. It makes packing your daily bag incredibly fast. Took me years to figure out.

Rubbermaid Configurations Deluxe Custom Closet Kit 4-8 Ft.
Rubbermaid Configurations Deluxe Custom Closet Kit 4-8 Ft. Adjustable punches above its price — 81 buyers rated it 4.5 stars. I would buy it again.
13. Implement a Monthly Maintenance Routine

Organizing your bag once and then ignoring it for six months is a recipe for disaster. Makeup bags get filthy. Liquid foundations leak, pencil shavings escape, and bacteria multiplies on your damp blending sponges. You have to implement a monthly maintenance routine. I set a repeating alarm on my phone for the first Sunday of every month. I sit at my kitchen table and empty my bag. I take a damp microfiber cloth and wipe down the hard plastic exterior of every compact and tube. You’d be shocked at how much sticky residue builds up on the outside of a lip gloss wand. I also check the tiny open-jar symbol on the back of my products to ensure nothing has expired. For an extra layer of hygiene, I use a handheld UV-C sterilizing wand. You can buy a decent one online for about $35. I wave the wand slowly over the empty interior lining of my bag for sixty seconds. The UV-C light kills 99.9% of surface microbes without using harsh chemicals that could bleach the fabric. I also run the light over my freshly washed brushes. It sounds extreme, but if you’re prone to acne, a dirty makeup bag is usually the culprit. Taking fifteen minutes once a month to sanitize your gear will keep your skin clear and your bag looking brand new.
Honestly, getting your cosmetics in order doesn’t have to be overwhelming. You just need to stop buying bottomless pouches and start using smart, compartmentalized systems. I recommend starting with the cotton pad hack and a thorough Clorox wipe-down today. It won’t cost you a dime, and you’ll immediately see the benefits. If you found these tips helpful, make sure you save this post or pin it to your favorite beauty board so you can reference it during your next major clean-out!
Frequently Asked Questions
How often should I clean out my makeup bag?
You should do a deep clean every four weeks. Empty everything out, wipe the interior with a disinfectant wipe, and check expiration dates. If a product smells like old crayons or has separated, throw it away immediately.
What is the best way to travel with liquid foundation?
Transfer your liquid foundation into a TSA-approved silicone squeeze tube, like a 1.7 oz GoToob. Place a small square of plastic wrap over the opening before twisting the cap back on to prevent pressure leaks in transit.
How can I stop my powder compacts from breaking?
Place a standard 2-inch cotton round directly over the powder before snapping the compact shut. The cotton acts as a thick shock absorber. It prevents the powder from shattering if you drop your bag onto a hard tile floor.
Are clear makeup bags actually better?
Yes, clear bags stop you from digging blindly. When you can see your 0.5 oz concealer right through the side, you save so much time. Make sure you buy one made of thick TPU plastic rather than cheap PVC so it lasts longer.
