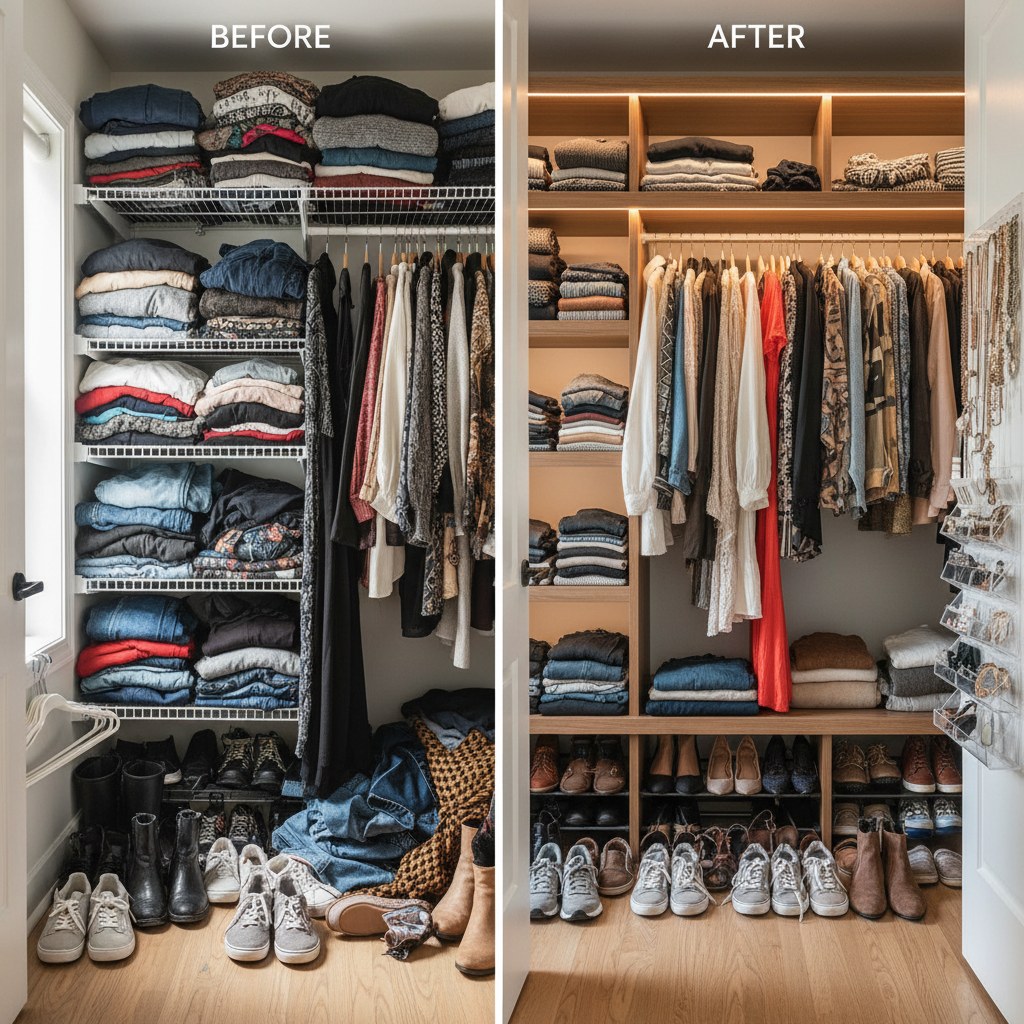
Your closet should be your secret weapon for starting the day stress-free, but let’s be honest—most of us open the doors to chaos instead of calm. A cluttered closet isn’t just annoying; it wastes time and makes it harder to keep your wardrobe in good shape. The good news? With a few simple DIY organization ideas, you can turn your closet into a functional, stylish space that actually works for you.
In this guide, I’ll walk you through practical, budget-friendly ways to organize your closet. You’ll learn how to maximize vertical space, create custom storage solutions, and keep everything looking neat long-term. Whether you’re working with a tiny reach-in closet or a spacious walk-in, these ideas are adaptable and easy to implement. Let’s get started!
Start with a Closet Cleanout
Before you can organize, you need to declutter. Trust me, trying to organize a closet full of stuff you don’t use is like putting lipstick on a pig—it’s just not going to work. The first time I tackled my closet, I was shocked by how many items I hadn’t worn in years. Here’s how to do it right:
- Empty everything: Pull every single item out of your closet—clothes, shoes, accessories, and all. This gives you a blank slate to work with.
- Sort into categories: Create piles for “keep,” “donate,” “sell,” and “trash.” Be ruthless! If you haven’t worn something in the last year, it’s probably time to let it go.
- Assess your storage needs: As you sort, think about what kind of storage solutions would work best for your wardrobe. Do you need more hanging space? Shelving? Shoe racks?
- Clean the closet: Wipe down shelves, vacuum the floor, and dust any corners. A clean space feels so much better to work in.
The cleanout process might take a couple of hours, but it’s worth it. You’ll end up with a closet that’s easier to organize and maintain. Plus, you’ll feel lighter knowing you’ve pared down to only the items you truly love and use.
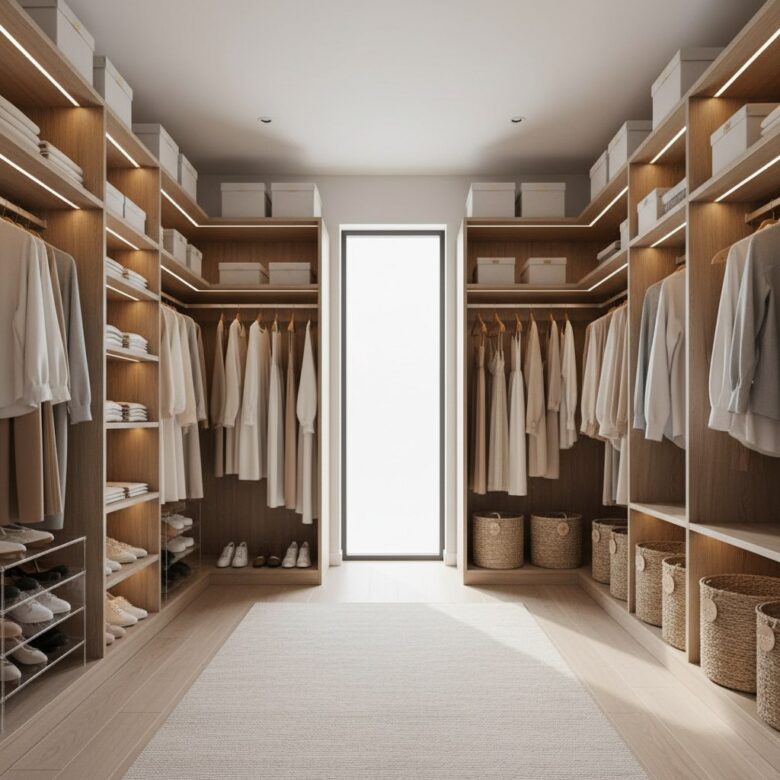
Maximize Vertical Space
One of the biggest mistakes people make is ignoring the vertical space in their closets. In my experience, going vertical is the easiest way to double your storage capacity without expanding the closet itself. Here’s how to make the most of it:
- Install double hanging rods: If you have a lot of shorter items like shirts or skirts, adding a second rod below the existing one can double your hanging space. You can buy adjustable rods or DIY them with PVC pipe and brackets.
- Use shelf dividers: Shelves often become a dumping ground for folded clothes, making it hard to find what you need. Shelf dividers keep stacks neat and prevent them from toppling over. I love these adjustable shelf dividers because they’re versatile and easy to install.
- Hang over-the-door organizers: These are perfect for storing accessories like belts, scarves, or even shoes. They’re affordable and take up zero floor space.
- Add hooks or pegs: Install hooks on the walls or inside the closet doors for items like bags, hats, or robes. It’s a simple way to keep things off the floor and easy to grab.
Vertical storage isn’t just practical—it’s visually appealing. When everything has its place, your closet looks more polished and put-together.
Create Custom Storage Solutions
Sometimes, off-the-shelf organizers just don’t cut it. That’s where DIY custom storage comes in. These projects are surprisingly easy and can be tailored to fit your exact needs. Here are a few ideas I’ve tried and loved:
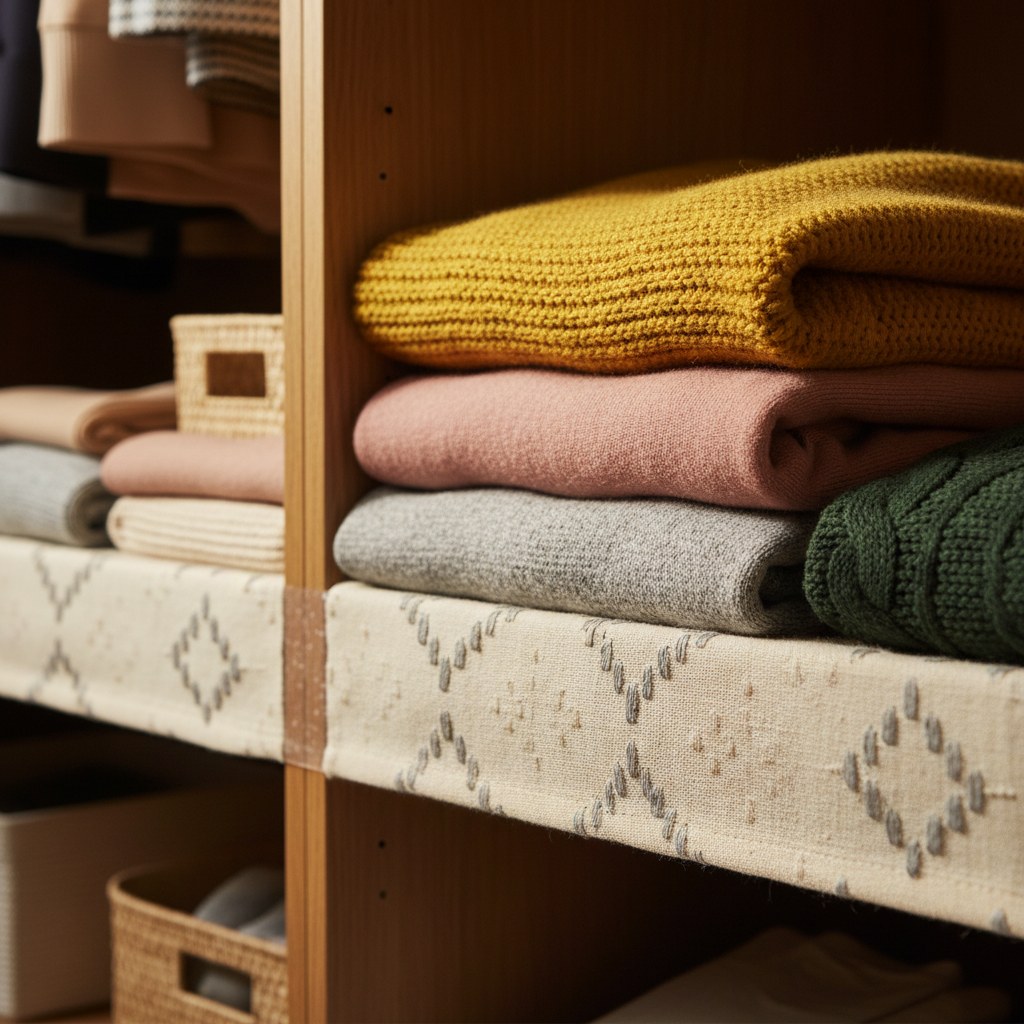
- Build a fabric shelf liner: If your shelves are rough or slippery, lining them with fabric can prevent clothes from sliding and protect delicate items. Measure your shelves, cut fabric to size, and secure it with adhesive or double-sided tape.
- DIY cubbies: Use wooden crates or small shelves to create cubbies for folded clothes, shoes, or accessories. You can paint or stain them to match your closet’s aesthetic.
- Make a jewelry organizer: Mount a corkboard or pegboard inside your closet door and use hooks to hang necklaces, bracelets, and earrings. It’s a great way to keep jewelry untangled and visible.
- Install a scarf rack: Use a towel rack or curtain rod to hang scarves. This keeps them accessible and prevents wrinkles.
These projects don’t require advanced DIY skills, and they make a huge difference in how your closet functions. Plus, you’ll feel proud knowing you created something unique and practical.
What You’ll Need
Here’s a quick list of supplies you might need for these projects:
- Adjustable shelf dividers
- Double hanging rods or PVC pipe
- Over-the-door organizers
- Hooks or pegs
- Fabric (for shelf liners)
- Wooden crates or small shelves
- Corkboard or pegboard
- Towel rack or curtain rod
Gather these items before you start, and you’ll be ready to tackle your closet organization like a pro. Stay tuned for Part 2, where we’ll cover more creative ideas and common mistakes to avoid!
Organize by Category, Not Just Color
Once your closet is decluttered and you’ve maximized your vertical space, the next step is to arrange your items in a way that makes sense for your daily routine. Many people default to organizing by color, but I’ve found that grouping by category is far more practical. Here’s how to do it:
- Separate by type: Start by dividing your wardrobe into categories like tops, bottoms, dresses, outerwear, and workout clothes. This makes it easier to find what you need quickly.
- Sub-categorize: Within each main category, create smaller groups. For example, organize tops into short sleeves, long sleeves, and sleeveless. This level of detail saves time when you’re getting dressed.
- Prioritize frequently worn items: Place the clothes you wear most often in the most accessible spots. I keep my workweek staples at eye level and my weekend or seasonal items on higher shelves.
- Use labels or dividers: If you’re worried about forgetting your system, add labels or dividers to each section. These closet dividers are a great option because they’re clear and easy to move around.
Organizing by category helps you see what you own at a glance and prevents the frustration of digging through piles of mismatched items. It’s a small change that makes a big difference in your daily routine.
Add Lighting for Function and Style
A well-lit closet is a game-changer, especially if your closet doesn’t have natural light. Good lighting not only makes it easier to find what you’re looking for but also elevates the entire space. Here’s how to brighten up your closet:
- Install LED strip lights: These are perfect for illuminating shelves or hanging rods. They’re energy-efficient, easy to install, and come in various colors to match your style. I used these LED strip lights in my closet, and they’ve been a lifesaver on early mornings.
- Add battery-operated puck lights: If you don’t want to deal with wiring, puck lights are a great alternative. Stick them under shelves or inside cabinets for targeted lighting.
- Use a motion sensor light: These are ideal for closets with limited space or if you want hands-free convenience. They turn on automatically when you open the door.
- Consider a stylish pendant light: If you have a walk-in closet with higher ceilings, a pendant light can add a touch of elegance while providing ample light.
Lighting might seem like a small detail, but it can completely transform the functionality and ambiance of your closet. Plus, it’s a relatively inexpensive upgrade that makes a big impact.
Keep It Neat Long-Term
Once your closet is organized, the challenge is keeping it that way. In my experience, maintaining a tidy closet is all about creating habits and systems that work for you. Here are some tips to help you stay on track:
- Do a monthly tidy-up: Spend 10-15 minutes each month reorganizing any areas that have gotten messy. This prevents small piles from turning into big disasters.
- Rotate seasonal items: Store out-of-season clothes in bins or under-bed storage. This frees up space for the clothes you’re currently wearing and keeps your closet from feeling cluttered.
- Put things back immediately: After wearing something, make it a habit to return it to its designated spot. This prevents clothes from piling up on chairs or floors.
- Regularly reassess your wardrobe: Every few months, go through your closet and donate or sell items you no longer wear. This ensures your closet stays streamlined and functional.
Consistency is key when it comes to closet organization. By incorporating these habits into your routine, you’ll save time and reduce stress in the long run.
Common Mistakes to Avoid
- Overstuffing your closet: Even with the best organization system, cramming too many items into your closet will make it hard to maintain. Stick to the essentials and store extras elsewhere.
- Ignoring your lifestyle: Your closet should reflect how you actually live. If you work from home, prioritize casual clothes over formal wear. Tailor your organization to fit your daily needs.
- Skipping maintenance: Organization isn’t a one-time task. Without regular upkeep, even the most beautifully organized closet will quickly fall into disarray.
- Focusing solely on aesthetics: While a pretty closet is nice, functionality should come first. Choose storage solutions that work for your space, even if they’re not Pinterest-perfect.
- Not labeling: Labels might seem unnecessary, but they’re incredibly helpful for maintaining your system, especially if you share the closet with someone else.
By avoiding these pitfalls, you’ll create a closet that’s both practical and enjoyable to use.
Conclusion
Organizing your closet doesn’t have to be overwhelming or expensive. With these DIY ideas and a little effort, you can create a space that’s functional, stylish, and tailored to your needs. Remember, the key is to start small, stay consistent, and focus on what works best for your lifestyle. Happy organizing!