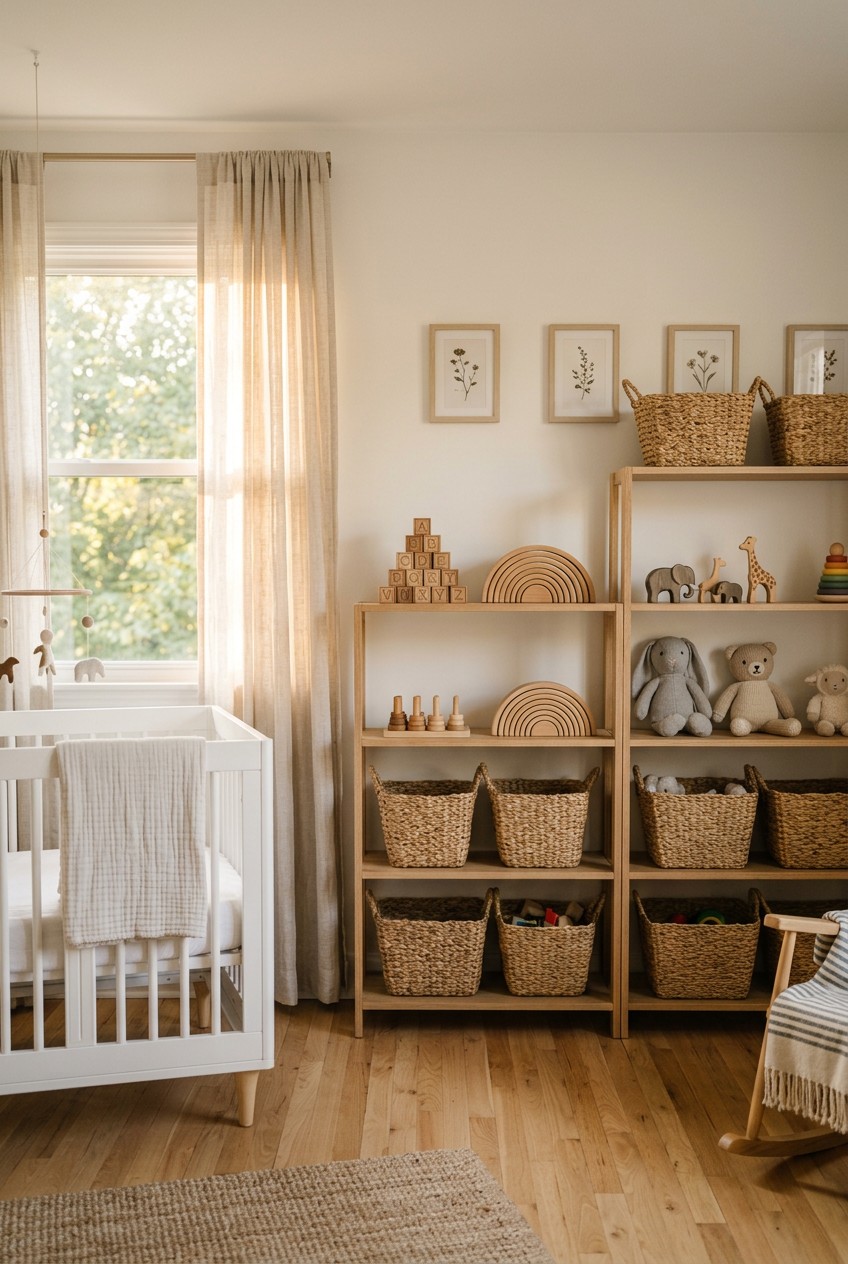
What’s Inside
- Embrace the Montessori Toy Rotation Method for Baby Toy Storage
- Invest in Modular Systems Like TROFAST
- Prioritize Low Accessible Cubbies for Independence
- Utilize Small Clear Bins for Tiny Pieces
- Go Vertical With Wall-Mounted Baby Toy Storage
- Hide Things in Multi-Functional Furniture
- Implement a Bagging Strategy for Puzzles
- Designate Clean-Up Zones with Small Rugs
- Switch to Soft Eco-Friendly Baskets
- Utilize Under-Bed Storage for Out-of-Rotation Items
- Label Everything with Picture Tags
- Avoid the Black Hole Toy Box Trap
- Repurpose Over-the-Door Organizers
I stepped on a hard plastic light-up cow at two in the morning last Tuesday. The sharp edge dug straight into my heel, and the toy immediately started singing a high-pitched farm song in the pitch-black hallway. I’m telling you right now, figuring out effective baby toy storage saved my sanity and my feet. Before I got my act together, my living room looked like a primary-colored plastic explosion. I tried tossing everything into a giant laundry basket. I tried lining things up on the floor. Nothing worked. The clutter made me anxious, and my daughter couldn’t even find the toys she actually wanted to play with. Most people get this wrong at first. We buy all these cute, trendy baskets that look great empty but turn into bottomless pits of chaos once you fill them with blocks and rattles. I spent a full year making every organization mistake possible. I bought flimsy bins that cracked. I bought heavy wooden chests that pinched fingers. I finally figured out a system that actually functions in a real house with a real, messy toddler. If you’re drowning in stuffed animals and teething rings, I’ve got the exact solutions you need to reclaim your floor space.
1. Embrace the Montessori Toy Rotation Method for Baby Toy Storage

I used to think my daughter needed access to every single toy she owned. I’d dump them all in a massive pile in the center of the living room. It was a disaster. She wouldn’t even play. She’d just sit there, overwhelmed by the sheer volume of plastic and bright colors. I tried this wrong for months before figuring it out. Then I learned about the Montessori toy rotation method. The concept is simple. You only leave out 4 to 6 toys at a time. You pack the rest away. When she gets bored, you swap them out. It sounds like extra work, but it actually saves you hours of cleaning. Learned that the hard way.
To make this happen, I went straight to Target. I bought four of the Brightroom 66qt Clear Storage Bins with Latches. They cost exactly $9.00 each. I brought them home, wiped them out with a wet rag, and started sorting. I put the noisy electronic toys in one bin, the wooden blocks in another, and the soft plushies in a third. These bins are large enough to hold bulky items, and the clear plastic means I know exactly what’s inside without popping the lid. The latches are tight, so dust stays out.
I shoved these bins in the top of her closet. Now, her play area only has a few items. She actually focuses on her toys now. She plays with a single wooden puzzle for twenty minutes instead of throwing it over her shoulder to grab something else. If you’re struggling with clutter, this is the very first step you need to take. Don’t buy more shelves yet. Buy bins and hide 80 percent of the stuff.
2. Invest in Modular Systems Like TROFAST

I bought a really cute, woven wicker basket from a boutique when I was pregnant. It cost fifty dollars and held exactly three stuffed bears. It was completely useless for actual daily life. Babies accumulate weirdly shaped items. You need storage that adapts. That is why I personally swear by the IKEA TROFAST system. It’s basically the gold standard for a reason.
The TROFAST is a sturdy wooden frame with plastic bins that slide in and out on grooves. A standard storage combination with boxes measures exactly 39×17 3/8×37 inches. You can usually get a basic setup for under $100. The best part is the sliding mechanism. My daughter can pull a bin entirely out, dump it on the floor, and slide the empty bin back in. When it’s clean-up time, we just toss the blocks back into the plastic tub.
The plastic bins come in different depths. I use the shallow 4-inch deep bins for flat items like coloring books and the deep 14-inch bins for chunky plastic cars. The texture of the plastic is smooth and easy to wipe down when sticky fingers inevitably touch it. I’ve spilled an entire 4 oz bottle of milk inside one of these bins. I just took it to the sink and rinsed it out. You can’t do that with a wicker basket. Skip the fancy decorative baskets. They just collect dust and snag your clothes.
3. Prioritize Low Accessible Cubbies for Independence

I made a massive mistake in my first nursery layout. I put all the beautiful wooden toys on a high floating shelf because it looked perfect for photos. My kid couldn’t reach a single thing. Every time she wanted a toy, she had to whine and point until I stopped what I was doing to get it for her. One afternoon, I caught her trying to climb a wobbly rocking chair to reach a stuffed dog. That was the day I rearranged the entire room.
You have to prioritize low, accessible storage. I bought the IKEA KALLAX shelving unit and laid it horizontally on the floor. This keeps everything right at a toddler’s eye level. To keep it looking neat, I filled the square cubbies with IKEA DRÖNA boxes. These fabric boxes fit perfectly and hide the chaotic mess of random plastic pieces.
We took a trip to Costco last month and I bought a massive set of magnetic building tiles. I thought they wouldn’t fit anywhere. But because the KALLAX cubbies are deep, the entire box fit neatly inside one DRÖNA bin. Keeping things low fosters independence. Now, when she wakes up from her nap, she crawls right over to the low shelf, pulls out a bin, and starts playing by herself. I get to drink my coffee hot for once. It’s totally worth the floor space. Trust me on this.

Sterilite 4 Pack Ultra Latching Box, Storage Bins with Lids
Sterilite 4 Pack Ultra Latching Box punches above its price — 126 buyers rated it 4.5 stars. I would buy it again.
4. Utilize Small Clear Bins for Tiny Pieces

Losing tiny toy pieces is my personal nightmare. I spent forty-five minutes last week looking for a specific blue plastic pacifier that goes to a baby doll. I finally found it at the bottom of a dark, opaque fabric bin, covered in cracker crumbs. Deep, dark bins are terrible for small items. You have to dump the entire thing out just to find one piece.
For small categories like pacifiers, tiny wooden figures, or puzzle pieces, clear storage is mandatory. I use the Target Brightroom All Purpose Clear Expandable Bin Small. It costs around $13.00 and fits perfectly inside a dresser drawer. I also buy the cheap 6qt Clear Storage Boxes from Target for about $1.25 each. I use these for crayons, small blocks, and flashcards.
The visibility changes everything. You can look at a stack of three clear bins and instantly know which one holds the toy cars. I label them anyway, but the clear plastic does the heavy lifting. I’ve learned to group tiny things aggressively. If a toy has more than three pieces, it immediately goes into a clear 6qt box with a snapping lid. I don’t let loose pieces float around in larger baskets anymore. It just leads to tears when a vital piece goes missing right before bedtime. You might also like: 20 Brilliant Indian Home Makeover Ideas for Any Style
5. Go Vertical With Wall-Mounted Baby Toy Storage

Floor space is a premium in my house. Between the high chair, the play kitchen, and the baby bouncer, I barely have room to walk. I was constantly tripping over stray toys. I realized I needed to use my walls. Going vertical is the best way to get toys out of the walking path while still keeping them accessible. You might also like: 15 Creative Hacks Organizing Ideas You Need to See
I absolutely love the IKEA BYGGLEK LEGO wall storage solution. It’s designed for building blocks, but it works for any small, lightweight toy. You mount these small white boxes directly to the wall. They look clean and modern. I also took a trip to Walmart and found some simple white floating shelves for exactly $12.50 each. I mounted three of them in a vertical row next to the window. You might also like: 20 Gorgeous DIY Waste Materials Home Decor Ideas for Any Style
I use these shelves to display books facing outward. The colorful covers act like art, and it gets a stack of twenty heavy board books off the floor. Just make sure you anchor everything directly into a wall stud. I tried using cheap drywall anchors once for a heavy shelf of wooden toys. The whole thing ripped out of the wall, leaving a massive hole and a pile of broken wood on the carpet. Learn from my mistake. Find the stud. Use long screws. Wall storage is great, but only if it stays on the wall.
6. Hide Things in Multi-Functional Furniture

Our living room is also the main playroom. For the first year, it looked like a preschool had exploded in our house. I hated having friends over because I felt like I was living inside a giant toy box. I needed a way to hide the bright plastic stuff when adults came over for dinner. Multi-functional furniture fixed this completely.
I invested in the Pottery Barn Kids Tucker Toy Chest. It is 36 inches wide and doubles as a sturdy bench. It wasn’t cheap, but it looks like a beautiful piece of adult furniture. The painted wood smells clean, and the hinges are heavy-duty. I keep it pushed against the wall under the front window. During the day, it’s open and my daughter pulls her toys out. At night, I throw everything inside, shut the lid, and toss two nice throw pillows on top.
Suddenly, my living room looks like an adult space again. I also bought a hollow fabric ottoman for the center of the room. It holds all the ugly, brightly colored blankets and soft toys. If you’re sharing your living space with your kids, you can’t rely on open shelving. You need closed storage that blends in. Don’t buy furniture that just does one thing. Make sure your coffee table has drawers and your benches have hollow centers.

Cisily Sponge Holder for Kitchen Sink
Honestly, Cisily Sponge Holder for Kitchen Sink surprised me — sturdier than it looks in the photos, and over 123 buyers gave it 4.5 stars.
7. Implement a Bagging Strategy for Puzzles

Cardboard boxes for kids’ games and puzzles are a scam. They rip, they get crushed, and they take up way too much space. I used to stack puzzle boxes on a shelf. Every time my daughter pulled one out, three others would tumble to the floor, spilling wooden pieces everywhere. I was at Whole Foods grabbing my favorite $6.99 almond butter when I noticed the small cotton produce bags they sell. A lightbulb went off.
I went home and ordered a bulk pack of 8×10 inch muslin drawstring bags online. I took every single wooden puzzle and board game we owned and threw the cardboard boxes in the recycling bin. I put the pieces for each puzzle into a separate muslin bag. I cut out the picture from the front of the original box and slipped it inside the bag so we know what it is.
This bagging strategy shrunk my puzzle footprint by 80 percent. I took a massive stack of ten bulky boxes and reduced it to a single medium-sized basket filled with soft bags. The muslin fabric is durable and washes easily. When a bag gets dirty, I just throw it in the washing machine with 2 tablespoons of mild detergent. Ditch the cardboard. It won’t last anyway.
8. Designate Clean-Up Zones with Small Rugs

If you have more than one kid, or just a kid who likes to spread out, toy creep is a real problem. My daughter would start playing in the corner, and within an hour, her toys would be scattered across the entire house. I was constantly picking up stray blocks from the kitchen floor. I needed a way to contain the mess visually. I read about using small rugs to define play zones, and it honestly changed how I manage playtime.
I bought a cheap, 3×5 foot textured woven rug from Target. I placed it right next to her toy shelf. I taught her that her toys have to stay on the rug. If a toy rolls off the rug, it goes back in the bin. It gives her a clear visual boundary. The rough texture of the rug also prevents slippery wooden blocks from sliding away.
When it’s time to clean up, the mess is already contained to a 15-square-foot area. We don’t have to hunt around the house. She knows that everything on the rug needs to be put away before dinner. It teaches spatial organization without me having to nag constantly. I tried using tape on the floor once to mark a zone. It left a sticky residue that ruined my hardwood finish. Stick to a small, washable rug. It’s much safer for your floors.
9. Switch to Soft Eco-Friendly Baskets

I learned the hard way that sharp plastic corners and toddlers don’t mix. My daughter was running through the room, tripped, and scraped her knee badly on the edge of a rigid acrylic toy bin. It left a nasty red mark. After that, I started swapping out my hard floor bins for soft, eco-friendly options. It’s safer, and it honestly looks much better.
I bought three Goodpick Cotton Rope Storage Baskets. They usually cost around $30 to $40 depending on the size. I got the large 15.8×15.8×13.8 inch ones. The cotton rope is incredibly soft, thick, and flexible. If she falls against it, it just collapses. They hold their shape reasonably well, but they aren’t rigid. I use these massive baskets for bulky, lightweight items like stuffed animals and large plastic balls.
I also picked up some EKOBO bamboo toy storage jars for the smaller items sitting on her dresser. The bamboo feels smooth and earthy, and it’s a great sustainable alternative to cheap plastic. The natural materials add a really calming texture to the room. Bright plastic bins can feel cold and clinical. Soft cotton and smooth bamboo make the space feel warm and inviting. Plus, I don’t have to worry about sharp edges anymore.

Sevenblue 3 Pack Under Sink Organizers
If you want something that just works, Sevenblue 3 Pack Under Sink Organizers is a safe bet (39 reviews, 4.5 stars).
10. Utilize Under-Bed Storage for Out-of-Rotation Items

The space under a bed is the most wasted real estate in a house. For a long time, the space under my daughter’s crib was just a collection zone for dust bunnies and lost socks. When we transitioned her to a toddler bed, I realized I had a massive 50×28 inch rectangle of empty floor space perfectly hidden from view. This is exactly where you should put your out-of-rotation baby toy storage.
I bought two of the IKEA VARDÖ under-bed storage boxes. They are brilliant because they have small wheels on the bottom and a fabric cover that zips shut. You just roll them out, grab what you need, and roll them back. The fabric cover keeps the dust off the toys. I use these specifically for seasonal items, like heavy wooden train tracks we only bring out in the winter, or bulky noisy toys I need a break from.
I used to just shove loose toys under the bed. That was a huge mistake. I’d reach under there to grab a ball and pull out a handful of dust and an old cracker. You have to use a sealed container. The rolling feature is non-negotiable. If you buy a flat bin without wheels, it will scrape your floors and you’ll hate dragging it out. The smooth rolling action of the VARDÖ makes rotating toys completely painless.
11. Label Everything with Picture Tags

My husband is a wonderful man, but he is terrible at putting toys away. I would spend an hour organizing the bins, and the next day I’d find wooden blocks mixed in with the soft plushies. It drove me crazy. I realized that my system made sense to me, but nobody else knew where things belonged. I needed labels. But since my daughter can’t read yet, traditional text labels were useless.
I was at Sprouts buying groceries when I saw a mom using picture cards to help her kid pick snacks. I immediately went home and printed out simple clip-art pictures of toys. A picture of a car, a picture of a block, a picture of a bear. I cut them out, laminated them with clear packing tape, and used a hot glue gun to stick them to the front of the opaque bins.
This changed everything. Now, my husband knows exactly where the cars go. More importantly, my toddler knows where they go. When I say, “put the blocks away,” she looks for the bin with the picture of the block. It gives her a sense of empowerment. I tried drawing the pictures myself at first. That was a mistake. My drawing of a dog looked like a lumpy potato, and she kept putting her play food in that bin. Print clean, clear pictures from the internet. It takes ten minutes and saves you hours of re-organizing.
12. Avoid the Black Hole Toy Box Trap

Traditional toy chests look charming in movies, but in real life, they are absolute black holes. I bought a deep, beautiful wooden chest at a yard sale. I thought it would solve all my problems. Instead, my kid would just throw everything inside. The heavy wooden toys crushed the fragile plastic ones at the bottom. I reached in one day and found a crusty, moldy sippy cup buried under a pile of stuffed animals. I nearly gagged.
If you’re going to use a toy chest, you have to do it right. I eventually replaced the yard sale find with a Melissa & Doug Wooden Toy Chest. It costs around $100 to $150 and offers 8.25 cubic feet of storage. The most important feature is the safety-hinged lid. It stays open at any angle, so it won’t slam down on little fingers.
To fix the black hole problem, I bought cheap plastic shoeboxes from Kroger during a late-night milk run. I placed these smaller boxes inside the large wooden chest. Now, the chest is compartmentalized. The dolls go in one plastic box, the cars in another, and the bulky items sit loose on top. You can’t just throw things into a deep box and expect to ever find them again. You have to create zones inside the chest. Otherwise, you’re just hoarding trash at the bottom. No exaggeration.

4 Tier Storage Bins with Lids
Honestly, 4 Tier Storage Bins with Lids surprised me — sturdier than it looks in the photos, and over 63 buyers gave it 4.5 stars.
13. Repurpose Over-the-Door Organizers

I was running out of floor space, wall space, and closet space. I had a massive collection of tiny, lightweight stuffed animals that were constantly underfoot. I was complaining to a friend while we were walking through Trader Joe’s, and she suggested using a shoe organizer. I thought she was crazy, but I was desperate.
I bought a clear plastic over-the-door shoe organizer for fifteen dollars. I hung it on the back of the nursery door. I stuffed a small plush toy into each of the 24 shoe slots. It looked hilarious, but it worked perfectly. The clear pockets meant my daughter could point to the exact toy she wanted. It kept 24 items completely off the floor without taking up a single inch of usable space.
I use the bottom row for her small play shoes and the upper rows for toys. It’s also a great spot to store small craft supplies or flashcards once they get a little older. If you have the budget, you can eventually upgrade to something like the Lovevery Montessori Playshelf. It costs around $400 to $450 and has built-in hidden storage in the back. But honestly, a fifteen-dollar shoe organizer does an incredible job for small, annoying items. Just don’t put heavy wooden toys in the plastic pockets. The weight will rip the seams right open.
Listen, organizing a house with a baby is never going to be perfect. You’re going to find a rogue Lego in your shoe eventually. But setting up a smart baby toy storage system means you won’t spend your entire evening cleaning up after they go to sleep. I highly recommend starting with the clear bins and the rotation method. It’s the cheapest and fastest way to see a difference. Pin this article so you can check the measurements next time you’re standing confused in the middle of an IKEA aisle!
Frequently Asked Questions
What is the best way to store baby toys in a small living room?
Use multi-functional furniture like a storage ottoman or a wooden toy chest that doubles as a bench. This hides the bright plastic toys out of sight when adults are using the space, keeping your living room looking clean.
How does the Montessori toy rotation method work?
You only leave 4 to 6 toys out in the play area at one time. Store the rest in clear plastic bins in a closet. Swap the toys out every few weeks to keep your child engaged and reduce daily clutter.
Are toy boxes safe for babies and toddlers?
Traditional toy boxes can be dangerous if the lid is heavy. Always buy a toy chest with a safety hinge that holds the lid open at any angle to prevent it from slamming on little fingers.
How do you organize puzzles without the bulky cardboard boxes?
Throw the cardboard boxes away and put the puzzle pieces into small, cotton muslin drawstring bags. Cut the picture off the original box and slide it into the bag so you know what’s inside.
