What’s Inside
- The Brutal (But Necessary) Pantry Purge
- Measure Your Space Like A Contractor For Realistic Pantry Organization
- Group By Zones For Soft Pantry Styling
- Decant Dry Goods The Right Way (Realistic Pantry Organization Must-Do)
- Double Your Space With Shelf Risers
- Spin Your Way Out Of Corner Clutter
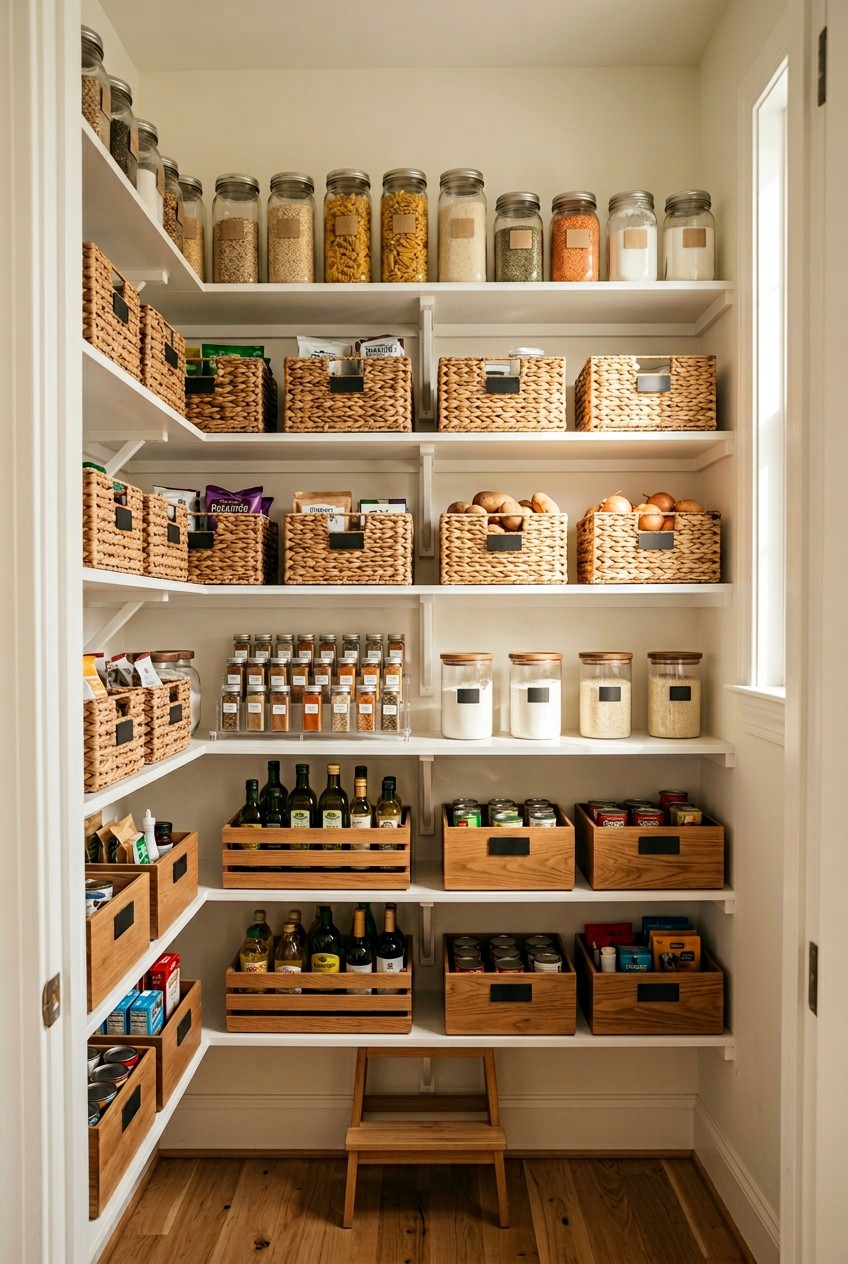
- Soften The Look With Woven Baskets
- Hijack The Back Of Your Pantry Door
- Raise Your Spices For Better Visibility
- Broad Labels Save Your Sanity
- Stop The Topple With Drawer Separators
- Build A Grab-And-Go Snack Station
Last Tuesday at Trader Joe’s, I bought my fourth jar of ground cumin. It hit me then: I desperately needed a system for my pantry. When I got home and tried to shove it into my tiny, dark cabinet, three boxes of stale crackers cascaded onto my toes. They left a fine dust of salt and regret all over the floor. If your shelves look like a grocery store exploded, you’re not alone. I spent months organizing my kitchen the wrong way. I bought expensive bins that didn’t fit and labeled things so rigidly my husband just stopped putting groceries away. It’s time to fix the mess. I’ve pulled together these realistic organization ideas for small spaces that actually work for people who eat normal food. You don’t need a mansion to have a functional kitchen. Here are the steps, products, and hard lessons I’ve learned.
1. The Brutal (But Necessary) Pantry Purge

Before you buy a single bin, you have to empty the whole thing. I mean every last crumb-covered shelf and sticky corner. Last October, I pulled everything out of my client Sarah’s pantry and we found a bag of flour from 2019 that smelled like wet dog hair. It’s gross, but it happens. Professional organizer Kayleen Kelly says that not purging your pantry every six months is a major faux pas. She’s right. You can’t organize clutter. Grab a heavy-duty Hefty Strong Large Trash Bag (about $12.49 for a 40-count box at Target) and start tossing. Throw out the stale chips, the weird canned fish you bought on a diet kick, and anything your kids refuse to eat. Skip the fat-free stuff too. It tastes like wet cardboard. Once the shelves are bare, wipe them down with a damp microfiber cloth and a generous spray of Mrs. Meyer’s Lemon Multi-Surface Cleaner ($4.89 at Whole Foods). The fresh citrus smell makes the space feel bigger. Don’t skip this. I tried to just shift things around once, and I ended up hiding a leaky bottle of soy sauce that ruined a wooden shelf. You have to start with a blank canvas. It’s a dirty job, but someone has to do it. Put on a good podcast and power through.
2. Measure Your Space Like A Contractor For Realistic Pantry Organization

Most people get this wrong. They see a pretty container, buy it, and get home only to realize their shelf is half an inch too short. I’ve done this. I bought a gorgeous set of tall glass jars for spaghetti, and the pantry door wouldn’t close because the hinges were in the way. I cried a little. Realistic organization means dealing with the actual physical limitations of your house. Grab a Stanley 25-Foot PowerLock Tape Measure (around $14.97 at Walmart) and measure everything. You need the exact width, height, and depth of every shelf. Write it down in your phone notes. Pay special attention to door hinges, lights, and air vents. If you block a vent with a massive bin of potatoes, they’re going to rot faster. I learned that the hard way when my kitchen started smelling like a swamp. Also, measure the clearance. If you only have 10 inches of height, don’t buy an 11-inch cereal dispenser. You’ll just get frustrated and shove it in a corner. Save yourself the headache and the return trip. Write down your dimensions before you spend a dime. Knowing your exact measurements is the only way to ensure the bins will actually slide in and out without scraping the paint off your walls. Contractors measure twice and cut once. You need to measure twice and buy bins once.
3. Group By Zones For Soft Pantry Styling

Stop putting the peanut butter next to the canned beans. It doesn’t make sense. You need a zone system for easy access. This is a 2026 trend called “Soft Pantry Styling.” It means making your pantry function like a natural, flowing space instead of a rigid supermarket aisle. Think about how you cook. You should have a baking zone, a breakfast zone, a snack zone, and a dinner prep zone. I keep all my baking ingredients in one area. That includes a 5lb bag of King Arthur flour, Domino sugar, and Clabber Girl baking powder. When I want to make cookies, I’m not running laps around my tiny kitchen. I just grab the baking bin. For my breakfast zone, I use a mDesign Plastic Storage Bin ($16.99 for a 2-pack at Target) to hold oatmeal, syrup, and my favorite Kashi cereal. Grouping similar items means everything has a home. It’s so much easier to find things. If you scatter your snacks, you’ll end up buying three boxes of Cheez-Its because you didn’t see the two boxes hiding behind the olive oil. Zones stop the overbuying cycle. Once you train your brain to look in the “breakfast zone” for syrup, your mornings become less chaotic. Soft styling isn’t just a buzzword. It’s a different way of thinking about your food.

Rubbermaid Configurations Deluxe Custom Closet Kit 4-8 Ft.
Honestly, Rubbermaid Configurations Deluxe Custom Closet Kit 4-8 Ft. Adjustable surprised me — sturdier than it looks in the photos, and over 81 buyers gave it 4.5 stars.
4. Decant Dry Goods The Right Way (Realistic Pantry Organization Must-Do)

Let’s talk about decanting. Getting rid of bulky, half-torn cardboard boxes is key. Decanting dry staples like flour, sugar, and pasta into clear, airtight containers keeps them fresh and stops nasty pantry moths from invading. I swear by OXO POP Containers. They’re BPA-free, stackable, and the push-button seal is satisfying. A 3-piece set runs about $30.99 to $32.99, or you can grab a big 4.4qt container for $21.99. If you’re on a tight budget, don’t panic. The Mainstays Clear Plastic Pantry Storage Organizer Bins from Walmart are fantastic and cost around $3.93 to $4.77 each. Now, here’s a tip that changed my life. When you pour your 18 oz container of Quaker Oats into a clear bin, you lose the expiration date. Take a black Expo Dry Erase Marker ($6.49 for a 4-pack at Kroger) and write the “best by” date directly on the bottom or back of the plastic container. This ensures you practice FIFO. That stands for First In, First Out. You’ll actually eat the older stuff before it goes bad. I used to guess if my almonds were still good, which resulted in a very chewy, gross mouthful of rancid nuts. Never again. Write the date on the bottom and save your tastebuds. Plus, clear bins look satisfying when they’re all lined up. You might also like: 15 Cozy Room Cleaning Tips Organizing Ideas to Steal Right Now
5. Double Your Space With Shelf Risers

If you have tall shelves, you’re wasting half your space. Stacking cans is a dangerous game. It usually ends with a heavy can of diced tomatoes rolling off and smashing your toe. You have to use vertical space safely. Shelf risers are the answer. They act like mini-shelves that sit on your main shelf, letting you store items underneath and on top. I love the Brightroom 3-Tier Can Organizer from Target. It’s only about $16.00 and it fixed my canned goods section. Instead of moving five cans of soup to find the black beans, I can see every label at a glance. You can also use flat wire shelf risers, like the simplehuman Cabinet Organizer ($19.99 at The Container Store), to stack plates or shorter boxes of pasta. Don’t let that empty air above your peanut butter jars go to waste. I used to complain that my pantry was too small, but once I added risers, I realized I was just organizing it badly. Effectively doubling your storage is easy when you start thinking up. Just make sure the risers have rubber feet so they don’t slide around and scratch your wooden shelves. Vertical space is the biggest missed opportunity in almost every kitchen I’ve ever organized. You might also like: 20 Inspiring Garage Organization Ideas That Are Totally Worth It
6. Spin Your Way Out Of Corner Clutter

Corners are where good groceries go to die. They become dark, unreachable dead spaces where items get lost for years. I once found a bottle of fancy truffle oil in the back corner of my pantry that expired during the Obama administration. It was tragic. To maximize corner space, you need Lazy Susans. Turntables are perfect for holding tall bottles of olive oil, balsamic vinegars, hot sauces, and spice blends. Instead of knocking over three bottles of soy sauce to reach the sesame oil, you just give it a spin. I recently picked up a clear 2-tier turntable at Kmart for about $12.00, and it holds so much. If you don’t have a Kmart nearby, the iDesign Linus Turntable ($14.99 at Sprouts or Amazon) is a great alternative. The clear plastic lip keeps things from flying off when you spin it too fast. I keep all my sticky items on one turntable. If a 12 oz bottle of honey leaks, it drips onto the washable plastic tray instead of staining my wooden shelves. It’s a small change that makes dinner feel less chaotic. You can just grab the soy sauce without playing a game of kitchen Jenga. Turntables are the unsung heroes of the kitchen. I don’t know how I survived without them. You might also like: 20 Cozy Aesthetic Organizing Ideas to Inspire Your Next Project

3-Tier Hanging Laundry Basket Organizer:Foldable Wire Shelf
If you want something that just works, 3-Tier Hanging Laundry Basket Organizer:Foldable Wire Shelf Laundry Ro is a safe bet (518 reviews, 4.5 stars).
7. Soften The Look With Woven Baskets

We’re moving away from the clinical-looking pantry. The 2026 trend favors sustainable materials like bamboo, wood, and natural fibers. It’s all about creating a “soft pantry” that feels warm. I recommend using Water Hyacinth Storage Baskets to group bulky items. Think massive bags of tortilla chips, loaves of bread, or kitchen linens. These baskets provide a clean visual line while keeping food breathable. You can find them at Target ranging from $15 to $50. I use a large, $24.99 Threshold water hyacinth basket specifically for my kids’ bulky snack bags. Before this, bags of Pirate’s Booty would spill all over the floor every time we opened the door. The woven texture adds character. Just a warning: don’t put loose, unwrapped food or anything that might leak into a woven basket. I once threw a bruised apple into one, forgot about it, and spent an hour scrubbing rotting apple juice out of the natural fibers with a toothbrush. Keep it strictly to packaged goods. The texture looks beautiful, but they’re a nightmare to clean if a bottle of syrup explodes. Natural textures bring a sense of calm to a space that usually feels overwhelming.
8. Hijack The Back Of Your Pantry Door

The back of your pantry door is prime real estate, and most people ignore it. If you have a swinging door, you’re sitting on a goldmine. I installed an Elfa Utility Over-The-Door Rack (around $140 for a full system at The Container Store, but you can find a cheaper Smart Design version for $45.99 at Costco). It blew my mind. I use it to hold all those annoying little items that get lost on deep shelves. It holds 1 oz taco seasoning packets, small jars of capers, and tiny boxes of raisins. It frees up valuable shelf space for bigger items. Here’s a tip for really tight spaces: consider magnetic storage. If your pantry door is metal, or if you can mount a metal strip to the wall, use the HuggieGems 4-Pack Magnetic Spice Storage Rack ($22.99 on Amazon). They stick right to the surface. I use magnetic racks on the side of my refrigerator for my most frequently used spices like garlic powder. It keeps them within reach without cluttering my countertops. Just make sure the magnets are strong, or you’ll have shattered glass and paprika all over your floor. I bought cheap magnets once and woke up to a terrible mess. Every square inch counts in a tiny kitchen. Don’t leave any surface unused.
9. Raise Your Spices For Better Visibility

Rummaging for spices while you’re trying not to burn a pan of onions is a miserable experience. If your spices are shoved into a cabinet in a messy pile, you’re probably double-buying things. I had three jars of ground ginger at one point because I couldn’t find the first two. You have to implement a tiered spice organizer. The Copco Non-Skid 3-Tier Spice Pantry Kitchen Cabinet Organizer is a classic for a reason. It’s only about $7.99 on Amazon or at Target, and the rubber grippers stop the jars from sliding. If you want something warmer, an expandable bamboo tiered rack ($19.99 at Whole Foods) is gorgeous and adjusts to the width of your shelf. By raising the jars in the back, you ensure every label is visible. I spent a Saturday afternoon transferring my mismatched spices into uniform glass jars with minimalist labels. It changed how I cook. I can actually see what I have, which means I’m not wasting money buying duplicates. Plus, it looks cleaner. Cooking should be fun, not a scavenger hunt for the garlic powder.

HomePekite Laundry Pods Storage Container
HomePekite Laundry Pods Storage Container punches above its price — 15 buyers rated it 4.5 stars. I would buy it again.
10. Broad Labels Save Your Sanity

Labels are essential for maintaining the system you built, especially if you live with others. If you don’t label the bins, your family will ruin your hard work in three days. But here’s the catch: you have to be broad. Professional organizers suggest using general categories instead of hyper-specific ones. I used to print labels that said “Pretzels” and “Almonds.” But what happens when we run out of pretzels and buy popcorn? The label is wrong, and I’m too lazy to print a new one, so the system falls apart. Now, I use broad labels like “Salty Snacks,” “Baking Basics,” and “Dinner Prep.” It allows for flexibility as our inventory changes. Trending in 2026 are minimalist, waterproof labels that give off a “Quiet Luxury” look. You can buy a pack of Talented Kitchen Minimalist Pantry Labels for about $14.99 on Amazon. They’re clean and easy to read. I stick them onto my bins and baskets using metal clip-on label holders ($9.99 for an 8-pack at Walmart). Broad labels stop the confusion and give your family zero excuses for putting the granola bars in the pasta bin. Keep it simple and your system will last. Your future self will thank you when you don’t have to replace a label every Sunday.
11. Stop The Topple With Drawer Separators

If you’re lucky enough to have pull-out drawers or deep slide-out shelves, you know the struggle of the “topple.” You pull the drawer open to grab a 5 oz can of tuna, and suddenly three bottles of cooking spray fall over. They jam the drawer so you can’t push it back in. It’s infuriating. You need drawer separators to prevent this. I bought a set of bamboo spring-loaded drawer dividers. The SpaceAid Bamboo Drawer Dividers are $29.99 for a 4-pack on Amazon, and they fixed the problem. They create rigid channels so items stay exactly where you put them. You can also use individual acrylic drawer organizers. The STORi Clear Plastic Drawer Organizers ($14.99 for a 6-piece set at Target) are perfect to corral smaller baking supplies like 2 oz vanilla extract bottles and cupcake liners. Before I installed dividers, my baking drawer was a chaotic soup of rolling bottles. Now, everything stays upright, even when my kids yank the drawer open. It ensures stability and keeps sticky messes contained. You won’t have to clean up spilled sprinkles ever again. Drawer dividers are a tiny investment that pays off every time you open that drawer.
12. Build A Grab-And-Go Snack Station

For busy families, you need a dedicated grab-and-go snack station. Designate a low, accessible shelf or a specific bin for kid-friendly snacks. I use a large, open-front mDesign plastic bin ($19.99 at Target) on the bottom shelf of my pantry. I load it up with 1 oz Goldfish packets, applesauce pouches, and granola bars. This empowers my kids to choose their snacks independently without climbing onto the counters and destroying the rest of the pantry. Plus, it keeps their messy hands away from my expensive baking chocolate. Ultimately, you have to plan for function, not just aesthetics. As expert Holly Blakey says, “clean, calm surroundings create a calm mind.” If you bake frequently, your baking supplies need prime real estate at eye level. If you store your bulky Dyson vacuum or a massive 6-quart slow cooker in the pantry, don’t stress about making it look perfect. Just use a large, opaque Sterilite Storage Box ($12.98 at Walmart) to conceal the ugly appliances. A beautiful pantry is great, but if it doesn’t work for your daily life, it’s useless. Make it functional first, and the beauty will follow. When kids can help themselves, it takes one more task off your plate.
I know tackling a messy kitchen feels overwhelming, but I promise these strategies will save you time and frustration. I swear by starting with just one shelf. Don’t try to rip apart your entire kitchen on a Tuesday night after work. Take it slow, measure your space, and invest in a few good bins. If you found these tips helpful, make sure to pin this article to your favorite home organization board on Pinterest so you can reference it during your next Target run. You’ve totally got this!

4 Pack Laundry Pods Container
A dependable everyday pick — 4 Pack Laundry Pods Container pulls in 473 ratings at 4.5 stars. Not flashy, just solid.
Frequently Asked Questions
How do I start organizing a really messy pantry?
Start by completely emptying every shelf. You can’t organize clutter. Throw away expired food, wipe down the shelves, and sort your remaining groceries into broad categories before buying any storage bins.
What are the best containers for dry goods?
Clear, airtight containers are best for realistic pantry organization. OXO POP containers are a top choice for freshness, while Mainstays clear bins offer a budget-friendly alternative. Always write the expiration date on the bottom.
How can I maximize corner space in a small pantry?
Use clear or bamboo Lazy Susans. They prevent items from getting lost in dark corners and make heavy bottles of oil, vinegar, and sauces incredibly easy to reach with a quick spin.
Should I label everything in my pantry?
Yes, but keep labels broad. Use general categories like ‘Salty Snacks’ or ‘Baking Basics’ instead of specific item names. This allows your inventory to change without ruining your entire labeling system.
