What’s Inside
- Embrace the DRÖNA Box for Bulk Storage
- Utilize KUGGIS Boxes for a Streamlined Look
- Integrate Drawers for Small Parts
- Add Doors for Hidden Storage and Visual Calm
- Use Vertical Space with Single Shelf Inserts
- Consider TROFAST Integration with Adapters
- Implement a Strict One In, One Out Rule
- Prioritize Safety with Wall Anchoring
- Avoid Direct Caster Installation on Kallax Units
- Label Everything Clearly
- Create a Play Surface with a Top Panel
- Mix Textures and Custom Panels for a High-End Look
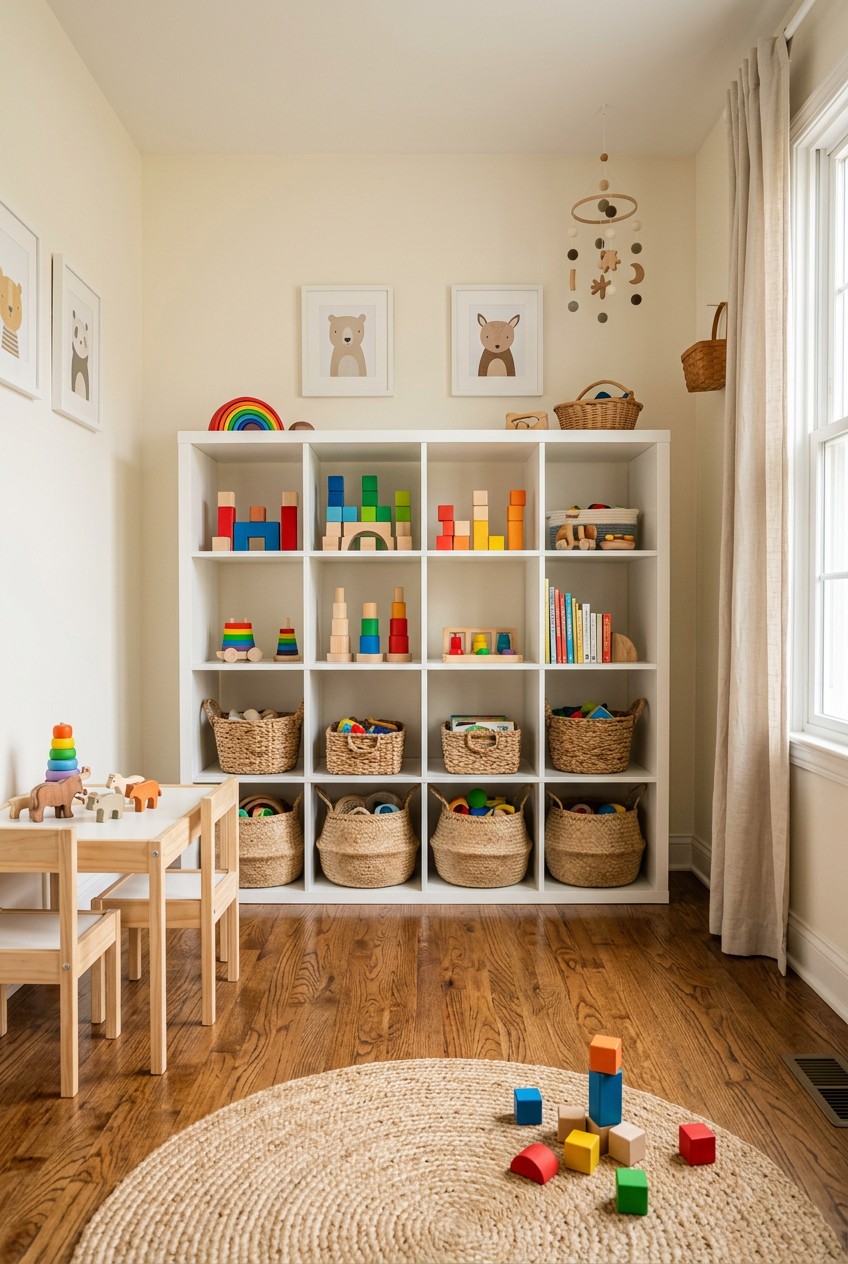
It’s 2:00 AM, and I’m hopping on one foot clutching my heel because I just stepped on a rogue plastic stegosaurus. If you’re dealing with endless clutter, mastering your kallax toy storage is the only way to save your sanity and your feet. Last Tuesday at Target, I watched an exhausted mom buy five random, mismatched plastic bins hoping they’d fix her chaotic playroom. I wanted to tap her on the shoulder and tell her to stop wasting her money. I tried throwing random dollar-store bins at my kids’ messes for months before figuring it out—took me years to figure out, no exaggeration. You need a dedicated system. The IKEA Kallax is that system. But most people set it up completely wrong. They buy the unit, shove some toys on the bare shelves, and wonder why their living room still looks like a daycare exploded.
I’m here to fix that. Let’s talk about exactly how to turn this basic shelving unit into a functional powerhouse. I’m sharing the exact inserts, the specific measurements, and the hard lessons I’ve learned from my own disastrous playroom setups. I promise you, putting in the effort to organize this properly will change your daily routine.
1. Embrace the DRÖNA Box for Bulk Storage

Let’s start with the absolute basics. You need bulk storage for the massive, awkward toys. I’m talking about the giant stuffed animals, the chunky wooden blocks, and those oversized plastic dump trucks you grabbed on sale at Costco for $19.99. The IKEA DRÖNA storage box is your best friend here. These fabric boxes measure exactly 33x38x33 cm (13x15x13 inches) and fit so perfectly into a Kallax cube that they create a satisfying little vacuum sound when you pull them out. They usually cost around $7.99 USD.
I bought six of the dark gray ones last year. I love the slightly textured fabric. It feels durable, not like that flimsy discount-store material that rips after two weeks of use. The beauty of the DRÖNA is that it hides a multitude of sins. You can toss fifty random Magna-Tiles in there, slide it back, and your room looks instantly clean. My biggest mistake early on was buying rigid plastic bins for these bottom cubes. My kids would drag them out, scrape the hardwood floor, and crack the sharp plastic edges against the baseboards. The soft DRÖNA boxes glide out easily. They’re lightweight enough that my toddler can pull them out without help. If you’re building a new setup, grab at least four of these for the bottom row.
2. Utilize KUGGIS Boxes for a Streamlined Look

Sometimes you need things to look a bit more grown-up. If your Kallax lives in your main living room, you probably don’t want bright neon fabric bins staring at you while you’re trying to watch a movie. This is where the IKEA KUGGIS boxes come in. These are rigid PET plastic boxes with sleek lids. They have a brilliant glossy white finish that reflects light and makes the whole unit look incredibly clean. A large KUGGIS box (13×14.5×13 inches) runs about $14.99.
Professional organizer Christian Pfeiffer actually recommended these to me, and I totally see why. They stack perfectly inside the cubbies. I use them for messy art supplies. I keep a 16 oz bottle of washable paint, three 24-packs of crayons, and stacks of construction paper inside. The lids mean I can stack a smaller KUGGIS box on top of a larger one within the same Kallax cubby. Last month, I bought a cheaper knockoff brand at Walmart for $8.99, thinking I’d save some cash. Huge mistake. The lids warped within a week, and they didn’t sit flush inside the 13×13 inch cube. The official KUGGIS boxes have a tiny finger cutout that makes pulling them off the shelf incredibly easy. They give your storage a clean, minimalist aesthetic that hides the chaotic colors of children’s toys.
3. Integrate Drawers for Small Parts

We need to talk about the tiny pieces. The Legos, the Barbie shoes, the microscopic puzzle pieces that seem to multiply in the dark. You can’t put these in a giant DRÖNA box. They will sink to the bottom, and your kids will dump the entire box on the rug just to find one tiny plastic wheel. I learned this the hard way. I spent three hours sorting tiny bead kits into a large bin, only for my daughter to upend it looking for a specific pink string. I was finding beads in the vacuum for months.
You need the IKEA KALLAX insert with 2 drawers. These inserts cost exactly $30.00 each. They measure 33×33 cm (13×13 inches) and slide right into a single cube. The drawers are shallow, which is exactly what you want for small parts. I line the bottom of my drawers with a $5.99 roll of non-slip shelf liner from Target so the tiny pieces don’t rattle around loudly when you open them. The hardware is surprisingly sturdy. The drawers glide on smooth metal runners, not just cheap plastic tracks. I keep all our card games in one drawer and tiny action figures in another. It completely eliminates the need for kids to dump a massive bin. They just pull the drawer, grab the two pieces they need, and push it closed. It’s a massive sanity saver.

IRIS USA 19 QT Plastic Storage Box with Lid and Latches
If you want something that just works, IRIS USA 19 QT Plastic Storage Box with Lid and Latches – 6 Pack – BPA is a safe bet (627 reviews, 4.5 stars).
4. Add Doors for Hidden Storage and Visual Calm

If you want your playroom to look like an actual adult lives in the house, you need doors. The IKEA KALLAX insert with a door costs $20.00 and completely changes the look of the unit. It turns an open, chaotic shelf into a sleek sideboard. I personally swear by these for the middle rows of a 4×4 unit. You install the little metal hinges directly into the pre-drilled holes of the Kallax. It takes maybe ten minutes per door. You might also like: 15 Inspiring Small Space Laundry Room Ideas to Steal Right Now
I use these closed cubbies for toys that require strict adult supervision. I’m talking about the loud musical instruments, the incredibly messy kinetic sand, and the 50-piece heavy wooden block sets I picked up at Sprouts for $24.99. By hiding these behind a solid door, I control when they come out. The visual calm this creates is unbelievable. When the doors are shut, you just see a smooth white surface. I tried an open-shelf concept for a year. It was a disaster. The visual clutter of seeing every single toy, every brightly colored spine of a book, and every mismatched puzzle box gave me daily anxiety. Adding four simple doors to my unit cost $80.00 and made the entire room feel ten times larger and infinitely more peaceful. You might also like: 15 Clever Kitchen Small Space Ideas That Changed Everything
5. Use Vertical Space with Single Shelf Inserts

The standard Kallax cube is 13x13x15 inches deep. That is a lot of vertical space. If you just put a small stack of books in there, you’re wasting a ton of room above them. You need the IKEA KALLAX insert with 1 shelf. This costs $15.00 and literally cuts the cube in half horizontally. It’s brilliant. I use these for displaying specific toys or organizing books by size without creating unstable towers. You might also like: 15 Clever DIY Easy Home Decor to Inspire Your Next Project
On the bottom half, I slide in two $4.99 wire baskets from Kroger holding small board books. On the top half, I display my son’s completed Lego cars. It breaks up the chunky look of the Kallax and gives you much more flexible storage. Before I found these inserts, I was stacking heavy wooden puzzles on top of each other. Whenever my kids wanted the puzzle at the bottom, they’d yank it out, and the whole stack would crash to the floor, scattering wooden farm animals everywhere. The single shelf insert stops that entirely. You can put three puzzles on the bottom shelf and three on the top. It’s so much easier for little hands to manage. The insert comes with tiny wooden dowels and screws, and it feels incredibly secure once installed.
6. Consider TROFAST Integration with Adapters

Here is the ultimate hack for your kallax toy storage. You probably know about the IKEA TROFAST system. It’s those sturdy, sliding plastic bins that every preschool in the world uses. They are indestructible. But the standard TROFAST wooden frames are kind of ugly. They look like raw pine shipping crates. The Kallax looks much nicer. What if you could combine them? You can.
You need third-party adapters. A company called TROFIX makes these amazing little plastic rails. You stick them inside your Kallax cube, and suddenly, you can slide standard TROFAST bins right in. A set of these adapter rails costs about $18.00 online. The TROFAST bins themselves are only $4.00 for the shallow size. I bought six bright green and orange bins. I slid them into my white Kallax, and it looks incredible. The bins are made of thick, durable polypropylene plastic. They can hold 10 pounds of heavy wooden train tracks without buckling. I tried using cheap dollar store bins on wire racks before this. The plastic tracks snapped within a week under the weight. The TROFAST bins are meant for heavy abuse. By using these adapters, you get the sleek, modern look of the Kallax frame with the rugged, kid-proof functionality of the TROFAST bins.

Cisily Sponge Holder for Kitchen Sink
If you want something that just works, Cisily Sponge Holder for Kitchen Sink is a safe bet (123 reviews, 4.5 stars).
7. Implement a Strict One In, One Out Rule

You can buy all the beautiful bins in the world, but if you have too much stuff, your kallax toy storage will still fail. You have to implement a strict one in, one out rule. The Kallax actually makes this easy because the physical boundaries are so clear. Each cubby is roughly 13x13x15 inches deep. Once a DRÖNA box is full of stuffed animals, it’s full. You can’t stretch it.
If your kid gets a new giant teddy bear for their birthday, an old toy has to go into the donation bag. I’m ruthless about this. Last Christmas, my kids received three massive remote-control cars. We brought them to the playroom. I pulled out the designated vehicle bin. It was already overflowing. I told them we had to pick three old trucks to donate to the local shelter. There were some tears, but they did it. If you don’t enforce this, toys will start migrating to the top of the Kallax, then to the floor, and suddenly your system is ruined. Professional organizers constantly preach this rule because it works. The Kallax sets the physical limit. Your job is to respect that limit. Don’t buy a second Kallax unit just because you bought more toys. Edit the toys instead.
8. Prioritize Safety with Wall Anchoring

I need you to listen to me very carefully right now. You must anchor your Kallax unit to the wall. This is not optional. It’s not a suggestion. It’s a mandatory safety requirement. A 4×4 Kallax unit weighs over 80 pounds empty. Once you load it up with wooden blocks, heavy books, and dense plastic toys, it can easily weigh 150 pounds. If a toddler pulls on a top shelf or tries to climb it like a ladder, that entire unit will tip over.
IKEA provides the wall-anchoring hardware in the box for free. Use it. I admit, I used to be lazy about this. I set up a 2×4 unit horizontally in my old apartment and figured it was low enough to be safe. Then I caught my two-year-old standing on the top edge, reaching for a picture frame on the wall. The unit wobbled. My heart stopped. I grabbed him, went straight to the hardware store, and bought heavy-duty drywall anchors for $6.99. You need to find the wall stud. If you can’t find a stud, use a toggle bolt that can support at least 100 pounds. Secure the metal L-brackets to the top of the Kallax and bolt them directly into the wall. It takes twenty minutes and guarantees your child’s safety. Expect some drywall dust, but it’s worth it.
9. Avoid Direct Caster Installation on Kallax Units

Let’s talk about a very popular internet trend that you need to avoid. People love the idea of putting caster wheels on the bottom of their Kallax units to roll them around the room. It looks cool. It seems practical. Don’t do it. I tried this exact hack two years ago.
I bought four heavy-duty metal casters from Walmart for $22.00. I screwed them directly into the bottom corners of a 2×4 Kallax. I loaded it up with toys. Three days later, I tried to roll it across the carpet to vacuum underneath. I heard a sickening cracking sound. The bottom panel of the Kallax completely sheared off, spilling a honeycomb paper core everywhere. The internal structure of a Kallax is not solid wood. It’s a paper honeycomb core sandwiched between thin particleboard. It can’t support point-load weight from screws. The wheels ripped right out, destroying the unit. If you absolutely must have your unit on wheels, you have to build a base. You need to buy a piece of 3/4-inch thick solid plywood. Cut it to the exact dimensions of the Kallax base (15 3/8 inches by 30 3/8 inches for a 2×2). Screw the casters into the solid plywood base. Then, attach the plywood base to the Kallax using construction adhesive. Honestly, it’s a huge hassle. Just leave it flat on the floor.

4 Tier Storage Bins with Lids
A dependable everyday pick — 4 Tier Storage Bins with Lids pulls in 63 ratings at 4.5 stars. Not flashy, just solid.
10. Label Everything Clearly

If you don’t label your bins, you’re the only person who knows where things go. This means you will be the only person cleaning up. You don’t want that. Clear labeling empowers your kids to clean up their own messes. For my toddler, I use picture labels. I take a photo of the toys, print it out, and laminate it. I attach it to the front of the DRÖNA box using a $4.50 roll of double-sided tape from Target.
For my older kids, I use clear text labels. I bought a Brother P-touch label maker for $35.00. I print out big, bold black text on white tape. “LEGOS.” “TRAINS.” “DOLLS.” I stick them right on the front of the KUGGIS boxes or the drawer inserts. I used to just write on masking tape with a Sharpie. It looked terrible and peeled off after a week. Then I tried buying those fancy chalkboard labels from Whole Foods for $9.99. They looked cute for exactly one day until my son wiped his sweaty, sticky hand across one and smeared the chalk dust everywhere. Stick to printed labels. Make them big. Make them obvious. When a friend comes over for a playdate, they can look at the bins and instantly know where to put the toys away.
11. Create a Play Surface with a Top Panel

If you lay a 2×4 Kallax unit horizontally on the floor, it sits at the perfect height for a toddler play table. It’s about 16.5 inches tall. But the top surface of the Kallax is just painted particleboard. It scratches easily, and it’s a bit slippery. To make this truly functional, you need to add a solid wooden top panel. This turns the storage unit into a dedicated play surface for building, crafting, or displaying large toys.
I went to a local lumber yard and bought a beautiful piece of edge-glued pine board for $45.00. I had them cut it to exactly 15 3/8 inches by 57 7/8 inches to match the top of the horizontal Kallax. I sanded it smooth and sealed it with three coats of matte polyurethane. I attached it to the top of the Kallax using heavy-duty double-sided mounting tape. It looks like a custom piece of furniture. The wood adds so much warmth to the room. My kids use this surface every single day. They build massive Magna-Tile castles on it. They roll out playdough on it. If they spill a little water, the polyurethane protects the wood. It completely maximizes the functionality of the unit. It’s not just holding toys inside; it’s providing a place to play with them on top.
12. Mix Textures and Custom Panels for a High-End Look

A big trend for 2026 is moving away from the sterile, all-white plastic look. You want your playroom to feel warm and inviting. The secret is mixing textures within your Kallax. Don’t just buy eight identical plastic bins. It looks like a hospital supply closet. You need to combine soft felt, natural wood, and woven materials. I love using the IKEA BRANÄS baskets. They are made of woven rattan and cost $13.00 each. They add a beautiful natural texture and a warm honey color.
I put two BRANÄS baskets in the bottom corners. Then, I use soft gray felt inserts for the middle cubes. I found some amazing thick felt bins at Target last month for $12.00 each. They feel like a cozy winter sweater. Finally, I use smooth, glossy white KUGGIS boxes for the top row. For an even more custom look, I use O’verlays. These are lightweight, decorative fretwork panels that you attach to the front of plain IKEA doors. A set of four panels costs about $40.00. I packed them in a reusable Trader Joe’s canvas bag, took them to the kitchen floor, and painted them a deep navy blue last weekend. I made a huge mess and got paint all over my favorite sweatpants, but the result was worth it. I glued them to the white Kallax doors. It instantly upgraded the entire unit from basic flat-pack furniture to a stunning, high-end piece.
Listen, organizing your kids’ stuff doesn’t have to be a daily nightmare. The IKEA Kallax is honestly the most versatile piece of furniture you will ever own. It transitions from a chaotic toddler playroom to a neat elementary school homework station without missing a beat. I’ve had my main unit for six years, and it’s survived three moves and endless abuse. You just have to set it up right. Skip the cheap dollar store bins. Invest in the proper inserts, anchor the damn thing to the wall, and label everything. If you follow these steps, you’re going to reclaim your living space and save your feet from the midnight Lego traps. I promise you, putting in the effort this weekend will pay off every single day. Save this guide, pin it to your playroom inspiration board, and head to IKEA with a solid plan. You’ve got this.

Vtopmart 25 PCS Clear Plastic Drawer Organizers Set
Vtopmart 25 PCS Clear Plastic Drawer Organizers Set has been one of the most consistently praised picks in this category. 412 reviewers averaged 4.5/5.
Frequently Asked Questions
How do I safely use a Kallax for toy storage?
You must anchor the unit to the wall using the provided L-brackets and heavy-duty drywall anchors. A loaded Kallax is heavy, and anchoring prevents dangerous tipping if a child tries to climb the shelves.
What are the best bins for Kallax toy storage?
The IKEA DRÖNA fabric boxes (13x15x13 inches) are perfect for bulk items like stuffed animals. For small parts, use the KALLAX 2-drawer inserts, and for a sleek look, use rigid KUGGIS plastic boxes with lids.
Can I put caster wheels on my Kallax unit?
Don’t attach casters directly to the Kallax frame. The honeycomb paper core will crack. You must attach a 3/4-inch solid plywood base to the bottom first, then screw the heavy-duty casters into the plywood.
How do I organize small toys in a Kallax?
Skip deep bins for tiny toys. Use the KALLAX drawer inserts or add the single-shelf divider insert to stack shallow, clear containers. This stops kids from dumping massive bins just to find one small Lego piece.
