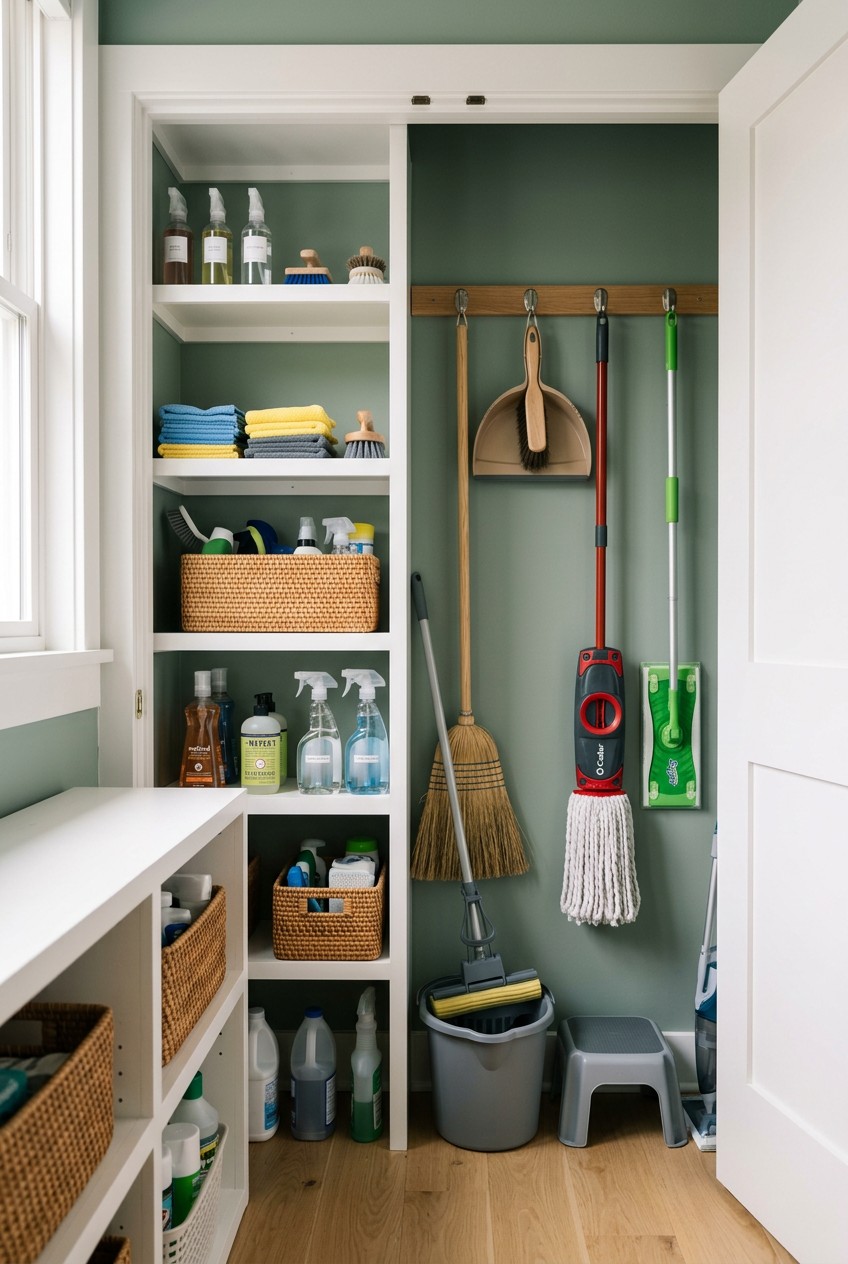
What’s Inside
- Install a Heavy-Duty Wall-Mounted Tool Organizer for Long Handles
- Maximize Door Space with an Over-the-Door Organizer
- Utilize Slim, Stackable Bins for Cleaning Supplies
- Implement Vertical Dividers for Bulkier Items
- Employ Command Hooks for Quick Access and Damage-Free Hanging
- Install Adjustable Shelving to Customize Storage
- Define Zones to Prevent Over-Accumulation
- Consider a Pull-Out Broom Cabinet for Narrow Spaces
- Utilize a Tension Rod for Spray Bottles and Gloves
- Store Chemicals Safely and Out of Reach
- Embrace Aesthetic Organization with Decorative Bins
- Label Everything for Quick Identification
- Keep Frequently Used Items at Eye Level
- Invest in a Compact, Cordless Vacuum with Wall Mount
- Brilliant Broom Closet Organization Hacks for Small Accessories
- Dedicate Time for Regular Maintenance
Last Tuesday at Whole Foods, I dropped a 16 oz glass bottle of organic all-purpose cleaner right in the middle of aisle four. It shattered instantly. The entire aisle smelled like aggressive fake pine and sheer embarrassment. I rushed home to grab my heavy-duty mop, yanked open my utility door, and immediately took a metal Swiffer handle straight to the forehead. My broom closet organization was a literal hazard zone. The floor was a tangled mess of cords, stiff bristles, and cracked plastic dustpans. If you’re tired of dodging falling mops every time you need to sweep up a few cereal crumbs, let’s fix this mess together. I’ve spent the last three years testing every hook, bin, and shelf system on the market. I tried this wrong for months before figuring it out. Honestly, I wasted so much money on flimsy plastic holders that snapped under the weight of a wet mop. You don’t have to repeat my mistakes. Grab a cup of coffee. We’re going to tear apart your utility closet and put it back together so it actually works for you.
1. Install a Heavy-Duty Wall-Mounted Tool Organizer for Long Handles

Ditch the leaning brooms immediately. Sticking your brooms in the corner is a massive mistake. The bristles get permanently crushed, wet mops breed nasty mildew, and everything comes crashing down the second you reach for a single duster. You need a solid wall-mounted holder to get things off the floor. I’m obsessed with the Berry Ave Broom Holder & Wall Mount Garden Tool Organizer. It costs exactly $15.99 on Amazon and features 5 spring-loaded slots alongside 6 foldable hooks. This thing holds up to 50 lbs of weight.
I installed mine right at eye level. The rubber grips have this incredibly satisfying, firm snap when you push a metal handle into them. Before I found this specific brand, I bought a cheap knockoff at Walmart for five bucks. It literally peeled off my drywall in three days, leaving a huge, ugly white patch behind. Don’t cheap out on your wall mounts. If you prefer a different style, the WellcoGray Broom Holder Wall Mount Mop Organizer runs about $14.00 and offers 4 clips and 5 hooks. Use a stud finder before you drill. Screwing directly into drywall won’t hold the weight of a heavy, soaking wet string mop.
2. Maximize Door Space with an Over-the-Door Organizer

Don’t let the back of your broom closet door go to waste. That flat surface is prime real estate for all the tiny, annoying items that usually clutter up your shelves. I personally swear by the Whitmor Over-the-Door Organizer. It costs $12.49 and comes with 24 clear plastic pockets. I hate opaque pockets because you end up digging around blindly for a single sponge.
I fill these pockets with 16 oz spray bottles, 3-packs of yellow rubber gloves, and stacks of Magic Erasers. The clear plastic crinkles a bit when you stretch it over a bulky bottle of window cleaner, but it holds up incredibly well. Most people get this wrong by buying cheap fabric shoe organizers. The fabric absorbs spills and smells like stale chemicals after a month. Stick to plastic or vinyl. You can easily wipe down plastic with a damp rag if a 4 oz bottle of wood polish leaks. I bought mine at Target last year, and it completely cleared off my middle shelf. It’s the easiest five-minute installation you’ll ever do. Trust me on this.
3. Utilize Slim, Stackable Bins for Cleaning Supplies

Loose rags and scattered dishwasher pods make your closet look like a disaster area. You need slim, stackable plastic bins to contain the chaos. I highly recommend the Brightroom 12″ x 6″ x 4″ all-purpose storage bins from Target. They cost exactly $7.00 each. I use them to store my 12-pack of microfiber cloths, 2 lb bags of baking soda, and extra scrubbing sponges.
Last month at Target, I made a classic impulse-buy mistake. I bought fifteen of these bins because they looked so sleek in the aisle. I got home, realized my closet only fits six, and had to do the walk of shame back to the return counter. Measure your shelves first. If you want something with a lid, IKEA’s SOCKERBIT storage boxes are fantastic. The hard plastic feels sturdy, and the lids snap on tightly to keep dust out. I fold my microfiber cloths into neat little squares and stack them vertically inside the bin. It looks like a tiny filing cabinet for cleaning supplies. You’ll never waste time hunting for a clean rag again.

Rubbermaid Configurations Deluxe Custom Closet Kit 4-8 Ft.
Honestly, Rubbermaid Configurations Deluxe Custom Closet Kit 4-8 Ft. Adjustable surprised me — sturdier than it looks in the photos, and over 81 buyers gave it 4.5 stars.
4. Implement Vertical Dividers for Bulkier Items

Ironing boards and oversized vacuum attachments are the absolute worst things to store. They’re awkwardly shaped, they slide around, and they take up way too much horizontal space. You need vertical dividers to keep them standing upright. I use the YoureDesign Acrylic Dividers, which cost $19.99 for a 4-pack. They slide right onto standard 3/4-inch wood shelves and stand 8 inches high.
These dividers create rigid zones on your shelves. I wedge my heavy ironing board between the wall and a divider, keeping it perfectly straight. Before I used these, my vacuum crevice tool and upholstery brush would constantly roll off the shelf and clatter loudly onto the floor. The sound of hard plastic hitting tile at 6 AM is not how I want to start my day. Acrylic dividers fix this completely. They’re crystal clear, so they don’t add visual clutter to a tight space. Just make sure your shelves are thick enough to hold the tension clips. If you have wire shelving, you’ll need to buy specific wire shelf dividers instead.
5. Employ Command Hooks for Quick Access and Damage-Free Hanging

For lightweight items like plastic dustpans, feather dusters, and reusable shopping bags, 3M Command Hooks are your best friend. I specifically use the Command Broom Gripper for my lighter brooms. It costs $9.47 for a 2-pack at Costco. It holds handles with diameters from 0.8 to 1 inch and supports up to 4 lbs.
I use the standard white plastic Command Hooks for my dustpans. Most dustpans have a tiny hole at the top of the handle, making them perfect for hanging. I’ve definitely messed up Command Hooks in the past. Two years ago, I ripped a massive chunk of paint off my apartment wall because I pulled the adhesive tab out toward me instead of pulling it straight down along the wall. Follow the instructions exactly. Clean the wall with a little rubbing alcohol on a cotton ball before you stick the hook on. It makes a huge difference in how well the adhesive grips. I hang my feather duster right inside the door frame so I can grab it quickly for a five-minute dusting session. You might also like: 15 Gorgeous Organizing Bathroom Home Hacks Ideas Worth Trying This Year
6. Install Adjustable Shelving to Customize Storage

Fixed shelves are the enemy of good organization. You’ll always end up with twelve inches of wasted vertical space above a tiny 8 oz bottle of dish soap, while your giant 144 oz jug of laundry detergent won’t fit anywhere. You need adjustable shelving. I installed the Rubbermaid Twin Track Upright system in my closet. The 47.5-inch metal tracks cost $14.98 each at Kroger in their home goods section. You might also like: 20 Inspiring Organizing Storage Home Hacks Ideas for Any Style
Adjustable shelves let you reconfigure your space every time your needs change. I keep my bottom shelf tall enough for my bulky carpet cleaner formulas, while my top shelves are spaced tightly together for small scrub brushes and 4 oz tubes of grout cleaner. The metal brackets click into the tracks with a loud, satisfying metallic snap. It takes a little bit of DIY effort to install the tracks into your wall studs, but it pays off instantly. Skip the cheap plastic shelving units that bow in the middle under the weight of liquid cleaners. Wood or metal adjustable shelves are the only way to go. You might also like: 20 Cozy Aesthetic Organizing Ideas to Inspire Your Next Project

AMKUFO 6 Pack-Closet-Organizers-and-Storage
Honestly, AMKUFO 6 Pack-Closet-Organizers-and-Storage surprised me — sturdier than it looks in the photos, and over 52 buyers gave it 4.5 stars.
7. Define Zones to Prevent Over-Accumulation

If you don’t assign a specific purpose to each shelf, your closet will turn into a dumping ground. You have to define strict zones. I designate my bottom shelf strictly for floor care (mop buckets, floor wax). The middle shelf is for surface cleaners (glass spray, antibacterial wipes). The top shelf is for laundry supplies.
Last Friday at Sprouts, I saw a massive sale on organic cleaning supplies. I blindly bought four 32 oz bottles of lavender surface spray. I shoved them into my closet wherever they fit. For three weeks, my entire hallway smelled like a grandma’s purse because one of the caps wasn’t screwed on tight. If I had stuck to my defined zones, I would have realized I didn’t have room for four giant bottles. I use the Madesmart 2-Tier Organizer ($22.99) under my sink and in my broom closet to physically separate different categories. Limiting your storage space forces you to stop hoarding cleaning supplies you don’t actually need. Use it up before you buy a replacement.
8. Consider a Pull-Out Broom Cabinet for Narrow Spaces

If you have a tiny, narrow gap between your refrigerator and your kitchen wall, you’re sitting on a goldmine of storage space. You can install a pull-out broom cabinet. I helped a client install the Rev-A-Shelf 448-BC-8C last month. It costs $189.99 and is exactly 8 inches wide. It slides perfectly into those annoying dead zones in your kitchen.
These sliding units are deep enough (usually 15 to 20 inches) to hold all your long-handled tools and a ton of cleaning bottles. The heavy-duty ball-bearing tracks glide out so smoothly, even when fully loaded with heavy liquid cleaners. It feels like a secret hidden room for your brooms. I bought a cheaper, plastic rolling cart from Walmart a few years ago for a narrow bathroom space. It was a disaster. The cheap plastic wheels locked up constantly, and it tipped over if I pulled it too fast. If you’re going to utilize a narrow gap, invest in a high-quality, wood or metal pull-out unit that mounts securely to the cabinet walls.
9. Utilize a Tension Rod for Spray Bottles and Gloves

This is my favorite weird, cheap trick. You can install a basic tension rod right under your lowest shelf to hang spray bottles. I use a Room Essentials Tension Rod from Target. It costs $4.50 and expands from 28 to 48 inches. You just twist it until it wedges tightly between the two side walls of your closet.
You can hook the triggers of your 16 oz spray bottles directly over the rod. It completely clears up shelf space. I also drape my wet yellow rubber gloves over the rod. They dry so much faster this way. If you leave wet rubber gloves crumpled in a pile on a shelf, they develop this disgusting, sour mildew smell within a week. The tension rod keeps them separated and exposed to air. Just don’t overload the rod. A cheap tension rod will definitely collapse if you try to hang six full 32 oz bottles of heavy bathroom cleaner on it. Stick to half-empty bottles or lighter 16 oz daily cleaners.

4 Pack Laundry Pods Container
Honestly, 4 Pack Laundry Pods Container surprised me — sturdier than it looks in the photos, and over 473 buyers gave it 4.5 stars.
10. Store Chemicals Safely and Out of Reach

Safety has to come first when dealing with harsh chemicals. You can’t leave toxic drain cleaners sitting on the floor. I made a huge mistake a few years ago. I left a 32 oz jug of bleach on the bottom floor of my utility closet. My golden retriever bumped the door open, knocked the jug over, and chewed on the plastic cap. Thankfully, he didn’t puncture it, but it scared me to death. No exaggeration.
Now, I keep all hazardous liquids on the absolute highest shelf. I store them inside a Sterilite 15 Qt Latching Box, which costs $8.98 at Walmart. The latching handles securely lock the lid down. Even if a bottle leaks, the harsh chemicals are contained inside the thick plastic tub instead of dripping down onto my vacuum cleaner. Skip the flimsy cardboard boxes for chemical storage. Cardboard disintegrates the second it gets wet, leaving you with a soggy, toxic mess. If you have toddlers in the house, I highly recommend installing a magnetic child lock on the main closet door as well.
11. Embrace Aesthetic Organization with Decorative Bins

Your utility closet doesn’t have to look like a sterile hospital supply room. You can actually make it look pretty. I love using decorative woven bins to hide ugly items. I use Water Hyacinth Storage Baskets for my bulky items. You can get a 2-pack of 12x12x12 inch baskets for $24.99 on Amazon. The rough, natural woven fibers add a gorgeous texture that looks a million times better than cheap, cloudy plastic.
I store my reusable grocery bags inside these baskets. I always buy those brightly colored, quirky reusable bags from Trader Joe’s, and they look messy when piled up. Tossing them into a beautiful woven basket hides the visual clutter instantly. I also painted the interior walls of my closet a soft, sage green. It sounds extra, but it makes me smile every time I open the door to grab a trash bag. Don’t use fabric bins for liquid cleaners, though. If a bottle of blue toilet bowl cleaner leaks into a natural woven basket, the basket is ruined forever. Keep the pretty bins for dry goods only.
12. Label Everything for Quick Identification

If you don’t label your bins, you’ll forget what’s inside them within a week. Labeling is non-negotiable. I use the DYMO LetraTag 100H Label Maker. It runs about $29.97, and it’s incredibly easy to use. I print out labels using their 1/2 inch clear plastic tape. The clear tape looks so much sleeker than the standard stark white tape.
I learned the importance of labeling the hard way. Last year, I decanted several liquids into matching clear glass jars because I saw it on Pinterest. I completely forgot to label them. I accidentally grabbed a 16 oz jar of concentrated floor wax thinking it was fabric softener. I poured half a cup of wax into my washing machine. It took me three hours of scrubbing with boiling water to get the sticky wax out of the drum. Always label your containers immediately. Label the bins, label the spray bottles, label the shelves. It takes two seconds and saves you from catastrophic mixing errors.

3-Tier Hanging Laundry Basket Organizer:Foldable Wire Shelf
3-Tier Hanging Laundry Basket Organizer:Foldable Wire Shelf Laundry Ro punches above its price — 518 buyers rated it 4.5 stars. I would buy it again.
13. Keep Frequently Used Items at Eye Level

Stop bending over backwards to reach the things you use every single day. Ergonomics matter in home organization. You need to keep your most frequently used items right at eye level. For me, that’s my Mr. Siga Microfiber Cloths ($12.99 for a 12-pack at Walmart) and my daily all-purpose surface spray. I put them on the shelf that sits exactly at my chest height.
Items I only use once a month, like 8 oz bottles of leather conditioner or heavy-duty oven cleaner, go on the very top shelf. The absolute heaviest items, like my giant carpet shampooer and my 20 lb bucket of mop water, live directly on the floor. I used to keep my heavy vacuum on a middle shelf. I nearly threw my back out trying to lift it down awkwardly one morning. Keep heavy things low, daily things in the middle, and rare things high. It sounds like common sense, but you’d be surprised how many people just shove things onto whatever shelf has an empty spot.
14. Invest in a Compact, Cordless Vacuum with Wall Mount

Bulky, corded upright vacuums are the enemy of a tidy closet. The cords tangle into massive, frustrating knots, and the wide bases take up half the floor space. If you can afford it, upgrading to a cordless stick vacuum completely changes your storage game. I use the Shark Stratos Cordless, which retails for around $299.99. If you prefer Dyson, the V8 Absolute is a classic choice at $399.99.
These stick vacuums come with slim wall-mounting docks. I screwed my docking station directly into the wall inside my closet. The vacuum clicks securely into the charger with a satisfying plastic thud. It hangs entirely off the floor, freeing up space for my mop bucket. I hired an electrician to install a basic electrical outlet inside my closet for $150 so I could plug the dock in directly. It hides the messy charging cord completely. Dealing with a 25-foot tangled black cord every time I wanted to vacuum my rug was driving me insane. Wall-mounting a cordless vacuum is a massive upgrade.
15. Brilliant Broom Closet Organization Hacks for Small Accessories

Tiny accessories are the hardest things to organize. Scrub brushes, 2 oz tubes of super glue, and little packets of dishwasher cleaner always fall behind larger bottles and disappear into the dark corners of the shelf. You need specific broom closet organization tactics for the micro-clutter. I use the OXO Good Grips Expandable Drawer Organizer. It costs $25.99. Even though it’s technically meant for kitchen utensils, it works perfectly on a closet shelf.
I lay the organizer flat on my middle shelf. I use the long compartments to hold skinny grout brushes and spare Swiffer wands. I use the smaller square compartments for my 4 oz bottles of essential oils and extra scrub daddies. The organizer has grippy rubber feet on the bottom, so it doesn’t slide around when I grab a brush. I tried using a deep basket for small items once. I ended up cutting my finger on a loose razor blade that had sunk to the bottom of the basket. Shallow, divided organizers keep everything visible and safe.

5 Tier Closet Hanging Organizer
A dependable everyday pick — 5 Tier Closet Hanging Organizer pulls in 1 ratings at 4.5 stars. Not flashy, just solid.
16. Dedicate Time for Regular Maintenance

You can buy all the fancy acrylic bins in the world, but if you don’t maintain the space, it will turn back into a disaster zone in a month. You have to dedicate five minutes a week to resetting the closet. I do this every Sunday morning. I grab a Clorox Disinfecting Wipe (they cost $5.49 for a 75-count tube at Whole Foods) and wipe down the empty spots on the shelves.
I pull out any empty cardboard boxes, throw away dried-out sponges, and make sure all my spray bottles are facing forward. The smell of fresh lemon bleach always makes me feel productive. If I skip this weekly reset, things pile up fast. I’ll lazily toss a wet rag onto a shelf instead of hanging it up, or I’ll shove a broom into the corner instead of clicking it into the wall mount. Organization isn’t a one-time project. It’s a daily habit. Spend five minutes putting things back exactly where they belong, and your utility space will stay perfectly neat all year long.
Honestly, getting my utility space under control completely changed how I feel about cleaning my house. I no longer dread opening that door. Everything has a specific place, nothing falls on my head, and I know exactly where my favorite microfiber cloths are. Start with the heavy-duty wall mount for your long handles, and build your system from there. If you found these tips helpful, be sure to pin this article for later so you can reference the exact product names and dimensions while you’re standing in the aisle at Target!
Frequently Asked Questions
How do you organize brooms and mops in a small closet?
The best way to organize long-handled tools in a tight space is by installing a heavy-duty wall-mounted grip organizer. This keeps brooms securely off the floor, prevents bristles from crushing, and maximizes vertical wall space.
What should you store on the back of a broom closet door?
The back of the door is perfect for an over-the-door pocket organizer. Use clear plastic pockets to store lightweight daily items like 16 oz spray bottles, rubber gloves, sponges, and dusters for quick, easy access.
How do you store heavy cleaning appliances like vacuums?
Always store heavy items like large vacuums or full mop buckets directly on the floor to prevent back strain and shelf damage. If you use a cordless stick vacuum, install its charging dock securely on the wall.
Is it safe to store chemicals in a regular utility closet?
Yes, but you must prioritize safety. Store harsh chemicals like bleach or drain cleaner on the highest shelves, far out of reach of children and pets. Keep them inside latching plastic bins to contain any accidental leaks.
