What’s Inside
- Set Up a Dedicated Drop Zone for Backpack Organization At Home
- Use the Sleeve Method for Foldable Travel Backpacks
- Invest in Modular Storage Systems Like IKEA JONAXEL
- Stop the Black Hole with Packing Cubes Inside
- Implement a Sunday Night Weekly Backpack Reset Routine
- Distribute Weight Correctly to Save Your Shoulders
- Install Magnetic Panels for Flexible Wall Storage
- Follow the 10-15 Percent Rule to Avoid Overpacking
- Switch to Clear Storage Bins for Extra Supplies
- Use a Draw Sack for Tiny, Easily Lost Items
- Upgrade to Sustainable Natural Fiber Organizers
- Deep Clean Your Bags to Prevent Odors and Wear
- Utilize Over-the-Door Organizers for Hidden Backpack Organization At Home
Last Tuesday at Whole Foods, I stood at the register with a cart full of groceries and a line of impatient people behind me. I reached into my bag to pay and realized my wallet was buried under a crushed protein bar, three loose pens, and a crumpled receipt from 2022. Backpack organization at home isn’t just about making your entryway look pretty. It saves your sanity during those chaotic checkout moments. I spent years tripping over heavy canvas straps and dealing with crusty, spilled lotion inside my favorite bags before I finally figured out a system that works. I’m going to share exactly how I fixed this mess. Spoiler alert. It takes a little effort upfront, but it’s worth it. I tried organizing my bags the wrong way for months, stuffing them into dark closets and crushing the fabrics, before realizing there’s a science to storing gear properly. Let’s fix your messy bags this weekend.
1. Set Up a Dedicated Drop Zone for Backpack Organization At Home

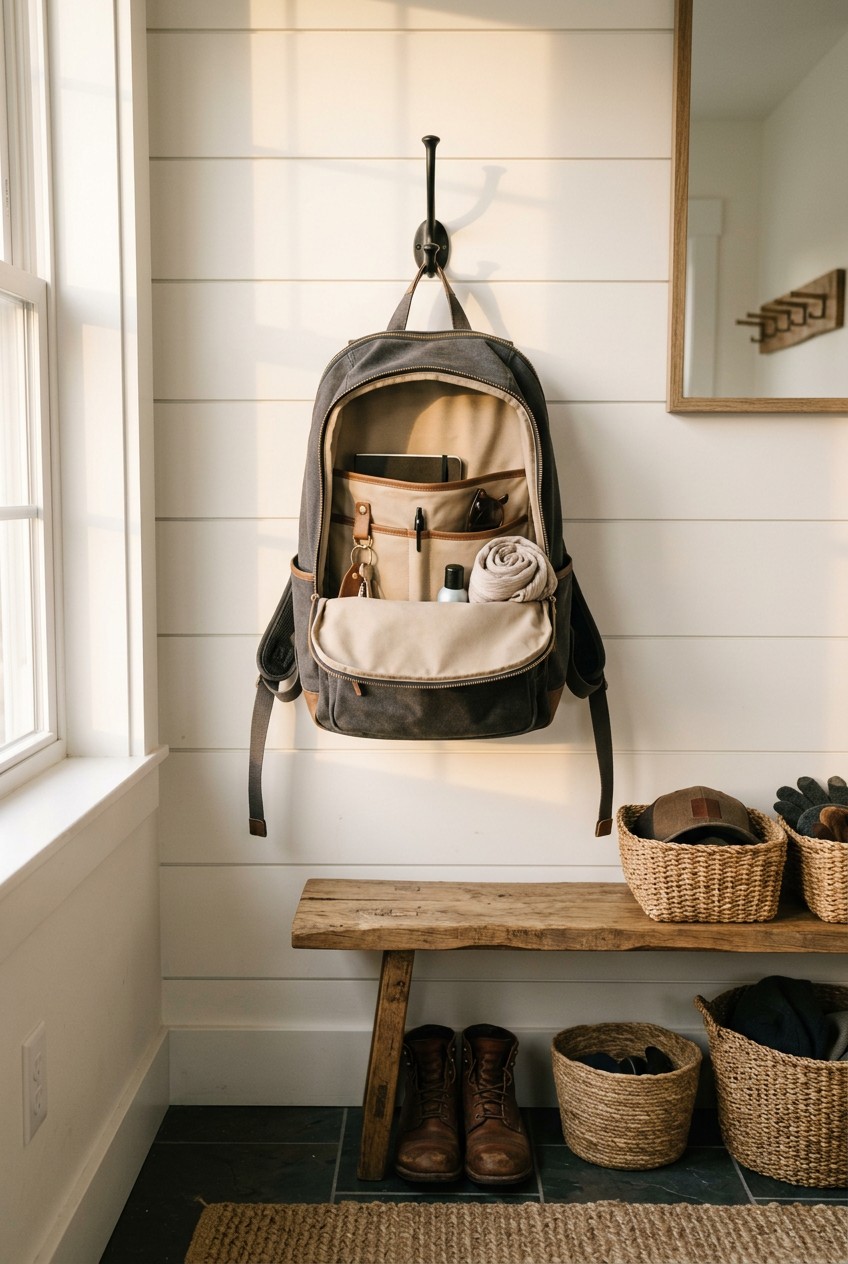
I can’t tell you how many times I’ve walked through my front door and tripped over a heavy, lumpy bag dropped right in the middle of the hallway. It’s infuriating. The texture of a rough nylon strap scraping across your ankle is the worst way to end a long workday. I learned that the hard way. The best way to stop this clutter from spreading like a virus through your house is to implement a strict drop zone the second you walk inside. I carved out a small corner in our mudroom for this exact purpose. You don’t need a massive, custom-built locker system to make this work. I personally swear by Command 15-pound XL Heavyweight Wall Hooks. They cost around $7 for a 2-count pack at Target. They stick right to the drywall without any drilling, and they hold up heavy winter canvas bags without ripping the paint off when you remove them. If you have a wooden board or wall studs you can drill directly into, I highly recommend Toughooks. They come in a bunch of bright colors and cost roughly $4 to $6 each depending on where you buy them. I mounted ours at varying heights. I put the lower hooks at about 36 inches off the ground for smaller daypacks, and the higher hooks at 60 inches for my massive 40-liter hiking packs. This staggered setup prevents the bags from overlapping into a tangled mountain of nylon straps. It’s a simple fix, but it completely changed the visual flow of my entryway.
2. Use the Sleeve Method for Foldable Travel Backpacks

Most people get this wrong. I definitely did. For years, I took my expensive, lightweight foldable travel bags, smashed them flat, and shoved them into a tight plastic tub under my bed. When I pulled them out for a trip to the mountains, the synthetic fabric was covered in permanent micro-creases. The waterproof polyurethane coating started flaking off right at the fold lines, leaving a mess of white dust everywhere. It was a costly mistake that ruined a perfectly good bag. Instead of folding them flat or stuffing them into tight bins, you need to use purpose-built hanging sleeves. I use sturdy, open-front fabric hanging sleeves that measure exactly 12 to 14 inches wide and 20 inches tall. You store the backpacks upright inside these sleeves, just like filing papers in a cabinet. This method preserves the structural integrity of the synthetic fibers and stops those damaging creases. You also need to leave a 1 to 2 inch air gap between the back of the sleeve and the wall. This tiny gap prevents moisture from getting trapped, which leads to that horrible, musty basement smell. I bought a basic canvas hanging closet organizer for $19.99, carefully cut out alternating shelves with fabric scissors to make the compartments 20 inches tall, and hung it in my guest closet. It keeps the bags structurally sound and lets the fabric breathe all year long.
3. Invest in Modular Storage Systems Like IKEA JONAXEL

If you’re dealing with multiple family members or a serious collection of outdoor gear, a static wooden shelf won’t cut it. Your storage needs change every single season. In the winter, you need tall space for bulky insulated bags and heavy coats. In the summer, you’re swapping those out for lightweight hydration daypacks. I realized my fixed wooden shelves were useless because the heights were all wrong for half the year. That’s when I switched to modular storage systems. I went with the IKEA JONAXEL series for my main gear closet. I bought the wire basket frame measuring 19 5/8 by 20 1/8 by 27 1/2 inches for exactly $49.99. The metal mesh baskets pull out smoothly, and you can adjust the configuration whenever you buy a new bag. If you want something more durable for a dusty garage setting, look into the Milwaukee Packout system. Yes, it’s technically built for heavy power tools, but the modular wall plates and locking crates are incredible for storing heavy hiking gear and survival packs. A basic Packout wall plate runs about $29.97 at Home Depot. You snap the hard plastic crates directly onto the wall plate. It’s brilliant because you can unclip a whole bin of backpack accessories, like compasses and water filters, and bring the entire bin inside when you need to pack on the kitchen table. Don’t lock yourself into permanent, unmovable shelves. Modularity is the only way to keep your storage functional long-term.

Rubbermaid Configurations Deluxe Custom Closet Kit 4-8 Ft.
Honestly, Rubbermaid Configurations Deluxe Custom Closet Kit 4-8 Ft. Adjustable surprised me — sturdier than it looks in the photos, and over 81 buyers gave it 4.5 stars.
4. Stop the Black Hole with Packing Cubes Inside

We all know the dreaded black hole effect. You drop a tiny tube of lip balm into your bag, and it vanishes into a dark, lint-filled abyss. You won’t see it again until you empty the bag three months later. I used to dig blindly through my main compartment, scratching my knuckles on sharp spiral binder coils and crusty metal zippers. The ultimate fix is containerizing the internal contents using packing cubes. I don’t just use these for my rolling suitcases anymore. I use them for daily backpack storage. I love the Eagle Creek Pack-It Isolate cubes. A medium cube costs about $25. They’re incredibly thin, slightly translucent so you can see what’s inside, and treated with an antimicrobial coating that keeps sweaty gym clothes from stinking up the whole bag. If you want a cheaper option, the Gonex Compression Packing Cubes are fantastic. You can get a 4-piece set for around $30 on Amazon. I use a small 8 by 6 inch Gonex pouch specifically for all my loose tech cords, a $15 Anker portable charger, and spare earbuds. I use a larger 14 by 10 inch cube for an extra change of clothes and a light rain jacket. Skip the cheap, stiff plastic pouches. They crack in cold weather and have zero flexibility when you’re trying to zip the bag shut. Soft, durable packing cubes keep everything grouped so you can pull out exactly what you need in two seconds flat. You might also like: 20 Brilliant Indian Home Makeover Ideas for Any Style
5. Implement a Sunday Night Weekly Backpack Reset Routine

This is a habit I had to force myself to adopt, but it cured my Monday morning anxiety. I used to leave my work bag untouched from Friday afternoon until Monday at 7:30 AM. I’d open it up to find a crushed, rotting banana, three empty snack wrappers, and a pile of crumpled grocery receipts. The smell of old fruit and stale coffee was terrible, and it set a stressful tone for the whole week. Now, I have a strict weekly reset routine. Every Sunday evening at 6:00 PM, I sit on my living room rug and empty my bag. I shake it upside down over the kitchen trash can to get rid of the annoying cracker crumbs. I throw away the empty granola bar wrappers I bought in bulk at Costco. I file away the loose paper receipts. Then, I repack only the items I actually need for the upcoming week. This simple 10-minute task prevents the slow accumulation of garbage that makes a bag feel ten pounds heavier than it is. It also gives me a chance to wipe down the interior lining with a damp microfiber cloth. If you skip this weekly reset, your bag will inevitably turn into a mobile trash can. Put a recurring alarm on your phone for Sunday night. It’s a tiny time investment that pays off when you’re rushing out the door on Monday morning. You might also like: 15 Cozy Room Cleaning Tips Organizing Ideas to Steal Right Now
6. Distribute Weight Correctly to Save Your Shoulders

I spent months complaining about chronic shoulder pain before I realized I was packing my bag like an amateur. I used to toss my heavy 32-ounce stainless steel Hydro Flask (which cost me $39.95) right at the front of the bag, furthest away from my body. I’d throw my heavy laptop in sideways. The bag constantly pulled me backward, straining my neck and ruining my posture every time I walked to the coffee shop. The rule for packing is simple. Store your heaviest items close to the back panel and centered vertically. If you carry a laptop, it goes in the padded sleeve directly against your spine. If you pack heavy glass meal prep containers, they go at the very bottom, pushed toward the back. Lighter items like a fleece jacket or a small paper notepad go at the top and front. This expert-recommended technique keeps the center of gravity tight against your body. It stops the bag from swinging wildly when you walk. I tested this out last month during a long commute, and the difference was shocking. The exact same load felt five pounds lighter just because I rearranged the internal weight distribution. Stop throwing things in randomly. Pack with intention. You might also like: 20 Charming Aesthetic Closet Organization Ideas You Need to See

HomePekite Laundry Pods Storage Container
HomePekite Laundry Pods Storage Container has been one of the most consistently praised picks in this category. 15 reviewers averaged 4.5/5.
7. Install Magnetic Panels for Flexible Wall Storage

If you live in a rental apartment or hate the idea of drilling holes into your smooth drywall, you need to look into magnetic wall storage. I discovered this trick when I was trying to organize a tiny utility closet that had zero floor space and terrible lighting. I installed Gator Magnetics Steel Panels directly on the inside of the wooden closet door. The panels cost around $29.99, and they attach with heavy-duty adhesive strips that won’t destroy the paint when you move out. Once the steel panel is up, you can snap on their Mega Hooks. These hooks use a patented magnetic technology that can hold up to 25 pounds of force. I hang my heavy, fully loaded canvas work bag on one of these hooks, and it doesn’t slide down a single millimeter. I also attach small magnetic metal mesh baskets right next to the hooks to hold my house keys, a $4.99 tube of Trader Joe’s daily sunscreen, and my sunglasses. Because it’s purely magnetic, I can slide the hooks up or down in seconds if I buy a longer bag or need more clearance at the bottom. It maximizes vertical space perfectly without committing to permanent hardware. It’s a brilliant workaround for tight entryways where traditional wooden shelving simply won’t fit.
8. Follow the 10-15 Percent Rule to Avoid Overpacking

I’m a recovering overpacker. I used to carry a heavy umbrella, a massive hard-shell first aid kit, three hardcover books, and a bulky knit sweater every single day just in case. My bag was bursting at the seams, the metal zippers were straining to close, and my lower back was constantly aching. I finally read about the 10 to 15 percent rule, and it changed my daily routine. Experts state that a loaded daypack should never exceed 10 to 15 percent of your total body weight. If you weigh 150 pounds, your bag should max out at 15 to 22 pounds. Honestly, for everyday commuting, I aim for under 10 pounds. When you exceed this limit, you aren’t just hurting your posture. You’re also making it impossible to find anything inside the bag because every square inch is jammed tight with junk. I started doing a ruthless daily audit. I took out the heavy hardcover books and switched to a lightweight Kindle Paperwhite ($139.99). I swapped the massive 16-ounce lotion bottle for a tiny 2-ounce silicone travel tube. I realized I didn’t need to carry my entire life on my shoulders. Weigh your fully packed bag on a bathroom scale tomorrow morning. You’ll probably be shocked by the number. Cut the dead weight immediately.
9. Switch to Clear Storage Bins for Extra Supplies

When you’re organizing the gear that doesn’t currently live inside your bag, visibility is everything. I used to store my extra notebooks, spare tech cables, and backup school supplies in opaque cardboard boxes on the top shelf of my hall closet. Out of sight, out of mind, right? Wrong. I ended up buying duplicate highlighters and charging cords because I forgot what I already owned. I switched to clear plastic storage bins, and it fixed the problem instantly. I bought a stack of Sterilite 6-Quart clear plastic bins from Walmart. They cost exactly $1.18 each. I use one bin for extra pens and markers, one for electronic accessories, and one for travel-sized toiletries. Because the plastic is transparent, I can scan the high shelf and see exactly where my spare laptop charger is without opening a single lid. This approach reduces visual clutter while maintaining high functionality. I print out simple text labels using my Brother P-Touch label maker ($34.99) and stick them right on the front. It’s a clean, modern look that keeps my backup gear categorized and ready to grab when I’m packing for a busy week of travel.

4 Tier Storage Bins with Lids
4 Tier Storage Bins with Lids has been one of the most consistently praised picks in this category. 63 reviewers averaged 4.5/5.
10. Use a Draw Sack for Tiny, Easily Lost Items

Every bag has a collection of tiny, annoying items that sink to the very bottom. I’m talking about loose pen caps, stray bobby pins, spare quarters, and lint-covered lip balm. I used to scrape my knuckles against the rough nylon bottom of my bag trying to fish out a single quarter for a parking meter. It’s frustrating and unhygienic to dig through that grime. My favorite trick is using a dedicated draw sack. I bought a small, 4 by 5 inch canvas drawstring pouch from a local craft store for $2.99. Every time I have a tiny, miscellaneous item that doesn’t belong in a specific tech pouch or wallet, I drop it directly into this draw sack. I keep the sack sitting right at the top of my main compartment. When I need a hair tie or a breath mint, I pull out the little sack, open the cotton drawstring, and grab it. The sticky coins stay contained, the sharp bobby pins don’t stab me, and the bottom of my bag stays free of random debris. It’s a simple habit, but it keeps the smallest clutter managed so you aren’t digging around like a raccoon.
11. Upgrade to Sustainable Natural Fiber Organizers

I used to buy cheap, flimsy plastic bins for all my visible closet organization. Over time, they cracked, warped, and started looking tacky. Plus, I hated the idea of bringing more plastic into my home. I recently decided to upgrade my entryway cubbies using natural fiber organizers. I went to Sprouts last Tuesday and bought a few beautiful, thick woven seagrass baskets. They cost about $24.99 each. I slid these textured baskets directly into my entryway bench cubbies. I use one basket to hold empty, off-season bags, and another to hold heavy winter scarves and leather gloves. The natural texture of the seagrass adds a warm visual element to the room. It feels much more intentional than clear plastic bins in a visible living space. You can also find great bamboo or solid wood crates if you prefer a more rigid structure. A solid bamboo storage box from Target runs about $35. These natural materials breathe well, which is great for storing canvas or leather goods, and they hold up beautifully to daily wear and tear. Ditch the brittle plastic tubs for your visible storage areas and invest in materials that look good.
12. Deep Clean Your Bags to Prevent Odors and Wear

Emptying your bag isn’t enough. You have to wash the fabric. I learned this the hard way after a plastic container of leftover tomato soup leaked inside my favorite hiking pack. I just wiped it with a dry paper towel and ignored it. Two days later, the sour smell of garlic and old broth was permanently baked into the nylon lining. The metal zipper tracks also got crusty and jammed every time I tried to close them. You need to clean your bags regularly to maintain the fibers and hardware. For a deep clean, I fill my bathtub with lukewarm water and add one tablespoon of Dr. Bronner’s Sal Suds Biodegradable Cleaner ($14.99 for a 16 oz bottle). I submerge the entire empty bag and let it soak for exactly 30 minutes. I use an old, soft-bristled toothbrush to gently scrub the zipper tracks and the back mesh panel, which absorbs a ton of sweat during the summer. After scrubbing, I rinse it thoroughly with cold water from the showerhead until there are no soap bubbles left. The most important part is the drying process. You can’t throw it in the dryer. The high heat will melt the waterproof coating and harden the synthetic fibers. You must hang it upside down in a shaded, well-ventilated area to air dry completely.

Galasily 3 Pack Laundry Detergent Dispenser Container with
Honestly, Galasily 3 Pack Laundry Detergent Dispenser Container with Tray surprised me — sturdier than it looks in the photos, and over 114 buyers gave it 4.5 stars.
13. Utilize Over-the-Door Organizers for Hidden Backpack Organization At Home

If you live in a small space and hate visual clutter, leaving bags hanging on an open wall might drive you crazy. I get it. Sometimes you just want your gear out of sight when guests come over. The best solution I’ve found is utilizing the dead space on the back of your closet doors. I bought a Simple Houseware 24-Pocket Over-The-Door Organizer from Amazon for $14.97. While it’s marketed for shoes, it is absolute perfection for backpack organization at home. I use the larger bottom pockets to hold my small, collapsed daypacks and thin drawstring gym bags. I use the middle pockets for my rolled-up canvas grocery totes. I use the top pockets for heavy-duty carabiners, spare chest straps, and nylon rain covers. It hooks right over the top of my standard bedroom door without any screws or messy adhesive. When the door is open, the organizer is hidden against the interior wall. When the door is closed, all my gear is neatly separated and accessible, but it doesn’t take up a single inch of floor or shelf space. It’s the ultimate low-effort, high-reward storage hack for tiny bedrooms. Took me years to figure out, no exaggeration.
I’ve tried a lot of different methods over the years, but combining a strict entryway drop zone with internal packing cubes has changed the way my house functions. You don’t have to implement all thirteen of these ideas by tomorrow morning. Pick two or three that sound doable and start there. I highly recommend starting with the Sunday night reset routine. It costs zero dollars and gives you immediate results. If you found these tips helpful, please save this article or pin it to your favorite home organization board on Pinterest. I’m always looking for new ways to keep the chaos contained, and I’d love to hear which of these hacks works best for your space.
Frequently Asked Questions
What is the best way to store empty backpacks?
The best way to store empty backpacks is using the sleeve method. Place them upright in 20-inch tall hanging closet sleeves with a 1-inch air gap. This prevents the fabric from creasing and stops moisture buildup.
How do I stop my backpack from getting so messy inside?
Use packing cubes and a small draw sack. Group your clothing and tech cords into soft, zippered packing cubes, and use a tiny drawstring pouch for loose items like coins, lip balm, and bobby pins.
How heavy should my daily backpack be?
Experts recommend following the 10 to 15 percent rule. Your fully loaded backpack should never exceed 10 to 15 percent of your total body weight to prevent shoulder strain and posture issues.
Can I wash my backpack in the washing machine?
It’s safer to hand wash. Submerge the empty bag in lukewarm water with mild soap for 30 minutes. Scrub the zippers with a toothbrush, rinse thoroughly, and hang it upside down in the shade to air dry.
