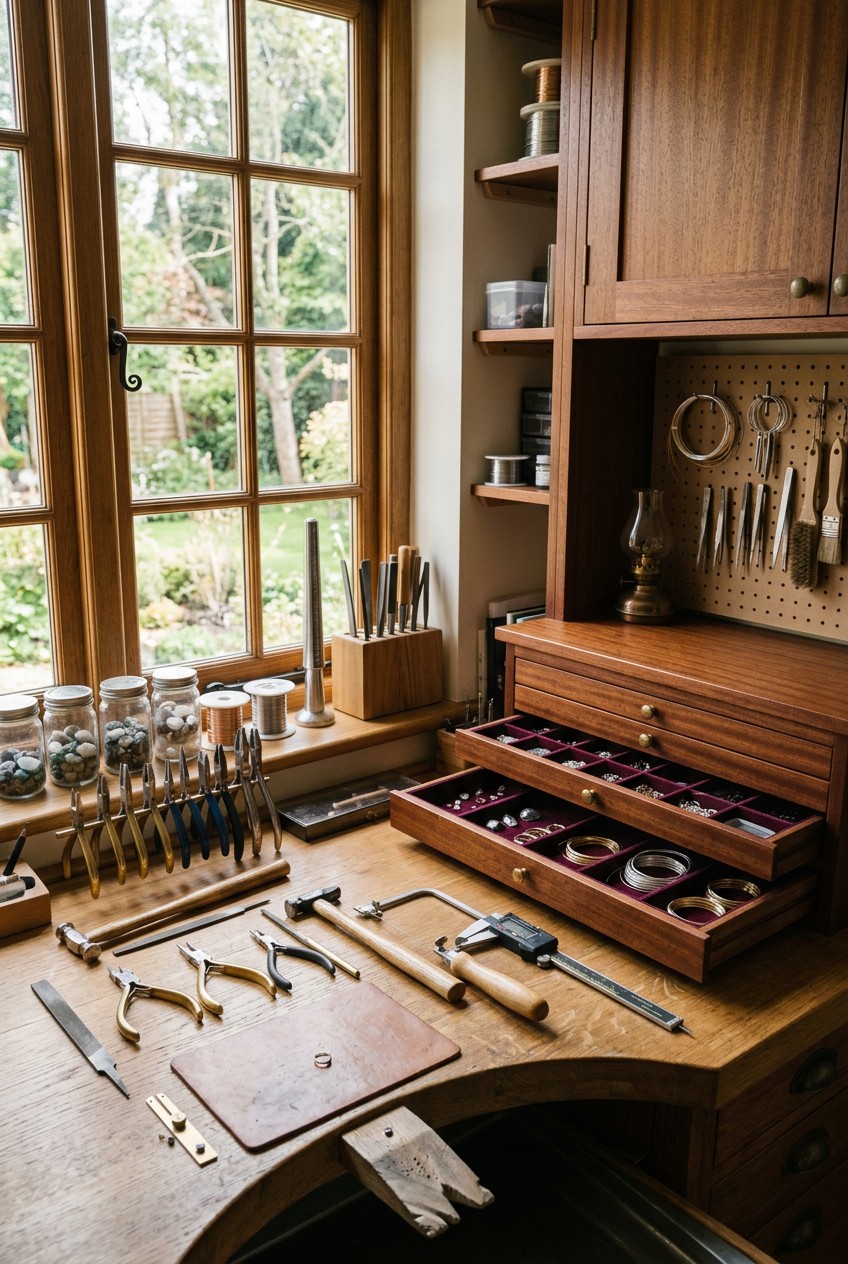
What’s Inside
- Invest In A Sturdy, Ergonomic Workbench
- Fix Your Lighting With A 10:3:1 Ratio
- Use Clear, Compartmentalized Containers For Beads
- Employ Pegboards For Accessible Tool Storage
- Organize Hand Tools With Dedicated Holders
- Implement A Strict Labeling System
- Maximize Vertical Space With IKEA Shelving
- Use Drawer Dividers For Small Components
- Set Up A Digital Inventory System
- Tame Your Wire Spools With Custom Racks
- Create A Safe Zone For Chemicals And Flux
- Manage Scrap Metal With Precision
- Contain The Mess At Your Polishing Station
- Streamline Your Packaging And Shipping Area
- Add Comfort With Anti-Fatigue Mats
Last Tuesday at 11 PM, I knocked over a flimsy plastic tray on my workbench. Three thousand 2mm glass seed beads hit my hardwood floor instantly. It sounded like a rainstorm inside my living room. That was my absolute breaking point. Proper jewelry studio organization isn’t just about making things look pretty for a social media photo. Effective jewelry studio organization is about saving your sanity and protecting your expensive materials. I spent four hours crawling on my hands and knees with a flashlight that night. My knees were bruised. My fingers were covered in metallic dust. I realized my setup was a complete disaster.
I’m Hannah, and I’ve spent years helping people fix their chaotic workspaces. I tried this wrong for months before figuring it out. I used to work on an old kitchen table with zero storage, tossing my expensive silver wire into random cardboard boxes. I’d constantly lose my favorite flush cutters. I’d accidentally mix up my 20-gauge and 22-gauge wire. It was incredibly frustrating. You can’t work efficiently when you’re constantly fighting your own space. Let’s fix your studio so you never have to experience a midnight bead spill nightmare. These are the exact tools, measurements, and habits I personally swear by.
1. Invest In A Sturdy, Ergonomic Workbench

A proper jeweler’s bench is the absolute foundation of your space. A standard office desk is usually 29 inches high. If you try to saw or solder metal at that height, your back will scream. I took that lesson to heart. My shoulders were constantly knotted, and I ended up at the chiropractor twice a month. You need a bench that positions your work surface so your elbows bend at roughly 90 degrees when holding tools. This typically means a height between 38 and 42 inches.
I finally upgraded to the Deluxe Solid Wooden Jewelers Bench Set. I bought it via PMC Supplies on Amazon for exactly $399.00. It measures 39 inches tall and features a thick wooden top that absorbs the heavy shock of my hammer blows. The solid wood feels incredibly sturdy under my hands. If you have a larger budget, the Durston Professional Jewelers Bench costs about $1,250.00. It’s an absolute beast. It features a high railing to catch flying metal sweeps and a central catch tray lined with metal. Don’t use a regular computer desk. Skip the cheap particle board furniture. It shakes like a leaf when you hammer, and the vibrations will drive you crazy. Your physical health depends on this one specific piece of furniture.
2. Fix Your Lighting With A 10:3:1 Ratio

Lighting is crucial for detailed jewelry work. Most people get this wrong by relying on a single, harsh overhead bulb. I used to work with a cheap desk lamp that cast terrible, deep shadows across my bench pin. I couldn’t tell if my silver jump rings were fully closed. Experts highly suggest a 10:3:1 contrast ratio. This means 10 units of light directly on your immediate task, 3 units for the local surrounding area, and 1 unit for the background ambient lighting.
I fixed my setup by installing a basic Philips 48-inch fluorescent tube light overhead for $24.99. This handles the ambient background light. Then, I bought two OttLite Dual Shade LED Desk Lamps for $89.99 each. I placed one on the left side of my bench and one on the right. I strictly use 6500K Daylight bulbs. This specific color temperature mimics natural sunlight perfectly. It completely eliminates shadows from my hands while I work. Honest negative: don’t place your overhead light directly behind your chair. Your own head will cast a giant, annoying shadow right over your work area. I learned that the hard way in my first apartment and spent weeks wondering why I couldn’t see my saw blade clearly.
3. Use Clear, Compartmentalized Containers For Beads

For small components, clear and compartmentalized storage is absolutely essential. I personally swear by the Elizabeth Ward Bead Storage Solutions. I bought the 42-piece tray set for $44.99 on Amazon. The medium containers measure exactly 1-3/4 inches by 2 inches by 1-1/8 inches. The hard plastic feels smooth, and the lids snap shut with a very satisfying click. I can see exactly how many 4mm turquoise beads I have left without opening the box.
Other reliable brands include Tite-Lip, Space Saver, Dot Box, and Plano. However, I have a strong opinion here. I used to buy cheap Plano plastic tackle boxes from Walmart for $12.99. Don’t do this. The removable dividers in those tackle boxes have tiny, microscopic gaps at the bottom. When you accidentally bump the box, all your 1mm silver crimp beads slide under the dividers into the next compartment. It’s infuriating. I spent three hours sorting silver crimps out of my gold jump rings. The Elizabeth Ward system uses individual boxes, which completely prevents this issue. For incredibly tiny 1mm cubic zirconia stones, I buy stackable screw-top acrylic towers. They cost $8.99 for a stack of six at Michaels. They never spill.

Galasily 3 Pack Laundry Detergent Dispenser Container with
Galasily 3 Pack Laundry Detergent Dispenser Container with Tray punches above its price — 114 buyers rated it 4.5 stars. I would buy it again.
4. Employ Pegboards For Accessible Tool Storage

Wall space is usually completely wasted in a home studio. I used to shove all my heavy steel hammers into a single deep drawer. Every time I needed my rawhide mallet, I had to dig through sharp metal tools. I constantly nicked my fingers. I decided to maximize my vertical space by installing metal pegboards to keep my frequently used tools visible and within arm’s reach.
I bought the Wall Control galvanized steel pegboards. They cost $65.99 for a two-pack of 16-inch by 32-inch panels. The cold metal looks incredibly professional and holds a massive amount of weight without warping. I purchased a 30-piece hook assortment kit for $19.99 to hang my saws, mallets, and ring mandrels. I also bought three small wire baskets for $14.50 each to hold my safety glasses and polishing cloths. This vertical storage solution effectively frees up valuable workbench real estate. It contributes to a much tidier workspace. You won’t believe how much faster you can work when your favorite chasing hammer is hanging directly in front of your face instead of buried under a pile of sandpaper. You might also like: 15 Gorgeous Hacks Home Organization to Inspire Your Next Project
5. Organize Hand Tools With Dedicated Holders

Protecting your tools is just as important as finding them. I used to toss my expensive Lindstrom flush cutters into a plastic bin. The delicate cutting blades got nicked against a steel file, and I had to throw a $75.00 tool in the trash. Now, I use specialized wooden holders. I bought a wooden plier holder from PMC Supplies for $18.50. It stores 8 to 10 pairs of pliers perfectly upright. The wooden dowels prevent the metal hinges from scratching each other. You might also like: 15 Clever Kitchen Small Space Ideas That Changed Everything
For my needle files, I use a dedicated wooden file stand. It measures approximately 13cm by 14cm by 8.5cm and features seven distinct compartments. It cost me $14.99 from Rio Grande. It keeps my files separated and prevents the abrasive surfaces from dulling. Here’s a surprising tip that changed how I work. I bought a 12-inch magnetic knife bar for $12.99 and screwed it to the right side of my bench. I slap my steel tweezers, small rulers, and extra saw blades directly onto the magnet. It’s incredibly satisfying. The cold steel tools just snap into place with a loud clack. It provides quick, effortless access. You might also like: 15 Stunning Organizing Kitchen Home Hacks Ideas You Haven’t Thought Of
6. Implement A Strict Labeling System

A comprehensive labeling system is non-negotiable for an organized studio. I used to guess my wire gauges just by looking at them. I ruined a custom silver ring because I accidentally used 22-gauge dead soft wire instead of 20-gauge half-hard wire. The ring bent entirely out of shape the second my client wore it. Now, I use a dedicated label maker for absolutely everything.
I bought the DYMO LabelWriter 450. These models, including the 550 or 5XL, typically range from $145.00 to $395.00 new. If you’re on a budget, the Brother P-touch costs about $39.99 and works perfectly fine. I print clear, durable labels for every single container, drawer, and shelf. I include the specific material type, the exact wire gauge, the quantity, and even the supplier part numbers. For example, my label reads: ‘Sterling Silver Round Wire, 20g Half-Hard, Rio Grande #100-320’. This prevents wasted time searching for supplies and makes re-ordering incredibly fast. Skipping the labels is a common mistake. You think you’ll remember what’s inside that tiny plastic bag. Trust me, three months from now, you won’t have a clue.

4 Pack Laundry Pods Container
4 Pack Laundry Pods Container punches above its price — 473 buyers rated it 4.5 stars. I would buy it again.
7. Maximize Vertical Space With IKEA Shelving

Beyond pegboards, you need heavy-duty shelving units for your bulk materials. I used to store my shipping boxes and bubble wrap on the floor. I tripped over a roll of bubble wrap last year and spilled a hot cup of coffee all over my favorite rug. I decided to install shelving units on the wall adjacent to my workbench. I went straight to IKEA.
I bought the IKEA KALLAX shelving unit for $79.99. It features large, deep square cubbies that hold a ton of weight. I also bought four IKEA DRÖNA fabric bins for $5.99 each to hide my ugly cardboard shipping supplies. For smaller items, I use the IKEA SKÅDIS pegboard system, which costs $24.99. It has fantastic little white plastic cups that hook onto the board. I use them to hold my Sharpies and ruler. I have a strong opinion on cheap plastic bins. I bought some flimsy $4.99 plastic bins from Kroger once. They cracked under the weight of my brass stamping blanks within a week. Skip the cheap grocery store bins. Buy solid modular storage that can handle the heavy weight of solid metal.
8. Use Drawer Dividers For Small Components

If you have drawers in your studio, you need dividers. Without them, your drawers will turn into a jumbled mess of tangled chain and loose clasps. I personally swear by the acrylic stackable drawer organizers from The Container Store. They range from $5.49 to $11.99 depending on the size. The clear acrylic feels thick and heavy. I use them to separate my sterling silver lobster clasps from my gold-filled spring rings.
For more delicate items, I use Stackers brand expandable jewelry trays. They run between $54.99 and $74.99. The soft velvet lining prevents my finished pendants from getting scratched while they wait to be shipped. Velvet or foam drawer inserts are also excellent. Brands like Glenor Co. (around $35.99) or Gems On Display sell fantastic foam inserts with tiny pre-cut slots. I use these to separate my ear wires and jump rings by exact size. Running my fingers over the soft grey velvet is a nice sensory break from the cold, hard metal I work with all day. Don’t just throw your findings loosely into a drawer. You’ll spend hours untangling delicate silver chains.
9. Set Up A Digital Inventory System

Physical organization is great, but digital organization is just as vital. I made a massive financial mistake last year. I accidentally ordered 5 ounces of sterling silver casting grain for $130.00. Two days later, I found a full, unopened bag of casting grain hidden in the back of my desk drawer. I wasted money because I didn’t know what I actually owned.
Now, I use a digital inventory system. I highly recommend the Sortly app. It costs about $15.00 per month for the advanced version, but there’s a free tier that works well for beginners. I take a photo of my supplies, type in the exact quantity, and enter the price I paid. I also use Airtable, which is completely free for basic use. I created a spreadsheet that tracks my metal sheets, wire spools, and gemstone strands. When I use a foot of silver wire, I update the app. This takes exactly ten seconds, but it saves me hundreds of dollars a year. Most people get this wrong by relying on their memory. Your memory isn’t reliable when you’re managing 400 different tiny components.

AMKUFO 6 Pack-Closet-Organizers-and-Storage
Honestly, AMKUFO 6 Pack-Closet-Organizers-and-Storage surprised me — sturdier than it looks in the photos, and over 52 buyers gave it 4.5 stars.
10. Tame Your Wire Spools With Custom Racks

Wire spools are incredibly frustrating to store. If you leave them loose, the wire uncoils, tangles, and gets kinked. I once spent an hour trying to untangle a massive bird’s nest of 26-gauge copper wire. The thin wire cut into my fingers, and I eventually had to throw the whole $18.00 spool in the trash.
I solved this by buying the ArtBin Super Satchel Thread Box. It costs $26.99 on Amazon. While it’s technically designed for sewing thread, the plastic prongs perfectly fit standard 1-ounce and 2-ounce wire spools from Rio Grande. The box snaps completely shut, keeping the dust off my silver. For larger 1-pound spools, I use a wooden thread rack that I bought from Joann Fabrics for $19.99. I mounted it directly to the wall behind my bench. Now, I can just pull the exact length of wire I need without taking the spool off the rack. It’s a massive time saver. Keep your wire tightly wound. Once a spool explodes into a tangled mess, it’s almost impossible to fix without kinking the metal.
11. Create A Safe Zone For Chemicals And Flux

Jewelry making involves some nasty chemicals. Flux, pickle solution, and patinas need to be stored carefully. I learned this the hard way. I accidentally knocked over a 4 oz bottle of Liver of Sulfur on my bench. It smells exactly like rotting eggs. The dark yellow liquid stained my wooden bench pin and made my entire house smell terrible for three days.
You must create a dedicated, contained zone for your liquids. I bought heavy-duty plastic bins from the Brightroom line at Target. They cost $8.00 each. I line the bottom of the bin with thick paper towels. I store my Handy Flux ($12.50 for an 8 oz jar), my Sparex No. 2 pickle compound ($16.99), and my patinas inside this plastic bin. If a bottle leaks, the chemical is completely contained inside the plastic tub. I also keep a box of baking soda ($1.25) right next to the bin to instantly neutralize any acid spills. Never store your chemicals on an open shelf above your head. If a bottle of acid falls and breaks, you’re in serious trouble.
12. Manage Scrap Metal With Precision

When you cut and file metal, you generate scrap. If you’re working with gold or sterling silver, that scrap is literally cash. I used to sweep my bench tray and dump everything into one big jar. Honest negative: this is a terrible idea. Refineries charge you higher fees if they have to separate mixed metals. You lose money.
I started organizing my scrap meticulously. I went to Sprouts and bought my daily vitamins. When the small plastic bottles were empty, I washed them out thoroughly. These free, upcycled bottles are perfect for scrap. If you want something prettier, you can buy a 12-pack of 2 oz clear glass jars on Amazon for $14.99. I label one jar ‘Clean Sterling Silver Scrap’ and another jar ‘Sterling Silver Dust/Sweeps’. I keep a separate jar for copper and brass. I use a bench brush with soft bristles ($9.50) to sweep the metal dust from my catch tray into the specific jar. The heavy glass jars sit securely on my shelf. When the silver jar gets full, I mail it to the refinery and usually get a check for over $100.00.

iDesign Laundry Detergent Holder
Honestly, iDesign Laundry Detergent Holder surprised me — sturdier than it looks in the photos, and over 13 buyers gave it 4.5 stars.
13. Contain The Mess At Your Polishing Station

Polishing jewelry creates a ridiculous amount of dirt. The polishing compound is greasy, black, and flies everywhere. I used to polish rings on my main workbench. The black grit got all over my clean silver wire and permanently stained my fingers. I’d go to Whole Foods to buy groceries, and the cashier would stare at my filthy hands. I finally bought their lavender soap for $4.99 just to scrub the grease off.
You absolutely must separate your polishing station from your clean fabrication area. I bought the Foredom Dust Hood for $45.00. It’s a heavy-gauge steel hood that sits behind my flex shaft polishing wheel. It catches about 90% of the flying black compound and cotton wheel fibers. I placed this setup on a small, separate rolling cart that I bought from Michaels for $39.99. I keep my Luxi Blue polishing compound ($14.95) and my muslin buffs in a closed plastic drawer directly under the hood. Keeping the dirty work completely isolated means my main workbench stays clean. I don’t have to wash my hands five times an hour anymore.
14. Streamline Your Packaging And Shipping Area

Shipping orders used to be the most stressful part of my week. I’d hunt for scissors, realize I was out of tape, and scramble to find the right size box. I’d end up eating Trader Joe’s peanut butter pretzels ($3.49) out of stress while packing boxes on my living room floor. You need a dedicated shipping zone to make this process smooth.
I cleared off a small folding table in the corner of my studio. I bought a pack of 500 pink poly mailers from Uline for $45.00. I store them in a large wire basket. I bought a heavy-duty desktop tape dispenser from Staples for $16.99. It’s weighted with sand, so it doesn’t move when I pull the tape. I keep my custom jewelry boxes ($85.00 for 100 boxes from Rio Grande) stacked neatly on a shelf above the table. I also bought a Rollo thermal label printer for $199.99. It sits right on the desk. Now, I can pack and label ten orders in under fifteen minutes. Keeping your shipping supplies organized in one specific zone prevents last-minute panic when you have to meet the mail carrier.
15. Add Comfort With Anti-Fatigue Mats

We’ve talked a lot about tools and storage, but your physical comfort is a huge part of proper jewelry studio organization. I have hard concrete floors in my studio. Standing at my high workbench to solder or sorting supplies at my shipping table used to destroy my feet. I’d buy bulk boxes of Ziploc bags at Costco for $15.99 and stand there for an hour sorting beads. My lower back would ache for days.
I finally invested in a high-quality anti-fatigue mat. I bought the Gorilla Grip Original Premium Anti-Fatigue Comfort Mat. It measures 32 by 20 inches and cost me $39.99 on Amazon. The thick foam core is incredible. It feels like standing on a firm marshmallow. I bought two of them. I put one in front of my main jeweler’s bench and one in front of my shipping station. They completely eliminated my foot pain. Honest negative: don’t wear sharp heels or heavy boots on these mats, as they can puncture the foam surface. Stick to sneakers or thick socks. Making your workspace physically comfortable means you’ll actually want to spend time there.
Organizing your studio is an ongoing process, but these changes will make a massive difference. I’m so glad I finally stopped working in chaos. Start with your bench height and lighting, then tackle the small bead storage. You’ll notice your productivity skyrocket. If you found these tips helpful, please pin this article and save it for your next studio clean-up weekend!

Rubbermaid Configurations Deluxe Custom Closet Kit 4-8 Ft.
Honestly, Rubbermaid Configurations Deluxe Custom Closet Kit 4-8 Ft. Adjustable surprised me — sturdier than it looks in the photos, and over 81 buyers gave it 4.5 stars.
Frequently Asked Questions
How do I organize tiny jewelry findings?
Use clear, compartmentalized acrylic containers with individual snap-shut lids, like the Elizabeth Ward Bead Storage system. Avoid cheap tackle boxes with removable dividers, as tiny crimp beads will easily slide underneath and mix together.
What is the best lighting for a jewelry studio?
Experts recommend a 10:3:1 contrast ratio: 10 units of direct task lighting, 3 units of local light, and 1 unit of ambient light. Use 6500K daylight bulbs in flexible task lamps to completely eliminate shadows.
How high should a jeweler’s workbench be?
A proper jeweler’s bench should be between 38 and 42 inches high. This specific height allows your elbows to bend at a comfortable 90-degree angle while you work, preventing severe back and neck strain.
How do I store pliers and hand tools?
Store pliers upright in a dedicated wooden plier stand to protect their hinges and blades. For smaller steel tools like tweezers and saw blades, attach a magnetic knife bar to the side of your bench for quick access.
