What’s Inside
- Start Your Makeup Table Organization by Purging the Expired Stuff
- Group Everything by Routine Order
- Repurpose Kitchen Drawer Dividers
- The Magic of Clear Acrylic Stackers
- Store Your Everyday Brushes Upright
- Create a Dedicated Skincare Zone
- Use Spice Racks for Nail Polish and Perfume
- Keep Bulk Cotton Pads in Hidden Storage
- Master Your Makeup Table Organization with Drawer Liners
- Label the Bottom of Your Opaque Bins
- Store Palettes like Vinyl Records
- Don’t Forget a Small Trash Can
- Tackle the Cord Clutter from Hot Tools
- Add a Washable Microfiber Mat
- Keep a DIY Cleaning Spray Handy
- Upgrade Your Lighting for Better Visibility
Last Tuesday at Whole Foods, I found myself scrubbing a sticky, neon pink puddle of shattered Nars blush off the bottom of my favorite canvas tote bag because I couldn’t find it on my vanity that morning. It was the exact moment I realized my makeup table organization was a disaster and needed an immediate overhaul. I’m Hannah, and I’ve spent the last four years coaching women on how to reclaim their spaces from clutter, so let’s fix this mess together. I’m going to share the exact strategies I use to keep my beauty space sorted, without spending a fortune on useless plastic bins.
1. Start Your Makeup Table Organization by Purging the Expired Stuff

Before you buy a single acrylic bin, you have to face the music and throw away the garbage. I’m talking about that crusty mascara you’ve been hoarding since 2021. Professional organizer Whitney taught me to always check for the tiny open jar symbol on the back of beauty packaging. This is called the PAO (Period After Opening) symbol, and it usually says something like 6M or 12M. If you can’t remember when you bought it, it’s time to toss it into a 13-gallon Hefty trash bag. Last month, I stubbornly applied a two-year-old $42.00 Estee Lauder Double Wear foundation from a 1 oz glass bottle. It smelled distinctly like old crayons and sour milk. My face broke out in angry red bumps for a solid week. I learned that the hard way. Grab a black garbage bag and ruthlessly toss anything separated, weirdly textured, or expired. I personally swear by holding each item and asking if I’ve used it in the last 30 days. If the answer is no, it won’t earn a spot on the vanity. I threw away 14 dried-out liquid lipsticks that day. It hurts to throw away money, but your skin will thank you. Wiping down the empty wood table with a fresh Clorox wipe afterward feels satisfying. The sharp smell of bleach means a fresh start.
2. Group Everything by Routine Order

I’m telling you, categorizing your products by the exact order you apply them is crucial for saving time. I used to dig through a massive $19.99 Target Caboodles case (the big 14-inch wide one) looking for my primer while my foundation was already drying on my hand. It was a stressful, messy way to start the morning. Now, I line my products up from left to right across my desk. First comes the skincare prep, then the $34.00 Smashbox Photo Finish primer in the 1 fl oz tube. Next is the foundation, followed by my 0.33 oz Nars Radiant Creamy concealer. When you group similar items together by routine order, your hands build muscle memory. You aren’t frantically searching for a setting spray when you’re already 10 minutes late for work. Most people get this wrong by sorting their makeup by brand or by packaging color. Don’t do that. A pretty rainbow arrangement won’t help you when you’re rushing out the door. Keep your daily drivers in a primary zone right in front of your mirror. Push the weekend-only glitter eyeshadows and bright red lipsticks to a secondary zone in a bottom drawer. Your everyday routine should feel like an assembly line. Smooth, efficient, and stress-free.
3. Repurpose Kitchen Drawer Dividers

You don’t need to buy expensive custom inserts for your vanity drawers. I personally swear by using kitchen drawer dividers to keep my pencils and tubes from rolling around. I bought the 18-inch Expand-A-Drawer bamboo dividers for $12.49 at Kroger. They smell amazing, like fresh cut wood, and they slide right into standard desk drawers. Pull out a 25-foot Stanley tape measure and check the depth of your drawer first. My main drawer is exactly 19.5 inches deep, so these spring-loaded dividers fit perfectly with a satisfying click. The contrast of the light bamboo against the dark wood drawer looks high-end. However, I have a major warning for you. Bamboo can splinter. I learned that the hard way when I snagged my favorite $15.00 Slip silk scrunchie (the 1.5-inch thick one) on a rough edge. It ripped a huge hole in the silk. Now, I always take a single sheet of 220-grit sandpaper and lightly buff the edges of the dividers before installing them. It takes two minutes and saves your expensive accessories from ruin. You can adjust the width of the compartments to perfectly fit long items like a 0.04 oz MAC lip pencil or bulky items like a 0.28 oz powder compact.

Rubbermaid Configurations Deluxe Custom Closet Kit 4-8 Ft.
Honestly, Rubbermaid Configurations Deluxe Custom Closet Kit 4-8 Ft. Adjustable surprised me — sturdier than it looks in the photos, and over 81 buyers gave it 4.5 stars.
4. The Magic of Clear Acrylic Stackers

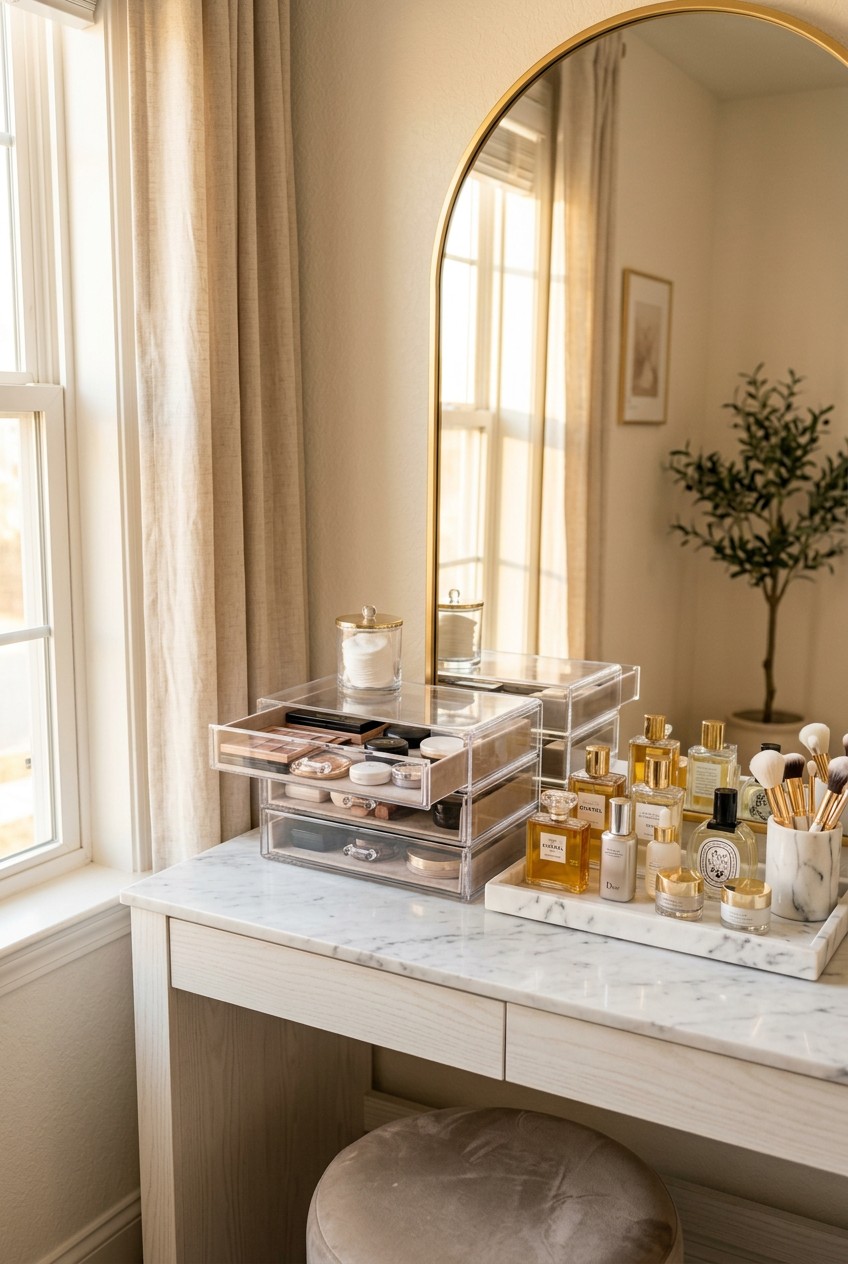
If you’re going to store makeup on top of your vanity, clear acrylic is the only way to go. You need to see exactly what you own, or you’ll forget it exists. I use the Brightroom 4-drawer acrylic organizer from Target. It costs $24.00 and measures exactly 10 by 10 inches. The heavy acrylic makes a loud, satisfying clacking sound when you close the drawers. Skip the ultra-cheap plastic bins from the dollar store. I made the mistake of buying a $5.00 flimsy plastic bin once. It literally cracked in half under the weight of a single 1.7 oz glass perfume bottle, sending shattered plastic all over my bedroom floor. Good acrylic is thick and heavy. Just remember that you can’t put acrylic in the dishwasher. The high heat warps the plastic instantly. I ruined a $15.00 Muji acrylic case that way, and it came out looking like a melted ice cube. Hand wash your stackers in the sink with warm water and 1 teaspoon of blue Dawn dish soap. Dry them immediately with a soft cotton towel to prevent hard water spots. Stacking your makeup vertically saves precious table space and keeps dust off your expensive blushes.
5. Store Your Everyday Brushes Upright

Laying your makeup brushes flat in a drawer destroys the bristles and spreads old makeup everywhere. You need to store them upright. I bought three simple Mainstays glass jars from Walmart for $3.48 each (the 16 oz size). To keep the brushes standing straight up, I filled each jar with 2 cups of Eight O’Clock whole bean coffee, which costs $6.98 for a 12 oz bag. The rich, roasted espresso smell hits me every single morning, and I love it. The coffee beans grip the brush handles perfectly, whether it’s the heavy wooden handle of a $22.00 Morphe powder brush or the thin metal handle of a $9.00 Real Techniques blending brush. Plus, the coffee naturally absorbs any lingering chemical smells from my daily brush cleaner. I tried using smooth glass beads first, which cost $4.99 a bag. It was a failure. The beads were way too slippery, and my heavy powder brushes just flopped over the sides and fell onto the floor. Stick to coffee beans or dry rice. It’s cheaper, it smells better, and it actually works to keep your tools organized and accessible. You might also like: 15 Brilliant Home Organization Ideas to Transform Your Space
6. Create a Dedicated Skincare Zone

Skincare bottles are notoriously tall, skinny, and prone to tipping over like dominoes. You need a dedicated zone for them. I keep my entire morning skincare routine on a basic 9-inch lazy Susan from Copco, which I grabbed for $7.99. I place my Trader Joe’s Rose Water Facial Toner ($3.99 for the 4 fl oz bottle) right next to my Whole Foods 365 Everyday Value Rosehip Oil ($9.99 for the 1 fl oz glass dropper bottle). The spinning mechanism is smooth, and the plastic lip around the edge keeps the bottles from flying off. Before I bought the lazy Susan, I used to just line the bottles up on my wood table. I’d constantly knock them over, and the leaking oil left permanent, sticky rings on the wood finish. It was a disaster. Now, I just give the tray a quick spin to find exactly what I need. The glass dropper of the rosehip oil clinks gently against the bottle as I spin it. Grouping your toner, serum, and moisturizer on a spinning tray keeps your makeup table organization looking intentional instead of cluttered. You might also like: 15 Stunning Home Storage Ideas to Transform Your Space

iDesign Laundry Detergent Holder
Honestly, iDesign Laundry Detergent Holder surprised me — sturdier than it looks in the photos, and over 13 buyers gave it 4.5 stars.
7. Use Spice Racks for Nail Polish and Perfume

If you have a large collection of perfumes or nail polishes, a tiered spice rack is exactly what you need. I bought a 3-tier acrylic spice rack from the home goods aisle at Sprouts for $14.99. It’s exactly 12 inches wide and fits perfectly in the corner of my vanity. I use it to display my heavy glass perfume bottles, like my 1.7 oz Chanel Coco Mademoiselle ($116.00). The tiered design means I can see every single label at a glance. I also use one for my collection of 0.5 oz OPI nail polishes ($11.49 each). Before I started using the spice rack, I kept my nail polishes in a deep basket. Every time I wanted a specific red shade, I’d have to dump the entire basket out onto the floor. The heavy glass bottles would crash into each other, and I actually chipped the corner of my favorite pink polish. The spice rack solves this completely. The satisfying clink when you set a heavy glass bottle down on the thick acrylic shelf is the best feeling. It looks like a high-end boutique display right in your bedroom. You might also like: 15 Clever Kitchen Small Space Ideas That Changed Everything
8. Keep Bulk Cotton Pads in Hidden Storage

We all love buying in bulk to save money, but you can’t leave massive packages sitting on your vanity. I always buy the huge pack of Costco Swisspers premium cotton rounds ($16.99 for a 900-count pack). The quilted texture is amazing, and they don’t leave fuzzy lint all over your eyelashes like the cheap ones do. However, a giant plastic sleeve of 900 cotton pads looks terrible. My solution is simple. I store exactly 50 pads in a small ceramic jar with a bamboo lid ($5.99, 4 oz size) right on my table. Then, I hide the massive Costco package in a 15-quart plastic tub under my bed. I used to just leave the open plastic sleeve on my desk. Within a week, the top layer of cotton pads would get covered in a fine layer of household dust and loose setting powder. Rubbing dusty cotton on your sensitive eyelids is a terrible idea. Keep your daily supply in a sealed container, and hide the bulk stash out of sight. The heavy plastic tub sliding under the bed and scraping against the carpet is a small price to pay for a clean, dust-free vanity.
9. Master Your Makeup Table Organization with Drawer Liners

If you’re putting makeup in drawers, you absolutely must use a grippy shelf liner. I use the Con-Tact brand grip liner, which costs $6.88 for a 12-inch by 5-foot roll. The rubbery texture of the liner is essential. I cut it to size using my heavy 8-inch Fiskars scissors. Peeling off the paper backing and smoothing out the air bubbles with a stiff plastic credit card takes a bit of patience, but it’s worth it. Before I used liners, my heavy $30.00 Urban Decay Naked palettes (the 0.45 oz ones) would slide wildly every time I opened the drawer. I’d hear a loud, aggressive bang as the heavy plastic palettes crashed into the back of the wood drawer. The constant impact actually shattered a pan of black eyeshadow once, covering the inside of my drawer in dark, shimmery dust. The rubber grip liner completely stops the sliding. It cushions the heavy items and keeps everything exactly where you placed it. It also protects the wood bottom of your drawer from accidental liquid eyeliner spills. If you spill something, you just peel up the liner and throw it away instead of scrubbing stained wood.

HomePekite Laundry Pods Storage Container
HomePekite Laundry Pods Storage Container punches above its price — 15 buyers rated it 4.5 stars. I would buy it again.
10. Label the Bottom of Your Opaque Bins

If you use any opaque bins or baskets, a label maker is your best friend. I use the Brother P-Touch label maker ($29.98) to print crisp, 0.5-inch white labels with bold black ink. The satisfying whirring sound of the machine printing the tape is addictive. I press the sticky labels right onto the smooth plastic of my opaque $4.00 white bins from IKEA (the 6×10 inch size). I used to think I’d just remember what was inside each identical white bin. I didn’t. I once spent 20 frantically stressful minutes dumping out three different bins just to find a single 0.12 oz MAC Ruby Woo lipstick. I was late to a dinner party and furious with myself. Now, I label the bottom edge of every single bin. I have one for lip gloss, one for extra sponges, and one for travel-sized liquids. You don’t have to label the clear acrylic stuff, because you can see right through it. But for the solid white or woven baskets, labels are non-negotiable. Peeling the split backing off the tape and pressing it onto the bin takes five seconds and saves you hours of frustration.
11. Store Palettes like Vinyl Records

Eyeshadow palettes are bulky, heavy, and annoying to store flat. If you stack them on top of each other, you have to lift four heavy palettes just to reach the one at the bottom. It’s a terrible system. Instead, you need to store them upright, like vinyl records in a crate. I use a simple Threshold wire letter sorter from the office supplies aisle at Target. It costs $10.00 and stands about 6 inches tall. The metal slots are the exact perfect width for sliding in a thick cardboard palette. I keep my massive $68.00 Natasha Denona palette (0.65 oz) in the back slot, and my smaller everyday palettes in the front. The satisfying feeling of flipping through them like records makes getting ready so much more fun. The sturdy metal wire keeps them separated and prevents the covers from scratching against each other. I used to stack them flat, and the friction completely rubbed the gold foil lettering off my favorite limited-edition palette. Storing them vertically protects the packaging and lets you grab exactly what you need with one hand without disturbing the rest of your collection.
12. Don’t Forget a Small Trash Can

This is the most common mistake I see when I help clients with their vanity spaces. They have a beautiful table, gorgeous organizers, and nowhere to put their garbage. You end up with dirty Q-tips, used makeup wipes, and black eyeliner shavings (from those tiny 0.04 oz pencils) littering the tabletop. It’s gross. You need a dedicated mini trash can right on the desk. I bought the Simplehuman 1.5-liter mini countertop trash can for $20.00. It has a brushed stainless steel finish that looks sleek, and a perfectly balanced swinging lid that hides the garbage from view. Emptying the tiny plastic inner bucket takes two seconds. Before I bought this, I’d just leave my dirty makeup wipes sitting on the edge of the desk. The leftover makeup remover would seep into the wood, leaving greasy stains. Having a tiny trash can within arm’s reach means you throw things away instantly. You aren’t tempted to leave a dirty cotton swab sitting next to your expensive clean brushes. It’s a tiny detail that changes how clean your space stays throughout the week.

3-Tier Hanging Laundry Basket Organizer:Foldable Wire Shelf
3-Tier Hanging Laundry Basket Organizer:Foldable Wire Shelf Laundry Ro punches above its price — 518 buyers rated it 4.5 stars. I would buy it again.
13. Tackle the Cord Clutter from Hot Tools

If you do your hair at your makeup table, the thick, heavy cords from your hot tools will ruin your organized aesthetic instantly. You can’t just leave them draped over the mirror. I use heavy-duty Command wire hooks to manage the chaos. I buy the 4-pack for $5.49, which safely holds up to 0.5 lbs per hook. I stick them to the back of my vanity mirror or the side of the desk. You just press the sticky strip into the wall for 30 seconds, and it holds perfectly. I use these hooks to loosely loop the thick black cord of my Revlon One-Step Volumizer hair dryer ($39.99, weighing 1.8 lbs). Wrapping the cord tightly around the handle of the hair dryer actually damages the internal wires and creates a fire hazard. Looping it on a hook keeps the cord safe and out of sight. I used to just let the cord dangle off the edge of the table. I tripped over it twice, almost pulling the heavy hair dryer onto my foot and knocking over a full cup of water in the process. Get the cords off the floor and onto a hook immediately.
14. Add a Washable Microfiber Mat

Makeup is inherently messy. Powders crumble, liquids drip, and glitter gets everywhere. You need a protective layer between your makeup and your table surface. I bought a pack of plush microfiber cloths from the automotive section at Walmart. They cost $5.98 for a 4-pack of 12×12 inch towels. I lay one flat directly under my mirror, right where I do my blending. The soft, plush texture of the microfiber is amazing at trapping the fine, powdery fallout from my 0.28 oz Anastasia Beverly Hills highlighter. When the towel gets covered in sparkling dust and foundation smudges, I just shake it out over the bathroom sink. A massive cloud of glitter falls out, saving my wood table from a mess. Then, I just throw the towel in the washing machine on hot with 1/4 cup of liquid Tide detergent. I used to use a pretty white faux fur rug on my vanity stool, and I accidentally dropped an open bottle of liquid blush on it. The stain never came out, and I had to throw the $40 rug in the trash. Use cheap, washable microfiber mats to catch the daily mess.
15. Keep a DIY Cleaning Spray Handy

Your makeup table organization won’t last if the table itself is covered in sticky residue. You need a fast, effective cleaning spray within arm’s reach. I make my own DIY cleaning solution because the store-bought stuff leaves a film on my acrylic bins. I mix 1/2 cup of 70% isopropyl alcohol, 4 oz of distilled water, and exactly 2 drops of blue Dawn dish soap. I keep this mixture in an 8 oz amber glass spray bottle that I bought for $4.99 on Amazon. The dark amber glass protects the mixture from sunlight. The fine mist nozzle sprays a perfect, even layer over my desk. The sharp, clinical smell of the alcohol evaporates in seconds, taking all the sticky lip gloss stains with it. I just spray it directly onto the acrylic and wipe it away with a paper towel. I tried using regular glass cleaner once, and it completely clouded the clear plastic of my expensive drawers. The alcohol and dish soap combo cuts through the heavy silicone in makeup primers without damaging the plastic. Keep this bottle right on your desk, and wipe down the surface every Sunday evening.

VIPEK V5 Heavy Duty Clothes Rack
A dependable everyday pick — VIPEK V5 Heavy Duty Clothes Rack pulls in 56 ratings at 4.5 stars. Not flashy, just solid.
16. Upgrade Your Lighting for Better Visibility

You can’t organize what you can’t see. Good lighting is a crucial part of makeup table organization. I used to get ready using the harsh, yellow glow of a single 60-watt bathroom bulb. It cast shadows across my desk, and I’d constantly lose my small eyeliner pencils in the dark corners of my drawers. Worse, the yellow light made my foundation look orange, leading to some truly embarrassing makeup mistakes in natural daylight. I finally upgraded to a Neewer 10-inch ring light for $35.99. The heavy metal tripod stand adjusts up to 60 inches tall, so it towers perfectly over my vanity mirror. The bright, cool white LED setting illuminates every single inch of my desk. I can clearly see the tiny text on my 0.1 oz concealer tubes, and I never lose my tweezers anymore. The reflection of the ring light in my eyes makes me feel like a professional makeup artist. If you’re struggling to keep your space tidy, it might just be because your room is too dark. Add a dedicated ring light, and you’ll see your space (and your face) clearly.
Organizing your vanity doesn’t have to be an expensive, stressful chore. By using simple kitchen dividers, cheap glass jars, and a little bit of daily maintenance, you can create a space that actually works for your morning routine. I’ve used these exact methods to keep my own chaotic collection in check for years. If you found these tips helpful, please save this article and pin it to your favorite home organization board on Pinterest. I’m always sharing new ways to conquer household clutter, so stick around and let’s get your entire home sorted!
Frequently Asked Questions
How do you organize a makeup table on a budget?
Repurpose cheap household items instead of buying expensive custom organizers. I use $12 bamboo kitchen drawer dividers, $3 glass jars filled with coffee beans for brushes, and acrylic spice racks for perfumes. These budget-friendly swaps keep everything perfectly sorted.
What is the best way to store eyeshadow palettes?
Never stack heavy eyeshadow palettes flat, or you’ll struggle to reach the bottom ones. Store them upright like vinyl records using a cheap metal wire letter sorter from the office supplies aisle. It protects the packaging and makes them easy to grab.
How often should I clean my makeup table organization bins?
You should wipe down your vanity and acrylic bins once a week. I use a DIY spray made of 1/2 cup 70% isopropyl alcohol, 4 oz distilled water, and a drop of dish soap. It cuts through sticky makeup residue without clouding the plastic.
How do you know when to throw away old makeup?
Always check the PAO (Period After Opening) symbol on the back of the packaging, which usually says 6M or 12M. If the product smells like crayons, has separated, or you can’t remember buying it, throw it away immediately to prevent skin irritation.
