What’s Inside
- The Brutal Full Purge for Open Pantry Organization
- Decanting Dry Goods (Without Going Broke)
- Fixing the Vertical Space Trap
- The 2×2 Rule for Deep Shelves
- Tiered Spice Racks That Actually Work
- Lazy Susans for the Awkward Corners
- Hiding the Ugly Stuff in Woven Baskets
- Minimalist Labels for Open Pantry Organization
- Acrylic Shelf Dividers for the Flimsy Stuff
- Under-Shelf Baskets to Double Your Space
- The Supermarket “Facing” Method
- Adding Cheap LED Lighting Strips
Last Thanksgiving, I stood in the middle of Whole Foods clutching my fourth $6.99 jar of nutmeg. My pantry was a disaster. I could never find what I needed. My shelves were a chaotic mess of half-rolled chip bags, sticky honey bottles, and stacks of canned beans that looked like a bad game of Jenga. I ignored the mess for months before finally admitting my system was broken. When you have shelves without doors, every flaw is on public display. You can’t just shut the door and pretend the clutter doesn’t exist. I’m going to walk you through exactly how I fixed my kitchen storage without spending a fortune. These are the specific, cheap, and effective methods I use daily to keep my food visible and fresh. Skip the expensive custom cabinet installations. You don’t need them. Let’s get into the gritty details of making your food storage work for your real life.
1. The Brutal Full Purge for Open Pantry Organization

I’m begging you to stop organizing around expired garbage. Start by taking every single item off your shelves. Last Tuesday, I helped a friend do this, and we found a 12 oz bottle of salad dressing that expired four years ago. It was terrifying. Grab a box of Hefty 30-gallon trash bags—they cost about $12.99 at Target—and get ruthless. If you haven’t eaten it in six months, you aren’t going to. Toss the stale 1/2 cup of walnuts. Throw away the sticky 4 oz jar of molasses you used once for gingerbread cookies. Once the shelves are bare, wipe them down. I swear by the Method Pink Grapefruit All-Purpose Cleaner ($3.99). It cuts through the weird sticky rings left by olive oil bottles and smells like a fresh citrus grove. I tried organizing in sections for months before figuring out that a full purge is the only way. You have to see the blank slate. Group your surviving items into strict zones right on your kitchen table. Put all the baking supplies in one pile. Put the 15 oz cans in another. This visual inventory forces you to see exactly how many duplicates you own. It’s usually a shocking amount.
2. Decanting Dry Goods (Without Going Broke)
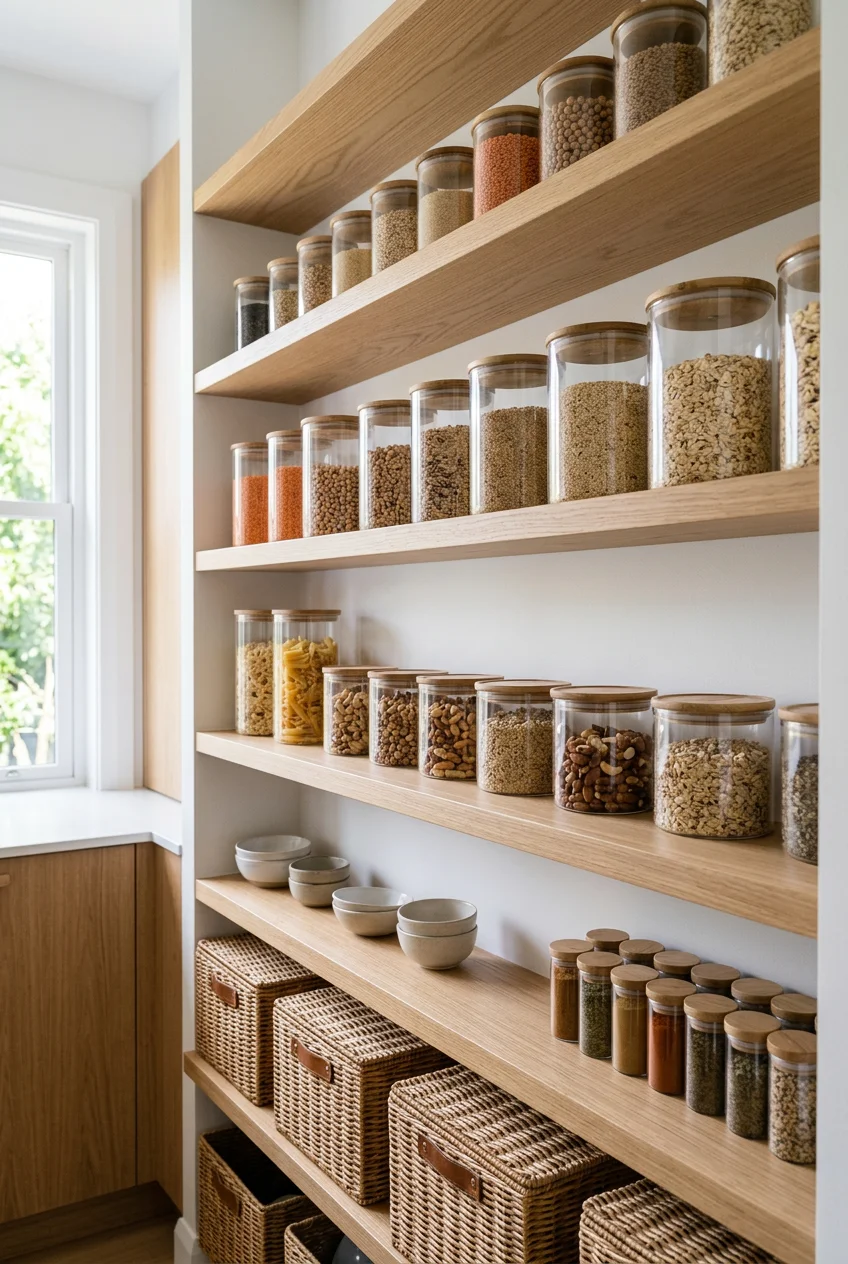
Let’s talk about those ugly, half-torn cardboard boxes of pasta and cereal. They look terrible on open shelves and they let your food go stale. Decanting dry goods into clear, airtight containers is mandatory. I’ve wasted money on cheap plastic bins from dollar stores that warped in the dishwasher. Don’t do it. Skip the flimsy stuff. I recommend the OXO Good Grips POP 2.0 Containers. A 10-piece set runs about $109. It sounds steep, but they last forever. The satisfying pop of the vacuum seal is worth every penny. If you’re on a tighter budget, the Rubbermaid Brilliance Pantry Organization 14-piece set is around $79 and works beautifully for 5 lb bags of flour. If you want the warm wood aesthetic for 2026, grab the Oggi Acacia Canister Set for $39.99. The glass jars with bamboo lids look high-end. Last month after a massive Costco run, I spent twenty minutes pouring 25 lbs of rice and 10 lbs of oats into these jars. The visual relief of tossing all that bulky, loud plastic packaging into the recycling bin is unmatched. Plus, you instantly know when you’re running low on coffee beans.
3. Fixing the Vertical Space Trap

Most people get this entirely wrong. They leave their shelves at the default heights set by the builder and end up with eight inches of dead air above their short canned goods. Wasted vertical space is the enemy. If your shelves are adjustable, take the time to move those little metal pegs. I used a simple flathead screwdriver to pop the pegs out and lowered my middle shelf to exactly 6 inches high, which perfectly fits my 4.5-inch tall cans of black beans. If you rent or can’t adjust your shelves, you must buy risers. I’m obsessed with the YouCopia ShelfSteps ($19.99). They’re sturdy white wire racks that let you stack items safely. Before I bought these, I tried balancing a 14.5 oz can of diced tomatoes on top of a 15 oz can of corn. It fell and dented my hardwood floor. Learned that the hard way. Measure your exact shelf height. If you have 12 inches of clearance, use a 6-inch tall stackable bin to cut that space in half. You’re effectively doubling your storage footprint for twenty bucks. It’s a relief to see every inch utilized properly.

Rubbermaid Configurations Deluxe Custom Closet Kit 4-8 Ft.
A dependable everyday pick — Rubbermaid Configurations Deluxe Custom Closet Kit 4-8 Ft. Adjustable pulls in 81 ratings at 4.5 stars. Not flashy, just solid.
4. The 2×2 Rule for Deep Shelves

I’ll admit a mistake I made when I first started. I thought deep shelves were a blessing. I was wrong. Deep shelves are where good groceries go to die. Last March, I was doing a quick clean-out before a grocery run to Sprouts. I reached into the very back of my 24-inch deep bottom shelf and my fingers squished into something soft, green, and fuzzy. It was a loaf of sourdough bread I bought three weeks prior. It was disgusting. The smell of mold hit my nose instantly. That’s when I instituted the strict 2×2 rule. It’s incredibly simple. You’re only allowed to stack items two-deep and two-high. Period. If you buy a 15 oz can of chickpeas for $1.19, you put one in the front and one directly behind it. You don’t shove five cans into the dark abyss. If you have a third can, it starts a new row. This ensures you never have to move more than one single item to see what you have in stock. When I started doing this, my grocery bills dropped because I stopped buying duplicates. It takes a little discipline to stop shoving things to the back, but the visual clarity is worth it. You might also like: 20 Lovely DIY Home Makeover That Make a Real Difference
5. Tiered Spice Racks That Actually Work
Spices are the worst offenders for visual clutter. If you shove them on a flat shelf, you’ll never find the cumin when your soup is boiling over. I tried keeping them in a messy basket for months before I realized I was buying duplicate $4.99 bottles of garlic powder every week. You need a tiered spice rack. I bought the Copco Non-Skid 3-Tier Spice Pantry Kitchen Cabinet Organizer for $7.99. It’s cheap, made of durable plastic with grippy rubber steps, and holds about 15 standard 2 oz spice jars. If you want something prettier, the TB Home 3-Tier Expandable Spice Rack expands from 12-1/8 inches to 21-1/4 inches wide for around $19.99. For those of you with deep cabinets next to your open shelves, the SpaceAid 3 Drawers 2-Tier Pull Out Spice Rack ($39.99) is incredible. It requires a cabinet space of at least 7.7 inches wide. I installed one in my mom’s kitchen last weekend. The smooth glide of the metal tracks and the clinking sound of the glass jars lining up is satisfying. Keep your everyday spices on the bottom tier and the rare stuff up top. You might also like: 15 Clever Kitchen Small Space Ideas That Changed Everything
6. Lazy Susans for the Awkward Corners
Corners are notorious dead zones. You shove a heavy 32 oz bottle of vegetable oil back there, and you can’t reach it without knocking over three bottles of vinegar. Lazy Susans are the only acceptable solution for corner storage. I’m a huge fan of the 10-inch Roninkier Lazy Susan ($14.99). It has a slight lip around the edge so things don’t go flying off when you spin it fast. I use one exclusively for my sticky condiment collection from Trader Joe’s. I load it up with their 8 oz bottles of soy sauce, toasted sesame oil, and that chili onion crunch. The smooth spin makes cooking so much faster. If you have a massive walk-in pantry with deep corners, you need something bigger. Rev-A-Shelf makes heavy-duty 24-inch diameter wooden turntables for about $59.99. I installed one for my heavy baking supplies. It easily holds a 5 lb bag of sugar, a 32 oz bottle of vanilla extract, and bulky tubs of coconut oil. The key is to wipe the bottom of your oil bottles with a damp paper towel before setting them on the turntable. I forgot to do this once, and the sticky residue glued a bottle of olive oil to the plastic base. It was a nightmare to pry off. You might also like: 20 Cozy Aesthetic Organizing Ideas to Inspire Your Next Project

3-Tier Hanging Laundry Basket Organizer:Foldable Wire Shelf
Honestly, 3-Tier Hanging Laundry Basket Organizer:Foldable Wire Shelf Laundry Ro surprised me — sturdier than it looks in the photos, and over 527 buyers gave it 4.5 stars.
7. Hiding the Ugly Stuff in Woven Baskets
Not everything in your pantry is pretty. No matter how hard you try, a giant, shiny, neon-orange family-sized bag of Doritos from Walmart will never look chic on an open shelf. This is where the 2026 Soft Pantry trend comes in. You need to hide the ugly, bulky packaging inside natural woven baskets. I love the Honey-Can-Do Banana Leaf Storage Baskets. They cost about $34.99 each and measure roughly 12x12x8 inches. The scratchy texture of the natural fibers and the earthy smell make a cheap wire shelf look like a custom build. Another great option is the Best Choice Products Water Hyacinth Pantry Baskets (a set of four is around $54.99). I use these specifically for my kids’ snacks. I dump the individual 1 oz bags of pretzels and fruit snacks directly into the basket. The bright, chaotic packaging is hidden from view, but the kids can still grab what they want. Don’t buy cheap fabric bins. They sag, they get stained by greasy fingers, and they look terrible after two months. Stick to rigid, natural materials like seagrass or water hyacinth. They hold their shape and hide the visual noise perfectly.
8. Minimalist Labels for Open Pantry Organization
Even if you decant your dry goods into beautiful clear jars, you’re going to mix up the baking powder and the baking soda. Trust me, I ruined a batch of chocolate chip cookies last Christmas because I thought the white powder in the unmarked jar was powdered sugar. It was cornstarch. The cookies tasted like wet cardboard. Labeling is mandatory. The current trend favors small, minimalist, waterproof labels over massive, swirly, farmhouse fonts. I use the Phomemo D30 Bluetooth label maker. It costs under $30 and connects directly to my phone. You just type in “1/4 cup Chia Seeds” and it prints a sleek, modern label in two seconds. Peeling the sticky backing off and placing it perfectly straight on a glass jar is oddly therapeutic. If you prefer a standalone device, the Brother P-Touch PT70BM is a classic workhorse for about $25. I highly recommend placing the labels near the bottom of the container rather than dead center. It looks cleaner and doesn’t obstruct your view of the food inside. Also, make sure you buy the waterproof tape cartridges. I tried the cheap paper labels once, and they disintegrated the first time I wiped down the jars with a damp sponge.
9. Acrylic Shelf Dividers for the Flimsy Stuff
If you have wide, flat shelves, you’ve probably experienced the avalanche of flimsy bags. You try to stack three 8 oz bags of dried mangoes from Kroger, and they immediately slide off each other and flop onto the floor. It’s frustrating. Clear acrylic shelf dividers are the secret weapon for keeping floppy items standing upright. I bought a set of EasyClosets clear dividers (8 inches tall by 12 inches deep) for $15.99. They have a brilliant design where they just slide tightly onto standard 3/4-inch thick wooden shelves. No screws, no drilling. I use them to create rigid columns for my dried fruit bags, my 16 oz bags of specialty pasta, and even my stack of paper plates. J&V Textiles also makes a great version measuring 8.25 inches high and 11.5 inches deep for around $18.99. The clear acrylic is practically invisible, so it doesn’t add any visual clutter. I tried using cheap plastic bookends before finding these, but they kept sliding around. The slide-on acrylic dividers grip the shelf tightly and refuse to move. They’re perfect for keeping your categories strictly separated.

HomePekite Laundry Pods Storage Container
Honestly, HomePekite Laundry Pods Storage Container surprised me — sturdier than it looks in the photos, and over 16 buyers gave it 4.5 stars.
10. Under-Shelf Baskets to Double Your Space
Look at your shelves right now. I guarantee there are at least four inches of empty air hanging right below the wooden planks. This is prime real estate that you’re ignoring. Under-shelf baskets are a ridiculously cheap way to instantly double your storage capacity for small, flat items. I bought the Simple Houseware Under Shelf Basket for $14.99 on a whim, and it completely changed my setup. It has two flat metal arms that slide right over the top of your existing shelf, suspending a wire basket underneath. I use mine exclusively for my collection of 2 oz tea boxes and flat packets of taco seasoning. It keeps the tiny, annoying boxes off the main shelf so I have more room for heavy cans. Just a quick warning: make sure you measure the thickness of your shelves before ordering. These baskets usually fit shelves up to 1.5 inches thick. Also, don’t overload them. I mistakenly tried to cram six 15 oz cans of soup into one, and the metal arms bent slightly. Stick to lightweight items like bread, tortillas, foil boxes, and tea. It’s a brilliant way to utilize every single cubic inch of your pantry.
11. The Supermarket “Facing” Method
This trick costs zero dollars and takes about five minutes, but it changes how your kitchen looks. Have you ever noticed how calming it is to walk down the aisles of Whole Foods? It’s because the employees constantly practice “facing.” Facing means pulling every item to the very front edge of the shelf and turning the label so it faces outward. I started doing this in my own house, and I can’t stop. Every night after dinner, I spend exactly two minutes pulling my 14.5 oz cans of diced tomatoes to the front edge of the wire rack. I line up the 16 oz jars of peanut butter so the logos all point the same direction. When you do this, your open pantry organization stops looking like a messy storage closet and starts looking like a high-end boutique. It also serves a practical purpose. When everything is pushed to the front edge, you can scan your inventory. You’ll never accidentally buy a third bottle of ketchup because the first two were hiding in the shadows. I tried skipping this step for a week, and my shelves immediately devolved into a chaotic mess. The visual discipline of facing your groceries forces you to keep the space clean.
12. Adding Cheap LED Lighting Strips

Dark shadows are the enemy of open shelving. If you can’t see the food, you won’t eat it, and it will expire. The biggest trend for 2026 is integrating lighting directly into your pantry shelves, but you don’t need to hire an electrician. I bought a 16.4-foot roll of Govee LED Strip Lights for $16.99. They have a strong 3M adhesive backing. I spent about twenty minutes unrolling the strip, peeling off the tape, and sticking it directly to the underside of each shelf. I plugged the end into a standard outlet near the floor. The difference is staggering. I set the lights to a warm 3000K white glow. When the bright light hits the clear OXO containers and the glass spice jars, it looks expensive. It eliminates the dark, scary corners where bags of potatoes used to rot unnoticed. I’ve bumped into a few issues with the adhesive peeling off wooden shelves that weren’t perfectly clean, so make sure you wipe the wood with rubbing alcohol before sticking the lights on. Having a beautifully lit display makes you want to keep the area organized. It’s a cheap upgrade that delivers massive visual impact.
Honestly, fixing your open pantry organization is just about making small, deliberate choices. You don’t need to drop thousands of dollars on custom cabinetry to have a functional, beautiful kitchen. By using the 2×2 rule, decanting your messy dry goods into clear OXO containers, and hiding the ugly bags in woven baskets, you’re going to save so much time and money. I’ve thrown away so much expired food in the past because I simply couldn’t see it. Now, I know exactly what I have before I leave for the grocery store. No exaggeration. I’d love to see how you tackle your own shelves. Take a before picture, rip everything out, and start fresh. If you found these tips helpful, pin this article to your kitchen organization board so you can reference the exact brand names and measurements when you’re standing in the middle of Target. You’ve got this!

4 Pack Laundry Pods Container
4 Pack Laundry Pods Container punches above its price — 509 buyers rated it 4.5 stars. I would buy it again.
Frequently Asked Questions
How do I hide ugly packaging on open pantry shelves?
Use natural woven baskets made of water hyacinth or seagrass. They completely conceal brightly colored, bulky snack bags while adding a high-end, textured look to your open pantry organization without looking messy.
What is the 2×2 rule for deep pantry shelves?
The 2×2 rule states you should only stack items two-deep and two-high. This prevents food from getting lost and expiring in the back of deep cabinets, ensuring everything remains visible and easily accessible.
Which containers are best for dry goods?
OXO Good Grips POP containers and Rubbermaid Brilliance are excellent clear, airtight options. For a warmer aesthetic, glass jars with acacia wood or bamboo lids are highly recommended to keep food fresh and visible.
How can I maximize vertical space between tall shelves?
Use adjustable shelving to eliminate dead air, or invest in wire shelf risers and stackable clear bins. These tools allow you to stack canned goods safely, effectively doubling the usable footprint of your open pantry.
