What’s Inside
- 1. Measure Your Drawers Before Buying Anything
- 2. Get Expandable Kitchen Tool Organizers with Non-Slip Bases
- 3. Switch to Natural Fiber Bins for Warmth
- 4. Use Discreet Label Holders Instead of Oversized Stickers
- 5. Store Pans Vertically with Adjustable Racks
- 6. Stack Modular Bins Inside Larger Bins for Micro-Organization
- 7. Use Divided Lazy Susans for Small Item Categories
- 8. Choose Modular Wardrobe Systems with Slim Hangers
- 9. Declutter Before Buying Organizers
- 10. Use Reusable Dry Erase Labels on Bins
- 11. Create Cohesive Aesthetics with Uniform Bins
- 12. Embrace Wellness-Inspired Bedroom Organization
- 13. Choose Function Over Aesthetic for Food Storage
- 14. Add Vertical Shelf Risers to Double Cabinet Capacity
- 15. Go Sustainable with Bamboo Drawer Dividers
- 16. Install Pull-Out Drawers in Deep Cabinets
- 17. Create Zones in Your Pantry with Consistent Container Heights
- 18. Use Tension Rods for Vertical Storage in Unexpected Places
- 19. Implement a One-In-One-Out Rule for Maintained Organization
- 20. Photograph Your Organized Spaces for Motivation
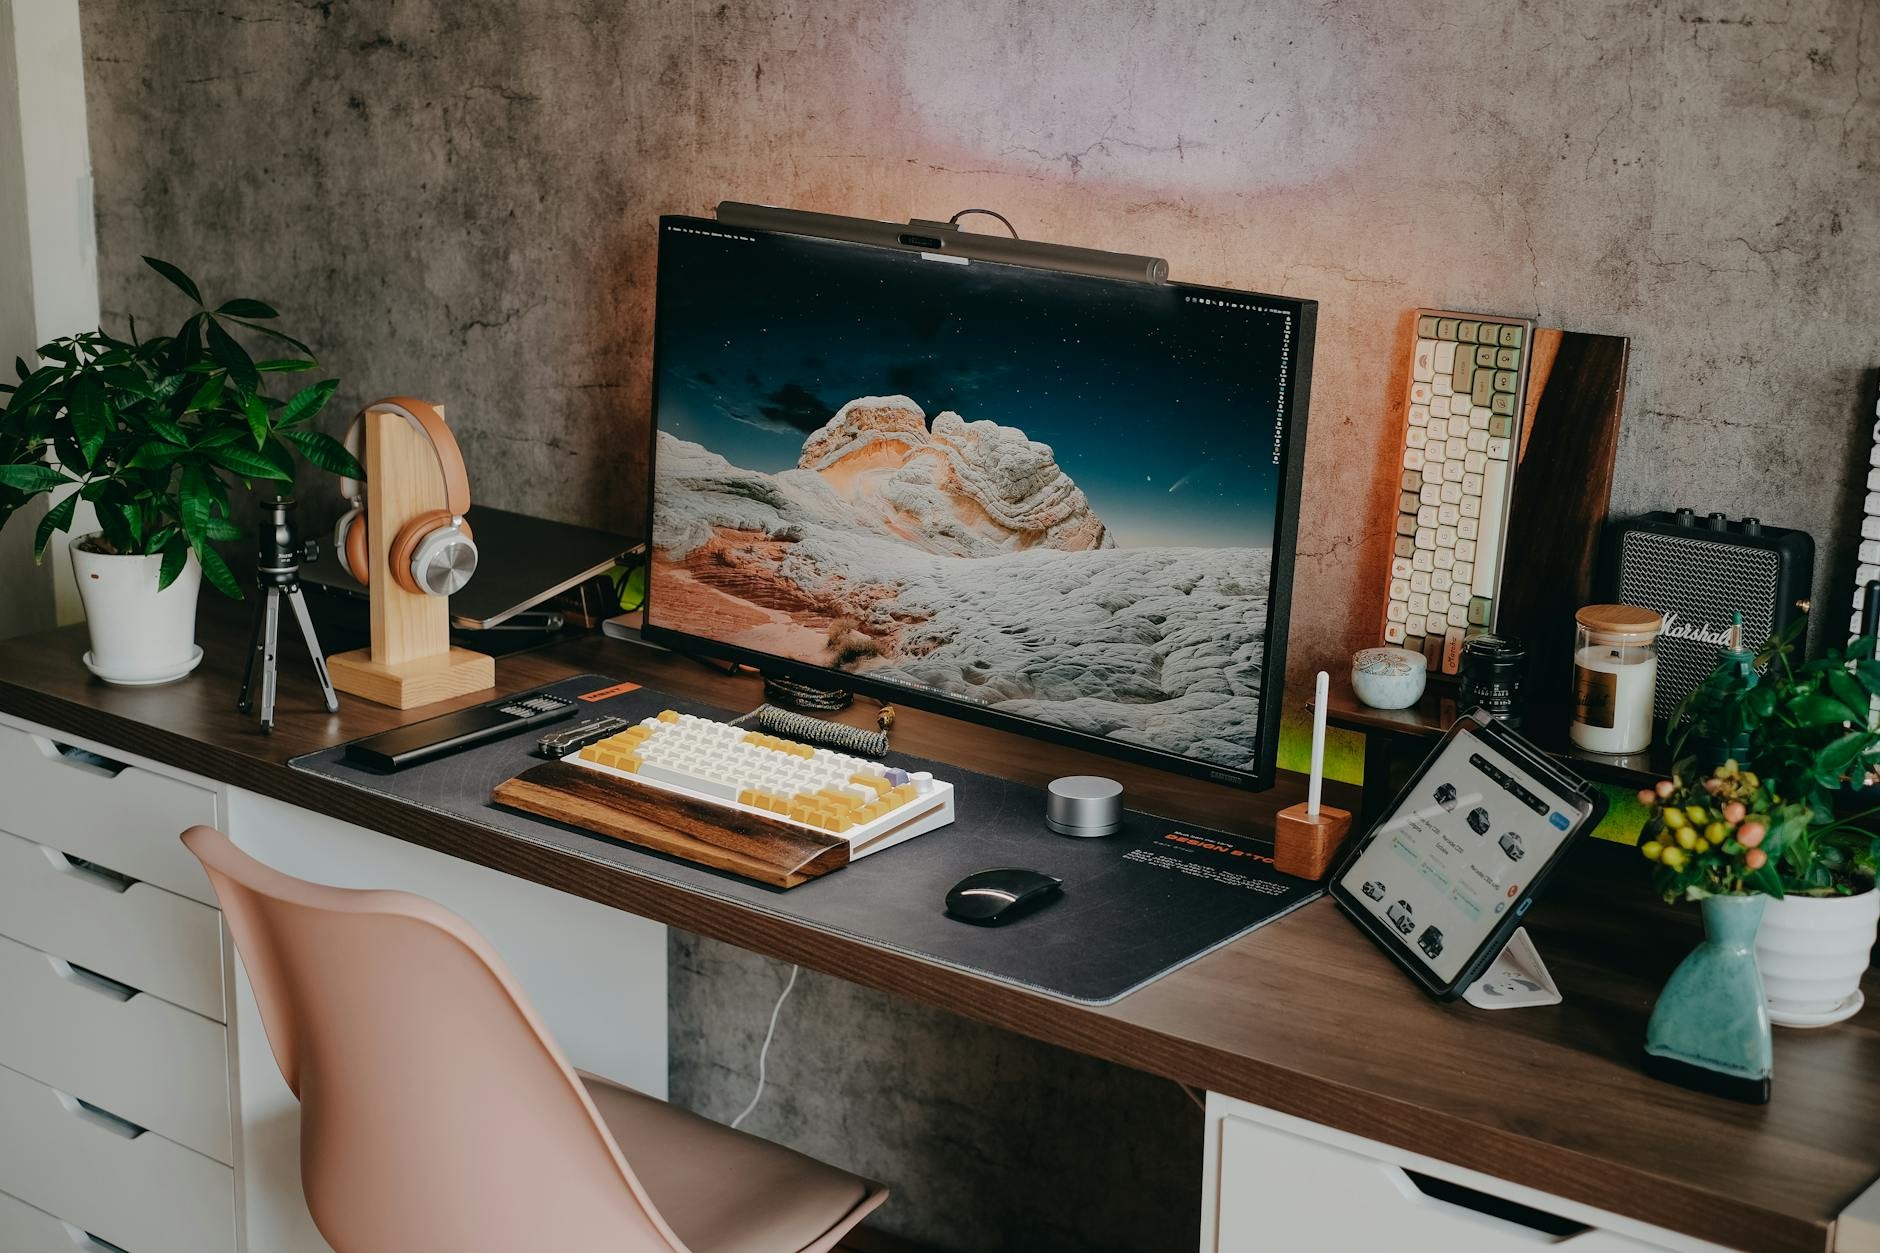
Last year, I dropped $200 on sleek acrylic organizers, only to realize they turned my kitchen into something resembling a science lab. That costly mistake taught me an important lesson: aesthetic organizing doesn’t have to feel cold or sterile. The best systems feel welcoming, functional, and tailored to how you actually live—not just how it looks on Pinterest.
After reorganizing my own house three times (yes, three) and helping dozens of clients, I’ve figured out which ideas stick and which ones fall apart after a week. Some of my favorite solutions cost under $5, while others require a bit more investment, but they all share one thing: they’re practical *and* pretty.
1. Measure Your Drawers Before Buying Anything

This sounds basic, but it’s the step everyone skips. I learned this the hard way when I bought bamboo drawer dividers that were half an inch too tall for my bathroom drawers. They sat in my closet for months before I finally donated them.
Grab a tape measure and note the height, width, and depth of every drawer you’re organizing. The Container Store’s Dream Drawer Organizers are a perfect example of why this matters. They expand from 4 to 12 inches wide and cost $15 to $25 per set, but they only work if you know your exact measurements. I keep a note in my phone with all my drawer sizes so I can shop confidently.
Most organizing fails happen because products don’t fit properly. That leads to gaps where things slide around or organizers that won’t let the drawer close. Take five minutes to measure now, and you’ll save yourself hours of frustration later.
2. Get Expandable Kitchen Tool Organizers with Non-Slip Bases

My kitchen drawers used to be a chaotic mess where spatulas and whisks disappeared daily. Then I found the OXO Good Grips Large Expandable Kitchen Tool Organizer, and it changed everything. It costs $20 to $30 and fits drawers up to 20 inches wide.
Here’s the secret most people miss: the non-slip base is a game-changer. I had a cheaper organizer before this one, and it slid around every time I opened the drawer. The OXO version stays put, which makes a huge difference in whether you’ll actually use the system.
The removable trays are genius for reorganizing or cleaning. I pull them out once a month, wipe them down, and put everything back in five minutes. It’s the kind of maintenance I can actually stick with.
3. Switch to Natural Fiber Bins for Warmth

Remember my acrylic organizer mistake? That’s when I discovered Clara Schoen from The Home Organized, who convinced me to ditch plastic for natural fibers like seagrass or bamboo.
Plastic and acrylic look cold and sterile, while natural fiber bins bring warmth and texture. I replaced all my bathroom acrylic bins with seagrass baskets, and the difference was instant. My bathroom went from feeling like a spa I’d never visit to a space I actually enjoy.
The eco-friendly aspect is a bonus I didn’t expect to care about, but now I do. These materials are sustainable and biodegradable, unlike plastic bins that’ll sit in landfills forever. Plus, they hide imperfections better—dust on seagrass barely shows, while fingerprints on acrylic are glaring.

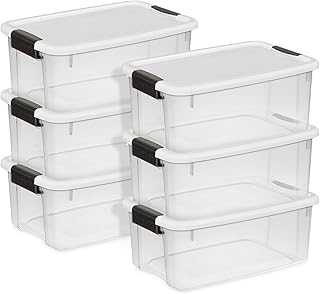
IRIS USA 19 QT Plastic Storage Box with Lid and Latches
If you want something that just works, IRIS USA 19 QT Plastic Storage Box with Lid and Latches – 6 Pack – BPA is a safe bet (627 reviews, 4.5 stars).
4. Use Discreet Label Holders Instead of Oversized Stickers

I used to be the person with giant chalkboard labels on everything, and looking back, it looked ridiculous. The labels competed with the contents for attention, creating clutter instead of reducing it.
NEAT Method’s stylish label holders cost $10 to $20 per pack and are smaller, subtler options that keep the focus on what’s inside your containers. I use these in my pantry now, and guests don’t even notice the labels at first glance—which is exactly the point.
The holders are reusable, so when I reorganize (which happens more often than I’d like), I just swap out the paper inserts instead of dealing with sticky residue or buying new labels. Pro tip: print labels on cardstock so they look polished and last longer.
5. Store Pans Vertically with Adjustable Racks

Stacking pans is the worst organizing mistake I see in kitchens. You need the pan at the bottom, so you pull out the entire stack, creating a clanging domino effect that damages your cookware.
Youcopia Horizontal Pan Storage racks changed this for me. They’re adjustable for pan thicknesses from 1 to 3 inches, cost $25 to $35, and store up to 15 pans vertically. I installed one in my lower cabinet, and now I can grab any pan in seconds without disturbing anything else.
The adjustability is key because pans vary so much in thickness, from thin cookie sheets to thick cast iron. This eliminated the problem of stacking, which buries items and damages cookware. My expensive All-Clad pans no longer have scratches, which makes me feel better about the money I spent on them.
6. Stack Modular Bins Inside Larger Bins for Micro-Organization

This sounds complicated, but it’s brilliant for maximizing space. The Home Edit Organizing Bins come in modular sets from $15 to $40, and their straight sides fit perfectly inside 12×12-inch shelves.
I use this system in my pantry for snacks. A large bin holds all the granola bars, and smaller bins inside separate them by flavor. It sounds excessive, but when my kids can find what they want without dumping everything out, it’s worth it. The straight sides are crucial because rounded bins create dead space.
This micro-organization approach works well for categories with lots of subcategories, like baking supplies or bathroom items. You contain the chaos within a larger container, so even if the small bins get messy, the overall space still looks organized.

Sterilite 4-Pack Ultra Latching Box, Storage Bins with Lids
A dependable everyday pick — Sterilite 4-Pack Ultra Latching Box pulls in 126 ratings at 4.5 stars. Not flashy, just solid.
7. Use Divided Lazy Susans for Small Item Categories

Regular lazy Susans are fine, but divided ones are next-level. I use 9 to 12-inch diameter divided lazy Susans ($15 to $25) that hold 6 to 8 categories of small items, and they cut my retrieval time in half.
Here’s a pro tip: stand items vertically instead of laying them flat. I do this with granola bars in my pantry and nail polish in my bathroom. You can see every item at a glance without spinning the turntable multiple times.
The divided sections keep categories from mixing together, which was my problem with regular lazy Susans. Now my vitamins stay with vitamins, and my supplements stay with supplements, even when I spin it quickly.
8. Choose Modular Wardrobe Systems with Slim Hangers

I resisted IKEA PAX wardrobe frames for years because I thought they looked too utilitarian, but I was wrong. Starting at $150 and modular up to 10 feet wide, they’re the foundation for the most functional closet systems I’ve created. Pair them with The Home Edit Thin Clothing Hangers, which come in 50-packs for $20.
The slim hanger design doubles your rod capacity compared to bulky hangers. I switched all my hangers to these thin velvet ones, and suddenly I had room for an entire season’s worth of clothes that were previously in storage bins.
The PAX system’s modularity means you can start small and expand as your needs change. I started with one 30-inch section and added two more over the next year. That flexibility is worth the investment.
9. Declutter Before Buying Organizers

This is where I disagree with extreme minimalism. You don’t need to get rid of everything to have an organized home. Instead, I ask myself: does this support my daily life?
I recommend editing about 13 items in each category before buying organizers. For example, do you need seven bath towels for two people? Probably not, but you also don’t need to pare down to two. Find the middle ground that works for your lifestyle. I kept four towels per person, which gives us enough for weekly laundry without excess.
This prevents rebound clutter, which happens when you organize without decluttering first. Start with intentional editing, then organize what remains. The order matters more than most people realize.

IRIS USA 72 QT Plastic Storage Box with Lid and Latches
A dependable everyday pick — IRIS USA 72 QT Plastic Storage Box with Lid and Latches – 4 Pack – BPA pulls in 627 ratings at 4.5 stars. Not flashy, just solid.
10. Use Reusable Dry Erase Labels on Bins

Permanent labels stress me out because my organizing needs change constantly. That’s why I love dry erase clip-on labels, which cost $5 to $10 for a 20-pack. They clip onto bins and let you change categories whenever you need to.
Here’s a pro hack: cut vinyl inserts for categories that never change. I have vinyl labels for “batteries” and “light bulbs” but use dry erase labels for seasonal items like “winter hats” that become “summer hats.” This hybrid approach gives you flexibility where you need it.
The reusable aspect saves money over time and reduces waste. I’ve used the same set of dry erase labels for two years, while I used to buy new sticker labels every few months.
11. Create Cohesive Aesthetics with Uniform Bins

This is the secret to that boutique-style look you see in professional photos. Using uniform bins like Dollar Tree’s multi-purpose large bins (12x12x6 inches, under $5 each) across your closets and pantries creates visual calm.
I use the same white bins in my linen closet, pantry, and kids’ closets. When you open any storage area, it has the same cohesive look, which makes everything feel intentional. The uniformity tricks your brain into perceiving less clutter.
Dollar Tree bins are my secret weapon for budget-friendly organizing. At under $5 each, I can afford to buy enough to outfit my entire house. They’re not the highest quality, but for lightweight items, they work perfectly fine.
12. Embrace Wellness-Inspired Bedroom Organization

Your bedroom should be a restoration zone, not a storage unit. That’s why I use soft neutral bins like Rubbermaid Configurations kits ($50 to $100 for 4 to 8-foot closets) that reduce visual clutter.
I switched from bright white organizers to soft beige and gray tones in my bedroom closet, and I sleep better. The visual calm helps me wind down instead of feeling stimulated by bright colors.
The modular nature means you can customize the setup to match how you actually use your closet. I have more hanging space than shelves because I prefer hanging clothes, while my husband’s side has more shelves. That personalization makes the system work long-term.

Sterilite 4 Pack Ultra Latching Box, Storage Bins with Lids
Sterilite 4 Pack Ultra Latching Box punches above its price — 126 buyers rated it 4.5 stars. I would buy it again.
13. Choose Function Over Aesthetic for Food Storage

Let’s be honest: Tupperware airtight containers aren’t the prettiest option. They’re not Instagram-worthy like glass containers with bamboo lids. But they keep food fresh twice as long.
I tested this with brown sugar. In a glass container, it turned into a rock within two weeks. In a Tupperware container, it stayed soft for three months. Function trumps looks when it comes to food storage.
The plastic is also lighter and safer than glass, especially if you have kids. I’m not worried about glass shattering if someone drops it. Sometimes the best organizing solution isn’t the most photogenic one.
14. Add Vertical Shelf Risers to Double Cabinet Capacity

The most common mistake in kitchens is ignoring vertical space, which wastes up to 50% of potential storage. Vertical shelf risers that are 6 to 12 inches tall cost $10 to $20 per pair and double your cabinet capacity.
I use these in my dish cabinet to stack plates and bowls on two levels instead of one. It freed up an entire cabinet that I now use for food storage. The risers create a second shelf where there wasn’t one before, and they’re adjustable.
Pro tip: measure your cabinet height before buying risers. I bought 12-inch risers for a cabinet that was only 14 inches tall, which left almost no room for items on the top level. Now I always check measurements first.
15. Go Sustainable with Bamboo Drawer Dividers

Bamboo drawer inserts that fit 18-inch drawers cost $20 to $30 and resist warping better than plastic in humid environments like bathrooms.
I had plastic dividers in my bathroom drawer that warped within six months from the humidity. The bamboo versions I replaced them with have lasted two years without any warping. That durability makes them worth the slightly higher price.
Bamboo also looks warmer and more natural than plastic. My bathroom feels more spa-like with bamboo organizers than it ever did with acrylic or plastic options.
Sterilite 6-Pack Ultra Latching Box, Storage Bins with Lids
Honestly, Sterilite 6-Pack Ultra Latching Box surprised me — sturdier than it looks in the photos, and over 126 buyers gave it 4.5 stars.
16. Install Pull-Out Drawers in Deep Cabinets

Deep cabinets are black holes where things go to die. I’ve found so many expired cans of coconut milk in the back of my pantry because I couldn’t see what was there. Pull-out drawer systems solve this completely.
I installed sliding organizers in my two deepest cabinets, and it was worth every penny of the $40 to $60 per drawer. Now I can see every item with one pull, and nothing gets lost in the back. The installation took about 20 minutes per drawer.
These work especially well for heavy items like small appliances or large pots. Instead of lifting them over other items, you pull out the entire drawer and grab what you need. My back thanks me every time I need my heavy Dutch oven.
17. Create Zones in Your Pantry with Consistent Container Heights

Random container heights create visual chaos that makes your pantry feel messier than it actually is. I learned this from a professional organizer who showed me how using consistent heights within each zone creates that organized look.
I have three zones in my pantry: short containers (4 inches) for spices and small items, medium containers (8 inches) for grains and pasta, and tall containers (12 inches) for cereal and snacks. Within each zone, everything is the same height, creating clean horizontal lines.
This approach maximizes shelf space because you’re not leaving gaps above shorter items. I can fit an entire additional shelf’s worth of items now because I’m using the vertical space efficiently.
18. Use Tension Rods for Vertical Storage in Unexpected Places

Tension rods aren’t just for curtains. I use them vertically in cabinets to hold cutting boards, baking sheets, and serving platters on their sides instead of stacked flat. This costs about $8 to $15 per rod and takes two minutes to install.
The vertical storage means I can grab exactly what I need without unstacking everything. Now everything is visible and accessible, and I actually use all my serving platters instead of just the one on top.
I also use tension rods under my bathroom sink to hang spray bottles by their triggers. It clears up floor space in the cabinet and keeps the bottles upright so they don’t leak. This hack seems too simple to work, but it’s genuinely brilliant.
19. Implement a One-In-One-Out Rule for Maintained Organization

The prettiest organizing system will fail if you don’t maintain it. I learned this the hard way after organizing my closet only to have it overflow again three months later. Now I follow a strict one-in-one-out rule: for every new item I bring home, something old has to leave.
This isn’t about deprivation. It’s about being intentional with what you allow into your space. When I buy a new sweater, I donate or sell an old one. When I get a new kitchen gadget, I evaluate whether I really need the old one I haven’t used in six months.
The rule also makes me a more thoughtful shopper. Before buying something new, I have to consider what I’m willing to let go, which often makes me realize I don’t actually need the new item. That saves money and prevents clutter simultaneously.
20. Photograph Your Organized Spaces for Motivation

This final tip sounds silly, but it works. I take photos of my spaces right after organizing them, and when I’m feeling unmotivated to maintain the system, I look at those photos. Seeing how good it looked reminds me why I put in the effort.
The photos also serve as a reference for how things should look. When my husband helps put away groceries, he can check the pantry photo to see where things go instead of guessing. This has eliminated so many “where does this belong” conversations.
I keep these photos in a dedicated album on my phone labeled “Home Organization” so they’re easy to find. Some people print them and put them inside cabinet doors, which is another smart approach. Whatever method you choose, having that visual reminder makes maintenance easier.
These 20 ideas have transformed how I live in my home. I’m not naturally organized (ask anyone who knew me in college), but these systems work with my real life instead of against it. Start with one or two ideas that address your biggest pain points, and build from there. You don’t need to implement everything at once.
Save this article or pin it so you can reference these specific products and measurements when you’re ready to tackle each space. Organization is a journey, and having concrete solutions makes it so much more achievable than vague advice to “just declutter.” You’ve got this.
Frequently Asked Questions
What are the best aesthetic organizing products for small spaces?
I recommend expandable organizers like OXO’s kitchen tool organizer ($20-$30) that adjust to fit your drawers, vertical pan storage racks from Youcopia ($25-$35), and shelf risers ($10-$20) that double your cabinet capacity without requiring any renovations or built-ins.
Should I choose glass or plastic containers for aesthetic organizing?
Honestly, I choose function over form here. Tupperware airtight containers ($30-$50 for 12) keep food fresh twice as long as glass alternatives. They’re not Instagram-perfect, but your groceries won’t spoil as quickly, which matters more in real life than pretty photos.
How do I create a cohesive aesthetic organizing system on a budget?
Use uniform bins throughout your space. I love Dollar Tree’s large multi-purpose bins (12x12x6 inches, under $5 each) across closets and pantries. This creates that boutique look without spending hundreds, and the uniformity calms visual chaos better than mismatched containers.
What’s the biggest mistake people make with aesthetic organizing?
Buying organizers before measuring drawers precisely. I’ve seen countless clients with ill-fitting products creating more chaos. Always measure height, width, and depth first. The Container Store’s Dream Drawer Organizers expand 4-12 inches wide ($15-$25), but only work if you know your exact dimensions.