What’s Inside
- 1. Declutter Ruthlessly Before Starting Your Home Bakery Organization
- 2. Invest in Airtight, Clear Containers for Dry Ingredients
- 3. Label Everything Clearly and Consistently
- 4. Establish a Dedicated Baking Zone
- 5. Store Baking Sheets and Pans Vertically
- 6. Utilize Bamboo Drawer Dividers for Small Tools
- 7. Hang Frequently Used Tools on a Pegboard
- 8. Optimize Spice Organization with Drawers
- 9. Use Small Baskets for Miscellaneous Items
- 10. Implement a First-In, First-Out System
- 11. Contain Oils and Extracts on a Tray
- 12. Repurpose Everyday Items for Clever Storage
- 13. Master Home Bakery Organization With a Mobile Cart
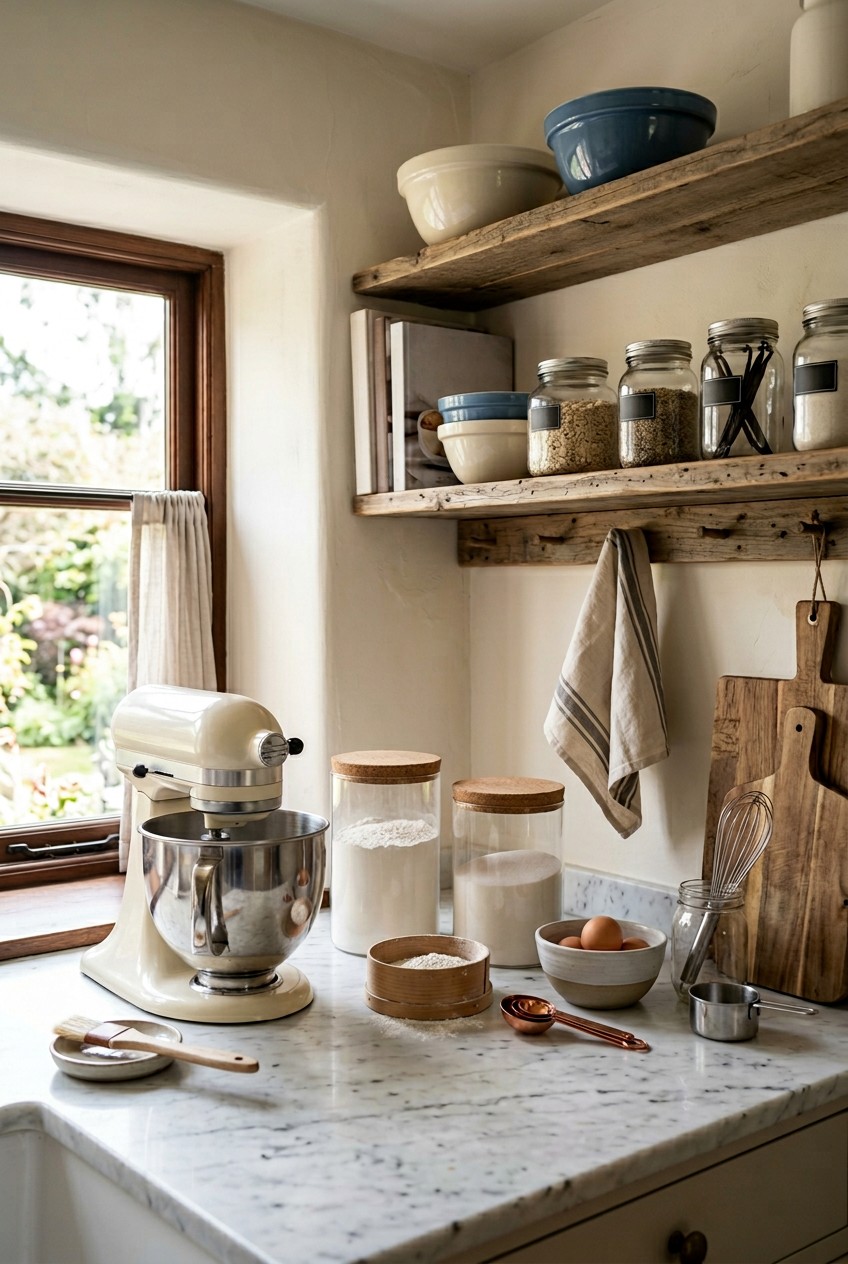
Last Tuesday at Whole Foods, I bought my third 16 oz bag of baking soda because my pantry was an absolute disaster. I came home, shoved the new bag into a dark corner, and accidentally knocked over a 5 lb sack of flour. It ripped wide open. My favorite black leggings and the kitchen rug were covered in a thick, white powder. The smell was everywhere, and cleanup took an hour. That was my breaking point. Home bakery organization isn’t about making your pantry look pretty for Instagram. It’s about saving your sanity, stopping messes, and not buying stuff you already have. I did this wrong for months before I figured it out. I’d shove piping tips into mugs and stack baking sheets until they crashed to the floor at 6 AM. Let’s fix your space. I’ll walk you through exactly how I turned my messy kitchen into a functional baking zone using tools and habits that actually work.
1. Declutter Ruthlessly Before Starting Your Home Bakery Organization

Before you buy a single bin, pull everything out of your cabinets. I mean everything. Most people get this wrong. They organize around clutter, which is like trying to paint a house while it’s on fire. Dump all your supplies on the kitchen table. You’ll be shocked by what you find. Last year, I pulled out a rusty 9-inch springform pan I hadn’t used since 2019 and three half-empty jars of crystallized honey. I learned that the hard way.
You need to be ruthless. If you haven’t used a specialty bundt pan in a year, let it go. I packed up a huge box of duplicate measuring cups, scratched pans, and novelty molds, then dropped them off at Goodwill. It felt great. Next, check every expiration date. I found a 12 oz bag of chopped walnuts that smelled like old oil paint. Rancid nuts ruin brownies. Toss them into a 13-gallon Glad trash bag (usually around $11.99 at Target) and don’t look back.
Once you’ve purged the expired ingredients and donated the gear, wipe down your shelves with a damp cloth. You want a blank slate. This takes time, but it’s the foundation of a real kitchen. You can’t organize garbage.
2. Invest in Airtight, Clear Containers for Dry Ingredients

Leaving flour and sugar in paper bags is a rookie mistake. I learned this when I found pantry moths in a bag of organic bread flour. It was gross, and I had to toss $40 worth of goods. To keep ingredients fresh, you need airtight, clear containers. Clarity is key—you need to see what’s left at a glance.
I swear by OXO Good Grips POP Containers. A 4.4 Qt (4.2 L) container fits a standard 5 lb bag perfectly. They cost $20 to $25, but they’re worth it. The click of the seal tells you no air is getting in. If you’re on a budget, IKEA 365+ containers are a great alternative. You can grab a 3-pack of glass containers with lids for around $13.99.
When I buy a 25 lb bag of flour from Costco for $12.99, I move a portion into my OXO container for daily use and store the rest in a food-grade bucket in the basement. Clear containers kill the guessing game. When you’re mid-recipe, you don’t want to realize you only have 1/2 cup of sugar left. The visual check saves you from emergency grocery runs.
3. Label Everything Clearly and Consistently

If you take ingredients out of their original packaging, label them. Don’t trust your memory. I ruined a batch of buttercream because I scooped 4 cups of cornstarch into my mixer, thinking it was powdered sugar. The texture was like wet cement. White powders all look the same in plastic bins.
I use a Brother P-Touch label maker. You can grab one at Walmart for about $34.99. I use 12mm black-on-white tape because it survives a damp sponge. Every container gets a label. I don’t just write “Flour.” I write “Unbleached All-Purpose Flour” or “Almond Flour.”
For things that rotate, like chocolate chips, I use a white wet-erase marker on the lid. It wipes off with a wet paper towel. Another tip: write the expiration date on blue painter’s tape and stick it to the bottom. This keeps the front looking clean. Consistent labeling prevents massive mix-ups.
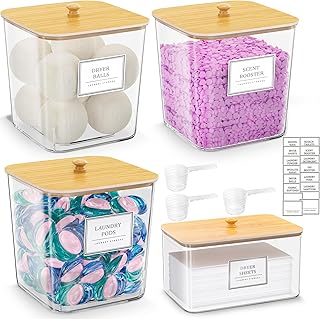
HomePekite Laundry Pods Storage Container
If you want something that just works, HomePekite Laundry Pods Storage Container is a safe bet (15 reviews, 4.5 stars).
4. Establish a Dedicated Baking Zone

Before I reorganized, my supplies were everywhere. Bowls under the island, spoons near the stove, vanilla lost above the fridge. Every time I made cookies, I was running laps. I’d drip batter on the floor carrying a whisk across the room.
Establish a dedicated baking zone. Choose one cabinet or drawer to house the essentials. I picked the cabinet above my stand mixer as my headquarters. Now, when I’m creaming butter, I don’t have to move my feet to grab the baking soda. Trust me on this.
Centralizing your workflow saves time and energy. If you have a small kitchen, get creative. Even one shelf in a closet beats having items spread across six cupboards. I recently did a Kroger run for butter and eggs. I walked two steps to my baking zone, and everything was within reach. It makes the process smooth instead of chaotic. You might also like: 15 Creative Hacks Organizing Ideas You Need to See
5. Store Baking Sheets and Pans Vertically

If you’re still stacking pans horizontally, you know the dreaded avalanche. You pull one 13×9 pan from the stack, and six others crash down. I used to wake up my house trying to bake muffins on a Sunday. You might also like: 20 Gorgeous DIY Waste Materials Home Decor Ideas for Any Style
Vertical storage is the answer. I bought two IKEA VARIERA Pot Lid Organizers. They’re $7.99 each and made of sturdy stainless steel. I put them in my lower cabinet and slotted my sheets and cupcake pans upright. You might also like: 20 Inspiring Garage Organization Ideas That Are Totally Worth It
Now, I can pull out a single sheet without disturbing anything. It also stops your non-stick pans from getting scratched. If you have deep cabinets, look for heavy-duty metal organizers on Amazon or at Target for around $20. Sliding a pie dish out of a vertical rack is easier than digging it out from under cast iron. Stop stacking and start standing them up.
6. Utilize Bamboo Drawer Dividers for Small Tools

Small tools are the worst for drawer clutter. Measuring spoons, cookie cutters, and piping tips end up in a jumbled mess. I used to dig blindly and stab my finger on a sharp piping tip. It was infuriating.
I recommend expandable bamboo drawer organizers. I bought a 14×10 inch bamboo organizer at Target for $24.99. Bamboo is durable and easy to clean. I use the long sections for wooden spoons and offset spatulas.
For tiny items, I use clear acrylic craft boxes inside the drawer. I group piping tips by style. I keep my measuring spoons on a binder ring so they don’t wander off. When you open the drawer, everything has a home. You won’t be rummaging for five minutes looking for a 1/4 teaspoon while your chocolate seizes. Dividers force you to keep boundaries.
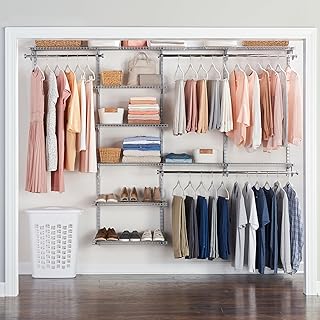
Rubbermaid Configurations Deluxe Custom Closet Kit 4-8 Ft.
Rubbermaid Configurations Deluxe Custom Closet Kit 4-8 Ft. Adjustable punches above its price — 81 buyers rated it 4.5 stars. I would buy it again.
7. Hang Frequently Used Tools on a Pegboard

If you’re short on drawer space, look up. I learned this trick from professional chefs. I used to cram my stand mixer attachments into a drawer where they barely fit. They’d jam the drawer shut, and I’d have to jiggle the handle to get it open.
I bought a metal pegboard kit from Home Depot for about $45.00. I mounted it next to my baking zone. I bought a pack of hooks and hung my most-used tools. Now, my glass measuring cups, whisks, and mixer attachments are displayed on the wall.
This frees up cabinet space. Plus, having tools visible means you grab what you need in a second. It adds an industrial look, too. Just wash and dry the tools before hanging them back up to avoid water spots. This changed how I operate. I don’t have to dig for my favorite whisk; it’s right there.
8. Optimize Spice Organization with Drawers

Spices are silent killers of a clean kitchen. I used to keep them in a jumble on a high shelf. When I needed ginger, I’d knock over three bottles of cumin to find it. I also bought three jars of cinnamon because I kept forgetting I had some.
The best way to store spices is in a shallow drawer. I bought a 12-pack of 4 oz square glass jars for $14.99. I transferred all my spices and ditched the plastic containers. I used my label maker to print names and stuck them on the lids.
When I open the drawer, I see a perfectly alphabetized grid. I can grab what I need without moving a single other jar. If you don’t have a drawer, buy a tiered acrylic rack. It elevates the jars in the back so you can read the labels. Never stack spices in a pile. You’ll forget what you have, and your baked goods will suffer.
9. Use Small Baskets for Miscellaneous Items

Every baker has random items that refuse to sit neatly on a shelf. I’m talking about cupcake liners, food coloring, and packets of gelatin. If you leave these loose, they look messy and fall over.
I corral these in small, opaque baskets. I love the IKEA PLOGSVÄNG baskets. They’re soft plastic and cost $0.79 each. Because they aren’t clear, they hide the clutter of mismatched packaging. I have one basket for cupcake liners, sorted by season. Another holds decorating supplies.
When I’m making a cake, I just pull the “decorating basket” off the shelf. It keeps tiny items in one place. I once stepped barefoot on a rogue sugar pearl that rolled across the floor. It felt like a Lego. Using bins prevents tiny items from escaping. It’s a cheap fix for an annoying problem.

iDesign Laundry Detergent Holder
If you want something that just works, iDesign Laundry Detergent Holder is a safe bet (13 reviews, 4.5 stars).
10. Implement a First-In, First-Out System
If you want to stop wasting money, adopt the “First-In, First-Out” (FIFO) system. Commercial kitchens use this, and it’s essential at home. Last Christmas, I tried to bake cinnamon rolls. I used yeast from the back of my pantry. The dough didn’t rise. The yeast had expired eight months prior. I had to throw the batch away and run to Whole Foods for fresh 0.25 oz packets.
The FIFO rule is simple: when you buy new, put it at the back. Pull older items to the front so you use them first. This is vital for baking powder, soda, and yeast, which lose potency quickly.
When I restock baking soda, the new box goes behind the open one. It takes three seconds, but it guarantees you’re baking with fresh ingredients. Expired leavening agents won’t give your cakes a lift, and rancid oils will make cookies taste metallic. Don’t let ingredients die in the back of your cabinet.
11. Contain Oils and Extracts on a Tray
Bottles of oil and vanilla are notorious for being messy. No matter how careful you are, a drop runs down the side and pools at the bottom. My wooden shelf was covered in sticky brown rings from vanilla and slippery spots from oil. It attracted dust and was a nightmare to scrub.
Now, I contain liquids on a tray. I bought a 10-inch clear lazy Susan for $12.99, but a plate or baking sheet works too. I place my 4 oz bottle of vanilla from Trader Joe’s ($8.99 and fantastic), almond extract, and corn syrup on this tray.
If a bottle leaks, the mess is contained. Once a month, I wash the tray in the sink. My shelves stay pristine. It saves you from intense scrubbing. Plus, if you use a turntable, you can spin it to reach the extract in the back without knocking over the oil.
12. Repurpose Everyday Items for Clever Storage
You don’t always need expensive organizers. Some of the best solutions come from other departments. Gel food coloring is a pain. The tiny 0.75 oz AmeriColor bottles tip over, and if one leaks, it stains everything.
I found a hack. I bought a clear acrylic nail polish organizer from Amazon for $18.99. It has small square compartments designed for nail polish bottles. They are the perfect size for food coloring. I arrange them in rainbow order, and the acrylic lets me see every color. If a bottle gets sticky, the mess is contained in its square.
Another great item is using heavy metal bookends to hold baking sheets upright. I’ve even used an empty egg carton to store round truffles while they set in the fridge. Look around your house or the office supply aisle. Sometimes a $5 magazine holder is exactly what you need to corral your silicone mats.

AMKUFO 6 Pack-Closet-Organizers-and-Storage
AMKUFO 6 Pack-Closet-Organizers-and-Storage has been one of the most consistently praised picks in this category. 52 reviewers averaged 4.5/5.
13. Master Home Bakery Organization With a Mobile Cart

If you have a tiny kitchen with no cabinet space, proper organization might feel impossible. I lived in a cramped apartment for two years with one drawer and three cabinets. I couldn’t sacrifice dish storage for cake pans. The solution is a mobile baking cart.
I bought the IKEA RÅSKOG utility cart for $39.99. It’s a three-tier metal cart on wheels. I loaded the top tier with canisters of flour and sugar. The middle held mixing bowls. The bottom held baking sheets. When I wasn’t baking, I rolled the cart into the hallway closet.
When I wanted to make muffins, I rolled the cart to my counter. The wheels glide over tile and hardwood. It gave me three extra shelves of storage exactly where I needed it. A cart is flexible, affordable, and keeps heavy ingredients off your countertops. It’s the perfect way to create a station out of thin air. Took me years to figure out.
Getting your kitchen organized takes a bit of sweat upfront, but the payoff is massive. You’ll bake more, stop wasting money, and won’t dread the cleanup. I recommend starting with the ruthless decluttering this weekend. Grab a trash bag and be honest about that rusty muffin tin. If you found these tips helpful, pin this article so you can reference the products later. Happy baking, and enjoy your newly organized space!
Frequently Asked Questions
What is the best way to store flour and sugar?
Always transfer dry goods into airtight, clear plastic or glass containers. This keeps pests out, locks in freshness, and lets you see your inventory. I highly recommend OXO Good Grips POP containers for their reliable seal.
How do I organize small baking tools like piping tips?
Use expandable bamboo drawer dividers or small clear acrylic craft boxes. Group items by category, like keeping all petal piping tips in one small compartment. This stops them from rolling around and getting lost in deep drawers.
How should I store metal baking sheets and pans?
Store them vertically using a metal pot lid organizer or a heavy-duty file sorter. This prevents the dreaded pan avalanche and makes it incredibly easy to pull out a single baking sheet without disturbing the rest.
What is the FIFO method in home bakery organization?
FIFO stands for First-In, First-Out. When you buy fresh ingredients like yeast, baking soda, or whole wheat flour, place them behind the older products. This ensures you use the older items before they expire and lose their potency.