What’s Inside
- Declutter Ruthlessly Before You Buy Anything New
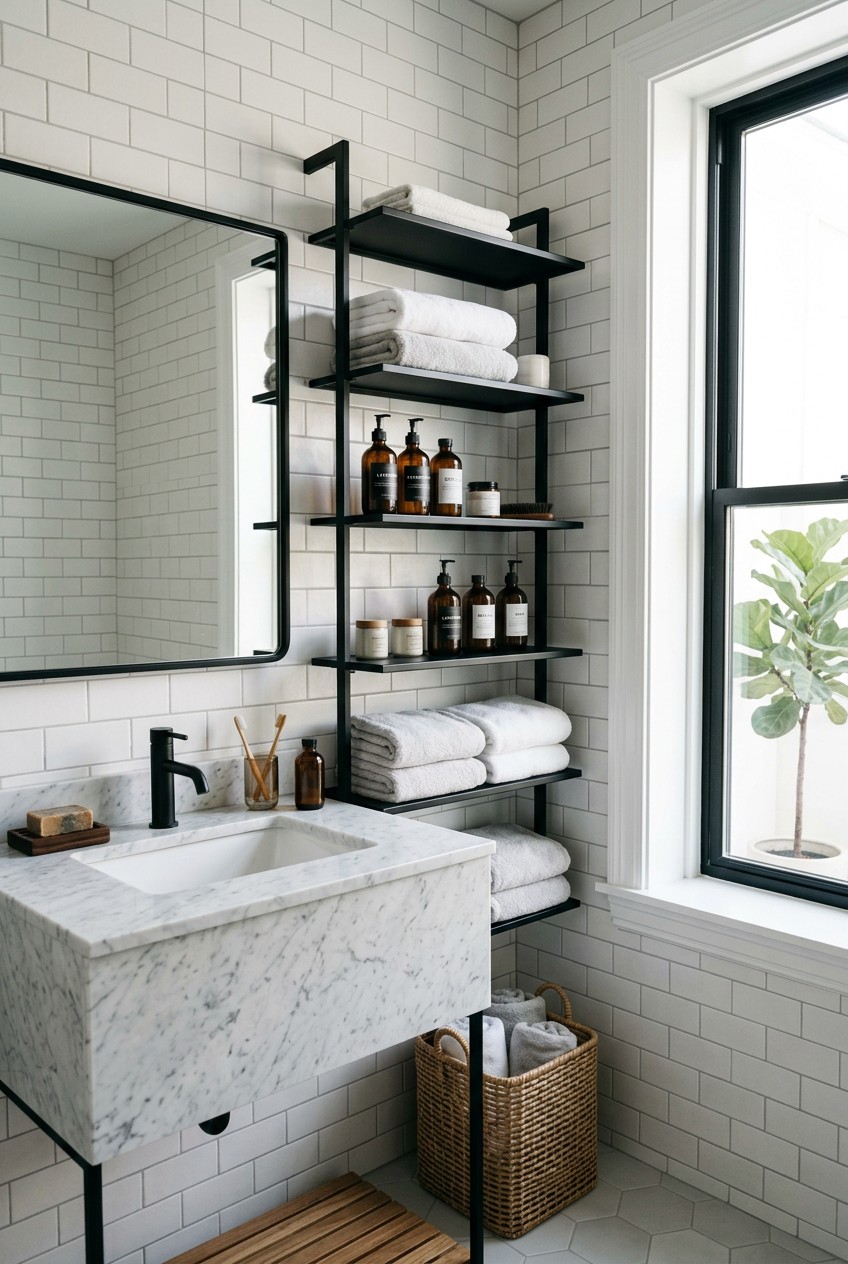
- Maximize Vertical Space with Floating Bathroom Organization Shelves
- Optimize Under-Sink Storage with Pull-Out Organizers
- Utilize Over-the-Toilet Storage Units
- Employ Clear, Stackable Containers for Visual Order
- Implement Drawer Dividers and Inserts for Small Essentials
- Repurpose Decorative Vessels for Countertop Items
- Group Similar Items and Store Heavier Products on Lower Shelves
- Use Trays to Corral Countertop Clutter
- Bring Kitchen Spice Racks into the Bathroom
- Add Corner Shelving Units for Dead Zones
- Install Suction-Cup Acrylic Shelves in the Shower
- Hang Wire Baskets as Floating Cubbies
- Label Everything (Even the Obvious Stuff)
Last Tuesday at Whole Foods, I grabbed a 16 oz bottle of organic peppermint mouthwash. When I got home, I tried to shove it into my overstuffed medicine cabinet. The bottle slipped, bounced off the porcelain sink, and shattered right on my big toe. The sharp, spicy smell of peppermint burned my nose while I hopped around on one foot, holding my foot in agony. That exact, painful moment forced me to completely rethink my bathroom organization shelves. I’m not proud of how messy my space had gotten, but I’ve learned a lot since then. No exaggeration.
If you’re tired of products falling on your head or losing your expensive serums in the dark corners of your cabinets, you’re in the right place. I tried doing this wrong for months before figuring it out. I bought cheap bins that didn’t fit, installed racks that rusted, and wasted money on systems that just didn’t work. Let’s skip the trial and error. Here are the exact methods and products I personally swear by for getting your bathroom under control.
1. Declutter Ruthlessly Before You Buy Anything New

I’m guilty of buying pretty plastic bins to hide my ugly messes. It’s a terrible strategy. Professional organizer Ann Lightfoot always says the key to lasting organization is to organize a little so you’re never organizing a lot. She recommends a deep declutter every three to four months. I tried ignoring this, and I ended up with bins full of trash. A common mistake is buying organizing products before decluttering. You aren’t organizing then. You’re just rearranging clutter into more expensive containers.
Before you even think about buying new shelves, empty your existing storage completely. Get a heavy-duty 13-gallon trash bag and be ruthless. Last month, I pulled out four different 4 oz tubes of expired sunscreen from my vanity. The lotion had separated into a gross, oily liquid that smelled like rancid plastic. Disgusting. Throw away or recycle anything expired. Relocate items that belong in the kitchen or bedroom. If you have half-empty shampoo bottles you won’t use, dump them out and recycle the plastic.
Once your counters and cabinets are bare, wipe them down with a damp microfiber cloth. The feeling of running your hand over a perfectly clean, empty surface is incredible. Only after you’ve purged the garbage can you accurately assess what kind of storage you actually need. Don’t skip this. I’ve done it, and it always backfires. Learned that the hard way.
2. Maximize Vertical Space with Floating Bathroom Organization Shelves

Neglecting vertical space is a massive mistake. I’m always shocked when I walk into a bathroom and see blank walls above the toilet while the countertops are drowning in clutter. Floating bathroom organization shelves are a huge trend right now, and for good reason. They give you a clean, modern look while keeping your daily essentials accessible without eating up floor space.
I personally swear by installing floating shelves above the toilet or sink. For a custom, spa-like feel, try built-in shelves between your wall studs. You want them to be exactly 8 to 10 inches deep and spaced 10 to 12 inches apart. Anything deeper than 10 inches just becomes a dark cave where things get lost. IKEA makes some fantastic, affordable options. The IKEA FRÖSJÖN Over-the-toilet shelf is 25 5/8″ x 61 3/8″ and costs exactly $49.99. It’s sturdy and looks great. If you prefer a natural wood texture, the IKEA RÅGRUND Shelf Unit is made from bamboo, measures 13 3/8″ x 23 5/8″, and runs about $39.99. Bamboo is naturally moisture-resistant, which is crucial for a humid bathroom.
When I installed my bamboo shelves, the powdery smell of drywall dust filled the air as I drilled into the studs. It’s a bit of work, but the payoff is huge. I even added a thin strip of warm white LED lighting under the bottom shelf. It casts a soft, relaxing glow on the tile at night. Just make sure you’re using heavy-duty wall anchors if you can’t hit a stud. You don’t want your new shelves crashing down.
3. Optimize Under-Sink Storage with Pull-Out Organizers

The cabinet under the sink is the worst spot in the house. It’s dark, awkward because of the plumbing, and usually becomes a disorganized black hole. I used to just toss things in there and hope for the best. Then, I knocked over an 8 oz bottle of hydrogen peroxide. It spilled everywhere, and the sharp, metallic smell lingered for days. It ruined a cardboard box of cotton swabs and left a permanent water stain on the wood baseboard.
Pull-out under sink organizers are incredibly popular right now because they actually solve this problem. I highly recommend investing in two-tiered sliding organizers. Janet Bernstein, founder of The Organizing Professionals, recommends adjustable shelves or stackable clear plastic bins for this specific area. I went to Target and bought their Brightroom organizers. They cost around $4 to $5 for the medium white plastic bins with handles. They have a smooth, matte texture and slide out easily.
I use one bin for my heavy hair tools and another for extra cleaning supplies. Being able to pull the drawer out and see exactly what’s in the back without getting on my hands and knees is amazing. When you’re setting this up, measure the exact clearance around your P-trap pipe. I bought a shelf once that was 12 inches wide, and it wouldn’t fit past the plumbing. I had to return it, which was a huge hassle. Always measure your space twice before buying.

HomePekite Laundry Pods Storage Container
If you want something that just works, HomePekite Laundry Pods Storage Container is a safe bet (15 reviews, 4.5 stars).
4. Utilize Over-the-Toilet Storage Units

If you’re working with a tiny bathroom, you can’t afford to waste the space above your toilet. Over-the-toilet organizers add a massive amount of storage without crowding your limited floor space. However, be careful about what you buy. I bought a cheap, flimsy metal rack years ago. The thin metal bars felt rough and cheap, and the whole thing wobbled every time I closed the bathroom door. I even hit my head on it once when standing up. Awful.
You need something sturdy. I recommend the Honey-Can-Do over-the-toilet rack available at Target. It costs around $30 and has a much thicker, more stable frame. It fits perfectly over a standard toilet tank and gives you three wide shelves for towels and extra toilet paper. If you want something that hides your clutter, check out the ZenStyle White Medicine Cabinet on Amazon. It costs about $65 and mounts directly to the wall over the toilet. It features both open shelving for decorative items and adjustable enclosed shelves with doors.
I put the ZenStyle cabinet in my guest bathroom. The smooth white painted wood looks so much better than exposed metal. I keep a 16 oz bottle of extra hand soap and 4 rolls of toilet paper hidden behind the closed doors. Just be sure to measure the height of your toilet lid when it’s fully open. I’ve seen people install these shelves too low, and then they can’t take the lid off the tank to fix a running flapper. Give yourself at least 3 inches of clearance. You might also like: 20 Stunning Tool Storage Organizing Ideas for a Fresh New Look
5. Employ Clear, Stackable Containers for Visual Order

Transparent containers are a massive trend. They keep your products visible and organized, creating a clean, uniform, and minimalist aesthetic. Professional organizers always prioritize clear visibility, stackable structures, and modular sizing. I used to use opaque woven baskets, but I’d forget what was inside them. I’d end up buying a new 2 oz jar of face cream because I couldn’t find the one I already owned. You might also like: 15 Creative Home Organizing Ideas You Haven’t Thought Of
Now, I strictly use stackable clear bins for items like cotton pads, Q-tips, and bobby pins. I absolutely love the STORi Audrey Stackable Clear Bin Plastic Organizer Drawers. A set of two costs exactly $22.99. The plastic is thick and heavy, and the drawers slide out with a satisfying, smooth glide. They don’t make that awful, high-pitched squeaking sound that cheap acrylic makes. Another great option is the ClearSpace Clear Plastic Storage Bins from Amazon. They measure exactly 11″ x 8″ x 6″ and cost $19.99 for a set of four. They’re BPA-free and incredibly durable. You might also like: 15 Inspiring Home Makeover Ideas You Haven’t Thought Of
I line these up on my open shelves. Being able to see that I’m running low on my 1 oz bottle of ordinary niacinamide serum before I completely run out is so helpful. The only downside is that clear bins show dust and spilled product very easily. If a drop of foundation leaks, you’ll see it immediately. You have to commit to wiping them down with a damp cloth and a drop of dish soap every few weeks to keep them looking pristine.
6. Implement Drawer Dividers and Inserts for Small Essentials

Bathroom drawers are notorious for becoming junk drawers. Without dividers, every time you open and close the drawer, your makeup, grooming tools, and dental floss slide around and crash into each other. The rattling sound of hard plastic compacts hitting metal tweezers drives me crazy. Janet Bernstein strongly advises measuring your drawers for preset dividers or using adjustable ones for greater flexibility.
I highly recommend the Vtopmart 25-Piece Drawer Organizer Set. It costs $18.99 and comes with various sizes of clear plastic trays. Ann Lightfoot also recommends using modular systems. If you prefer a frosted plastic look, Target’s Brightroom Modular Storage Drawer Set costs $16 and offers multiple compartments that are ideal for sorting makeup. I use the long, narrow trays for my makeup brushes and the small square ones for my single eyeshadows.
Here’s a major mistake I made: I didn’t measure the interior height of my drawer before buying a set of deep bamboo dividers. I loaded them up, shoved the drawer closed, and it got completely stuck. The dividers were a quarter-inch too tall. I spent twenty minutes aggressively wiggling the drawer while sweating and cursing until I finally got it open. Always measure the depth, width, and height of your drawers. I’d suggest leaving at least a half-inch of clearance at the top so nothing catches on the frame when you pull it open.

iDesign Laundry Detergent Holder
A dependable everyday pick — iDesign Laundry Detergent Holder pulls in 13 ratings at 4.5 stars. Not flashy, just solid.
7. Repurpose Decorative Vessels for Countertop Items

You don’t always have to buy new plastic containers to get organized. One of my favorite tricks is giving new life to beautiful candle holders or small vases. It adds a really nice, personalized decorative touch to your bathroom counters while still keeping things functional. Plus, it’s virtually free if you’re already buying candles.
Last month, I finished burning a Trader Joe’s Peony candle that cost $3.99. The tin it comes in is a gorgeous, vibrant pink with a floral pattern. Instead of throwing it away, I stuck the container in the freezer overnight. The next morning, the cold temperature had shrunk the leftover wax. I took a butter knife and easily popped out the remaining 2 tablespoons of hard soy wax. It came out in one solid chunk. I washed the tin with hot water and dish soap to remove the black soot around the rim.
Now, that pretty little tin sits on my vanity holding my hair ties and bobby pins. The metal texture looks great next to my ceramic sink, and it still faintly smells like sweet vanilla and peony. You can do this with heavy glass candle jars, too. They make elegant holders for Q-tips, cotton balls, or makeup brushes. Skip the cheap plastic cups and use what you already have. It’s better for the environment and looks so much more expensive.
8. Group Similar Items and Store Heavier Products on Lower Shelves

Organizing isn’t just about making things look pretty. It’s about functionality. Professional organizers recommend grouping all your skincare products on one shelf and your hair care products on another. This is called behavior-first storage. You want to place your most frequently used items right at eye level, less-used items higher up, and backup supplies in the furthest corners.
I learned the importance of weight distribution the hard way. I used to keep my massive, 32 oz Kirkland shampoo and conditioner bottles from Costco on the very top shelf of my wire rack. One morning, I reached up with wet, slippery hands to grab the conditioner. It slipped, plummeted three feet, and landed squarely on my bare toes. The heavy plastic bottle bruised my foot instantly. I was limping for two days.
Now, I strictly store heavier items on the lowest shelves. My large 16 oz bottles of body wash, heavy glass jars of bath salts, and bulk refill bottles live at the bottom. The top shelves are reserved for lightweight items like a 2 oz jar of moisturizer or a small stack of washcloths. Grouping by category also saves me so much time in the morning. When I’m doing my skincare routine, I’m not reaching across the bathroom to find my toner. Everything I need is clustered together in one logical zone.
9. Use Trays to Corral Countertop Clutter

If you leave your daily products sitting directly on the countertop, it just looks messy. Even if the bottles are perfectly lined up, it visually reads as clutter. A decorative tray instantly changes a random collection of bottles into an intentional, curated display. It’s a simple visual trick that makes a massive difference in how clean your bathroom feels.
I bought a gorgeous Threshold marble vanity tray from Target for exactly $15. The stone is heavy and cool to the touch, with beautiful grey veining. I placed it right next to my sink. On the tray, I keep my daily essentials: a 2 oz bottle of Whole Foods rosehip oil, a small glass bottle of perfume, and a sleek metal tube of hand cream. When you group things on a tray, it creates a boundary. You know that once the tray is full, you can’t add anything else to the counter.
The best part about using a tray is how easy it makes cleaning. When I need to wipe down the bathroom counter, I don’t have to pick up five individual bottles. I just lift the entire tray with one hand, wipe the quartz countertop with the other, and set the tray back down. It takes two seconds. Just make sure you buy a tray made of a moisture-resistant material like marble, resin, or sealed ceramic. I once used an unsealed wooden tray, and it warped and grew black mold underneath from sitting in small puddles of water.

4 Pack Laundry Pods Container
4 Pack Laundry Pods Container has been one of the most consistently praised picks in this category. 473 reviewers averaged 4.5/5.
10. Bring Kitchen Spice Racks into the Bathroom

Sometimes the best bathroom organization shelves aren’t made for the bathroom at all. I love wandering down the kitchen aisles looking for storage hacks. Kitchen spice racks are absolutely perfect for organizing tiny bathroom items that normally get lost in deep medicine cabinets. The tiered design ensures you can see the labels on every single bottle.
I bought a Walmart Mainstays wood spice rack for just $9.88. It has three shallow, tiered steps. I placed it inside my bathroom cabinet to organize my nail polish collection. Before this, my 1 oz nail polish bottles were shoved into a makeup bag. Whenever I wanted a specific red, I had to dump the whole bag out, and the strong chemical smell of acetone would fill the room. Now, they’re perfectly lined up on the wooden steps. I can see every color at a glance.
Spice racks are also incredible for organizing essential oils, small 1 oz bottles of facial serums, and acne spot treatments. The wood texture adds a nice warmth to the sterile white interior of my cabinet. If you decide to mount a spice rack to the back of your cabinet door, make sure you measure the depth first. I’ve seen people screw racks onto their doors, only to realize the door won’t close because the rack hits the internal shelves. Always check your clearances.
11. Add Corner Shelving Units for Dead Zones

Every bathroom has dead zones. These are the awkward, empty corners on your vanity or on the floor next to the toilet where nothing quite fits. Leaving these spaces empty is a waste, but shoving random bottles into the corner looks terribly messy. Corner shelving units are specifically designed to maximize these exact spots.
I had a huge, empty corner on my vanity top that was just collecting dust and stray hairs. I went on Amazon and found the Simple Houseware 3-tier corner shelf for $14.99. It has a sleek chrome finish and fits perfectly into a 90-degree angle. I loaded it up with my daily body care items. The bottom tier holds my 8 oz bottle of Sprouts lavender body lotion, the middle tier holds my deodorant, and the top tier holds a small decorative succulent.
The wire texture of the shelves prevents dust from accumulating, which is a huge bonus for cleaning. However, you have to be careful with wire shelves if you have items with narrow bases. A small tube of lip balm will easily tip over and fall through the gaps. I’d suggest cutting a small piece of clear plastic shelf liner to place on the wire racks if you plan to store tiny items there. It keeps everything stable while still utilizing that awkward corner space perfectly.
12. Install Suction-Cup Acrylic Shelves in the Shower

Shower organization is notoriously difficult. If you don’t have built-in niches, your shampoo bottles usually end up sitting on the wet floor, growing pink mildew around the rims. Over-the-showerhead caddies are okay, but they often rust or slide down the pipe. Suction-cup acrylic shelves are a much better solution for keeping your shower walls looking clean and modern.
I bought the KINCMAX shower caddy set on Amazon for $24.99. It comes with two clear acrylic shelves and heavy-duty adhesive suction pads. I was skeptical at first. I’ve used cheap suction cups before. There’s nothing worse than being jolted awake at 3 AM by the terrifying sound of a plastic shower caddy crashing down into the tub. But these adhesive pads are incredibly strong. They comfortably hold my heavy 16 oz bottle of Kroger moisturizing body wash and a full 12 oz bottle of purple shampoo without budging.
The clear acrylic looks completely invisible against my white subway tile. It gives the shower a high-end, floating look. The key to making these stick is surface preparation. You can’t just slap them onto a wet wall. I scrubbed the tile with rubbing alcohol, dried it completely with a microfiber cloth, and pressed the adhesive pads firmly into place, smoothing out all the air bubbles. I let it cure for 24 hours before putting any weight on it. If you have porous natural stone tile, don’t use these. They won’t stick, and your products will absolutely fall.

OKZEST Utility Slim Storage Cart
If you want something that just works, OKZEST Utility Slim Storage Cart is a safe bet (17 reviews, 4.5 stars).
13. Hang Wire Baskets as Floating Cubbies

If you love a slightly rustic or industrial farmhouse vibe, hanging wire baskets on your walls is a fantastic alternative to traditional wooden shelves. They’re lightweight, easy to install, and visually break up the heavy, solid blocks of cabinetry in a bathroom. Plus, the open wire design means you can easily see exactly what’s inside them.
I found these great matte black wire baskets at Target for $12 each. Instead of sitting them on the counter, I flipped them sideways and screwed the bottom of the basket directly into the wall using drywall anchors. Suddenly, I had these cool, floating metal cubbies. The rough metal texture contrasts beautifully with the soft items I store inside them. I rolled up four plush, 100% cotton white hand towels and stacked them inside the baskets.
This setup looks like something straight out of a boutique hotel. It’s incredibly practical for a guest bathroom because visitors don’t have to rummage through your private drawers to find a clean towel. One thing to keep in mind: don’t store small, loose items in wire baskets mounted sideways. I tried putting a box of Band-Aids in one, and it immediately slipped through the wide metal grid and fell behind the toilet. Stick to storing large, soft items like towels, washcloths, or extra rolls of toilet paper.
14. Label Everything (Even the Obvious Stuff)

Once you’ve bought your bins, built your shelves, and decanted your products, there’s one final, crucial step. You have to label everything. I know it sounds excessive to label a clear bin that obviously contains cotton balls, but labels do more than just identify the contents. They establish a strict rule for the space. If a bin is labeled “Face Serums,” you’re much less likely to lazily toss a tube of toothpaste in there when you’re tired at night.
I’m obsessed with my Brother P-Touch label maker. It costs $29.99, and it’s worth every single penny. I use the 12mm white tape with black text for a crisp, uniform look. The satisfying peeling sound of the adhesive backing is my favorite part of the organizing process. I label the front of every single acrylic drawer and plastic bin in my bathroom. It completely eliminates the “where does this go?” excuse for my husband. Took me years to figure out.
I tried using a cheap chalk marker on black sticker labels once. It was a disaster. The humidity from the shower caused the chalk ink to run, and when I grabbed a bin with wet hands, the white ink smeared all over my fingers and stained my white towels. Stick to laminated, waterproof thermal labels. They survive the steamy bathroom environment perfectly and peel off cleanly if you ever need to repurpose the bin. Labeling is the final polish that makes your bathroom organization shelves look professionally done.
Tackling your messy bathroom doesn’t have to be an overwhelming weekend project. By starting with a ruthless decluttering session and strategically utilizing the right bathroom organization shelves, you can completely change how your space functions. I’ve made all the mistakes, from buying cheap bins and ignoring vertical space to dropping heavy bottles on my feet, so you don’t have to. Stick to measuring your spaces, grouping your items logically, and investing in sturdy, moisture-resistant materials.
If you’re ready to finally stop fighting with your medicine cabinet, pick just one or two of these tips to start with this weekend. Grab a trash bag, clear off your counters, and see what a difference it makes. Don’t forget to save or pin this article so you can reference these exact product dimensions and tips the next time you’re standing in the storage aisle at Target!
Frequently Asked Questions
How deep should bathroom organization shelves be?
I recommend keeping your shelves between 8 to 10 inches deep. Anything deeper becomes a dark black hole where 4 oz bottles of lotion go to die. Shallow shelves keep everything visible.
What is the best material for bathroom shelves?
Bamboo and rust-resistant metals are best for humid bathroom environments. I’d avoid unsealed wood or cheap particle board, as moisture will cause them to warp, peel, and grow mold over time.
How can I organize a bathroom with no drawers?
Use clear, stackable acrylic bins on open shelves or invest in a rolling storage cart. Two-tiered pull-out organizers under the sink are also perfect for replacing lost drawer space.
Should I store heavy items on top or bottom shelves?
Always store heavy items like 32 oz shampoo bottles on the lowest shelves. This prevents serious injuries if a bottle slips and falls, and keeps your shelving units from becoming top-heavy and unstable.
