
What’s Inside
- Implement a “One-In, One-Out” Rule for Supplies
- Utilize Vertical Space with Desk Shelves
- Categorize Paperwork with Stackable Trays
- Organize Drawers with Modular Dividers
- Invest in an Ergonomic Setup for Health
- Implement a “Teacher Toolbox” for Small Essentials
- Conceal Cables with Management Solutions
- Designate “Zones” for Different Tasks
- Embrace Clear Acrylic Organizers for Visibility
- Utilize a Rolling Cart for Mobile Storage
- Avoid Over-Decorating Your Desk
- Create a Weekly Paper System with Daily Folders
- Label Everything for Clarity and Substitute Teachers
- Ditch the Sticky Note Overload
- Implement a “Clean Desk Friday” Routine
I sat at my desk last October, staring at a half-eaten granola bar stuck to a pile of ungraded math tests. My attempt at organizing my workspace was a complete disaster. I’m talking crusty dry-erase markers, tangled laptop chargers, and a weird sticky spot near my keyboard that smelled like old apple juice. I tried fixing it by buying a bunch of cute, overpriced woven baskets at Target, but they just became expensive trash cans for rogue paperclips and crumpled sticky notes. You’re probably feeling that same mid-semester desk dread right now. Let’s fix it. I’ve spent three years figuring out how to stop the absolute chaos that happens on a teacher’s desk. I’ll show you exactly what works, what to buy, and what trendy garbage to skip. We aren’t doing perfection here, just practical systems that survive a Tuesday afternoon.
1. Implement a “One-In, One-Out” Rule for Supplies

I’m ruthless about pens now. Before you even think about buying more supplies, you need a strict one-in, one-out rule. Professional organizers talk about this constantly because it works. Last September at Target, I bought a crisp 12-pack of black Sharpie fine point markers for $12.99. The smell of fresh Sharpies is intoxicating. But I made a mistake. I dumped them into my top drawer with all the old ones. The next week, I grabbed a marker to write a hall pass and it was dead. It scratched the paper and left a sad, gray streak. So frustrating. Now, if I buy new markers, the old ones go straight into the trash. No exceptions. This prevents that junk accumulation that ruins your desk. You won’t believe how much space you save when you stop hoarding dried-out highlighters and bent paperclips. Keep your inventory lean. If you bring a fresh 4 oz bottle of Elmer’s glue to your desk, an old crusty one has to leave. It’s the only way to survive.
2. Utilize Vertical Space with Desk Shelves

You’re wasting the footprint of your desk if you aren’t building up. I kept everything flat for months before figuring this out. It felt claustrophobic. My laptop was always sitting on top of my grade book, and my coffee mug was dangerously close to my trackpad. Adding a desk shelf solves this instantly. If you want a massive splurge, the Grovemade Walnut Desk Shelf is stunning. The small size is 18.5 inches wide by 9 inches deep and costs $290. The wood feels premium under your hands. But honestly, you can find a solid bamboo riser at Walmart for about $24.99 that does the exact same job. Putting your monitor or laptop on a shelf creates a new horizontal plane underneath. I slide my 8.5 by 11 inch spiral planner and a heavy 20 oz Yeti tumbler right under there. It keeps my workspace clear. Plus, it lifts your screen, which helps your neck immensely. Don’t let your desk become a flat dumping ground. Build upwards.
3. Categorize Paperwork with Stackable Trays

Paper clutter is the worst part of teaching. I used to have random stacks of permission slips mixed with lesson plans. It was a nightmare. I’d panic every time a student asked for an extra worksheet. You need to combat this with a clear system using stackable paper trays. I’m a fan of the basic black plastic mesh trays from Staples. You can get a set of four for $14.99. They have a slightly rough, industrial texture but they’re indestructible. Set up four specific categories. Label them “To Do”, “To File”, “To Read”, and “Pending”. Do not just toss papers in randomly. That defeats the purpose. Last Tuesday at Staples, I saw a new teacher buying those flimsy cardboard magazine holders. Don’t do that. They rip within a month, fade in the sun, and look terrible. Stick to rigid plastic or metal trays. When you categorize your incoming paper immediately, your organization improves instantly. You won’t ever lose a 504 accommodation form under a stack of old spelling tests again.
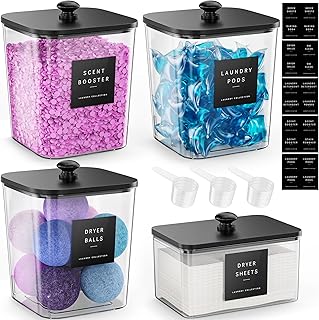
4 Pack Laundry Pods Container
A dependable everyday pick — 4 Pack Laundry Pods Container pulls in 473 ratings at 4.5 stars. Not flashy, just solid.
4. Organize Drawers with Modular Dividers

We need to talk about the dreaded junk drawer. You know the one. It’s filled with loose pushpins, half-eaten mints, and sticky notes covered in lint. I used to scrape my knuckles trying to find a binder clip in mine. You absolutely must use modular drawer organizers. Professional organizers constantly recommend the iDesign Linus Drawer Bins. You can grab a starter pack at The Container Store for about $24.99. They’re made of thick, crystal-clear plastic. They fit snugly together so you don’t have that annoying sliding sound every time you open the drawer. I bought a cheap, flimsy mesh organizer from the dollar store once. Huge mistake. It slid around and the compartments were too small for my scissors. If you want a cheaper alternative, the Madesmart junk drawer organizer from Target is $12.99. It has specific partitions for items like paper clips and a removable top tray. Measure your drawer first. My top desk drawer is 3.5 inches deep, so I buy bins that are 2 inches tall. This leaves just enough clearance so things don’t jam when I pull it open. You might also like: 15 Inspiring Small Space Laundry Room Ideas to Steal Right Now
5. Invest in an Ergonomic Setup for Health

You’re going to burn out physically if your desk setup is hurting you. I ignored ergonomics for my first two years of teaching. I’d sit hunched over my laptop, grading essays until my shoulders screamed. I’d go home with a throbbing headache behind my eyes. Adjust your chair right now. Your feet need to be flat on the floor, your knees at a 90-degree angle, and your desk at elbow height. Position your monitor so the top of the screen is at eye level, about an arm’s length away. If your screen is too low, you’ll get neck strain. I personally swear by the OPNICE 2-Tier Monitor Stand Riser. It costs $25.99 on Amazon and comes with a tiny built-in drawer and pen holders. The matte black finish looks clean. Getting your monitor to the right height is non-negotiable. I tried stacking my screen on three old textbooks for a while. It looked ridiculous, collected tons of dust, and was unstable. Just spend the $25. Your neck will thank you. You might also like: 20 Creative DIY Garage Organization Ideas That Changed Everything
6. Implement a “Teacher Toolbox” for Small Essentials

This trick completely changed how I handle tiny supplies. Think about paper clips, rubber bands, pushpins, and extra staples. They always end up scattered at the bottom of a drawer, waiting to poke you. A multi-drawer teacher toolbox fixes this. I found an Akro-Mils 24-Drawer plastic storage cabinet at Lowe’s for $34.99. It’s technically meant for nuts and bolts in a garage, but it’s brilliant for a classroom. It has small, clear plastic drawers that slide out with a satisfying click. I used my label maker to print tiny white labels for every single drawer. One for 1-inch binder clips, one for silver thumb tacks, one for standard staples. It looks satisfying. I tried keeping these things in little glass baby food jars for a semester. It was a disaster. The jars clanked together loudly during quiet reading time, and I eventually shattered one full of plastic beads on the hard tile floor. Stick to a unified plastic toolbox. It keeps all those tiny, sharp items contained and makes finding a rubber band take two seconds. You might also like: 20 Cozy Aesthetic Organizing Ideas to Inspire Your Next Project
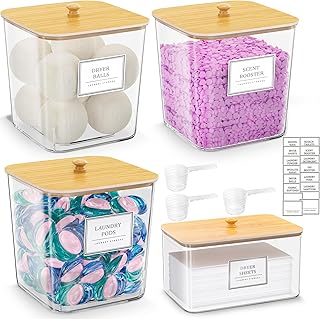
HomePekite Laundry Pods Storage Container
Honestly, HomePekite Laundry Pods Storage Container surprised me — sturdier than it looks in the photos, and over 15 buyers gave it 4.5 stars.
7. Conceal Cables with Management Solutions

Tangled cords create visual clutter. It makes your whole desk look messy even if the papers are put away. I used to have a massive knot of black and white wires hanging off the back of my desk. It looked like a dusty rat’s nest. My foot would constantly get caught in my laptop charger when I stood up. You need to conceal those cables immediately. I use clear Command Cord Clips. You can get a pack of 13 clips at Target for $7.99. They stick right to the back edge of your desk. You just pop the wire into the little plastic hook. I run my monitor power cord, my HDMI cable, and my phone charger right along the back lip. They are out of sight. I’ve tried using those cheap plastic zip ties before. Don’t do it. You have to cut them off with scissors every time you want to move a charger, which is annoying. The Command clips let you remove the wire easily. Clean cables are essential for proper desk organization.
8. Designate “Zones” for Different Tasks

You can’t just treat your desk as one big flat surface. You need to create distinct zones for different activities. This forces you to be intentional with your space. I divide my desk into three areas. The left side is my grading zone. It holds my red pens, a 2-inch stack of current assignments, and my grade book. The center is my planning zone, which stays clear except for my laptop and a coffee. The right side is my materials zone, where I put my heavy stapler, tape dispenser, and pen cup. Before I set up zones, I’d try to grade papers while my laptop was open and my lunch was sitting right there. I spilled a 12 oz can of Diet Coke all over a stack of history quizzes because my desk was too crowded. It was a sticky, brown nightmare that took hours to clean up. Setting up zones prevents that. It creates physical boundaries for your tasks. When I’m grading, I only look at the grading zone. It helps my focus so much.
9. Embrace Clear Acrylic Organizers for Visibility

I’m obsessed with clear acrylic organizers. They let you see exactly what you have without rummaging through opaque cups. I used to keep my dry erase markers in a cute ceramic mug. It looked nice, but I could never tell if I was grabbing a black marker or a blue one until I pulled it out. Now, I use a Sorbus Acrylic Organizer that I found on Amazon for $18.99. It has four angled compartments. It feels heavy and durable, not like that brittle plastic that cracks when you drop it. I keep my Expo markers in one slot, my Flair pens in another, and my sticky notes in the bottom tray. The clear aesthetic is neutral, so it doesn’t clash with any classroom decor. I bought a dark wooden organizer at TJ Maxx last year and it just made my desk look heavy. The clear acrylic bounces the fluorescent classroom light around and makes the space feel brighter. It’s a small detail, but it matters.

iDesign Laundry Detergent Holder
iDesign Laundry Detergent Holder has been one of the most consistently praised picks in this category. 13 reviewers averaged 4.5/5.
10. Utilize a Rolling Cart for Mobile Storage

Sometimes your desk just isn’t big enough for everything you need. That’s where a rolling cart comes in. I love my 3-Tier Rolling Cart from The Container Store. The standard size costs $39.99 and comes in a white finish. The metal feels sturdy. I use it as a mobile extension of my desk. The top tier holds my current read-aloud book and a huge stack of 8.5 by 11 inch construction paper. The middle tier holds extra glue sticks and scissors. The bottom tier holds my personal bag and a heavy 32 oz Hydro Flask. The best part is the wheels. I can pull it right up to my desk when I’m planning, and then roll it over to the reading rug during instruction. I used to try carrying a massive stack of supplies across the room and I’d inevitably drop a box of crayons. It sounded like a plastic explosion. A rolling cart prevents that entirely. It gives you flexible storage that moves with you.
11. Avoid Over-Decorating Your Desk

We need to have an honest conversation about desk decor. I know you want your space to look cute. I get it. But over-decorating is a mistake. I used to have three framed photos, a fake succulent, a wooden inspirational sign, and a decorative ceramic apple all crammed onto my desk. It looked like a tiny garage sale. Expert organizers advise against this. You need to keep only the absolute essentials on your desktop to reduce stress and improve focus. When my desk was covered in knick-knacks, I felt claustrophobic. I couldn’t even open a standard 12 by 18 inch manila folder without knocking over a picture frame. Relocate those non-essential decorations to a nearby bookshelf or the top of a filing cabinet. Keep your desk surface clean and functional. I stripped my desk down to just my laptop, my acrylic pen holder, and one small 4 oz candle that smells like vanilla. The difference in my anxiety levels was immediate. A clear desk equals a clear mind.
12. Create a Weekly Paper System with Daily Folders

This is a simple trick that eliminated my daily paper panic. You need to set up a file folder for each day of the week. I bought a pack of six Smead Poly File Folders at Office Depot for $11.49. They are made of thick, brightly colored plastic that doesn’t tear like the paper ones. I labeled them Monday through Friday. On Friday afternoon, I stand at the copy machine and print every single worksheet I need for the following week. Then, I sort them directly into these daily folders. Monday’s math quiz goes in the Monday folder. Wednesday’s permission slips go in the Wednesday folder. I used to leave a 5-inch stack of assorted copies on the corner of my desk. Every morning I’d frantically dig through it, searching for the right reading passage while the kids were walking in. My heart would pound. It was awful. The daily folder system stops that chaos. You just open the folder for that day and everything is perfectly organized.
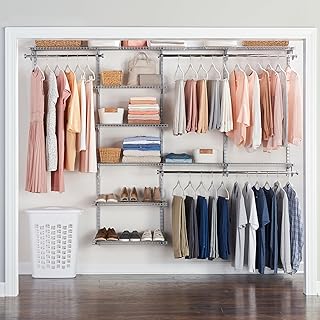
Rubbermaid Configurations Deluxe Custom Closet Kit 4-8 Ft.
Honestly, Rubbermaid Configurations Deluxe Custom Closet Kit 4-8 Ft. Adjustable surprised me — sturdier than it looks in the photos, and over 81 buyers gave it 4.5 stars.
13. Label Everything for Clarity and Substitute Teachers

A label maker is the greatest tool you will ever own for organization. I’m serious. You need to label your drawers, your bins, and your file folders clearly. I use the Brother P-Touch label maker. I picked it up at Target for $29.99. The rubber buttons have a satisfying squishy feel, and the tape peels off easily without leaving sticky residue. Labeling isn’t just for your own sanity. It’s invaluable for substitute teachers. I was out sick with the flu last February. I had a fever of 102 and couldn’t even look at my phone. Because I had labeled every single drawer on my desk, the sub found my emergency lesson plans, the extra hall passes, and the band-aids without tearing my room apart. Before I started labeling, I had a sub leave a note saying she couldn’t find the dry erase markers, so she just wrote on the board with a permanent Sharpie. It took me an hour with rubbing alcohol to scrub it off. Label everything. It saves you so much trouble.
14. Ditch the Sticky Note Overload

I have a love-hate relationship with sticky notes. They are great for a quick reminder to call a parent. But relying on them for important, long-term tasks is a mistake. I used to have my computer monitor framed in neon pink and yellow Post-it notes. I bought a massive 14-pad value pack at Walmart for $6.99 and just went wild. It looked like a piñata exploded on my desk. The problem is, they lose their stickiness. One morning, a crucial note about a student’s severe peanut allergy peeled off and fell behind my desk. I didn’t find it until three weeks later. That terrified me. Now, I refuse to use sticky notes for anything permanent. If it’s a crucial task, I immediately type it into my digital task manager on my laptop. I use Google Keep, but any app works. If you have more than three sticky notes on your desk right now, you’re doing it wrong. They create visual clutter and they aren’t reliable. Transfer those notes to a digital list immediately.
15. Implement a “Clean Desk Friday” Routine

You can’t leave your classroom on Friday afternoon with a messy desk. I used to run out the door at 3:15 PM on Fridays, leaving coffee mugs, graded papers, and unfiled folders everywhere. I thought I was doing myself a favor by starting my weekend early. But walking into that mess on Monday morning instantly ruined my mood. My chest would tighten looking at the clutter. Now, I swear by a strict Clean Desk Friday routine. I dedicate 10 minutes at the end of the day to reset my space. I wipe down the surface with a Clorox wipe. The sharp lemon smell is refreshing. I file away the week’s papers. I put my pens back in the acrylic organizer. I take my dirty mugs to the staff lounge. It takes barely any time, but it changes my Monday morning. Starting the week with a pristine, organized workspace sets a calm and productive tone. Don’t skip this step. It’s the secret to maintaining your desk organization all year long.
Getting your desk under control doesn’t have to take a whole weekend. Just pick two or three of these ideas and start there. I’d recommend starting with the one-in, one-out rule and grabbing a label maker. Those two changes alone will make a massive difference. I’ve wasted so much time and money buying cute bins that didn’t solve my problems. Stick to practical, clear systems. You’re going to feel so much better when you sit down at a clean desk on Monday morning. Pin this article so you can find it later when you’re standing in the aisle at Target trying to remember which drawer organizers to buy!

AMKUFO 6 Pack-Closet-Organizers-and-Storage
AMKUFO 6 Pack-Closet-Organizers-and-Storage has been one of the most consistently praised picks in this category. 52 reviewers averaged 4.5/5.
Frequently Asked Questions
How do I start organizing my teacher desk?
Start by clearing the entire surface and implementing a one-in, one-out rule for supplies. Toss dried markers and broken clips. Then, group items by category using clear acrylic organizers and modular drawer bins.
What are the best organizers for teacher desk organization?
Clear acrylic desktop organizers, stackable plastic mesh trays for paperwork, and modular drawer dividers like iDesign bins are top choices. They maximize visibility and prevent items from becoming a junk drawer mess.
How can I organize paperwork on my desk?
Use a set of stackable trays labeled ‘To Do’, ‘To File’, ‘To Read’, and ‘Pending’. For daily lesson materials, use a color-coded file folder system for Monday through Friday to sort copies in advance.
How do I keep my desk organized all year?
Establish a strict 10-minute ‘Clean Desk Friday’ routine. Wipe down the surface, file away loose papers, and return pens to their cups before leaving for the weekend. This ensures a fresh start every Monday.