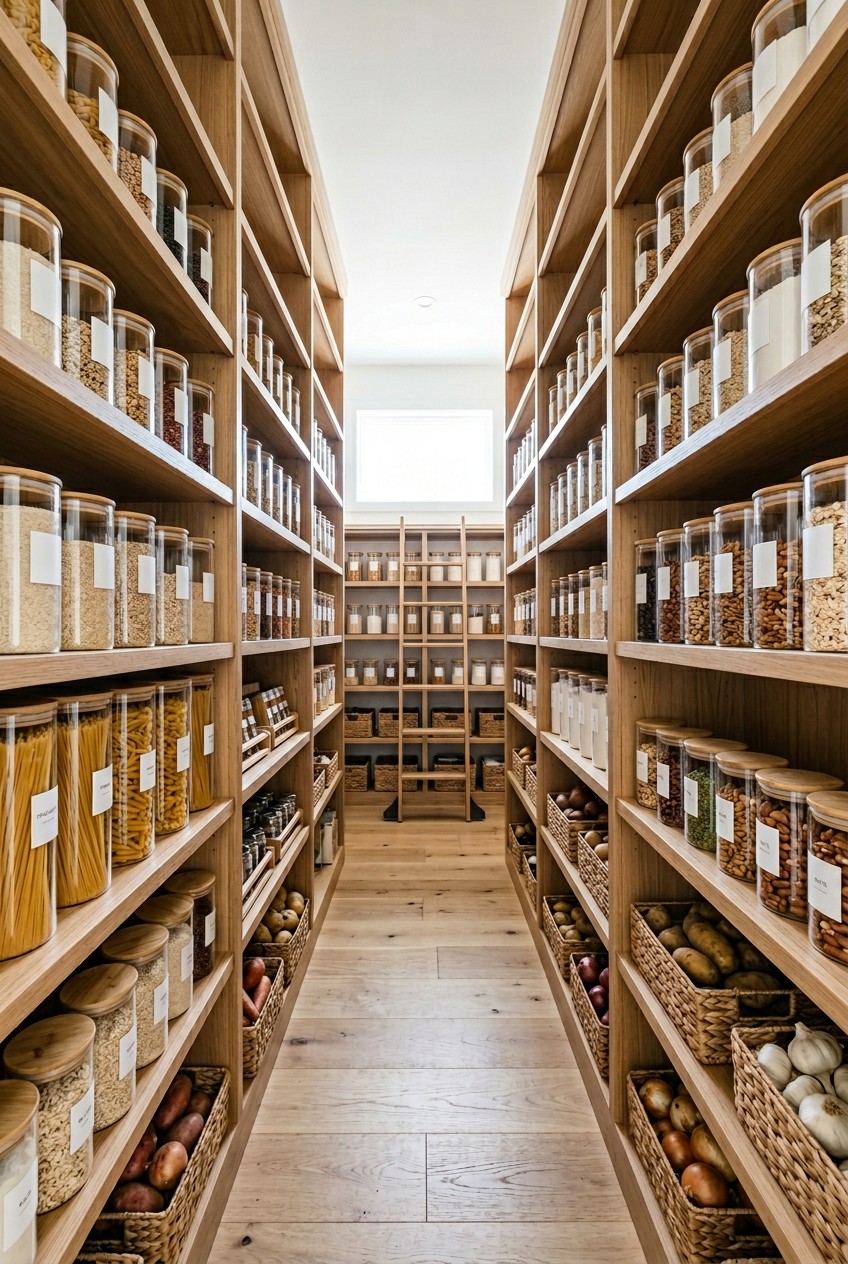
What’s Inside
- Optimize Shelf Spacing for Varied Items (Walk In Pantry Organization)
- Ditch the Original Packaging for Clear Bins
- The Lazy Susan Corner Strategy
- Floor-Level Baskets for Heavy Items
- Over-the-Door Racks for Tiny Stuff
- Decant Snacks into Open Acrylic Bins
- Label Everything (But Do It Right)
- Create a Dedicated Baking Zone (Walk In Pantry Organization)
- Use Tiered Steps for Canned Goods
- Contain the Potatoes and Onions (Separately!)
- Implement a First In, First Out Can Tracker
- Add Motion-Sensor Lighting
Last Tuesday at Whole Foods, I caught myself tossing a $14.99 jar of artisanal roasted almond butter into my shopping cart. I got home, shoved it into my dark, chaotic food closet, and heard a dull thud. I moved a crushed box of stale water crackers and found three exact replicas of that same expensive almond butter hiding in the shadows. That right there is why proper walk in pantry organization is my absolute obsession. If you can’t see your food, you won’t eat it. You’ll just keep buying it until your shelves literally groan under the weight of expired jars. I’m Hannah, and I’ve spent the last four years helping clients fix their kitchen storage disasters. I used to think a pretty pantry was just for magazine covers, but I was so wrong. It’s about saving hard-earned money and stopping the daily frustration of digging through sticky syrup bottles just to find a simple can of black beans.
Most people get this wrong. They buy a bunch of matching baskets without measuring anything, dump their groceries inside, and call it a day. Let’s fix that right now. We’re going to build a system that actually makes sense for how you cook, how you shop, and how you live. Grab a cup of coffee. I’m going to walk you through the exact products, measurements, and strategies I personally swear by to get your space completely under control.
1. Optimize Shelf Spacing for Varied Items (Walk In Pantry Organization)

Don’t assume all shelves need to be the exact same height. This is the biggest mistake I see when I walk into a new client’s home. Expert organizers always recommend spacing general kitchen shelves 10 to 14 inches apart. However, you absolutely must adjust this for specific items. You need to allow 12 to 16 inches for taller things like family-sized cereal boxes or large olive oil bottles. If you leave a uniform 12 inches everywhere, you’re going to end up laying tall bottles on their sides, which inevitably leads to greasy leaks all over your painted wood shelves.
I learned that the hard way two years ago. I installed fixed wooden shelves in my own house and realized my favorite 32 oz bottles of Bragg Apple Cider Vinegar (which cost $6.49 each) wouldn’t stand up straight. I had to rip out the brackets and start over. Now, I personally swear by adjustable track systems. The Rubbermaid FastTrack system from Home Depot costs about $149.99 for a basic kit, and it lets you move the wire shelves up and down in one-inch increments. You can adjust the height in seconds without tools. Keep your heavy, bulky items like 12-packs of soda on the lowest shelf with about 18 inches of clearance. Keep your standard canned goods at eye level with just 10 inches of clearance so you aren’t wasting vertical air space. It’s a simple tweak, but it completely changes how much food you can actually fit in the room.
2. Ditch the Original Packaging for Clear Bins

Cardboard boxes are the enemy of a clean kitchen. They tear, they leak powdered sugar everywhere, and they hide exactly how much product you have left. I can’t tell you how many times I’ve reached into a box of baking soda only to find a hard, useless clump. You need to transfer your dry goods into clear, airtight containers. I highly recommend the OXO Good Grips POP Containers. You can get a 10-piece set at Costco for $112.99. Yes, that feels like a big upfront investment, but it pays for itself when you aren’t throwing away stale food every single month.
Here is my strict rule for decanting. Only decant items you use constantly. Flour, sugar, rice, oats, and pasta are perfect candidates. Skip the fat-free stuff by the way. It tastes like wet cardboard, and you won’t eat it anyway. When you pour a 5 lb bag of King Arthur All-Purpose Flour ($5.99 at Target) into a clear OXO bin, you immediately see the bright white powder and know exactly when to add it to your grocery list. A quick pro tip for you. Cut the expiration date and cooking instructions off the original cardboard box and tape it to the back of the clear plastic container. I tried skipping this step for months before figuring it out, and I ruined a whole batch of quinoa because I forgot the water ratio. The clear plastic also keeps pests out. Finding tiny brown weevils crawling in a paper bag of expensive almond flour is a visual you won’t ever forget.
3. The Lazy Susan Corner Strategy

Corners in a walk-in space are notorious black holes. Things go in there and they never come out. I used to just shove my extra bottles of vegetable oil and random half-empty jars of peanut butter into the back corner. Six months later, I’d find them covered in a thick layer of sticky dust. The solution is incredibly simple but highly effective. You need a turntable. I specifically use the Copco 12-inch non-skid turntable, which you can pick up for exactly $9.99 at Target. The grippy silicone lining on the bottom stops glass bottles from flying off the edge when you spin it.
I use these exclusively for my liquid condiments and sticky items. Group your 15 oz bottles of Kikkoman soy sauce ($3.49), your sticky honey bears, and your tall bottles of extra virgin olive oil on one turntable. When you need something, you just give it a quick spin. The smooth, quiet rotation is surprisingly satisfying. Plus, if a bottle of maple syrup drips, the sticky mess is contained entirely on the plastic turntable instead of soaking into your wooden shelf. You can just pull the whole turntable out and wash it in the sink with warm soapy water. Honestly, this changed how I cook. I no longer knock over three bottles of vinegar just to reach the sesame oil hiding in the back. Just make sure you measure your shelf depth before buying. A 12-inch turntable needs at least 12.5 inches of shelf depth to spin freely without scraping the back wall.

Rubbermaid Configurations Deluxe Custom Closet Kit 4-8 Ft.
Rubbermaid Configurations Deluxe Custom Closet Kit 4-8 Ft. Adjustable punches above its price — 81 buyers rated it 4.5 stars. I would buy it again.
4. Floor-Level Baskets for Heavy Items

The floor of your storage room is valuable real estate, but you can’t just leave bags of groceries sitting directly on the linoleum. That invites bugs and makes sweeping impossible. Instead, you need heavy-duty, floor-level bins for your massive bulk purchases. I’m talking about those giant 20 lb bags of basmati rice from Costco or the 12-packs of paper towels. I use the Waterloo industrial steel wire baskets. They run about $34.99 each at Walmart. They have a rugged, matte black finish and slide easily across the floor. You might also like: 20 Lovely DIY Home Makeover That Make a Real Difference
I realized I needed these after a particularly painful grocery trip. I dragged a massive 40 lb bag of dog food into the house and just dumped it on the floor. Every time I needed to sweep, I had to physically lift this heavy, dusty bag. It was exhausting. Now, the dog food lives inside a rolling steel basket. I can push it out of the way with one foot. The wire grid design is crucial here because it lets air circulate. If you put heavy bags of potatoes or onions in solid plastic tubs on the floor, the lack of airflow will cause them to sprout and rot within a week. The smell of a rotting potato is a putrid, sweet stench that will linger in your house for days. Stick to wire baskets for anything heavy that needs to breathe. It keeps the floor clear, looks incredibly neat, and saves your lower back from unnecessary strain. You might also like: 15 Creative Home Organizing Ideas You Haven’t Thought Of
5. Over-the-Door Racks for Tiny Stuff

If you aren’t using the back of your door, you’re leaving money on the table. The door is the absolute best place for tiny, annoying items that get lost on deep shelves. Think about those little 2 oz bottles of McCormick vanilla extract ($4.19 at Kroger) or those tiny packets of taco seasoning. On a standard 12-inch deep shelf, these items get pushed to the back and vanish. I use the Smart Design over-the-door pantry rack. It costs $45.99 on Amazon and hooks right over the top hinges without needing any screws or drills. You might also like: 20 Gorgeous DIY Waste Materials Home Decor Ideas for Any Style
I strictly use this door rack for my baking extracts, small spice jars, and single-serve snack pouches. The shallow shelves (usually only 4 inches deep) mean nothing can hide behind anything else. You open the door, and boom, everything is staring right at you. I do have one major warning about this setup. Don’t put heavy glass jars of pasta sauce on a door rack. I made this mistake early on. The weight of six jars of marinara sauce caused the rack to swing wildly every time I opened the door. The loud metal clanking drove me crazy, and one jar eventually flew off and shattered on the tile floor, splashing red tomato sauce across my white baseboards. Stick to lightweight plastics, small boxes of gelatin, and tiny spice jars. Secure the bottom of the rack to the door with double-sided mounting tape so it doesn’t bounce when you open it.
6. Decant Snacks into Open Acrylic Bins

Kids (and hungry adults) are visually driven. If snacks are hidden inside opaque cardboard boxes with folded-down flaps, nobody is going to eat them. They will just tear open a new box instead. To stop this cycle of waste, you need to use open-top acrylic bins for all individually wrapped snacks. I absolutely love the mDesign plastic storage bins. You can get a 4-pack for $24.99. The clear, thick plastic feels premium, and the open top means you can just reach in and grab what you want without wrestling with a lid.
I do this every Sunday after my grocery run. I take those crinkly bags of Trader Joe’s peanut butter pretzels ($2.99) and dump them straight into a clear bin. I take granola bars out of their cardboard boxes and line them up like little soldiers. The visual impact is stunning. It looks like a high-end hotel minibar. More importantly, it gives you an instant inventory check. When the bin is empty, you know exactly what to buy. A quick tip on acrylic bins. Do not put them in the dishwasher. I ruined a beautiful $20 bin because the high heat warped the plastic into a cloudy, melted mess. You have to wash these by hand in the sink with a soft sponge and mild dish soap. Dry them thoroughly with a microfiber cloth so you don’t get hard water spots. It takes an extra three minutes, but it keeps the plastic looking crystal clear for years.

3-Tier Hanging Laundry Basket Organizer:Foldable Wire Shelf
If you want something that just works, 3-Tier Hanging Laundry Basket Organizer:Foldable Wire Shelf Laundry Ro is a safe bet (518 reviews, 4.5 stars).
7. Label Everything (But Do It Right)

A beautifully organized shelf falls apart the second someone puts the self-rising flour into the all-purpose flour bin. You have to label everything. But please, I am begging you, stop using those trendy chalkboard stickers. I tried this wrong for months before figuring it out. I bought a pack of cute black chalkboard labels and a white liquid chalk pen. Within three weeks, the chalk had smeared into a dusty gray mess from my slightly damp hands grabbing the jars. It looked terrible and felt gritty. Trust me on this.
Instead, you need a thermal label maker. I personally use the NIIMBOT D11 label maker. It’s a tiny wireless machine that costs $29.99 and connects to your phone via Bluetooth. You type the word into the app, pick a clean, modern font, and it prints a waterproof, smudge-proof sticker in two seconds. I label the bottom edge of my clear OXO bins so the text doesn’t block the view of the food inside. Labeling is especially crucial for things that look identical. You won’t know the difference between a 1/2 cup of baking soda and a 1/2 cup of baking powder until you ruin a batch of chocolate chip cookies. The labels remove the guesswork. If you have kids, print labels with little icons next to the words. It helps them put things back in the exact right spot, which means you aren’t the only one maintaining the system.
8. Create a Dedicated Baking Zone (Walk In Pantry Organization)

If you bake more than twice a year, you need a dedicated baking zone. Scattering your sugar on one shelf, your chocolate chips on another, and your cupcake liners in a random drawer is a recipe for frustration. Walk in pantry organization is all about grouping items by how you use them. I designate one specific shelf at chest height entirely for baking supplies. This way, when I want to make banana bread, I just stand in one spot and grab everything I need.
I store my 5 lb bags of granulated sugar ($3.29 at Sprouts) and flour in large airtight bins right next to smaller bins holding brown sugar and powdered sugar. Here is a massive time-saver. Buy cheap plastic measuring cups (you can get a set for $3.00 at Walmart) and leave a 1/2 cup scoop permanently buried inside the flour and sugar bins. You won’t have to dig through your kitchen drawers looking for a clean measuring cup every time you bake. I also keep a small plastic shoebox bin on this shelf just for baking accessories. It holds my 12 oz bags of Nestle Toll House chocolate chips, tiny bottles of food coloring, and paper muffin liners. Keeping all these small, messy items contained in one pull-out box stops them from rolling around the shelf. It smells faintly of vanilla and cocoa powder every time I slide that box out, which is a lovely little bonus.
9. Use Tiered Steps for Canned Goods

Canned goods are heavy, metallic, and incredibly hard to organize. If you just line them up on a flat shelf, the cans in the back become completely invisible. You’ll end up buying three cans of crushed tomatoes because you couldn’t see the four cans hiding behind the chicken broth. To fix this, you need tiered shelf organizers. I recommend the Joseph Joseph CupboardStore expandable tier. It costs $19.99 and expands to fit the exact width of your shelf.
It essentially creates a tiny set of stairs for your cans. You put the tallest cans in the back and the shortest cans in the front. Suddenly, you can read every single label without moving a thing. I use this for my 15 oz cans of black beans ($1.29 at Target) and my small cans of green chiles. The visual difference is shocking. You go from a cluttered, metallic mess to a grocery store display in about five minutes. One common mistake I see is people buying tiered steps that are too deep for their shelves. If your shelf is only 10 inches deep, a 12-inch tiered organizer will hang off the edge and eventually tip forward, sending heavy cans crashing onto your toes. Measure your shelf depth with a tape measure before you buy anything. The metallic clanking of cans hitting a hardwood floor is a sound I’d rather you avoid.

Galasily 3 Pack Laundry Detergent Dispenser Container with
Honestly, Galasily 3 Pack Laundry Detergent Dispenser Container with Tray surprised me — sturdier than it looks in the photos, and over 114 buyers gave it 4.5 stars.
10. Contain the Potatoes and Onions (Separately!)

Root vegetables are the troublemakers of the kitchen. They shed papery skins everywhere, they drop dirt on your clean shelves, and they rot if you look at them wrong. For years, I kept my 3 lbs of yellow onions ($2.99 at Kroger) and my russet potatoes in the same wooden crate. I thought it looked rustic and cute. A few weeks later, I noticed a foul, sour smell coming from the corner. The onions emit ethylene gas, which caused the potatoes to sprout massive green eyes and turn into mushy, rotting lumps. It was disgusting.
You absolutely must store onions and potatoes in separate containers, preferably on opposite sides of the room. I use open wire baskets lined with a cheap cotton dish towel. The wire basket provides the crucial airflow they need to stay dry, and the cotton towel catches all the dry dirt and flaky onion skins so they don’t fall onto the floor. When the towel gets gross, I just toss it in the washing machine. Keep these baskets in the darkest, coolest part of the room, usually on a lower shelf away from the door. Light makes potatoes turn green and bitter. Never put them in sealed plastic containers or Ziploc bags. They will sweat, grow mold, and ruin your whole week.
11. Implement a First In, First Out Can Tracker

If you have a large family or you like to buy in bulk during sales, standard tiered steps might not be enough for your canned goods. You need a gravity-fed can tracker. This is the exact same system grocery stores use to rotate their stock. You load the newest cans into the top, and they roll around to the bottom. When you need a can, you pull from the front, ensuring you always use the oldest food first. It completely eliminates expired food waste.
I bought the FIFO Can Tracker for $29.99 on Amazon. It holds up to 54 standard-sized cans. I use it strictly for the items I buy in massive quantities, like 14.5 oz cans of diced tomatoes and Campbell’s chicken noodle soup. The heavy plastic tracks are sturdy, and the cans make a satisfying, low rumbling sound as they roll down the ramp. It does take up a significant amount of vertical space (about 16 inches high), so you have to measure your shelf clearance first. Also, don’t try to force dented cans into the tracker. I tried to shove a badly dented can of sweet corn into the top slot, and it jammed the whole system. I had to take a butter knife and pry it out while all the other cans rattled around. Keep your dented cans on a regular shelf and use them up quickly.
12. Add Motion-Sensor Lighting

You can buy all the expensive acrylic bins in the world, but if you can’t see them, your system will fail. Most builder-grade homes come with one harsh, glaring overhead light bulb that casts terrible shadows on the lower shelves. You end up stumbling in the dark for a midnight snack, knocking over boxes of cereal. Upgrading your lighting is the cheapest way to make your space feel like a high-end custom kitchen.
You don’t need to hire an electrician. I use the EZVALO LED puck lights. You get a 4-pack for $39.99. They have built-in rechargeable batteries and attach to the underside of your shelves with a magnetic strip. The best part? They have motion sensors. The second I open the door, a soft, warm white light floods the shelves. It highlights the clear bins, makes the labels pop, and completely removes the dark, scary corners. When the battery dies (usually after about two months of normal use), you just pop the light off the magnet and plug it into a USB charger. I placed one directly above my baking zone and one down low near the floor baskets. It makes finding a 1 oz packet of yeast at 6 AM incredibly easy. Don’t skip the lighting. It’s the final polish that makes the whole system actually work.
Getting your food storage under control isn’t about achieving perfection. It’s about building a system that forgives you when you’re tired and just need to make dinner quickly. If you implement even half of these strategies, I promise you’ll stop buying duplicate jars of peanut butter and start actually enjoying your kitchen again. I’d love to see how you tackle your own space, so definitely save this guide and pin it to your favorite home improvement board for your next weekend project. You’ve got this!

AMKUFO 6 Pack-Closet-Organizers-and-Storage
AMKUFO 6 Pack-Closet-Organizers-and-Storage has been one of the most consistently praised picks in this category. 52 reviewers averaged 4.5/5.
Frequently Asked Questions
How much space should be between pantry shelves?
Expert organizers recommend spacing general shelves 10 to 14 inches apart. For taller items like cereal boxes or tall oil bottles, allow 12 to 16 inches of vertical clearance to prevent laying items on their sides.
What is the best way to store potatoes and onions?
Store them in separate wire baskets to allow proper airflow. Never store them together, as onions emit ethylene gas that causes potatoes to sprout and rot quickly. Keep them in a cool, dark place.
Are clear pantry bins really worth the money?
Yes. Clear airtight containers keep pests out, prevent powdered goods from clumping, and allow you to see exactly how much inventory you have left, which stops you from overbuying duplicate items.
How do you organize deep pantry corners?
Use a 12-inch non-skid turntable (lazy Susan) in the corners. This allows you to store sticky condiments, oils, and vinegars in the deep space while still being able to reach them with a quick spin.
