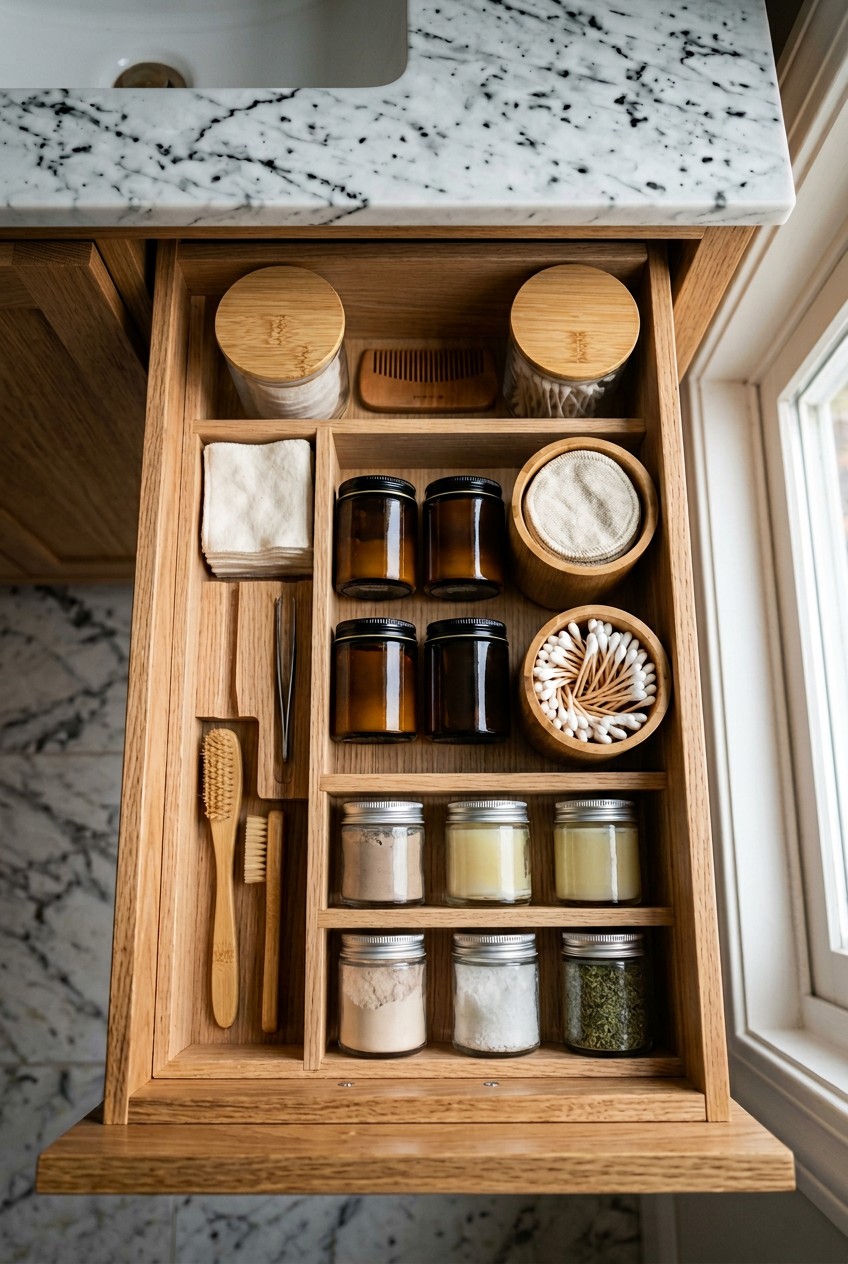
What’s Inside
- Start with a Ruthless Decluttering Session
- Invest in Modular Clear Acrylic Organizers
- Utilize Expandable Drawer Dividers for Custom Compartments
- Prioritize Daily Essentials Front and Center
- Maximize Vertical Space with Stackable Bins
- Line Drawers to Prevent Sliding and Protect Surfaces
- Group Like Items Together
- Utilize Tiered Drawer Storage for Optimal Access
- Remove Packaging to Save Space
- Incorporate Magnetic Strips for Metal Tools
- Avoid Overfilling Your Compartments
- Consider Silicone Organizers for Easy Cleaning
- Roll Towels and Washcloths for Compact Storage
- Label Containers for Long-Term Maintenance
Last Tuesday morning, I yanked open my vanity and a half-empty bottle of gooey pink NYX lip gloss spilled directly onto my only clean cotton pad. It was a sticky, cherry-scented disaster. I stood there staring at the mess, realizing I couldn’t even find my tweezers under the mountain of half-used hotel lotions and tangled hair ties. If you’re looking for bathroom drawer organization ideas, trust me, I completely feel your pain. I’ve spent years fighting with tiny spaces and terrible storage layouts. You don’t need a massive, custom-built vanity to have a functional morning routine. You just need a few smart strategies and the right containers. I’m going to share exactly what worked for me after months of trial and error. I tried doing this wrong for a long time. I bought cheap bins that cracked, I shoved too much stuff into tiny spaces, and I ignored the vertical height of my cabinets. Let’s fix your space. I’m breaking down the best methods to get your vanity under control using specific products I actually buy and use in my own house. Grab a coffee and let’s get into it.
1. Start with a Ruthless Decluttering Session

Before you buy a single plastic bin, you have to empty the drawer completely. I mean every single item. Professional organizer Kim Correy advises sorting items into clear categories and discarding anything you haven’t used in the last six months. I agree. Last month, I dumped my entire top drawer onto a white bath towel. The smell of old, waxy lipstick hit me. It smelled like dusty crayons. I found a crusty tube of Maybelline Great Lash mascara that expired in 2021. It’s gross what we keep hidden in the back of our cabinets.
Grab a box of Target Up&Up tall kitchen trash bags ($11.99 for 120 bags) and get ruthless. Throw away the separated nail polishes, the dried-out face wipes, and those tiny foil samples you’re never going to use. This initial purge frees up so much space. You can’t organize clutter. I tried organizing my junk for months before figuring it out. I’d just move the expired bottles from the left side to the right side. Once you actually throw the trash away, you finally see exactly what you truly need to store. Wipe the empty drawer down with a damp cloth and let it dry completely before moving to the next step.
2. Invest in Modular Clear Acrylic Organizers

Clear acrylic bins are popular because of their visibility and clean look. I swear by them. When you use opaque bins, things get lost in a dark plastic cave. Brands like iDesign Linus offer modular pieces in specific sizes. I buy the 4×4 inch and the 4×12 inch rectangles. They allow you to customize layouts for different items like makeup brushes, cotton swabs, or boxes of dental floss. A single iDesign Linus Shallow Drawer Organizer usually costs between $6.49 and $10.99 at The Container Store.
You want modular bins because your needs will change. If you buy one giant molded plastic tray, you’re stuck with those exact compartment sizes. The modular pieces let you play Tetris until everything fits. I’ve found that these clear bins are some of the best bathroom drawer organization ideas you can implement. Skip the cheap, thin plastic bins from discount stores. I tried those once and they cracked the second I dropped a heavy glass perfume bottle into them. The iDesign ones are thick, heavy, and make a satisfying click sound when you push them together. They look like glass but won’t shatter on your tile floor.
3. Utilize Expandable Drawer Dividers for Custom Compartments

For larger spaces, expandable dividers are crucial. If you don’t use them, your individual bins will slide around every time you pull the handle. OXO Tot Expandable Drawer Dividers are my favorite. They expand from 11 to 17 inches long and sit about 4.5 inches tall. They have thick, gray non-slip foam ends that grip the wood tightly. A 2-pack typically costs around $22.95. If you need a different look, SpaceAid offers bamboo expandable dividers that adjust from 17 to 22 inches.
I bought my OXO dividers at Walmart last spring. Setting them up is satisfying. You just push the gray button, compress the tension spring, slide it into place, and let it snap tight against the wood. It sounds like a heavy staple gun locking into place. These dividers are perfect for creating long columns for your hair tools. I use one section just for my flat iron and its thick black cord. Most people get this wrong by just tossing their hot tools in loose. The heavy cords end up knocking over all the small bottles of serum and lotion. Section off the heavy stuff with a strong divider.

iDesign Laundry Detergent Holder
iDesign Laundry Detergent Holder punches above its price — 13 buyers rated it 4.5 stars. I would buy it again.
4. Prioritize Daily Essentials Front and Center

A common mistake is burying your most frequently used items in the back. Expert advice always suggests placing daily toiletries and makeup at the very front of the space or in the top drawer. This streamlines your morning routine so you aren’t rummaging around while half asleep. I keep my CeraVe Daily Moisturizing Lotion (the 12 oz pump bottle, $14.99) right at the front edge. It smells like clean, unscented skin and I reach for it every single morning.
I used to keep my daily face wash buried behind a bunch of extra toothpaste boxes. I’d knock over three things just trying to wash my face. It was frustrating. Now, I keep a strict rule. If I don’t use it every day, it doesn’t get front-row access. I buy my CeraVe at my local Kroger, and the second I bring it home, it goes directly into the front right corner. Put your daily toothbrush, your favorite deodorant, and your primary moisturizer in the most accessible spot. Push the extra razor blades and the weekly face masks to the back. It’s a tiny shift that saves me at least five minutes of digging every morning.
5. Maximize Vertical Space with Stackable Bins

If you have deep cabinets, stackable organizers are a huge help. Most people just fill the bottom layer and leave six inches of empty air above it. Products like The Container Store’s Everything Organizer Deep Drawer Organizers allow you to create multiple tiers. They cost about $14.99 per bin. This doubles your storage capacity for bulky items like extra bars of soap, heavy glass lotion bottles, or big claw clips. You might also like: 15 Inspiring Home Makeover Ideas You Haven’t Thought Of
I buy huge bulk packs of cotton swabs and makeup wipes at Costco. I used to just shove the giant boxes into the bottom of my cabinet, which looked terrible. Now, I use clear stackable bins. I put the backstock items in the bottom bin, and the currently open items in the top bin that rests directly over it. The top bin slides back and forth on little plastic tracks. It’s brilliant. I tried using cheap plastic shoeboxes for this once, but the lids were too clunky and they didn’t slide. You really need bins specifically designed to stack and slide. When you maximize that vertical height, a tiny small-space vanity suddenly holds twice as much stuff without looking cluttered. You might also like: 20 Charming Aesthetic Closet Organization Ideas You Need to See
6. Line Drawers to Prevent Sliding and Protect Surfaces

A lesser-known tip is the importance of non-slip liners. Non-adhesive, ribbed liners like Con-Tact Brand Grip Prints prevent your acrylic organizers from sliding around. You can buy an 18-inch by 4-foot roll at Home Depot for about $4.49. They also protect the painted wood from spills or moisture damage. I learned that the hard way. You might also like: 15 Creative Dollar Tree Hacks Organizing Ideas for a Fresh New Look
Two years ago, I knocked over a 1-liter bottle of bright blue Listerine mouthwash inside an unlined cabinet. The sticky blue liquid seeped right into the particle board. My bathroom smelled like intense, eye-watering mint for three weeks, and the wood permanently warped. Now, I line everything. The Con-Tact paper has a slightly rubbery, ribbed texture. When you set an acrylic bin on top of it, the bin simply won’t move. You can pull the handle open as fast as you want, and nothing shifts. Don’t use regular wrapping paper or thin tissue paper. I tried that once to make it look pretty, and it just tore. Stick to the thick, rubbery liners. They are cheap, easy to cut with kitchen scissors, and they save your furniture from permanent liquid damage.

4 Pack Laundry Pods Container
If you want something that just works, 4 Pack Laundry Pods Container is a safe bet (473 reviews, 4.5 stars).
7. Group Like Items Together

Professional organizers constantly emphasize categorizing. You have to group all your dental care items together, all your makeup together, and all your hair products together. Cara Palmer of Organize Every Room suggests using labeled baskets to maintain this system. It makes it intuitive to find what you need. I keep all my oral care in one specific 4×12 inch bin. My Oral-B Glide Pro-Health dental floss (43.7 yards, $4.99), my spare toothbrushes, and my whitening strips all live in one spot.
I pick up my floss at Sprouts Farmers Market during my weekly grocery run. Because I have a dedicated dental bin, I know exactly where to put the new floss when I get home. Before I started grouping items, I’d have a box of floss next to my hairspray, and a tube of toothpaste rolling around next to my eyeliner. It was chaos. When you group like items together, your brain doesn’t have to work as hard. If I need to fix my hair, I pull out the hair bin. If I need to do my nighttime skincare, I grab the skincare bin. It’s a simple rule, but it fixes a messy space.
8. Utilize Tiered Drawer Storage for Optimal Access

For very deep or specialized spaces, you should consider tiered solutions. KraftMaid offers Vanity Wood Tiered Drawer Storage, which features a sliding top tray for small items and a spacious lower compartment for larger essentials. If you can’t remodel your cabinets, Salt by Sabrina makes a beautiful Expandable Vanity Organizer for around $52.00. It’s designed to fit and maximize every square inch of a standard space.
I bought a similar tiered organizer at Target last winter. It has a smooth wooden base and a clear acrylic top tray that glides back and forth. I keep my heavy glass foundation bottles in the bottom section, and my tiny, easily lost items like tweezers and lip liners in the sliding top tray. Some of the best bathroom drawer organization ideas involve using these multi-level trays. They prevent small items from getting crushed under heavy bottles. I used to just toss my expensive makeup brushes in with my heavy hair styling creams. The bristles got totally smashed and ruined. A tiered system protects your delicate items while keeping them perfectly accessible right at the top.
9. Remove Packaging to Save Space

A surprisingly simple trick is to remove bulky cardboard packaging the second you get home from the store. Take your cotton swabs, dental floss refills, and razor blade cartridges out of their boxes. Cardboard takes up a massive amount of unnecessary room. It also looks visually cluttered. I buy the 365 brand organic cotton rounds (100 count, $3.29) from Whole Foods. The plastic sleeve they come in is crinkly and annoying.
I immediately rip open the plastic and stack the soft white cotton rounds directly into a clear acrylic square bin. The cotton smells fresh and clean, not like dusty cardboard. By removing the packaging, the items fit tightly into smaller organizers and you maximize the usable space. I used to keep a giant 500-count cardboard box of Q-tips in my vanity. It took up a quarter of the entire space. Once I dumped the Q-tips into a small clear cup, I reclaimed so much room. Plus, seeing the actual product through clear plastic looks like a high-end hotel display. Throw the cardboard recycling away. You won’t miss it.

OKZEST Utility Slim Storage Cart
OKZEST Utility Slim Storage Cart has been one of the most consistently praised picks in this category. 17 reviewers averaged 4.5/5.
10. Incorporate Magnetic Strips for Metal Tools

This is a trick I love. Install a self-adhesive magnetic strip along the inside wall of a drawer to hold small metal items. I use a Master Magnetics strip that costs about $6.99 at the hardware store. It holds my Tweezerman slant tweezers ($23.00), my metal nail clippers, and my bobby pins. This keeps them organized, visible, and prevents them from getting lost at the bottom of a deep plastic bin.
I bought my Tweezerman tweezers at Target. They are heavy, cold metal and they used to constantly slide to the back of my vanity. I’d scrape my knuckles trying to dig them out from under a heavy bottle of mouthwash. Now, I just slap them against the magnetic strip on the side wall. You hear a sharp metallic click, and they stay suspended perfectly in place. It’s brilliant. Just make sure you clean the inside wood surface with a little rubbing alcohol before you stick the magnetic strip down, or the adhesive won’t hold. I tried sticking it to a dusty side panel once and the whole strip fell off the next day. Clean the wood first.
11. Avoid Overfilling Your Compartments

While it’s tempting to use every single inch of available space, overfilling makes it impossible to maintain your organization. You have to leave a little breathing room in each compartment so items are easy to access and put back. I’m guilty of breaking this rule. Last winter, I bought a huge handful of seasonal lip balms from Trader Joe’s. They were tiny (0.15 oz, $2.99 each) and smelled like peppermint.
I tried to shove 14 tubes of lip balm into a tiny acrylic square that was only meant to hold maybe six. Every time I opened the handle, the little plastic tubes would explode over the sides and roll everywhere. It was infuriating. Organization experts always say that a bin shouldn’t be more than 80 percent full. If you have to force an item into a slot, you have too much stuff. I finally took half the lip balms out and put them in a backstock bin under the sink. Give your items some physical space. If your bins are packed tight like sardines, you won’t want to put things away, and the mess will just end up on your countertop.
12. Consider Silicone Organizers for Easy Cleaning

While clear acrylic is the most popular choice, silicone organizers are gaining traction. They have natural non-slip properties and are incredibly easy to clean. They are ideal for items that might get wet, sticky, or leak. I bought a Madesmart Silicone Organizer 2-pack for $12.99 at Target. The silicone has a soft, matte, slightly grippy texture. It feels very different from rigid plastic.
I use the silicone trays specifically for my liquid foundations and my sticky hair serums. If a bottle of foundation leaks onto clear acrylic, it dries into a crusty, stubborn mess that you have to scrub with hot water. If it leaks onto a flexible silicone tray, you just wait for it to dry, pop the tray out, and bend the silicone. The dried makeup just peels right off in one piece. It’s amazing. I won’t use anything else for my messy liquids now. The only negative is that silicone attracts a little bit of dust and pet hair because of the grippy texture. But you can just rinse it under the faucet and it looks brand new in five seconds.

HomePekite Laundry Pods Storage Container
If you want something that just works, HomePekite Laundry Pods Storage Container is a safe bet (15 reviews, 4.5 stars).
13. Roll Towels and Washcloths for Compact Storage

Instead of folding your small towels, roll them tightly. This method is a fantastic space-saving hack. It allows washcloths to fit much more compactly into deeper spaces or stackable bins. I buy the Utopia Towels 12-pack of white washcloths (12×12 inches, $13.99) from Walmart. They are soft, thick, and bleach-friendly.
I used to fold them into flat squares, but the stack would always topple over when I tried to grab the bottom one. Now, I fold them in half and roll them into tight little cylinders. I stand them upright in a deep acrylic bin. It looks like a luxury spa display. You can grab a single rolled cloth without disturbing the rest of the clean ones. The texture of the fresh, tightly rolled cotton looks neat and uniform. Most people get this wrong by trying to store giant, fluffy bath towels in their vanity. Don’t do that. Keep the big towels in a linen closet, and only store your small, rolled face cloths right at your sink where you need them for washing your face at night.
14. Label Containers for Long-Term Maintenance

If multiple people use your bathroom, labeling is key to keeping things tidy. I use a Nelko Label Maker Machine. I bought it on Amazon for $19.99. It connects to my phone via Bluetooth and prints these crisp, sticky white labels instantly. I label the edge of every single opaque bin. I have labels for ‘Night Creams’, ‘Hair Ties’, and ‘First Aid’.
I used to think labels were overkill for a private bathroom. I was wrong. When you’re tired and rushing to get ready for bed, you don’t want to think about where the extra toothpaste goes. The label makes the decision for you. It ensures everything has a designated home. My husband used to constantly put his heavy shaving cream cans in my delicate makeup bin. Once I slapped a bold black-and-white label that said ‘Hannah’s Makeup’ on it, he finally stopped. The label maker prints with a quiet, satisfying little buzzing sound, and the stickers peel off easily if you ever need to change your categories. It’s the final touch that locks your new system into place permanently.
I really hope these ideas help you tackle your messy vanity. I know how overwhelming it feels to look at a chaotic pile of bottles and tubes, but if you take it one step at a time, you can fix your space. Start with the trash bag, get some clear bins, and don’t forget the non-slip liners. Trust me, putting in the effort this weekend will make your Monday morning routine feel so much smoother. If you found these tips helpful, pin this article to your favorite home organization board so you can reference the specific product sizes later!
Frequently Asked Questions
What is the best way to organize deep bathroom drawers?
Stackable clear acrylic bins are your best option for deep spaces. They allow you to utilize vertical height efficiently. Just make sure to put your daily essentials in the top sliding bins and your bulky backstock items in the lower bins.
How do I stop my drawer organizers from sliding around?
You need to use a non-slip ribbed liner like Con-Tact paper at the bottom of the wood. Alternatively, you can use expandable tension dividers with foam ends to lock your individual bins tightly into place so they won’t shift.
Should I use acrylic or silicone organizers for makeup?
Silicone organizers are fantastic for liquid makeup because they are flexible and easy to wash. If foundation leaks, you can peel it right off the silicone. Clear acrylic is better for dry items like cotton swabs or boxed floss.
How can I maximize space in a tiny bathroom vanity?
Remove all bulky cardboard packaging immediately. Group similar items together in small modular bins, use magnetic strips on the inside walls for metal tools like tweezers, and tightly roll your washcloths instead of folding them flat.
