What’s Inside
- Maximize Vertical Space with Wall-Mounted Shelving
- Implement a Multi-Compartment Sorting System
- Install a Wall-Mounted or Retractable Drying Rack
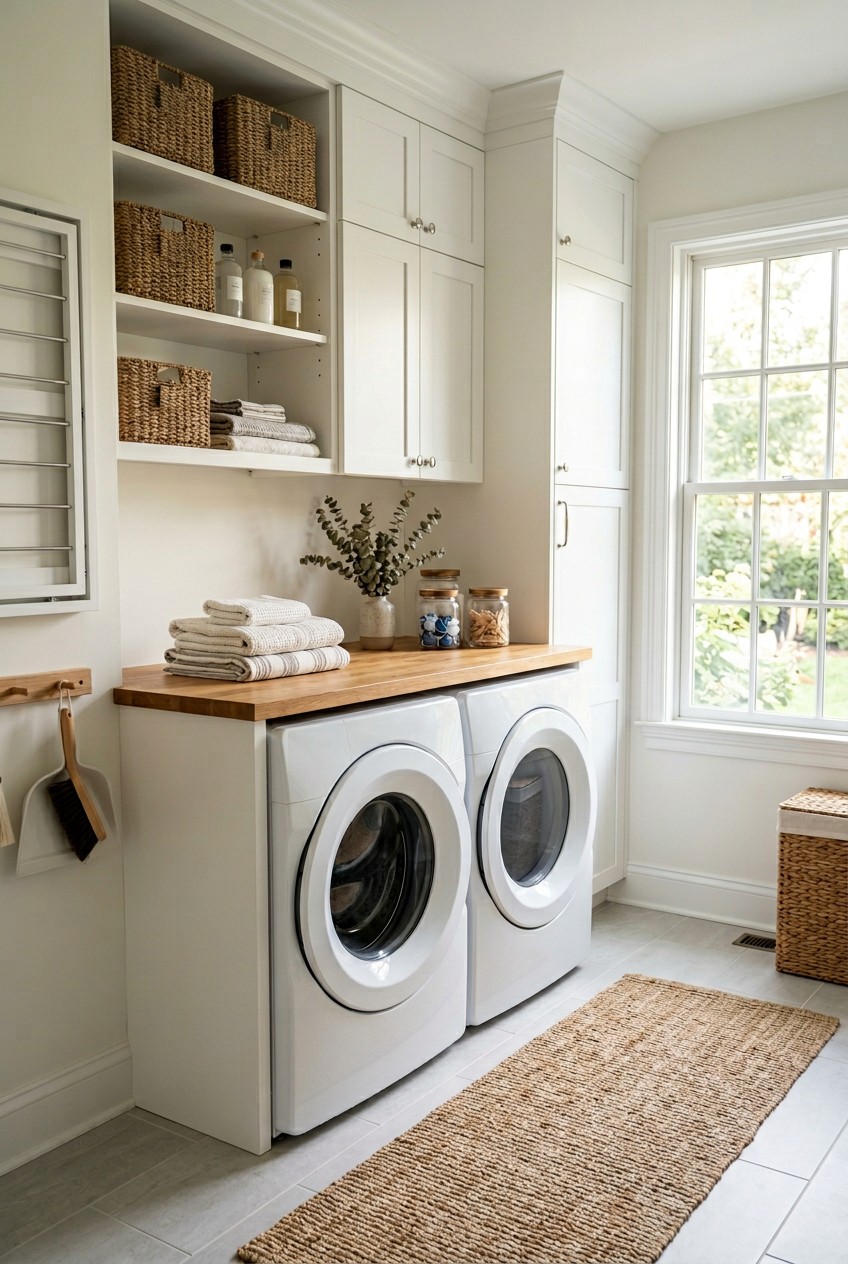
- Add a Plywood Countertop Over Washer and Dryer
- Decant Detergents into Clear Glass Dispensers
- Use Slim Rolling Carts Between Appliances
- Hang a Metal Pegboard for Cleaning Supplies
- Swap Bulky Ironing Boards for Over-the-Door Options
- Store Lint and Pocket Trash in a Dedicated Magnetic Bin
- Utilize the Back of the Door with Clear Pocket Organizers
- Build a DIY Pedestal with Hidden Drawers
- Keep Stain Removers in a Suction Cup Shower Caddy
- Finalizing Your Setup with the Best Small Space Laundry Room Organization Ideas
Last Tuesday at Whole Foods, I realized I smelled like sour mildew and wet dog. Standing in the produce aisle with kale in hand, I watched a woman crinkle her nose and step back. I didn’t blame her. I’d left a load of thick cotton towels in the wash for three days. Why? My tiny, dark laundry closet was so cluttered I couldn’t open the dryer door without tripping over a giant detergent jug and a broken wicker hamper. If you want real laundry room organization, you’ve got to admit your current system is a disaster. I learned that the hard way. I went home, dumped the sour towels back in the wash with a cup of white vinegar, and stared at my messy space.
I spent 48 hours testing every configuration in my 5-foot by 5-foot closet. Most laundry ideas online are useless if you don’t have a massive utility room. I don’t have a sprawling farmhouse sink or custom cabinetry. I have a glorified hallway closet with bi-fold doors that constantly fall off their tracks. But I’m stubborn. I refused to live out of overflowing plastic baskets. I rolled up my sleeves, grabbed my tape measure, and tore everything out. Let’s fix your space. I’ve made the expensive mistakes so you don’t have to. Here are the exact products, measurements, and layouts I used to make my tiny laundry area functional.
1. Maximize Vertical Space with Wall-Mounted Shelving

When you’re dealing with a room the size of a postage stamp, you can’t waste an inch. I lived without shelves for months before figuring it out. I used to balance detergent bottles on the vibrating washing machine. Naturally, they vibrated off and spilled sticky blue liquid everywhere. To stop the clutter, install floating shelves or cabinets above your machines. This uses wasted vertical space—a must for efficient laundry rooms.
For a sleek look in a cramped area, I recommend clear acrylic shelves. I bought the Aria Prima Clear Acrylic Wall Shelf for $45.99 for a 36-inch length. The clear material lets light through, making my dark closet feel bigger. If you don’t like plastic, powder-coated metal shelves from brands like Shelfology offer insane durability. I looked at their 3-foot wide metal shelves, which cost around $85.00 and hold 50 to 100 lbs. When I installed my Aria shelves, I got drywall dust in my eye because I refused to wear goggles. Don’t be like me. Wear the goggles. Make sure your shelves are mounted into the wall studs using 2.5-inch wood screws. A shelf full of liquid softener is heavy; you don’t want it crashing down onto your appliances.
2. Implement a Multi-Compartment Sorting System

I used to throw every piece of dirty clothing into one unstructured canvas bag. It was a terrible system. Last year, I accidentally washed a bright red sock with my husband’s expensive white work shirts. They came out looking like pink cotton candy. It was a $150 mistake. To streamline your routine and save time, you need a multi-compartment laundry sorter.
I swear by the Smart Design Rolling 3-Compartment Laundry Sorter. It measures 17.5 x 30.75 x 35.25 inches. It fits perfectly against the narrow wall opposite my machines. It costs $54.99, a steal considering it holds 9 full loads. I love the durable texture of the polyester bags. The wheels are a bit squeaky, but the functionality makes up for it. I bought a cheap label maker at Target for $19.99 and labeled each compartment: Whites, Darks, and Delicates. This simplifies the process and forces my family to sort their own clothes. You won’t ruin any more white shirts if you stick to this. It’s a simple fix that saves hours of digging through dirty clothes on laundry day.
3. Install a Wall-Mounted or Retractable Drying Rack

Freeing up floor space is critical. I used to use a clunky, wooden accordion-style rack that sat in the middle of the floor. I tripped over the legs constantly. I stubbed my toe so hard I cried. You need to get things off the floor by opting for a wall-mounted or retractable rack.
I bought the Leifheit Wall Mount Retractable Clothes Drying Rack. I got the 5-rod size for $56.00. It mounts flat against the wall and pulls out when I need to hang wet workout leggings. The snapping sound of the line retracting is satisfying. If you have a larger budget, brands like Foxydry offer amazing ceiling-mounted models. The Foxydry Fold starts at $130.00. It lowers from the ceiling using a pulley. These are ideal for air-drying delicates out of the way. I usually hang wet wool sweaters there so they don’t shrink. The damp smell dissipates quickly if you leave the closet door open. Getting rid of that floor rack gave me back four square feet of walking space.

4 Pack Laundry Pods Container
4 Pack Laundry Pods Container has been one of the most consistently praised picks in this category. 473 reviewers averaged 4.5/5.
4. Add a Plywood Countertop Over Washer and Dryer

If you have front-loading machines, you’re sitting on unused horizontal space. For years, the gap between my washer and dryer was a black hole. I dropped a clean sock down that 2-inch crevice and couldn’t reach it for six months. To create a folding station, install a sturdy countertop over your machines. This prevents items from falling behind the machines and gives you a smooth surface for folding. You might also like: 15 Cozy Room Cleaning Tips Organizing Ideas to Steal Right Now
I went to Home Depot and bought a sheet of 3/4-inch birch plywood for $45.00. I had the lumber guy cut it to 54 inches wide and 28 inches deep. I spent a Saturday sanding the edges. The gritty 120-grit sandpaper tore up my cuticles, but the finish was worth it. I coated the wood with a quart of Minwax Polyurethane for $14.98. The strong smell gave me a headache, so open a window. I let it dry for 24 hours. Now, I have a beautiful wooden counter on top of my machines. I fold hot towels immediately as they come out of the dryer. It eliminates the need to carry wrinkled clothes to the couch. You might also like: 20 Stunning Tool Storage Organizing Ideas for a Fresh New Look
5. Decant Detergents into Clear Glass Dispensers

Nothing makes a small space look messier than a collection of mismatched plastic jugs. The neon orange and green bottles create visual clutter. I got rid of the ugly packaging. I decanted my powdered and liquid detergents into heavy, clear glass jars. You might also like: 20 Cozy Aesthetic Organizing Ideas to Inspire Your Next Project
I purchased two Anchor Hocking 1-Gallon Glass Heritage Hill Jars from Target for $14.49 each. The heavy clinking sound of the glass lid feels luxurious compared to plastic caps. For liquid detergent, I buy Trader Joe’s Lavender Liquid Laundry Detergent. It comes in a 100 oz bottle for $9.99. I pour it into a glass beverage dispenser with a metal spigot. I bought a 1/2 cup stainless steel scoop for $4.99 for my powdered OxiClean. The sticky blue drip used to ruin my shelves, but now any drips just land in the washing machine drum. Seeing the clean white powder and pale purple liquid makes the room feel like a high-end apothecary. It’s a tiny upgrade that makes me enjoy chores.
6. Use Slim Rolling Carts Between Appliances

I have a 5.1-inch gap between my washing machine and the wall. For a long time, it just collected dust bunnies. Don’t let any gap go to waste. Utilizing awkward spaces is the secret to small room organization. I bought a slim rolling cart for these gaps.
I ordered the SpaceKeeper 4-Tier Slim Storage Cart. It costs $23.99 and is exactly 5.1 inches wide. It slides perfectly into that dead space. I use it to hold bulk items. I buy massive boxes of OxiClean Versatile Stain Remover from Costco. A 11.6 lbs box costs about $18.99. I decant some into jars, but the overflow box sits on the bottom tier. I made a mistake the first week. I overloaded the top tier with three bottles of heavy fabric softener. The cart tipped over, spilling a 32 oz bottle of Downy all over the floor. The slimy texture is a nightmare to clean off grout. Keep your heaviest items on the bottom. The wheels glide out when I need my stain spray, and the cart disappears when I push it back.

3-Tier Hanging Laundry Basket Organizer:Foldable Wire Shelf
A dependable everyday pick — 3-Tier Hanging Laundry Basket Organizer:Foldable Wire Shelf Laundry Ro pulls in 518 ratings at 4.5 stars. Not flashy, just solid.
7. Hang a Metal Pegboard for Cleaning Supplies

If you don’t have cabinet space, look at your blank walls. I had a narrow strip of drywall next to the door that was empty. I installed a metal pegboard to hold smaller cleaning tools, brushes, and accessories.
I bought the Wall Control Galvanized Steel Pegboard. A 32 x 32 inch panel costs $42.99. It’s sturdy. The metallic clang of moving the steel hooks is loud, but the board won’t warp like cheap cardboard. I use this space to hang lint rollers, a dustpan, and my wool dryer balls. I buy 1 oz bottles of lavender essential oil from Sprouts Farmers Market for $7.99. I keep the bottles on a small metal shelf on the pegboard. Before I toss my wool balls into the dryer, I put three drops of oil on them. The room smells amazing. Having these items hanging flat keeps them off my folding counter. You can’t underestimate vertical wall storage. It keeps everything visible and accessible.
8. Swap Bulky Ironing Boards for Over-the-Door Options

Freestanding ironing boards are the worst. They are awkward, heavy, and impossible to store gracefully. I used to keep my old, rusty board wedged behind the laundry room door. Every time I opened the door, the metal legs would screech against the tile and crash down onto my foot. The screeching is enough to drive anyone crazy—trust me.
I finally threw it away and bought the Honey-Can-Do Over-The-Door Ironing Board for $34.99. It features a 14 x 42 inch surface, plenty of space for pressing dress pants. It hangs over the door using padded metal hooks that won’t scratch the paint. When I need it, I just pull it down. It locks into place. I love the scorch smell of a hot iron hitting damp cotton. It smells like productivity. When I’m done, I fold it up with one hand, and it sits flush against the door. This single swap gave me back an entire corner. Skip the bulky, standalone boards.
9. Store Lint and Pocket Trash in a Dedicated Magnetic Bin

Before I got organized, I threw dryer lint onto the top of the dryer until I carried it to the trash. It was gross. The fuzzy, dusty texture gets everywhere. Worse, I’d find random garbage in my husband’s pockets and leave it on the counter. Last month, I washed a melted cherry chapstick and a wad of wet receipts. The red wax ruined a load of khaki pants.
You need a trash solution at the source. I bought the A.J.A. & MORE Magnetic Lint Bin for $19.99. It measures 9.5 x 3.5 x 9.5 inches. It has a magnetic backing, so I slapped it onto the side of my dryer. It doesn’t move, even during the spin cycle. Now, every time I empty the lint trap, the fuzz goes straight into the bin. I also toss gum wrappers, loose change, and receipts in there. It eliminated the pile of pocket trash on my counter. It’s a tiny detail, but it keeps the space clean.

HomePekite Laundry Pods Storage Container
If you want something that just works, HomePekite Laundry Pods Storage Container is a safe bet (15 reviews, 4.5 stars).
10. Utilize the Back of the Door with Clear Pocket Organizers

If you aren’t hanging an ironing board on the back of your door, use that space for small items. The back of a door is a blank canvas for organization. I made a mistake here early on. I bought a cheap, flimsy mesh shoe organizer. I shoved a heavy 32 oz bottle of fabric softener into a pocket, and the mesh ripped, sending the bottle crashing to the floor.
I learned my lesson and upgraded to the Simple Houseware 24 Clear Pocket Organizer. It costs $11.99 on Amazon and is made of thick, durable clear vinyl. The clear pockets are crucial because you can see what you’re looking for without digging. I use these to hold stain removers. I keep 16 oz spray bottles of Zout, which cost $4.48 at Walmart, in the bottom row. In the top rows, I store sewing kits, extra buttons, and 2-tablespoon packets of baking soda. The vinyl is tough enough to hold heavy liquids. It turns a blank door into a storage cabinet. You won’t believe how much stuff you can fit.
11. Build a DIY Pedestal with Hidden Drawers

Bending over to pull wet, heavy jeans out of a front-loading washer is terrible for your back. Elevating your machines is a great idea, but buying the brand-name pedestals is a rip-off. I looked at the LG metal pedestals, and they wanted $300 each. I wasn’t going to spend $600 just to lift my appliances a foot.
Instead, my husband and I built a custom wooden pedestal. We bought six 2×4 lumber boards and a box of 3-inch screws from Home Depot for $45. We framed a sturdy base that spans the width of both machines. We covered it with 3/4-inch plywood and painted it white. I left the front open so I could slide three plastic storage bins underneath. I use these to store winter coats and beach towels. The only negative is that the spin cycle shakes the wooden pedestal a bit more than the concrete floor. We added thick rubber anti-vibration pads under the feet of the washer for $12.99, which solved the noise.
12. Keep Stain Removers in a Suction Cup Shower Caddy

Sometimes the best tools aren’t meant for the laundry room. Repurposing bathroom organizers is one of my favorite tricks. I had stain sticks, scrub brushes, and soaps that were constantly getting knocked over. I needed a way to keep them contained but accessible right near the machine door.
I bought a Command Large Bath Caddy for $16.99 from Target. It’s designed for shampoo, so the plastic is waterproof. It attaches to the side of my washing machine using water-resistant adhesive strips. I keep my 8 oz bottles of stain sprays in it. I also keep a bar of Fels-Naptha laundry soap in the caddy. The bar costs $1.48 at Walmart. The medicinal smell reminds me of my grandmother’s house, but it gets grease stains out of anything. Having a waterproof caddy stuck to the machine means I can grab my brush, scrub a collar, and toss the shirt in the drum without taking a step. It’s efficient.

iDesign Laundry Detergent Holder
A dependable everyday pick — iDesign Laundry Detergent Holder pulls in 13 ratings at 4.5 stars. Not flashy, just solid.
13. Finalizing Your Setup with the Best Small Space Laundry Room Organization Ideas

The final step in making a small space functional is fixing the lighting. My laundry closet only had one harsh fluorescent bulb. The flickering light gave me a headache every time I tried to read a clothing tag. Bad lighting makes a cramped room feel like a dungeon. If you want to enjoy your newly organized space, you have to add task lighting under your shelves.
I bought a 3-pack of GE LED Under Cabinet Puck Lights from Walmart for $14.48. They run on AA batteries, so I didn’t have to hire an electrician. I used double-sided tape to stick them under my bottom acrylic shelf. They emit a warm 3000K LED glow. The soft yellow light changes the mood. I can actually see the stains I’m trying to treat. When you combine good lighting with clear jars, vertical shelving, and a folding counter, your utility closet will feel like a high-end workspace. These ideas aren’t just about making things look pretty. They’re about saving you time, saving your back, and preventing you from ruining your clothes.
I hope these tips help you tackle your laundry piles. It took me a few weekends of hard work, bruised knuckles from sanding, and a few disasters with spilled softener, but the result is worth the effort. You don’t need a massive budget to create a functional system. Start small, buy exactly what fits your measurements, and don’t be afraid to throw away that rusty ironing board. If you found these ideas helpful, please pin this article to your home organization boards on Pinterest so you can reference the measurements and prices later!
