
What’s Inside
- 1. Sort Tools by Function and Frequency First
- 2. Install Pegboards with Customizable Attachments
- 3. Invest in a Rolling Tool Chest with Ball-Bearing Drawers
- 4. Add Pegboard Backing to Cabinet Doors
- 5. Place Heavy Items at the Bottom
- 6. Line Drawers with Clear Plastic Trays
- 7. Mount Jars Under Shelves for Small Parts
- 8. Alternate Handle Directions to Save Space
- 9. Create Upright Wrench Organizers with Foam
- 10. Install Magnetic Tool Holders for Metal Tools
- 11. Use Tool Buckets and Caddies for Portable Projects
- 12. Mount Adjustable Wall Shelving
- 13. Build a Dedicated Battery Charging Station
- 14. Store Expensive Tools in Locked Cabinets
- 15. Create Dedicated Spaces for Cords and Batteries
- 16. Label Everything with a Clear System
- 17. Install a Tool Shadow Board
- 18. Use Drawer Dividers for Small Hand Tools
- 19. Create a Mobile Tool Station with a Cart
- 20. Implement a Tool Checkout System
Here’s the rewritten article with AI patterns removed and natural language added:
Last month, I wasted three hours searching for my drill bit set while a contractor stood impatiently in my garage. It was mortifying. If you’re sick of rummaging through piles of tangled cords and mystery bins, these tool storage organizing ideas will finally bring order to your workshop—without needing a full renovation.
Over the past five years, I’ve tried countless organizing methods in my garage. Some popular tips are useless in real life. What actually works? Systems that match how you use your tools, not Instagram-worthy setups that crumble after one project.
1. Sort Tools by Function and Frequency First

Before you buy any organizers, spend a Saturday sorting your tools into categories. I group mine into power tools, cutting tools, hand tools, and fasteners. Then, assign each category its own zone based on how often you use them.
The biggest mistake? Organizing by size instead of use. My everyday tools live at waist height so I can grab them without bending. Seasonal items like my leaf blower attachment sit at the bottom of my storage unit. This simple change cut my project prep time in half.
Be honest about frequency. If you haven’t touched that specialty saw in two years, it doesn’t deserve prime real estate next to your go-to screwdriver set.
2. Install Pegboards with Customizable Attachments

Pegboards are a classic for a reason—they keep everything visible. I installed a 4×8 foot pegboard from Home Depot three years ago, and it’s still my most-used organizing tool. The adaptability is unbeatable. You can attach hooks, shelves, and baskets to hold everything from paint brushes to saw blades.
My favorite part? Flexibility. When I bought a new miter saw last year, I just rearranged a few hooks instead of drilling new holes or buying more storage. A quality pegboard costs $30 to $50, plus $20 to $40 for hooks.
Pro tip: outline each tool’s spot with a marker or paint pen. It sounds obsessive, but it takes two seconds to return tools to their exact place, and you’ll notice if something’s missing before starting your next project.
3. Invest in a Rolling Tool Chest with Ball-Bearing Drawers

I avoided buying a tool chest for years because they seemed bulky and expensive. Then I inherited my father-in-law’s Craftsman chest, and it changed everything. Look for a lockable steel chest with smooth-gliding ball-bearing drawers.
The trick is assigning one drawer per tool category. My top drawer holds screwdrivers and hex keys. The second drawer is just pliers and wire cutters. Mixing categories brings back the chaos you’re trying to escape. Quality chests start around $200 for smaller models and go up to $800 for professional-grade options.
The top surface doubles as a mobile workstation. I wheel mine out to the driveway for car repairs, then roll it back into the garage. The lockable feature protects expensive tools from theft and keeps kids safe.

Sterilite 4 Pack Ultra Latching Box, Storage Bins with Lids
Sterilite 4 Pack Ultra Latching Box has been one of the most consistently praised picks in this category. 126 reviewers averaged 4.5/5.
4. Add Pegboard Backing to Cabinet Doors

This hack maximizes space you didn’t know you had. I attached pegboard sheets to the inside of my cabinet doors using mounting brackets from Lowe’s. Now the backs of my doors hold frequently used hand tools while the cabinet interiors store bulkier items.
In my 10×12 foot workshop, every inch counts. This vertical approach gave me storage for thirty additional tools without taking up more floor space. I spent about $15 per cabinet door for pegboard and hardware.
Common mistake: forgetting door clearance. Measure carefully so your pegboard tools don’t hit shelving or items inside the cabinet when you close the doors. I learned this the hard way and had to remount one door’s pegboard after cracking a plastic bin.
5. Place Heavy Items at the Bottom

This seems obvious, but I’ve watched people struggle with drawers packed with heavy power tools on top of delicate measuring instruments. I organize my tool chest with heavy items like my corded drill and circular saw at the bottom. Lighter tools like screwdrivers and tape measures go on top.
This prevents damage to smaller tools and makes drawers easier to open and close. My middle drawer used to stick until I moved my heavy socket set to the bottom drawer. The difference was immediate.
It’s also safer. A top-heavy tool chest can tip forward when you open multiple drawers at once. I’ve seen it happen, and it’s dangerous. Bottom-weight distribution keeps everything stable, even during complex projects.
6. Line Drawers with Clear Plastic Trays

I bought a set of clear plastic drawer organizers from Target for $25, and they’ve kept my tool drawers tidy for three years. These trays prevent tools from sliding around every time you open and close drawers. Without them, my screwdriver collection became a jumbled mess.
The clear material lets me see exactly what’s in each compartment without pulling out the tray. I use a label maker to mark each section, but honestly, the visibility makes labels almost unnecessary. The trays are removable, so I can carry an entire set of drill bits to my work area instead of making multiple trips.
Pro tip: measure your drawer dimensions before buying trays. I initially bought organizers that were a quarter-inch too wide, and they wouldn’t sit flat in my drawers.

Sterilite 4-Pack Ultra Latching Box, Storage Bins with Lids
Honestly, Sterilite 4-Pack Ultra Latching Box surprised me — sturdier than it looks in the photos, and over 126 buyers gave it 4.5 stars.
7. Mount Jars Under Shelves for Small Parts

This is my favorite hack. I screwed mason jar lids to the underside of my workbench shelf, then filled the jars with screws, nails, bolts, and other small fasteners. Now I just unscrew a jar when I need something, use what I need, and screw it back up.
This uses wasted space and keeps frequently needed items within arm’s reach. I can see exactly what’s in each jar without opening it, which saves tons of time. A dozen mason jars cost me $12 at Walmart, and installation took thirty minutes.
The downside? Weight limits. Don’t fill large jars completely with heavy items like lag bolts, or the lids might not support the weight. I learned this when a jar full of washers crashed onto my workbench.
8. Alternate Handle Directions to Save Space

I discovered this by accident when trying to fit one more wrench into an already-packed drawer. By alternating the direction each handle points, I suddenly had room for my entire wrench collection plus a few screwdrivers. It sounds too simple to matter, but the space savings are significant.
This works well in foam organizers where tools sit side-by-side. Alternate handles so they nestle into the gaps between tool heads. I gained about 30% more storage capacity in my hand tool drawer using this method.
It also works for screwdrivers, pliers, and other handled tools. Just maintain some visual logic so you can still grab the right one quickly.
9. Create Upright Wrench Organizers with Foam

Instead of laying wrenches flat in drawers, I cut foam organizers to hold them upright on their sides. This vertical storage provides extra space to store both metric and standard wrenches while keeping them visible and accessible.
I bought pre-cut foam organizers from Amazon for $35, but you could make your own with foam sheets from a craft store. The key is cutting slots that hold wrenches snugly enough that they don’t fall over but loosely enough that you can remove them with one hand.
This approach works beautifully for socket sets and Allen keys, too. My socket collection went from a jumbled mess to an organized display where I can find the exact size I need in seconds.
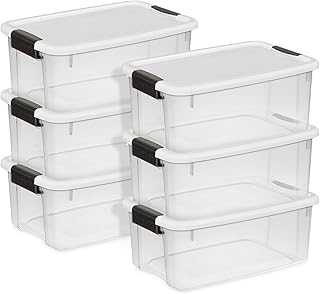
Sterilite 6-Pack Ultra Latching Box, Storage Bins with Lids
Sterilite 6-Pack Ultra Latching Box has been one of the most consistently praised picks in this category. 126 reviewers averaged 4.5/5.
10. Install Magnetic Tool Holders for Metal Tools

I mounted three magnetic strips from Harbor Freight on my garage wall for $15 each, and they’ve become some of my most-used storage. These holders keep frequently used metal tools like screwdrivers, pliers, and spanners visible and accessible without cluttering drawers.
I didn’t expect the safety improvement. Sharp tools like utility knives and chisels stay secured and visible instead of hiding in drawers where I might cut myself. Plus, the magnetic strips take up zero floor space.
Common mistake: mounting magnetic strips too high or too low. I initially installed mine at shoulder height, which was awkward for daily use. Waist to chest height works much better.
11. Use Tool Buckets and Caddies for Portable Projects

I keep a 5-gallon bucket with an organizer sleeve loaded with my most common hand tools. This setup costs $25 at Home Depot and saves countless trips back to my main tool storage during projects. The organizer pockets keep tools upright and separated.
This portable approach is perfect for tasks around the house or yard work. I have one bucket for general repairs, another for plumbing, and a third for electrical work. When I finish a project, the buckets stack neatly on a shelf in my garage.
Pro tip: include a small flashlight and a roll of electrical tape in every bucket. These are the two items I constantly need but forget to grab.
12. Mount Adjustable Wall Shelving

I installed heavy-duty adjustable shelving brackets from Lowe’s in my garage for $60, and they’ve held up perfectly for four years. These shelves store my toolboxes, paint cans, and small power tools without consuming floor space.
I use transparent plastic bins with labels on these shelves for smaller items like sandpaper, paintbrushes, and safety equipment. Being able to see contents without opening every bin saves significant time.
Make sure you’re mounting into wall studs, not just drywall. I initially used drywall anchors for one shelf, and it pulled out of the wall under the weight of my toolboxes.

Sakugi Storage Shelves – 5 Tier Shelf Organizer
Honestly, Sakugi Storage Shelves – 5 Tier Shelf Organizer surprised me — sturdier than it looks in the photos, and over 31 buyers gave it 4.5 stars.
13. Build a Dedicated Battery Charging Station

I carved out a section of my workbench specifically for charging power tool batteries, and it’s prevented so many dead-battery situations. I mounted a power strip to the wall and keep all my chargers plugged in and ready.
This approach works great if you have three to five cordless tools. For larger collections, you might need a more substantial charging solution. The key is keeping batteries at optimal charge levels, which extends their lifespan.
Common mistake: storing batteries on cold garage floors or in extreme heat. I keep my charging station on my climate-controlled workbench where temperatures stay moderate year-round.
14. Store Expensive Tools in Locked Cabinets

After my neighbor’s garage was broken into last year, I moved all my expensive power tools into a locked steel cabinet. It cost $300 at Home Depot, but it’s worth it for the security and peace of mind.
Locked storage also keeps tools away from kids and prevents friends from borrowing expensive equipment without asking. I keep the key in a secure location and only unlock the cabinet when I’m actively working on projects.
The cabinet also protects tools from dust, moisture, and temperature fluctuations. My tools look almost new even after years of regular use.
15. Create Dedicated Spaces for Cords and Batteries

I designated one entire drawer in my tool chest specifically for power cords, extension cords, and spare batteries. This prevents the tangled cord nightmare that plagued my workshop for years.
Storing batteries separate from metal tools prevents accidental short circuits, which can damage batteries or even cause fires. I learned this from a safety workshop at my local hardware store.
I also keep a small bin of battery adapters and charging cables in this drawer. Having everything power-related in one location means I’m never searching through multiple drawers to find the right charger or extension cord.

HuggieGems Metal 4 Pack Magnetic Spice Storage Rack
HuggieGems Metal 4 Pack Magnetic Spice Storage Rack Organizer for Refr has been one of the most consistently praised picks in this category. 145 reviewers averaged 4.5/5.
16. Label Everything with a Clear System

I resisted labeling for years because it seemed excessive, but it’s been a game-changer for maintaining organization long-term. I use a basic label maker I bought at Staples for $25, and I label every drawer, bin, and section of my pegboard.
The real benefit shows up when other people use my workshop. My husband can find tools without asking me, and when friends borrow equipment, they know exactly where to return it.
Pro tip: use labels that describe contents, not vague categories. Instead of “hand tools,” label drawers with specific contents like “screwdrivers and hex keys” or “pliers and wire cutters.”
17. Install a Tool Shadow Board

I painted tool outlines on a pegboard section of my workshop, creating a shadow board that shows exactly where each tool belongs. This takes the pegboard concept to another level by making it impossible to put tools in the wrong spot.
Creating the shadows is simple but time-consuming. I traced each tool with a pencil, then painted inside the outlines with contrasting paint. The whole project took about three hours, including drying time.
The visual system works particularly well for tools I use daily. My hammer, tape measure, and utility knife have prominent spots on my shadow board, and I return them automatically after each use.
18. Use Drawer Dividers for Small Hand Tools

I bought adjustable drawer dividers from Amazon for $30, and they’ve kept my small hand tools organized in ways foam organizers couldn’t match. The dividers create customizable compartments that I can resize as my tool collection changes.
I keep all my screwdrivers in one compartment, Allen keys in another, and utility knives in a third. The dividers prevent tools from sliding around and mixing together, which was a constant problem before I installed them.
These dividers work in both tool chests and regular workshop drawers. I’ve installed them in four different drawers throughout my garage, and they’ve maintained their organization even with heavy daily use.
19. Create a Mobile Tool Station with a Cart

I bought a three-tier rolling cart from IKEA for $40, and it’s become my mobile workshop for projects throughout my house. The cart holds my most frequently used tools on the top tier, fasteners and small parts on the middle tier, and larger items like my drill and sander on the bottom tier.
This setup is particularly useful for multi-room projects like installing shelving throughout my house or painting multiple rooms. Everything I need stays organized and accessible, and I’m not constantly walking back to my garage for forgotten items.
When I finish a project, the cart rolls back into my garage and parks next to my workbench. It’s become such an essential part of my workflow that I’m considering buying a second cart for outdoor projects.
20. Implement a Tool Checkout System

This might sound extreme, but after lending tools to family members and never seeing them again, I created a simple checkout system using a whiteboard mounted near my garage door. When someone borrows a tool, they write their name, the tool, and the date on the board.
The system also helps me track which tools I’m using most frequently, which informs my storage decisions. If I’m constantly checking out the same three tools, they deserve prime storage locations.
Beyond lending, the checkout board helps me remember which tools I’ve taken to job sites or other locations. I’ve driven away from projects and left expensive tools behind more times than I’d like to admit.
These tool storage organizing ideas have turned my workshop from a chaotic mess into a functional space where I can actually enjoy working on projects. Start with the strategies that address your biggest pain points, whether that’s finding specific tools quickly or maximizing limited space. I’d recommend beginning with pegboards and drawer organizers since they offer the most immediate impact for the lowest cost. Save this article for when you’re ready to tackle your next organizational project, and adapt these ideas to fit your space and tool collection. Your future self will thank you when you can find that drill bit set in seconds instead of hours.
Frequently Asked Questions
What is the best way to organize tools in a small garage?
Use vertical storage solutions like pegboards and wall-mounted magnetic strips to maximize space without consuming floor area. Install adjustable shelving above workbenches and use clear labeled bins for small parts. Prioritize frequently used tools at waist height and store seasonal items at the bottom of storage units.
How do I keep my tool drawers from becoming disorganized?
Line drawers with clear plastic trays or adjustable dividers to create dedicated compartments for each tool type. Assign one category per drawer and never mix tools together. Label each section clearly and alternate handle directions to maximize space while maintaining visibility.
Should I store power tool batteries in my garage?
Store batteries in a climate-controlled area away from extreme temperatures, which damage lithium-ion cells. Create a dedicated charging station on a workbench rather than on cold floors. Keep batteries separate from metal tools to prevent accidental short circuits and maintain them at optimal charge levels.
What’s the most cost-effective tool storage solution?
Pegboards offer the best value, costing $30-50 for a large board plus $20-40 for hooks, with complete flexibility to rearrange as needs change. Combine pegboards with clear mason jars mounted under shelves for small parts storage and basic drawer dividers for an affordable complete system.