What’s Inside
- Declutter Ruthlessly Before You Buy Anything
- Embrace Vertical Space With An IKEA Pegboard
- The $40 Rolling Cart Fix For Art Desk Organization
- Categorize And Contain With Clear Stackable Bins
- Stop Drawer Chaos With Customizable Dividers
- Repurpose Acrylic Makeup Organizers For Small Supplies
- Build A Vertical Drying Rack For Wet Canvas Pieces
- Designate A Portable Art Caddy For Daily Essentials
- Label Everything With Tape And Sharpies
- Maximize Under-Desk Space With Wicker Storage
- Protect Your Walls With Clear Plastic Sheeting
- Repurpose Glass Mason Jars From The Grocery Store
- Install Adjustable Shelving For Growing Collections
- Create A Dedicated Zone For Works In Progress
Last Tuesday at Target, I stared at a new $14.99 acrylic paint set with dried crust covering my hands. My home studio was a disaster zone. The sharp, chemical smell of old linseed oil and damp, warped watercolor paper was giving me a headache. I realized my art desk organization was failing me. I’m talking crusty brushes permanently glued to the wood grain, dried-up 2 oz tubes of expensive gouache hiding in dark corners, and stray 0.5mm micron pens rolling off the edge every time I bumped the table. Art desk organization shouldn’t make you want to rip your hair out. Let’s fix this mess. I’ve spent months testing different plastic bins, metal carts, and wall shelves to see what actually works in a real, messy studio. I did this wrong for months before figuring it out. You don’t need a massive budget to create a clean workspace. You just need a solid plan and a few tools. Grab a cup of coffee. Let’s clean off that desk.
1. Declutter Ruthlessly Before You Buy Anything

I’m guilty of hoarding broken supplies. Last month, I found myself holding a rock-hard 4 oz tube of cerulean blue acrylic paint. I tried squeezing it, and the brittle plastic cracked, spilling dried blue dust all over my lap. The first step in organizing your art space is getting rid of the stuff you don’t need. Erika Lancaster, an art studio organization expert, preaches this constantly. Most people get this wrong. They run out and buy expensive storage bins before tossing the trash. Don’t do that. Go through every drawer first. Toss the crusty brushes with stiff, crunchy bristles that scratch your canvas. Throw away the alcohol markers that squeak dryly across your expensive marker paper. I used to hoard empty 16 oz glass salsa jars from Sprouts, thinking I’d need forty water cups. I didn’t. Keep only what works. If you have unopened supplies you won’t use, donate them to a local middle school art program. Once you clear out the garbage, you can see what needs storing. I threw away $45 worth of dried Windsor & Newton 14ml watercolor tubes last week, and the relief was instant. Empty space is the best starting point.
2. Embrace Vertical Space With An IKEA Pegboard

When your flat desk surface is covered in half-finished charcoal sketches and messy palettes, you have to look up. I swear by the IKEA SKÅDIS pegboard system. It costs around $24.99 for the 30″ x 22″ white board, and it cleared off my primary workspace. If you rent and can’t drill holes, you can buy the $6.00 metal SKÅDIS desk clamps. I clamped the board directly to the one-inch thick wooden back lip of my desk. I bought a pack of the $3.00 white metal hooks and hung up my heavy metal fabric scissors. The clanking sound of those scissors hitting the hooks is satisfying. I also use the little translucent plastic SKÅDIS cups to hold my 2 oz craft paint tubes upright. A common mistake is putting heavy, bulky items at the top of the pegboard. I did this once with a heavy tape dispenser. I bumped the desk, and the dispenser fell, smashing my favorite ceramic mixing palette into pieces. Keep the heavy things low. Hang the lighter things, like rolls of 1-inch masking tape, up high. This keeps your most-used tools visible and safe.
3. The $40 Rolling Cart Fix For Art Desk Organization

If you don’t have built-in drawers, you need a mobile rolling cart. Professional home organizer Juliana Meidl of Serenity at Home highlights this as a mandatory item. I agree. I bought the classic IKEA RÅSKOG 3-tier metal cart for $39.99 in matte black. I tried a cheaper, wobbly plastic knockoff from Costco first. That was a mistake. I learned that the hard way. The cheap plastic wheels kept locking up on my area rug. I’d try to pull the cart closer, and it’d jerk forward, nearly spilling an open 8 oz bottle of black India ink onto my carpet. I returned it the next day. The sturdy IKEA version glides smoothly over both thick carpet and hardwood. I keep my heavy 16 oz bottles of liquid pouring medium on the bottom tier so the cart won’t tip over. The middle tier holds my bulky 8.5″ x 11″ sketchbooks. The top tier is for my daily grab-and-go items, like a glass jar of dirty paint water and a fresh roll of paper towels. You can wheel it to your chair when you’re working, then shove it into a closet when company comes over. It’s the ultimate flexible storage piece.

HomePekite Laundry Pods Storage Container
HomePekite Laundry Pods Storage Container punches above its price — 15 buyers rated it 4.5 stars. I would buy it again.
4. Categorize And Contain With Clear Stackable Bins

Opaque storage boxes are where art supplies go to die. If I can’t see the item, I won’t use it. That’s why I swapped my old cardboard shoeboxes for clear, stackable plastic containers. I found a set of IRIS USA modular plastic storage bins at Walmart last week. Specifically, I bought their 3-piece acrylic paint organizer set for $19.99. Each box measures 14.17″ x 5.12″ x 4.33″, which is the perfect height to keep standard 2 oz craft paint bottles standing straight up. Grouping similar items is crucial. I keep all my warm-toned cadmium reds and yellows in one bin, and my cool-toned cobalt blues in another. The hard plastic surface is easy to wipe down with a damp rag when I spill paint. Before I switched to clear bins, I’d spend twenty minutes digging through a dark drawer just to find one tube of titanium white gouache. Now, I can scan my entire storage shelf in seconds. You get immediate visual feedback on your inventory, so you won’t accidentally buy a fourth bottle of burnt sienna. You might also like: 20 Inspiring Garage Organization Ideas That Are Totally Worth It
5. Stop Drawer Chaos With Customizable Dividers

Desk drawers turn into junk drawers if you aren’t fighting the mess. I used to toss my expensive Copic alcohol markers and soft chalk pastels directly into my wide wooden drawer. Every time I opened it, they’d roll around, hit each other, and chip the fragile pastel sticks. It left a chalky residue everywhere. To fix this, I drove to The Container Store and bought a few pieces from “The Home Edit by iDesign.” These clear plastic drawer organizers range from $8.99 for small bins up to $111.92 for a massive starter kit. I bought four of the 3″ x 6″ narrow bins for $9.99 each. They fit perfectly inside my shallow top desk drawer. Now, my 0.5mm black fineliner pens stay in one section, my kneaded erasers sit in another, and my charcoal sticks aren’t rubbing dirt onto my blending stumps. You have to measure the inside depth of your drawers before buying these. I didn’t measure the first time. I proudly bought bins that were half an inch too tall, and my drawer jammed shut for three days. You might also like: 20 Creative DIY Garage Organization Ideas That Changed Everything
6. Repurpose Acrylic Makeup Organizers For Small Supplies

You don’t have to shop in the art aisle to find storage. Some of the best tools are meant for bathroom cosmetics. I use a MelodySusie clear acrylic makeup organizer I bought online for $49.99. It measures 218mm high by 279mm wide by 144mm deep. The top open section has tiny, one-inch square vertical slots designed for lipstick. Guess what fits perfectly in those tiny squares? One-ounce glass jars of fine gold glitter, small dropper bottles of acrylic ink, and tiny metal tubes of super glue. The bottom section features three shallow, sliding drawers that make a satisfying clicking sound when you close them. I cut a thin piece of black craft felt to line the bottom of those drawers. This ensures my expensive sable hair watercolor brushes won’t roll around and damage their delicate tips. Honestly, this organizer changed how I store my smallest items. Skip the cheap, flimsy dollar-store organizers. They scratch easily and look cloudy after a few months. Trust me. You might also like: 15 Clever Kitchen Small Space Ideas That Changed Everything

iDesign Laundry Detergent Holder
iDesign Laundry Detergent Holder has been one of the most consistently praised picks in this category. 13 reviewers averaged 4.5/5.
7. Build A Vertical Drying Rack For Wet Canvas Pieces

Figuring out where to put wet, sticky paintings is the most annoying part of painting at home. I used to lay wet 8″ x 10″ canvas boards all over my living room floor. That was a mistake. My orange tabby cat walked over a wet oil painting and tracked sticky burnt sienna paw prints across my cream rug. You need vertical artwork storage. If you have the budget, the Sax All-Purpose Double-Sided Rack is an incredible piece of equipment. It costs around $129.99 and features 50 individual wire shelves with 1-inch spacing. The shelves are 9″ x 16.5″, which is perfect for drying flat canvas panels up to 11″ x 17″. It takes up a tiny footprint but holds dozens of wet pieces safely. If you’re on a tighter budget, you can buy a basic metal wire shelving unit and use cotton twine to weave vertical dividers between the shelves. Just slide your dry canvas panels in vertically like books on a library shelf. It saves so much horizontal desk space.
8. Designate A Portable Art Caddy For Daily Essentials

Sometimes I don’t want to sit at my desk. Sometimes I want to sit at the kitchen island and sketch while eating a $4.99 box of spicy tuna sushi. That’s why a portable art caddy is a necessity. Professional organizer Tova Weinstock recommends using a handled tote for supplies, and I agree. I use the mDesign Plastic Portable Craft Storage Organizer Caddy. It cost me $14.99. It has a sturdy built-in handle and four separate compartments. I keep my daily essentials packed in it: a sharp pair of 8-inch titanium scissors, two graphite pencils, a kneaded eraser, and a water brush pen. When I want to move to the couch, I grab the handle and take my core supplies with me in one trip. It prevents me from carrying an awkward armful of markers and dropping them. When I’m done drawing, I set the caddy back on the corner of my desk. It’s an instant cleanup trick that requires zero mental effort.
9. Label Everything With Tape And Sharpies

If you don’t label your opaque plastic bins, you’re creating mystery boxes of hidden clutter. I used to think I’d remember that the blue shoebox held my 120-piece Prismacolor set. I didn’t. I’d open five dusty boxes looking for one blending tool. Now, I label everything. You don’t need a $50 electronic label maker. I use a roll of 1-inch blue painter’s tape and a black fine-point Sharpie. The blue tape costs $3.98 at the hardware store, sticks to bins perfectly, and peels off without leaving sticky residue. I rip off a two-inch strip, write “Acrylic Mediums” on it, and slap it on the front of the bin. For a high-tech approach, some artists are using printable QR code stickers. You stick a code on a storage bin, scan it with your phone, and see a full list of the markers inside. I haven’t gone that far yet, but it’s a brilliant concept for managing massive supply hoards.

Rubbermaid Configurations Deluxe Custom Closet Kit 4-8 Ft.
A dependable everyday pick — Rubbermaid Configurations Deluxe Custom Closet Kit 4-8 Ft. Adjustable pulls in 81 ratings at 4.5 stars. Not flashy, just solid.
10. Maximize Under-Desk Space With Wicker Storage

The dark void underneath your desk is prime storage real estate that usually collects dust bunnies and pencil shavings. I was wasting four square feet of floor space down there. You can slide wide stackable bins or low-profile drawers under your desk for bulky items. I bought the Bay Isle Gainey Wicker Underbed Storage basket for $65.00 online. It’s meant to slide under a bed, but it fits perfectly under the right side of my desk. I love the rough, woven texture of the brown wicker compared to all the sterile plastic bins. It’s only 6 inches tall, so it doesn’t hit my shins when I’m sitting down. I use it to store my oversized pads of 18″ x 24″ newsprint and packages of paper towels. Make sure you measure the vertical clearance under your desk chair before buying anything for the floor. I once bought a plastic drawer tower that was two inches too tall, and my knees banged into the hard plastic edge every time I swiveled my chair.
11. Protect Your Walls With Clear Plastic Sheeting

This is a specific tip that messy painters need to hear. If you do any sort of splatter painting or use liquid acrylic inks, your walls are in danger. I ruined the white drywall behind my desk last year with a spray of permanent black India ink. I spent three hours scrubbing the wall with bleach, and the stain never came out. Now, I protect the wall behind my desk with clear plastic sheeting. I buy a 9 ft x 12 ft clear plastic drop cloth from the paint aisle at Walmart for $4.98. I use scissors to cut a section to fit the wall space and tack it up with clear pushpins. It’s transparent, so you barely notice it until you touch it and hear that crinkly plastic sound. When the plastic gets covered in neon pink paint splatters after a few months, I pull it down, throw it in the trash, and staple up a fresh piece. It saves me hours of scrubbing and protects my security deposit.
12. Repurpose Glass Mason Jars From The Grocery Store

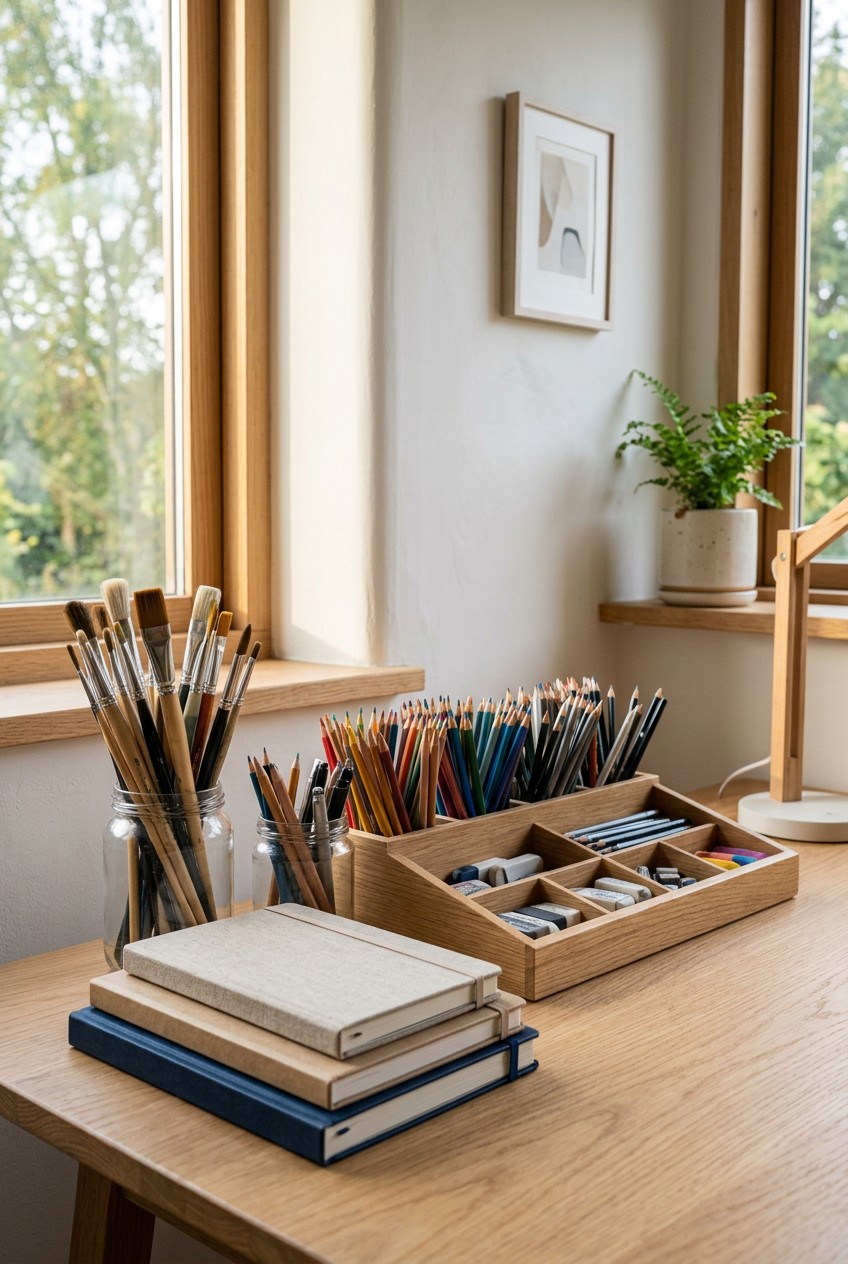
You don’t need to spend a fortune on artisanal ceramic brush holders. My favorite containers for holding top-heavy supplies are recycled glass jars from my kitchen. Every time I finish a 16 oz jar of salsa from Whole Foods, I scrub it out with boiling hot, soapy water until the smell of garlic is gone. I peel off the label using olive oil and baking soda to remove the glue. These thick glass jars are perfectly weighted. A 12-inch watercolor brush won’t tip over a heavy glass jar the way it tips over a lightweight plastic cup. I use the shorter 16 oz jars for colored pencils and the taller 32 oz jars for my long-handled oil painting brushes. I line them up in a row on the back edge of my desk. It looks charming and rustic, and it costs me zero dollars. Stop buying $15 decorative jars from craft stores when your recycling bin is full of them.

AMKUFO 6 Pack-Closet-Organizers-and-Storage
Honestly, AMKUFO 6 Pack-Closet-Organizers-and-Storage surprised me — sturdier than it looks in the photos, and over 52 buyers gave it 4.5 stars.
13. Install Adjustable Shelving For Growing Collections

Your art supply collection will change and expand. Two years ago, I only owned a handful of watercolors. Today, I own gallon jugs of gesso and 32 oz tubs of modeling paste. Static, built-in wooden shelves can’t adapt to that kind of growth. That’s why I invested in an adjustable shelving system. I went with The Container Store’s famous ELFA system. The basic wall-mounted white metal starter kit set me back $140.00, but it was worth every penny. The metal tracks mount to the wall studs, and you can clip the shelf brackets in at any height you want. When I bought a taller plastic storage bin for my 8 oz squeeze bottles, I just popped the bracket out and moved it two inches higher. It took thirty seconds. If you buy cheap, fixed wooden shelves, you’re stuck with whatever spacing you originally chose. Adjustable shelving maximizes your vertical space because you never have wasted, empty dead air sitting above your short supplies.
14. Create A Dedicated Zone For Works In Progress

Leaving unfinished projects scattered across your desk is the fastest way to ruin them. I learned this the hard way. Last Tuesday, I was eating a $3.49 bag of plantain chips from Trader Joe’s at my desk. I accidentally knocked my elbow into a half-finished, soaking wet watercolor painting. My sleeve smeared wet ultramarine blue paint across the sky, destroying three hours of brushwork. I was furious. You must create a dedicated “Works in Progress” (WIP) zone to protect your active art. I bought a large, flat plastic ArtBin box that measures 17″ x 17″ x 3″ for $28.99. Whenever I need to step away from a wet painting or a smudgable charcoal sketch, I slide the paper into this flat bin and snap the lid shut. It protects the surface from dust, cat hair, and my own clumsy elbows. I slide the bin onto the bottom shelf of my desk, out of the way. Keeping your active projects protected is the final step to maintaining true, lasting art desk organization.
I hope these tips help you conquer the chaos in your creative space. I’ve wasted time and money buying the wrong bins and shelves, so I want you to avoid those mistakes. Start with a trash bag, clear out the dried-up junk you won’t use, and then slowly build up your storage with clear bins and sturdy pegboards. You’ll be amazed at how much more you want to sit down and paint when you aren’t fighting a mountain of messy supplies. If you found this breakdown helpful, I’d love it if you pinned this article to your favorite Pinterest board so you can find it later. Let’s keep those desks clean and those paintbrushes wet!
Frequently Asked Questions
How do I organize art supplies in a small space?
You’re going to want to utilize vertical space with wall-mounted pegboards and adjustable shelving. I also highly recommend buying a 3-tier rolling cart that you can easily tuck away in a dark closet when you aren’t actively painting or sketching.
What is the best way to store acrylic paint bottles?
I’m a huge fan of storing standard 2 oz craft paint bottles perfectly upright in clear, stackable plastic bins. This prevents them from leaking and allows you to grab the exact color you need without blindly digging through dark, messy drawers.
How do you store wet canvas paintings?
If you can’t afford a large wire drying rack, I’d suggest using a basic metal shelving unit with tight cotton twine woven between the horizontal shelves. You can slide the wet panels in vertically so they won’t take up flat desk space.
How do I keep dust off my unfinished art projects?
I’ve found that placing fragile works in progress inside a flat, latching plastic project box is the absolute best method. It’s cheap, slides right under your desk, and guarantees your wet watercolor paper won’t get ruined by pet hair or spills.
