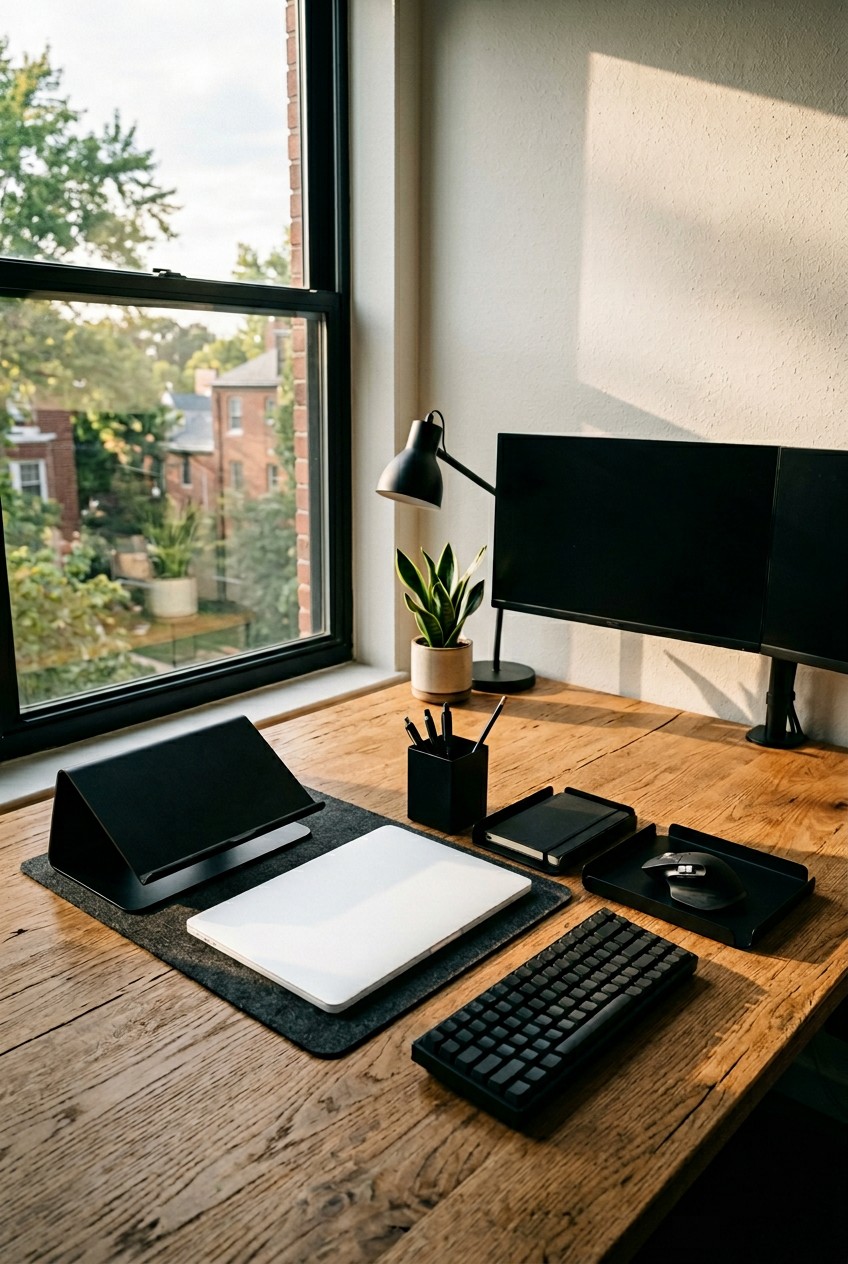
What’s Inside
- Implement the One-Touch Rule for Papers in Your College Desk Organization
- Maximize Vertical Space with a Monitor Riser
- Optimize Drawers with Modular Dividers
- Conquer Cable Clutter with Management Solutions
- Designate Desk Zones for Workflow Efficiency
- Embrace Digital-First Documentation
- Color-Code Your Files and Supplies
- Adopt a Minimalist Aesthetic
- Implement a Daily Reset Routine
- Prioritize Ergonomics with Proper Setup
- Utilize Multi-functional Organizers
- Integrate Aesthetic Organizers for Motivation
- Employ Portable Storage for Flexibility
- Maximize Under-Desk Storage Space
- Keep a Mini Desktop Dust Bin
My first attempt at college desk organization ended with me crying over a spilled 16 oz iced matcha latte that ruined three weeks of biology notes. I’m not exaggerating. Last Tuesday at Whole Foods, I saw a girl buying a massive stack of notebooks, and it instantly brought me back to my sophomore year. My desk surface was a sticky, green disaster zone because I’d piled so many loose papers, tangled cords, and random snack wrappers that my cup literally had nowhere safe to sit. I spent that entire night peeling wet paper apart, and my room smelled like stale milk for days. It was a miserable, expensive lesson in why having a system actually matters.
I tried doing it wrong for months before figuring out what really works. I bought cheap bins that didn’t fit, ignored my messy cables, and let my syllabi stack up until they looked like a leaning tower of trash. You don’t have to live like that. I’m going to walk you through exactly how I fix these disasters now. Skip the overpriced boutique solutions. You can build a highly functional, beautiful workspace without emptying your bank account. Let’s fix your setup so you don’t repeat my matcha catastrophe. Here are my absolute favorite, budget-friendly ways to get your workspace in line.
1. Implement the One-Touch Rule for Papers in Your College Desk Organization

I used to let papers stack up on the corner of my desk until they formed a terrifying mountain. I’d grab a syllabus, glance at it, and toss it on the pile, thinking I’d deal with it later. You won’t. That’s the biggest lie we tell ourselves. The common mistake is treating your desk surface as a waiting room for decisions. It just creates visual stress and makes finding anything impossible.
Now, I strictly follow the one-touch rule. When you touch a physical document, you have to decide its fate right then and there. If it takes less than two minutes to handle, do it immediately. If it needs to be filed, file it. I personally swear by the Target Up&Up 2-Pocket Poly Folders. They cost exactly $2.19 for a 10-pack, and they’re incredibly durable. I keep a 1/2 cup of medium binder clips in a small dish nearby. The second a paper hits my desk, I clip it, punch it, or slide it into the exact folder it belongs in. Learned that the hard way.
Don’t ever set a piece of paper down without a plan. It sounds harsh, but it completely eliminates the paper clutter problem. I tried keeping an “inbox” tray for months, and it just became a graveyard for unread readings. Force yourself to make a decision the moment the paper hits your hand. Your future self will thank you when you aren’t digging through a pile of trash at midnight before a final.
2. Maximize Vertical Space with a Monitor Riser

Looking down at a laptop screen for four hours straight gives you that horrible, sharp pinch at the base of your skull. I spent my entire freshman year hunched over like a gargoyle, and my neck paid the price. You need to raise your screen to eye level. But more importantly, you need to use that vertical space for storage. Leaving the area under your monitor empty is a massive waste of prime real estate.
I bought the Simple Trending 2-Tier Monitor Stand with USB 2.0 and Dual Drawers for exactly $34.99 on Amazon. It holds my heavy 24-inch monitor perfectly. Plus, it has these amazing little sliding drawers underneath. I stash a 2 oz tin of Trader Joe’s peppermint mints, my blue light glasses, and a spare phone charger in there. It completely hides the small clutter that usually floats around the keyboard.
If you prefer a warmer look, the Bambusi Bamboo Monitor Stand Riser runs about $45.00 and looks incredibly high-end. Getting your monitor up off the desk surface frees up so much flat area. You suddenly have room to actually open a textbook without pushing your keyboard off the edge. I’ve noticed a huge trend toward these dual-purpose risers because they instantly make a cramped dorm desk feel twice as deep. Just make sure you measure the base of your monitor first so it doesn’t hang off the edges.
3. Optimize Drawers with Modular Dividers

Opening a desk drawer and hearing that awful plastic scraping sound as pens, loose change, and sticky notes slide into a chaotic mush is enough to ruin my focus. I used to just dump everything into my top drawer. Finding a working pen felt like digging for treasure in a junkyard. You can’t just toss things in a drawer and hope for the best. You need strict boundaries.
I’m a big believer in measuring first. My top drawer is exactly 12 inches wide by 10 inches deep by 3 inches high. Before you buy anything, grab a tape measure. I bought a set of MUJI’s Polypropylene Organiser Boxes. They start at just $1.90 each, and they fit together like Tetris pieces. I use the tiny square ones for a 1/2 cup of silver paperclips and the long rectangular ones for my specific Pilot G2 pens.
If you want a cheaper bulk option, the Amazon Basics Plastic Rectangular Desk Organizers are around $6.00 for a small tray. The trick is to fill the entire drawer so the organizers don’t slide around when you open it. If you have gaps, stick a 1-inch ball of mounting putty under the corners of the trays to lock them down. Honestly, this changed how I work. When every single highlighter and thumb drive has a designated, walled-off home, your brain doesn’t have to work as hard to find them.

3-Tier Hanging Laundry Basket Organizer:Foldable Wire Shelf
Honestly, 3-Tier Hanging Laundry Basket Organizer:Foldable Wire Shelf Laundry Ro surprised me — sturdier than it looks in the photos, and over 518 buyers gave it 4.5 stars.
4. Conquer Cable Clutter with Management Solutions

I absolutely hate the look of black cords dangling like ugly spiderwebs behind a desk. It’s visually loud, and it gathers massive clumps of gray dust bunnies. I used to just kick the cords under the desk, which meant I was constantly unplugging my lamp with my foot by accident during Zoom calls. It was embarrassing and totally avoidable.
You have to get the cords off the floor. I mount a basic power strip underneath the desk surface using a pack of heavy-duty Command Strips. You can get a 4-pack for about $10.49 at Target. Just stick the power strip upside down right to the bottom of the desk. Suddenly, all those heavy plugs are hidden from view. Then, I use cheap velcro cable ties to bundle the slack together.
Most people get this wrong by unplugging things and then losing the cord behind the desk. To fix this, I use 1/4 inch strips of colored washi tape to label the ends of my chargers. Red is for my laptop, blue is for my phone, green is for the desk lamp. I also clip a standard binder clip to the back edge of my desk and thread the charging cables through the metal loops. It stops them from falling on the floor when I unplug my phone. It costs literally zero dollars if you already have binder clips, and it works flawlessly.
5. Designate Desk Zones for Workflow Efficiency

I used to keep my heavy tape dispenser and my stapler right next to my mouse. Why? I used them maybe once a month. They were just blocking my hand and making me feel cramped. I’ve learned from professional organizers that you have to divide your desk into strict physical zones based on how often you actually touch things. You might also like: 15 Cozy Room Cleaning Tips Organizing Ideas to Steal Right Now
The Primary Zone is the space directly in front of you. This should be completely empty except for your keyboard, your mouse, and whatever 8×11 inch notebook you’re currently writing in. Nothing else belongs here. The Secondary Zone is within arm’s reach. This is where I keep my pen cup and my daily planner. The Reference Zone is further away, usually the back corners of the desk. This is for things you need, but don’t touch constantly. You might also like: 15 Stunning Home Storage Ideas to Transform Your Space
I keep a heavy Poppin Desktop Tray (around $18.00) in the reference zone for my textbooks. If you put reference items in your primary zone, you’re constantly shuffling them around to make room. I tried working without zones for a long time, and I constantly felt like my desk was shrinking. Once you map out the zones, you realize you actually have plenty of space. You just have to stop crowding your own hands. Be ruthless about moving things to the outer edges if you aren’t actively holding them. You might also like: 20 Cozy Aesthetic Organizing Ideas to Inspire Your Next Project
6. Embrace Digital-First Documentation

Paper smells dusty after a while, especially cheap printer paper. I used to keep every single handout, syllabus, and graded quiz in a massive accordion folder. By midterms, my desk looked like a recycling bin, and I couldn’t find anything anyway. I finally realized that keeping physical paper is a massive waste of space.
Now I’m completely ruthless about digital documentation. I use the free Adobe Scan app on my phone. The second I get a physical piece of paper, I flatten it out, snap a photo, and save it as a PDF. I immediately upload it to a specific Google Drive folder for that class. Then, unless it’s a legal document or something I absolutely have to turn back in, I throw the physical paper straight into my Costco Kirkland Signature 13-gallon trash bag (they are $19.99 for a box of 200, and they never rip).
This digital-first mindset is incredibly freeing. You don’t need a bulky filing cabinet if all your notes live in the cloud. A lot of people are scared to throw away physical notes, but I promise you won’t miss them. If you need to study, you can pull them up on an iPad or your laptop. It clears off your desk surface instantly and makes your backpack about ten pounds lighter. Stop hoarding paper. It’s ruining your workspace.

iDesign Laundry Detergent Holder
iDesign Laundry Detergent Holder has been one of the most consistently praised picks in this category. 13 reviewers averaged 4.5/5.
7. Color-Code Your Files and Supplies

Visual recognition is so much faster than reading tiny labels. When I’m stressed and running late for class, I don’t have time to squint at manila folders trying to find my chemistry lab report. I used to just throw everything into identical black binders, and I was constantly grabbing the wrong one. It was a stupid, avoidable mistake.
I started using a strict color-coding system, and it changed my life. I use Pendaflex Color-Coded Hanging File Folders. They cost about $15.29 for a 25-pack. Red is strictly for urgent things and math. Blue is for science. Green is for finances and lease documents. I even color-code my digital folders on my desktop to match the physical folders perfectly. Your brain processes color instantly, so you know exactly where to reach without thinking.
I took it a step further and bought a pack of Sharpie S-Gel pens in assorted colors ($12.49 for a 4-pack) at Kroger last month. I write my planner entries in the color that matches the class. It sounds a little intense, but it stops my brain from panicking when I need to find something fast. When your desk is visually organized by color, it looks intentional and clean, rather than like a random explosion of office supplies.
8. Adopt a Minimalist Aesthetic

You don’t need seven different decorative candles and a row of funko pops on your desk. I tried the maximalist thing my freshman year because I wanted my desk to look cute and cozy. It backfired completely. The visual noise was exhausting. Every time I sat down to write an essay, I felt claustrophobic and distracted by all the knick-knacks.
Productivity experts always say that visual clutter leads to mental clutter, and they’re completely right. I cleared off everything. I mean everything. I wiped the desk down until it was bare. Now, I only keep the absolute essentials on the surface. I have my monitor, my keyboard, and a sleek White Poppin Pencil Cup ($11.00) that holds exactly three pens. I also keep a single 4 oz glass jar of mounting putty in the corner for hanging up quick notes.
That’s it. It feels so clean and cold in the best possible way. When there’s nothing on your desk to distract you, you actually have to do your work. Store everything else in your drawers or a rolling cart. The minimalist aesthetic isn’t just about looking trendy on social media. It’s a functional defense mechanism against procrastination. If you give yourself a blank slate, your brain can actually focus on the screen in front of you.
9. Implement a Daily Reset Routine

If you leave your desk a total mess at 2 AM after a cram session, sitting down the next morning feels like a punishment. I used to wake up, look at the scattered highlighters and half-empty coffee mugs, and immediately want to go back to sleep. You’re setting yourself up for failure if you don’t close out your workspace properly.
I force myself to do a strict five-minute reset routine every single night, no exceptions. I put away the pens, stack the reference books, and take any trash out to the kitchen. Then, I wipe the entire surface down with a Clorox Disinfecting Wipe. I buy the 75-count tubs for $6.49 at Walmart. The smell of that fake lemon scent means the workday is officially over. It’s a psychological trigger.
This routine takes almost no time, but it pays off massively the next day. When you sit down at a clean, fresh desk in the morning, you feel in control. It stops the clutter from accumulating into an unmanageable disaster by the end of the week. Don’t skip this step. Even if you’re exhausted, take the five minutes to put your desk back to baseline. Your morning self will be so incredibly grateful.

4 Pack Laundry Pods Container
A dependable everyday pick — 4 Pack Laundry Pods Container pulls in 473 ratings at 4.5 stars. Not flashy, just solid.
10. Prioritize Ergonomics with Proper Setup

I spent my entire freshman year hunched over a tiny laptop screen while sitting on a cheap wooden dining chair. My lower back throbbed constantly, and my wrists ached. You can’t do good work if you’re in physical pain. Ergonomics isn’t just a corporate buzzword. It’s essential for surviving college without destroying your posture.
Your screen needs to be about 17 to 20 inches away from your face, and the top of the monitor should be at eye level. If you’re working strictly from a laptop, you absolutely need a stand. I use the Amazon Basics Ventilated Laptop Stand. It’s literally $9.34, and it’s made of a cold, sturdy metal mesh that keeps the laptop from overheating. You have to pair it with an external wireless keyboard and mouse, though. Don’t try to type at an angle on a raised laptop. That’ll ruin your wrists.
I also invested in a decent lumbar support pillow for my chair. You don’t need a thousand-dollar Herman Miller chair, but you do need to support the natural curve of your spine. Once I fixed my setup, I could study for three hours without feeling like I’d been hit by a truck. Take the time to measure your screen distance and adjust your chair height. It makes a massive difference in your daily stamina.
11. Utilize Multi-functional Organizers

Space is incredibly tight in dorms and college apartments. You really can’t afford to have single-use items taking up precious surface area. I used to have a massive desk lamp, a separate pencil cup, a phone stand, and a clock all fighting for space on a tiny 36-inch desk. It was ridiculous.
I’m obsessed with things that do two or three jobs at once. For example, I bought a MOOSOO 19.5-inch Desk Lamp with an Organizer base for $35.99. It provides a really bright, adjustable LED light, but the base is actually a sturdy cup. I keep my dry erase markers and a 2 oz bottle of Purell hand sanitizer right in the lamp base. It also has a built-in USB port in the back, so I don’t need a separate charging block on my desk.
Combining your lighting, storage, and charging into one footprint saves about four square inches of desk space. That sounds small, but it’s huge when your desk is the size of a postage stamp. Look for monitor stands with drawers, lamps with cups, or mousepads that have wireless charging built in. The more functions you can stack vertically, the more breathing room you have on the desk itself.
12. Integrate Aesthetic Organizers for Motivation

Ugly, cracked plastic bins make me sad. If your workspace looks depressing, you won’t want to study there. I used to buy the cheapest, neon-colored plastic organizers from the dollar store, and my desk looked like a kindergarten classroom. I hated sitting there, so I always ended up doing my homework in bed, which is terrible for your sleep hygiene.
I saved up and bought the MUJI MDF Wooden Storage 1 Drawer for $39.00. Yes, it’s a bit of a splurge, but the smooth, light wood texture instantly made my desk look like a curated Pinterest board. It hides my messy supplies, but the outside looks incredibly chic. I also grabbed a tiny faux succulent from Sprouts for $4.99 to put on top of it. Having a space that actually looks pretty is a massive motivator to keep it clean.
You have to figure out your personal aesthetic. If you like the dark academia vibe, look for rich wooden organizers or brass accents. If you like modern minimalism, stick to clear acrylic or matte white. When your desk feels like a reflection of your style rather than a sterile holding cell, you’ll naturally want to spend more time there. Don’t underestimate the power of a good-looking workspace.

AMKUFO 6 Pack-Closet-Organizers-and-Storage
AMKUFO 6 Pack-Closet-Organizers-and-Storage punches above its price — 52 buyers rated it 4.5 stars. I would buy it again.
13. Employ Portable Storage for Flexibility

Sometimes you get completely sick of staring at the same wall and need a change of scenery. I hate feeling chained to my desk. But moving to the living room used to mean dropping armfuls of textbooks and losing my favorite pens in the couch cushions. I needed a way to make my study setup mobile without making a mess.
I use a white IKEA RÅSKOG utility cart ($39.99) parked right next to my desk. It acts as an extension of my desk storage. The top tier holds my current textbooks and an IKEA RÅVAROR storage box filled with my active supplies. The bottom tier holds a 16 oz bag of whole bean coffee and some snacks. If I want to move to the kitchen table or the couch, I just grab the handle and roll the entire cart with me.
It has completely changed how I manage my study materials. I never have to pack a bag just to move to the next room. Portable storage gives you the flexibility to change your environment when you hit a wall mentally. Plus, when you’re done, you just roll it back to the desk. It keeps the clutter off your main surface while keeping everything instantly accessible.
14. Maximize Under-Desk Storage Space

Most cheap college desks or apartment-provided tables don’t have built-in drawers. It’s infuriating. I used to stack cardboard boxes under my desk to hold my extra supplies, which meant I was constantly kicking them with my shins. It looked terrible, and I had zero legroom. You have to utilize the space under your desk correctly, or it just becomes a junk pile.
I finally decided to invest in a proper solution and bought a Poppin 3-Drawer Locking Stow Filing Cabinet from The Container Store. It costs $199.99, which is definitely an investment, but it’s built like a tank. It’s exactly 24 inches tall, so it slides perfectly underneath almost any standard desk without hitting your knees. The metal is super durable, and the wheels lock in place.
I use the deep bottom drawer to hide all my ugly spiral notebooks and a 12 oz bag of emergency trail mix. The top drawers hold my extra cables and stationary. If you can’t afford a metal cabinet, look for slim rolling plastic carts that fit the exact height clearance of your desk. Just make sure you measure the height before you buy anything. Getting your bulky items off the desk and safely tucked underneath is the ultimate secret to a clean surface.
15. Keep a Mini Desktop Dust Bin

I used to leave gum wrappers, tiny scraps of paper, and broken pencil lead on my desk because I was simply too lazy to walk across the room to the main trash can. It’s a terrible habit, but I know I’m not the only one who does it. Those tiny pieces of trash accumulate quickly, making the whole desk look gross and neglected.
I fixed this by buying the MUJI Mini Desktop Dust Bin for $7.90. It is tiny, maybe the size of a large coffee mug, and it has a little swinging lid. It sits right in the back corner of my desk, almost out of sight. I use it strictly for dry, tiny trash. Eraser shavings, pen caps that snapped, and sticky note backings go straight in there. Took me years to figure out that trick.
It’s such a tiny change, but it makes a massive difference in my daily maintenance. I don’t have to break my focus to throw away a piece of tape. I just drop it in the mini bin. I empty it into my main kitchen trash once a week. Removing the friction of walking across the room means I actually keep my desk clean in real-time. It’s honestly one of the best eight dollars I’ve ever spent on my workspace.
Honestly, fixing your desk setup doesn’t require a massive budget or a professional decorator. It just takes a few smart systems and the discipline to stick to them. I highly recommend starting with the cable management and the one-touch paper rule, as those make the biggest visual difference immediately. If you found these tips helpful, definitely save or pin this article so you can reference the exact product dimensions next time you’re standing in the aisle at Target trying to guess what fits!

Rubbermaid Configurations Deluxe Custom Closet Kit 4-8 Ft.
If you want something that just works, Rubbermaid Configurations Deluxe Custom Closet Kit 4-8 Ft. Adjustable is a safe bet (81 reviews, 4.5 stars).
Frequently Asked Questions
How do I organize a college desk with no drawers?
Use a monitor riser with built-in shelves to add vertical storage. Additionally, invest in a slim, rolling utility cart or a 24-inch tall filing cabinet that slides directly under the desk to hold bulky supplies.
What is the best way to hide desk cables?
Mount a power strip upside down under your desk using heavy-duty Command Strips. Bundle the slack with velcro ties, and use colored washi tape to label the ends of your chargers for quick identification.
How can I keep paper clutter off my desk?
Adopt the one-touch rule: file, action, or toss papers immediately. Better yet, use a scanning app on your phone to digitize syllabi and notes, then recycle the physical copies to save space.
What are desk zones and why do they matter?
Desk zones divide your workspace by usage. The primary zone holds only your keyboard and current notebook. The secondary zone holds daily items like pens, keeping your immediate workspace clear of distractions.
