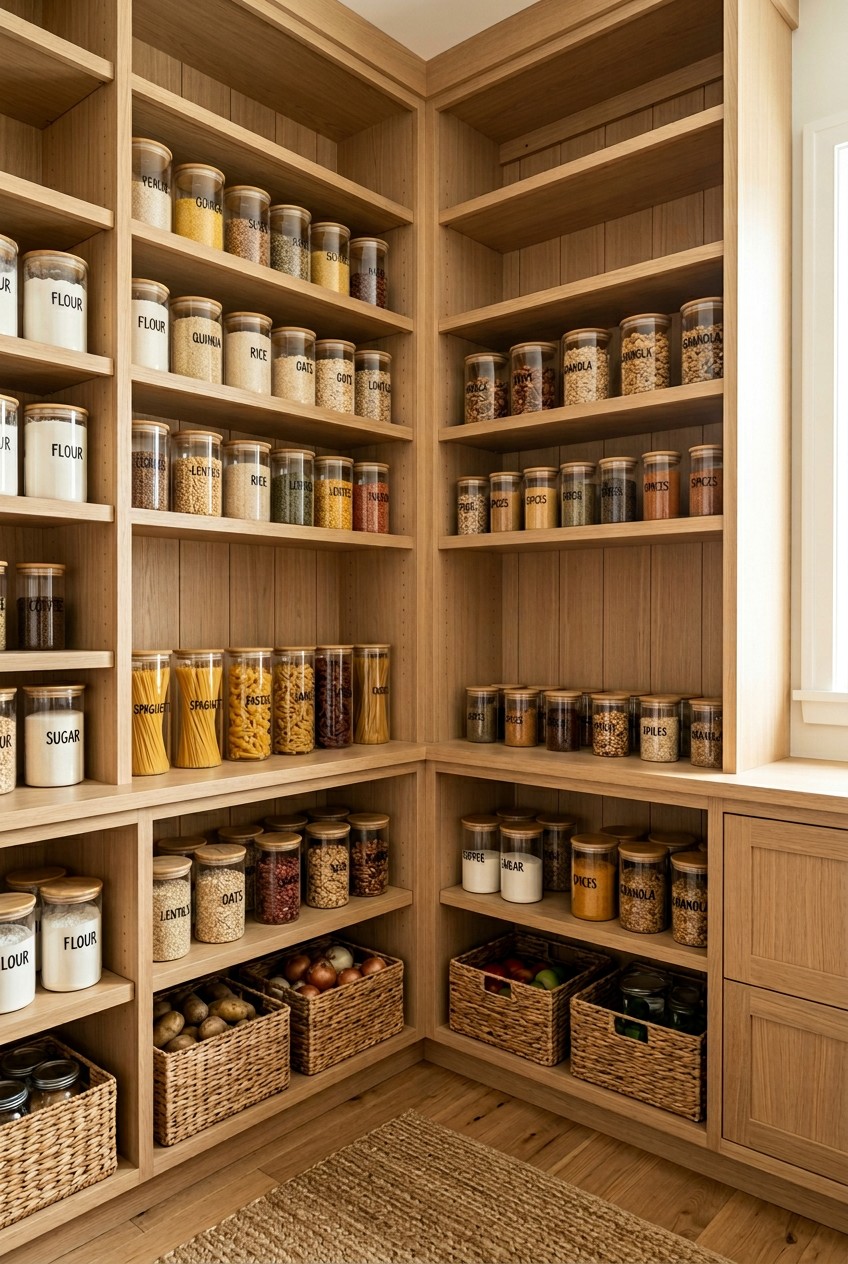
What’s Inside
- Embrace D-Shaped Lazy Susans for Deep Corners
- Utilize Clear, Airtight Containers for Dry Goods
- Implement Zone-Based Corner Pantry Organization
- Install Under-Shelf Lighting for Enhanced Visibility
- Prioritize Shallower Shelving or Pull-Out Solutions
- Maximize Vertical Space with Shelf Risers and Stackable Bins
- Label Everything Clearly and Consistently
- Utilize the Back of the Pantry Door for Extra Storage
- Store Small Appliances on Rolling Plant Stands
- Use Cardboard Magazine Holders for Awkward Items
- Create a Grab-and-Go Station for Busy Mornings
- Consider a Hosting Section for Entertaining Essentials
- Integrate Pull-Out Spice Racks or Tiered Organizers
- Measure Your Space Precisely Before Buying Organizers
Last Tuesday at Whole Foods, I bought three 16 oz jars of creamy almond butter because I was sure I was out. I got home, shoved my arm deep into the dark, terrifying abyss of my corner cabinet, and immediately knocked over a sticky, half-open 12 oz jar of blackstrap molasses. It spilled all over four other hidden almond butters I didn’t know I owned. The smell of sulfur and old, dusty peanuts was awful. My fingers were coated in thick brown syrup. That sticky, frustrating disaster forced me to finally figure out my storage situation. I learned that the hard way. If you’re dealing with a deep, dark space where good groceries go to die, I’ve got you covered. Mastering corner pantry organization isn’t just about making things look pretty. It’s about knowing what food you own so you don’t waste money.
Most people get this wrong by treating corners like regular flat shelves. You can’t just shove boxes in there and hope for the best. Over the last three years of organizing kitchens professionally, I’ve made every expensive mistake possible. I bought the wrong bins. I measured incorrectly. I ignored the lighting. Today, I’m sharing the exact products, measurements, and systems that work for awkward corners. Grab a cup of coffee. Let’s fix that messy pantry right now.
1. Embrace D-Shaped Lazy Susans for Deep Corners

Let’s start with the absolute worst part of any corner cabinet: the deep, unreachable back. I tried this wrong for months before figuring it out. I originally bought a standard round turntable for my deepest shelf. It left massive gaps on the sides, and I ended up dropping a 16 oz bag of chia seeds right down the back. Sweeping up thousands of tiny seeds from the floor was a nightmare. You need a D-shaped or kidney-shaped lazy Susan. These are designed to follow the natural curve of a corner cabinet.
I swear by the Rev-A-Shelf Two-Tier Lazy Susan. You can get the 28-inch polymer version for $89.99. The heavy-duty plastic feels sturdy, not flimsy. It rotates 360 degrees, even when loaded with heavy 28 oz cans of crushed tomatoes. Chef and home design expert Norah Clark recommends these two-tiered systems for maximizing dead space. When you spin it, the flat side of the “D” aligns flush with your cabinet doors so they close perfectly. The installation takes about 20 minutes with a drill. Just make sure you measure your door opening first. I once bought a 32-inch version that physically wouldn’t fit through my pantry door frame. That was a frustrating return trip to the hardware store.
2. Utilize Clear, Airtight Containers for Dry Goods

Two years ago, I opened a 5 lb paper bag of flour I bought at Kroger, only to find it crawling with tiny pantry moths. The powdery, web-filled mess made my skin crawl. I had to throw away $60 worth of baking supplies. That gross experience taught me to immediately decant all dry goods into clear, airtight containers. It’s the only way to keep food fresh and see your inventory.
I recommend the OXO Good Grips POP Containers. The 4.4 qt size is $22.99 and perfectly holds a standard 5 lb bag of flour or sugar. The satisfying pop sound of the silicone seal guarantees no bugs are getting inside. If you’re on a tighter budget, The Home Edit Pantry Canisters at Walmart range from $13.99 to $26.99 and work well. Professional organizer Brenda Scott preaches about clear stackable bins for maintaining order. When you use opaque bins, you forget what you own. You end up buying a fourth box of penne pasta because you couldn’t see the other three. Plus, getting rid of bulky, brightly colored cardboard boxes makes your corner pantry look twice as large. Skip the fat-free stuff, by the way. It tastes like wet cardboard. Stick to the real snacks and store them properly.
3. Implement Zone-Based Corner Pantry Organization

If you just throw items onto shelves randomly, your corner pantry organization will fail within a week. You need to implement strict, zone-based storage. This just means grouping items by how you use them, rather than what they are. I used to store all my 16 oz boxes of pasta next to my 12 oz boxes of cereal because they were both in boxes. It made zero sense when I was trying to cook dinner quickly.
Now, I create specific functional zones. My breakfast zone sits on the easiest-to-reach middle shelf. It holds a 12 oz bag of Trader Joe’s French Roast coffee, a 16 oz container of rolled oats, and a 12 oz bottle of maple syrup. Everything I need at 6 AM is in one spot. I use large acrylic bins to separate these zones. The mDesign Plastic Storage Bins cost $24.99 for a set of two. They have built-in handles and thick, crystal-clear walls. Creating a baking zone on a higher shelf is another great idea. Put your 12 oz bags of chocolate chips, baking powder, and 4 oz bottles of vanilla extract all in one basket. When you’re ready to make cookies, you just pull out the entire baking bin. It saves you from digging through the dark corners looking for a tiny 2 oz jar of nutmeg.

3-Tier Hanging Laundry Basket Organizer:Foldable Wire Shelf
Honestly, 3-Tier Hanging Laundry Basket Organizer:Foldable Wire Shelf Laundry Ro surprised me — sturdier than it looks in the photos, and over 518 buyers gave it 4.5 stars.
4. Install Under-Shelf Lighting for Enhanced Visibility

Poor lighting is the number one reason corner pantries turn into black holes. The overhead kitchen lights never reach the back corners of those deep shelves. For years, I used my iPhone flashlight while holding a recipe in my other hand just to find a 4 oz jar of capers. It was ridiculous. You don’t need an expensive electrician to fix this. Battery-operated, stick-on motion-sensor LED lights are the answer.
I bought the Brilliant Evolution Wireless LED Puck Lights. A 6-pack costs $29.99 on Amazon. They emit a warm white glow that makes the space look custom-built. The motion sensor feature is crucial. The second I open my pantry door, the dark corners light up automatically. I can see the expiration dates on my 15 oz cans of soup. Here is a massive warning: do not buy the cheapest $10 lights you find. I made that mistake. The cheap adhesive backing melted in the summer heat, and the heavy plastic lights crashed down onto my glass jars of marinara sauce. It sounded like a bomb went off. Spend the extra twenty dollars for quality lights with strong 3M adhesive tape. Your eyes will thank you. You might also like: 20 Charming Aesthetic Closet Organization Ideas You Need to See
5. Prioritize Shallower Shelving or Pull-Out Solutions

Most builder-grade pantries come with shelves that are 24 inches deep. This is a massive structural mistake for corners. Anything pushed past the 12-inch mark disappears forever. I once found a 32 oz box of chicken broth from 2018 hiding in the back corner of my old apartment pantry. It was covered in a thick layer of sticky dust. If you’re building or renovating, demand shallower shelves. A 14-inch depth is the sweet spot. It gives you plenty of room for a 10 lb bag of potatoes without creating a black hole behind it. You might also like: 15 Gorgeous Hacks Home Organization to Inspire Your Next Project
If you’re stuck with existing deep shelves and can’t rip them out, you need to install pull-out drawers. I love ShelfGenie’s Glide-Out Shelves. They are custom-built, so they usually cost around $150 per shelf, but the investment is worth it. The heavy-duty metal glides pull the entire back of the shelf out into the light. You can easily reach a 16 oz jar of peanut butter that was hiding in the back. If custom drawers aren’t in the budget, buy long, deep plastic bins that act like drawers. You just grab the front handle and slide the whole bin forward. It’s a quick fix that stops food waste instantly. You might also like: 15 Inspiring Small Space Laundry Room Ideas to Steal Right Now
6. Maximize Vertical Space with Shelf Risers and Stackable Bins

Look at your pantry right now. I bet you have at least eight inches of empty air hovering above your canned goods. That empty vertical space is wasted storage potential. I used to stack my 15 oz cans of black beans from Sprouts directly on top of each other. Every time I tried to grab the bottom can, the whole tower would collapse with a loud, metallic crash that scared my dog. No exaggeration.
You need shelf risers to properly use that height. The Home Edit’s 3-Tier Shelf costs $32.99 and is made of gorgeous, thick acrylic. It creates stadium seating for your cans and jars. You can read the labels on the back row without moving the front row. For bulkier items, you need stackable bins. The mDesign Plastic Wide Stackable Kitchen Storage Organizers are fantastic. A 4-pack runs $91.99. I use these for my 16 oz bags of dried lentils and 12 oz bags of quinoa. The clear plastic lets me see exactly how much grain I have left. The little feet on the bottom of the bins lock into the lid of the bin below it, so they won’t slide around or tip over. This simple swap doubles your shelf capacity.

Rubbermaid Configurations Deluxe Custom Closet Kit 4-8 Ft.
Rubbermaid Configurations Deluxe Custom Closet Kit 4-8 Ft. Adjustable punches above its price — 81 buyers rated it 4.5 stars. I would buy it again.
7. Label Everything Clearly and Consistently

Labels aren’t just for aesthetics; they are a functional necessity. Last Thanksgiving, I was rushing to finish a pie crust. I grabbed an unlabelled glass jar filled with white powder, assuming it was my 1/2 cup of powdered sugar. It was actually baking soda. The pie tasted like salty soap, and I had to throw the whole thing in the trash. I cried out of pure frustration. After that disaster, I labeled absolutely everything.
Trending for 2026 is a move away from messy chalk markers toward clean, uniform printed labels. I bought the Talented Kitchen Pantry Labels. You get 157 pre-printed pieces for $14.99. The matte black vinyl texture looks sharp against clear plastic containers. If you want custom text, invest in a Brother P-touch Cube label maker. It costs $59.99 and connects to your phone via Bluetooth. You can print labels for specific, weird items like “3 oz dried ghost peppers” in seconds. Make sure you apply the labels at the same height on every container. I use a ruler to place my labels exactly two inches from the bottom of the bin. This creates a visually calm, organized space.
8. Utilize the Back of the Pantry Door for Extra Storage

The back of your pantry door is a massive sheet of unused real estate. Leaving it blank is a missed opportunity. I used to store my 2 oz spice packets and small boxes of aluminum foil on my main corner shelves. They constantly fell over and created visual clutter. I tried hanging a cheap fabric over-the-door shoe organizer first. That was a terrible idea. The flimsy fabric ripped after three weeks, and heavy bottles of hot sauce crashed to the floor.
You need a rigid, metal wire rack system. A heavy-duty over-the-door wire rack organizer usually costs around $35.99 at Target or a local hardware store. It hooks securely over the top of the door and screws into the wood at the bottom so it won’t swing and bang against the frame. I use the shallow wire baskets to hold all my 75 sq ft boxes of parchment paper, 1 oz packets of taco seasoning, and 8 oz bottles of vanilla extract. Moving all these tiny, annoying items to the door frees up an incredible amount of space on your main shelves for bulky appliances and large food bins.
9. Store Small Appliances on Rolling Plant Stands

Corner pantries are great for storing bulky small appliances, but actually getting them out is a physical nightmare. My 25 lb cast-iron stand mixer used to sit in the bottom back corner of my pantry. Every time I wanted to bake, I had to get on my hands and knees and drag that heavy metal beast across the painted wood shelf. It left deep, ugly scratches.
A few months ago, I discovered the weirdest, most effective hack. I put my heavy appliances on rolling plant stands. I bought a DeVault Enterprises 12-inch Plant Stand for $14.99 on Amazon. It’s a heavy-duty plastic disc with four smooth caster wheels originally meant for heavy ceramic flower pots. I set my stand mixer on it, and now I can pull it out of the deep corner with one finger. The wheels glide smoothly over the shelf surface without scratching anything. I bought three more for my food processor, my heavy glass blender, and my 6 qt slow cooker. It removes the physical strain of retrieving heavy items from awkward, deep spaces. Just make sure the plant stand has a weight capacity of at least 50 lbs.

HomePekite Laundry Pods Storage Container
HomePekite Laundry Pods Storage Container punches above its price — 15 buyers rated it 4.5 stars. I would buy it again.
10. Use Cardboard Magazine Holders for Awkward Items

Long, skinny boxes are the enemy of a tidy pantry. Boxes of aluminum foil, plastic wrap, and gallon-sized ziplock bags simply refuse to stack nicely. They slide around, fall off the shelf, and unroll into a tangled mess. I used to keep them in a messy pile until a box of heavy-duty foil slid off a high shelf and hit me right on the bridge of my nose. It hurt. Trust me on this.
To fix this, I started repurposing standard cardboard magazine holders. You can buy a 6-pack of basic white cardboard magazine holders for $14.99 online, or grab the IKEA Tjena magazine files for $4.99 a pair. You stand the magazine holder upright and slide the long boxes in vertically. One standard holder fits three 75 sq ft boxes of foil or parchment paper. This keeps them tightly contained and takes up a fraction of the shelf space. I also use these sturdy holders to store my awkward plastic cutting boards and floppy silicone baking mats. Standing things up vertically is always more efficient than laying them flat. You can even wrap the cardboard holders in contact paper to match your pantry decor.
11. Create a Grab-and-Go Station for Busy Mornings

If you have kids, or if you’re just constantly rushing out the door, you need a dedicated grab-and-go station. Before I set this up, my kids would tear apart the entire corner pantry looking for after-school snacks. They would leave a trail of crushed crackers and open chip bags in their wake. Shira Gill, an organizing expert, warns against the dreaded snack avalanche.
To stop the chaos, I cleared off the most accessible shelf right at waist height. I bought three large, clear Brightroom bins from Target for $12.00 each. (If you prefer Walmart, the Mainstays clear bins are $9.98 and work just as well). I unbox everything immediately. I dump 1 oz fruit leathers into one bin, 1.5 oz Costco granola bars into the second, and small 1 oz bags of pretzels into the third. Now, everyone knows exactly where the approved snacks are. They don’t have to dig through the dark corners or move heavy jars to find food. This system saves me at least ten minutes of frantic searching every single morning. It also makes it obvious when we’re running low on groceries, so I can update my shopping list instantly.
12. Consider a Hosting Section for Entertaining Essentials

One major trend I’m seeing for 2026 is the dedicated hosting section inside the pantry. We all have those specific serving platters, fancy napkins, and specialty glasses that we only use three times a year. Storing them in your everyday kitchen cabinets takes up valuable real estate. Last Christmas, I had guests standing in my kitchen while I frantically dug through a bottom drawer trying to find my wooden cheese board. It was embarrassing.
Now, I use the very highest shelf in my corner pantry exclusively for entertaining gear. I use large, beautiful baskets to hide the visual clutter of random party supplies. The mDesign Woven Hyacinth Kitchen Storage Organizer Baskets are stunning. An 8-pack costs $129.99. They have a slightly rough, natural texture and smell faintly like dried sweetgrass. I keep my 16 oz crystal wine glasses safely wrapped in one basket, and my heavy ceramic serving bowls in another. Because these items aren’t used daily, placing them in the hardest-to-reach top corner makes sense. It frees up your prime, eye-level shelving for the food you actually eat every day.

4 Pack Laundry Pods Container
4 Pack Laundry Pods Container has been one of the most consistently praised picks in this category. 473 reviewers averaged 4.5/5.
13. Integrate Pull-Out Spice Racks or Tiered Organizers

Spices are notoriously difficult to store in a corner pantry. The tiny jars get pushed to the back, tip over, and disappear. I used to keep all my spices in a messy cluster on a flat shelf. One evening, I was reaching for a 2 oz jar of cumin in the back and accidentally knocked over twelve other glass jars. Two of them shattered, covering my floor in sharp glass and bright red paprika. It took an hour to clean up.
You must use a specialized system for spices. I recommend the YouCopia SpiceLiner. A set of 6 rolls costs $24.99. It’s a soft, foam liner that holds spice jars flat so they won’t roll around. If you prefer keeping spices on the shelf rather than in a drawer, grab a Copco Basics Non-Skid Lazy Susan Turntable for $16.99. The rubber grippy texture on the base prevents the tiny jars from flying off when you spin it. Group your spices by category. Put all your baking spices like 2 oz jars of cinnamon and nutmeg on one turntable, and your savory cooking spices like garlic powder and oregano on another. It speeds up your cooking prep time.
14. Measure Your Space Precisely Before Buying Organizers

This is the most boring tip, but it’s the one that will save you the most money. You can’t guess your shelf dimensions. Two years ago, I got overly excited at a local home store. I eyeballed my pantry size and bought $200 worth of beautiful, deep acrylic bins. I brought them home, loaded them up with heavy 32 oz bags of rice, and shoved them onto my shelves. They stuck out one inch too far. I couldn’t close my pantry door. I was so angry at myself.
You need to measure the exact width, height, and depth of every shelf. I use a standard Lufkin 25-foot tape measure that costs $12.99 at any hardware store. Write the numbers down in your phone notes immediately. You also need to account for the door hinges. A lot of people measure the interior width of the cabinet but forget that the metal hinges protrude inward by an inch. If you buy a stiff plastic bin that perfectly fills the width, the door hinge will smash into it when you try to close the door. Measure twice, buy once. It prevents so many frustrating returns and guarantees your corner pantry organization system fits flawlessly.
I’d love to hear how these tips work out for you. Organizing a deep, dark corner cabinet is physically exhausting, but the feeling of knowing exactly where your 16 oz box of pasta is located is worth it. If you found these ideas helpful, please pin this article to your favorite Pinterest board so you can reference the exact measurements and brands later. Happy organizing!
Frequently Asked Questions
How do you organize a deep corner pantry?
The best way to organize a deep corner pantry is by using D-shaped lazy Susans that spin 360 degrees. This prevents items from getting lost in the back. You should also install under-shelf LED lighting and use clear, labeled bins for dry goods.
What is the best depth for pantry shelves?
The ideal depth for pantry shelves is between 12 and 16 inches. Anything deeper than 16 inches causes food items to get pushed to the back and forgotten. If you have 24-inch shelves, use pull-out drawers or deep plastic bins.
How do you store small appliances in a corner pantry?
Store heavy small appliances like stand mixers and slow cookers on rolling plant stands. This allows you to easily pull them out of deep corners without scratching your painted shelves or straining your back.
Are clear pantry containers worth the money?
Yes, clear airtight containers are worth the investment. They keep pests like pantry moths out, extend the shelf life of your dry goods, and let you instantly see your inventory so you don’t accidentally overbuy groceries.
