What’s Inside
- Start Your Makeup Desk Organization with Kitchen Drawer Dividers
- Line Every Drawer Before You Add Products
- Repurpose Grocery Store Glass Jars for Brushes
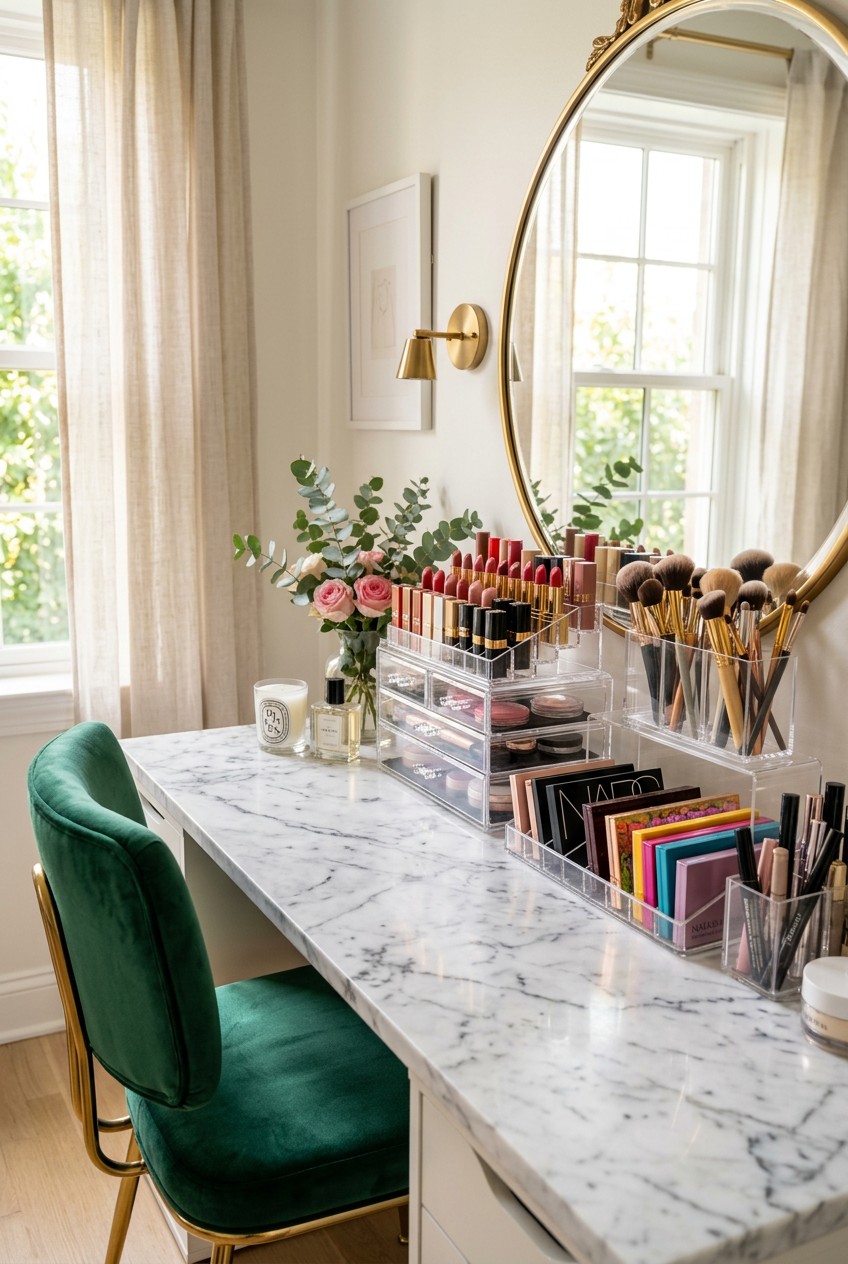
- Master Vertical Makeup Desk Organization with Clear Stacking Drawers
- Use Ice Cube Trays for Single Eyeshadows
- Corral Daily Skincare on a Lazy Susan
- Store Cotton Swabs in Apothecary Jars
- Hang Your Hot Tools on Adhesive Hooks
- Use File Organizers for Large Palettes
- Maximize Depth with Sliding Trays
- Purge Expired Products Before Organizing
- Repurpose Essential Oil Bottles for Travel Skincare
- Protect Your Desk Surface with a Silicone Mat
- Use a Decorative Tray to Anchor Perfumes
- Label Everything with a Simple Maker
Last Tuesday at 7:15 AM, I knocked a brand-new 1 oz bottle of NARS Sheer Glow foundation off my cluttered vanity. It shattered across the hardwood floor, splashing sticky beige liquid onto my favorite white rug. That $47 disaster happened because my makeup desk organization was a total joke. I’m Hannah, and I’m a recovering makeup hoarder. I spent years shoving 30-pan eyeshadow palettes into drawers that wouldn’t close. I kept buying duplicates of $22 MAC lipsticks because I couldn’t find the ones I already owned. If you’re drowning in half-empty concealer tubes and tangled hair ties, I get it. We need to fix this mess right now. I’ve tested hundreds of storage solutions over the last five years. Most are overpriced junk that cracks after a week. I’m going to show you what works. No fluffy Pinterest fantasies. Just real, practical systems that keep your mornings stress-free. Let’s look at the exact bins, jars, and dividers I use to keep my sanity intact.
1. Start Your Makeup Desk Organization with Kitchen Drawer Dividers

I tried this wrong for months before figuring it out. I bought those tiny 2-inch plastic squares meant for lipsticks. They just slid around the drawer every time I opened it. It sounded like a plastic maraca. Skip the tiny bins for your main drawers. You need tension dividers. I bought a 4-pack of Seville Classics bamboo spring-loaded dividers at Costco for $19.99. They measure exactly 17.5 inches long and snap perfectly into most standard desk drawers. The tension keeps them locked in place. You can create long horizontal rows for your 12-inch Urban Decay Naked palettes. It’s brilliant. I line my palettes up like books on a shelf. You can see every single spine. No more digging through a stack of heavy palettes and chipping a nail. I also use these to separate my face products from my eye products. The bamboo looks high-end against the white drawer interior. It smells faintly of natural wood instead of cheap factory plastic. If your drawer is deeper than 3 inches, you can even stack them. Just make sure you measure your drawer depth first. I bought a set that was 4 inches tall once and my drawer got stuck shut for three days. I had to pry it open with a metal butter knife and scratched the paint. Save yourself the headache and measure twice.
2. Line Every Drawer Before You Add Products

Most people get this wrong. They toss their expensive glass serum bottles straight onto the hard wood or painted MDF drawer bottoms. Every time you open the drawer, the bottles slam into the back. It sounds awful and leaves sticky rings everywhere. I ruined a beautiful vintage desk this way. A leaky 1 oz bottle of e.l.f. Power Grip Primer glued itself to the wood. When I pulled it up, the paint came with it. Never again. You absolutely must line your drawers. I swear by the Mainstays Grip Shelf Liner from Walmart. It costs exactly $5.88 for an 18-inch by 5-foot roll. It has a squishy, rubbery texture that grips the bottom of your drawer without any messy adhesive. Your $30 Charlotte Tilbury Flawless Filter bottle won’t slide an inch. The gray geometric pattern hides foundation smudges perfectly. Plus, when it gets covered in loose setting powder, you just pull the whole sheet out and rinse it in the sink. It takes two minutes to dry. Don’t buy the adhesive contact paper. It’s a nightmare to peel off later and leaves a sticky residue that attracts dust like a magnet. Stick to the rubbery grip liners. They’re cheaper and work much better for holding slippery makeup tubes.
3. Repurpose Grocery Store Glass Jars for Brushes

Acrylic brush holders are a massive rip-off. I bought a fancy spinning acrylic brush caddy on Amazon for $35. It collected a thick layer of fuzzy gray dust at the bottom within a week. Cleaning those tiny compartments was impossible. I threw it in the trash. Now I use something free. Well, almost free. Last month, I washed out three 16 oz glass jars of Trader Joe’s Chunky Salsa (which costs $2.99). The glass is thick and heavy, so the jars won’t tip over when you stuff them full of heavy Morphe powder brushes. Here is my honest negative though. You have to run them through the dishwasher on the hottest sanitize cycle at least twice. I didn’t do this the first time. My fluffy blush brush smelled like garlic and jalapeños for a week. It was highly unpleasant brushing that on my cheeks at 6 AM. Once they’re truly clean, they look minimalist and chic. I sort my brushes by function. One jar for fluffy face brushes. One for dense foundation kabukis. One for tiny eye blending brushes. The glass clinks satisfyingly when you drop a brush back in. You save money and keep heavy glass out of the landfill. It’s a win all around.

AMKUFO 6 Pack-Closet-Organizers-and-Storage
AMKUFO 6 Pack-Closet-Organizers-and-Storage has been one of the most consistently praised picks in this category. 52 reviewers averaged 4.5/5.
4. Master Vertical Makeup Desk Organization with Clear Stacking Drawers

If you have a tiny bedroom, your desk surface area is precious. You can’t waste it on sprawling trays. You need to build up. I use the Brightroom Clear Acrylic 2-Drawer organizers from Target. They cost $14.99 each and measure roughly 6 by 6 by 6 inches. I stack three of them on top of each other in the back corner of my desk. The clear plastic lets you see exactly where your 0.15 oz NARS Radiant Creamy Concealer is hiding. No guessing. No pulling out four different drawers. I organize these vertically by my routine order. Top drawer holds my daily primers and concealers. Middle drawer is for blushes and bronzers. Bottom drawer holds setting powders and sprays. The drawers slide out smoothly with a quiet plastic swoosh. Don’t buy the frosted plastic versions. I tried those from a cheap dollar store last year. They look cloudy and dirty within a month, and you can’t actually see the labels on your makeup. Spend the extra few dollars for crystal clear acrylic. It reflects the light in your room and makes your whole setup look brighter and cleaner. Just wipe them down with glass cleaner every few weeks to remove fingerprints. You might also like: 15 Cozy Room Cleaning Tips Organizing Ideas to Steal Right Now
5. Use Ice Cube Trays for Single Eyeshadows

Single eyeshadow pots are the absolute worst items to organize. Those little MAC paint pots and ColourPop Super Shock shadows roll around everywhere. They get shoved to the back of the drawer and forgotten. I solved this by walking down the kitchen gadget aisle at Kroger. I found a heavy-duty silicone ice cube tray for $3.49. The squares are exactly 1.5 inches wide. This fits almost every standard single eyeshadow pot perfectly. The soft silicone grips the plastic pots so they don’t rattle. I bought a pale pink one that looks adorable inside my white drawer. You just drop one eyeshadow into each square. All the colors face up. You can see your entire collection at a single glance. I arrange mine by color gradient, from icy whites to deep charcoals. It looks like a professional makeup artist’s kit. The only downside is that really bulky pots, like the 0.24 oz Charlotte Tilbury cream shadows, are a tight squeeze. You might have to stretch the silicone a bit to jam them in. But for standard sizes, this is the cheapest and most effective storage hack I’ve found. It completely stops the chaotic rumbling noise when you open your drawer. You might also like: 15 Creative Home Organizing Ideas You Haven’t Thought Of
6. Corral Daily Skincare on a Lazy Susan

I used to line my skincare bottles up in a neat row across the back of my desk. It looked great for exactly one day. Then I knocked over a heavy 4 oz glass bottle of snail mucin while reaching for my moisturizer. It smashed my favorite ceramic ring dish into five pieces. You need a Lazy Susan. I bought the OXO Good Grips 11-inch Turntable from Target for $17.99. It has a non-slip rubber base and a tiny lip around the edge. That lip is crucial. It keeps your tall, skinny serum bottles from flying off when you spin it. I keep all my morning skincare on this spinner. The 2 oz CeraVe moisturizer, the 1 oz La Roche-Posay sunscreen, the vitamin C serum. Everything is instantly accessible with a quick flick of the wrist. It makes a very satisfying, smooth whirring sound when it spins. Make sure you wipe the rubber base down with a damp microfiber cloth once a week. Dust and spilled toner combine into a sticky crust on the rubber if you ignore it. I learned that the hard way when a bottle of glycolic acid leaked. Cleaning dried acid crust out of rubber grooves is not fun. You might also like: 15 Gorgeous Organizing Bathroom Home Hacks Ideas Worth Trying This Year

4 Pack Laundry Pods Container
4 Pack Laundry Pods Container has been one of the most consistently praised picks in this category. 473 reviewers averaged 4.5/5.
7. Store Cotton Swabs in Apothecary Jars

Leaving Q-tips in their original flimsy cardboard packaging is a crime against aesthetics. The cardboard gets crushed, the lid tears off, and you end up with cotton swabs spilling all over your desk. I used to keep them in a plastic sandwich bag. It looked incredibly trashy. Now, I use small glass apothecary jars. I found the perfect ones at Whole Foods in their natural beauty aisle. They sell empty 4 oz clear glass jars with tight-sealing bamboo lids for just $3.99 each. The tight seal is important because it keeps bathroom humidity and dust away from things going near your eyes. I fill one jar with standard Q-tips and another with flat cotton rounds for toner. They look like expensive spa decor sitting on the corner of my desk. The bamboo lids match my drawer dividers perfectly. Just don’t overfill the jar with cotton rounds. If you cram 50 of them in there, the friction makes it impossible to pull just one out. You end up yanking out a clump of five and dropping them on the floor. Leave about an inch of space at the top so they slide out easily.
8. Hang Your Hot Tools on Adhesive Hooks

Hair tools take up an ungodly amount of space. A chunky Revlon One-Step Volumizer brush will consume half a drawer all by itself. Plus, you can’t put them away while they’re still hot. I used to leave my 1-inch curling iron cooling on my desk surface. It accidentally melted the plastic casing of my favorite $32 Fenty beauty gloss. Total tragedy. To fix this, I use the dead space on the side of my desk. I stuck two heavy-duty Command Wire Hooks on the exterior side panel. I bought a 2-pack at Walmart for $6.48. These specific hooks hold up to 3 pounds each. The metal wire part flips out, creating the perfect cradle for the cord and handle of a hair dryer or curling iron. I hang my tools up immediately after turning them off. The hot barrel hangs safely in the air, touching nothing. It frees up a massive amount of drawer space. You must clean the desk surface with rubbing alcohol before applying the adhesive strip. I skipped this step on my first try, and my heavy blow dryer crashed to the floor at 2 AM. Terrifying sound. Do the prep work.
9. Use File Organizers for Large Palettes

If you own more than five large eyeshadow palettes, drawer dividers might not be enough. The massive 18-pan Natasha Denona or Morphe palettes are just too bulky. I used to stack them in a plastic bin. The one I wanted was always at the absolute bottom. I’d try to slide it out like a Jenga piece, and the whole stack would collapse. The best solution is actually an office supply product. I use a 5-section clear acrylic file sorter from The Container Store. It costs $24.99. It measures about 10 inches wide with 2-inch gaps between the thick acrylic walls. You stand your palettes up vertically, exactly like files on a desk. You can flip through them instantly. The heavy acrylic is sturdy enough to hold heavy cardboard and metal palettes without tipping over. I keep this right on top of my desk against the wall. It turns your beautiful palette artwork into a display piece. Make sure you don’t buy the cheap wire file sorters from the dollar bin. The thin metal wires will scratch the glossy covers of your expensive makeup palettes every time you slide them in and out. Stick to the smooth acrylic.

Galasily 3 Pack Laundry Detergent Dispenser Container with
Galasily 3 Pack Laundry Detergent Dispenser Container with Tray has been one of the most consistently praised picks in this category. 114 reviewers averaged 4.5/5.
10. Maximize Depth with Sliding Trays

Deep drawers are a blessing and a curse. You have tons of volume, but everything gets buried under a mountain of compacts. You end up digging blindly and getting foundation underneath your fingernails. You need to create tiers. I use shallow plastic trays that are slightly wider than my drawer. I bought the Room Essentials shallow plastic bins from Target for $3.00 each. They measure about 9 by 6 inches and are only 1.5 inches deep. Because my desk drawer is 10 inches wide, this tray rests perfectly on the side rails of the drawer, hovering over the bottom. It creates a sliding top shelf. I keep my everyday essentials up top in the sliding tray. My $24 Glossier Boy Brow, my eyelash curler, and my favorite tube of mascara. In the deep space underneath, I store my bulky backup products. Extra makeup sponges, unopened setting sprays, and seasonal foundations. I just slide the top tray back to grab the big stuff. It doubles the usable footprint of your drawer. Just double-check your measurements. If the tray is even a quarter-inch too narrow, it will plunge into the abyss below. I broke a powder compact learning that lesson.
11. Purge Expired Products Before Organizing

You can’t organize clutter. It is physically impossible. I tried for years to buy enough cute bins to hide my hoarding habit. Last Tuesday, while packing for a move, I dumped my entire vanity onto my bed. I counted 45 dried-out tubes of mascara and 14 crusty liquid eyeliners. Some of them smelled like sour milk. It was disgusting. You have to purge before you buy a single organizer. Grab a 13-gallon trash bag. Be ruthless. Liquid products like the $10 Maybelline Fit Me concealer expire after 12 months. If the oil is separating from the pigment, throw it away. If your cream blush has tiny hard bumps on the surface, it’s done. I know it hurts to throw away a $40 lipstick you only used twice. But keeping it in a drawer taking up premium space is worse. It just adds visual noise to your morning routine. Once I threw away a grocery bag full of expired junk, I realized I only needed half the storage containers I thought I’d need. Your makeup desk should only hold products you actively use and love. Everything else is just expensive garbage clogging up your daily life.
12. Repurpose Essential Oil Bottles for Travel Skincare

Travel-sized skincare takes up a weird amount of space on a vanity. Those tiny, mismatched plastic tubes never stand up straight. They constantly fall over like dominoes. Instead of keeping the ugly plastic packaging, I decant my travel liquids into uniform glass bottles. I buy empty 2 oz amber glass dropper bottles from the wellness section at Sprouts Farmers Market. They cost $2.99 each. The amber glass protects sensitive ingredients like Vitamin C from degrading in the sunlight. I use a tiny plastic funnel to pour my bulky 8 oz toners and makeup removers into these small bottles. They look incredibly cohesive lined up on a small brass tray. The glass droppers give you perfect control over how much product you dispense. No more accidentally pouring half a bottle of expensive Paula’s Choice BHA liquid onto a single cotton pad. The only negative is that thick creams absolutely won’t work in these dropper bottles. I spent twenty minutes aggressively tapping a bottle against my palm trying to get a thick ceramide cream to drop out. Stick to watery toners, essences, and lightweight serums for this specific method.

HomePekite Laundry Pods Storage Container
If you want something that just works, HomePekite Laundry Pods Storage Container is a safe bet (15 reviews, 4.5 stars).
13. Protect Your Desk Surface with a Silicone Mat

Makeup is inherently messy. Powders crumble, liquids drip, and glitter gets literally everywhere. If you have a porous wood desk or a matte white painted surface, you’re going to ruin it. I stained a gorgeous white desk with a single drop of liquid red blush. It seeped right into the paint and looked like a crime scene. You need a dedicated mixing and prep zone. I use a large silicone craft mat. I found a great 16 by 20-inch gray silicone mat in the craft aisle at Walmart for $9.97. It’s meant for resin art, but it is the ultimate makeup desk protector. It lays perfectly flat and doesn’t curl at the edges. I do all my makeup application right over this mat. I even use the corner of it as a mixing palette to blend two different shades of foundation together. When it gets dirty, I just take it to the bathroom sink and wash it with warm water and Dawn dish soap. All the oil and pigment melts right off. The silicone texture also provides a soft landing pad for fragile glass bottles. It’s saved my $45 Estée Lauder Double Wear foundation from shattering at least twice.
14. Use a Decorative Tray to Anchor Perfumes

Perfume bottles are beautiful, but they look incredibly cluttered when scattered randomly across a desk. They also get knocked over easily. Last year, my cat jumped onto my desk and knocked over a full 1.7 oz bottle of $65 Maison Margiela Replica perfume. The glass didn’t break, but the atomizer snapped off entirely. The bottle was ruined. You need to anchor your fragrances. I use a 12-inch round mirrored brass tray from the Target Threshold line. It cost $25.00. Placing your perfumes on a tray creates a distinct visual boundary. It tells your brain (and hopefully your pets) that this is a contained collection. The mirrored bottom reflects the glass bottles and makes them look sparkly and luxurious. I arrange mine by height, with the tall 3.4 oz bottles in the back and the short rollerballs in the front. Never put this tray in direct sunlight. The heat and UV rays will break down the delicate fragrance oils and make your expensive perfumes smell like rubbing alcohol. Keep the tray on the darkest side of your desk. It instantly upgrades the look of your entire room without any actual effort.
15. Label Everything with a Simple Maker

Once you have all these beautiful bins and dividers set up, you will absolutely forget what goes where. I thought I’d remember that the left acrylic drawer was for matte lipsticks and the right was for glosses. I didn’t. Two weeks later, everything was mixed up again into a chaotic soup of tubes. You have to label your zones. I use a basic Brother P-Touch label maker I bought on Amazon for $29.99. I strictly use the black text on clear tape cartridges. The clear tape blends perfectly into acrylic drawers and glass jars. It looks clean and intentional. I label the lip of every drawer and the front of every opaque bin. ‘Daily Face’, ‘Eye Prep’, ‘Night Skincare’. It seems slightly neurotic, I know. But it forces you to put things back in their proper home when you’re rushing at 7:30 AM. If a slot is labeled ‘Blush’, you’re much less likely to jam a random eyeshadow palette in there. My biggest mistake was printing labels in a fancy cursive font. It was completely unreadable from a distance. Stick to a bold, simple sans-serif font. Your tired morning eyes will thank you.
That’s exactly how I keep my space functional and pretty. Honestly, setting up a solid makeup desk organization system takes a single Saturday afternoon, but it saves you hours of frustration every single month. You won’t be buying duplicate concealers because you finally know what you actually own. My biggest piece of advice? Start with the drawer liners and the Costco bamboo dividers. Those two things alone will change how your desk functions. Don’t rush out and buy $200 worth of acrylic bins today. Measure your drawers, purge the expired junk, and build your system slowly based on what you actually use. If you found these tips helpful, please pin this article to your favorite home organization board on Pinterest. I’m always tweaking my setup, so let me know what weird grocery store jars you end up repurposing!

Rubbermaid Configurations Deluxe Custom Closet Kit 4-8 Ft.
A dependable everyday pick — Rubbermaid Configurations Deluxe Custom Closet Kit 4-8 Ft. Adjustable pulls in 81 ratings at 4.5 stars. Not flashy, just solid.
Frequently Asked Questions
How do I organize deep makeup drawers?
Use shallow sliding trays that rest on the drawer rails. This creates a top tier for daily essentials while leaving the deep space below for bulky backup products and extra sponges.
What is the best way to store makeup brushes?
Heavy glass jars are perfect because they won’t tip over. Repurpose thick 16 oz salsa jars from the grocery store. Sort your brushes by function so you aren’t digging around.
How should I store large eyeshadow palettes?
Use a clear acrylic file sorter from the office supply section. Stand the palettes vertically like books. This prevents the heavy bottom palettes from getting crushed in a stack.
How often should I clean my makeup organization bins?
You should wipe down acrylic bins and drawer liners once a month with a damp microfiber cloth. Dust and loose setting powder build up quickly and create a sticky grime if ignored.
