What’s Inside
- Always Declutter Before Buying Bins
- Establish Clear Zones for Your Groceries
- Decant Dry Goods (And Keep the Expiration Dates)
- Label Everything with a Minimalist Vibe
- Maximize Vertical Space with Tiered Risers
- Combat Deep Shelves with Turntables
- Embrace the 2026 Soft Pantry Trend
- Implement the First-In, First-Out Rule
- Optimize Your Spice Storage for Quick Cooking
- Utilize the Back of Your Pantry Door
- Prioritize Accessibility for the Whole Family
- Add Intentional Lighting to Dark Corners
- Use Rolling Solutions and Set Hard Limits
Last Tuesday at Whole Foods, I bought my fourth bag of organic chia seeds because I swore I was out. When I got home, my lack of pantry cabinet organization finally caught up with me. I opened my cramped kitchen cupboard, and three half-empty bags cascaded onto my toes. A total avalanche of tiny black seeds exploded all over my kitchen floor. I spent thirty minutes sweeping them out of the grout lines with a tiny brush. That was the exact moment I realized my storage system was a complete joke. It’s just a dark graveyard for expired snacks and lost ingredients. If you’re dealing with a tiny kitchen, smart pantry cabinet organization isn’t just nice to have. It’s a survival requirement. I’ve wasted so much money buying duplicate spices and stale crackers over the years. Learned that the hard way. Let’s fix that right now. I’m going to walk you through exactly how I fixed my own disaster zone. No perfectly staged, unrealistic mansions here. Just practical, space-saving tricks for real life. These aren’t just pretty pictures. They’re functional systems that actually work for busy people.
1. Always Declutter Before Buying Bins

I used to rush to Target, buy a bunch of cute $15 plastic bins, and try to shove my mess into them. It never worked. Professional organizer Kayleen Kelly is absolutely right when she says organizing first and decluttering second is a massive mistake. You have to completely empty your pantry first. I mean it. Pull every single box, can, and stray granola bar out and put them on your kitchen counter. Wipe down the bare shelves with a damp cloth and some Method All-Purpose Cleaner (the Pink Grapefruit scent, about $4.49 at Target). The caramel-butter smell of clean citrus always motivates me. I even use an old toothbrush to get the sticky syrup residue out of the corners. It takes an extra ten minutes, but putting fresh bins on sticky wood is a terrible idea. Then, be ruthless. Toss the expired canned beans. Donate the unopened boxes of weird crackers you bought on a whim at Trader Joe’s and won’t actually eat. I found a jar of salsa from 2021 hiding in the back of my cabinet last month. Disgusting. Once you pare down to what you actually consume, you can see your true inventory. You can’t organize clutter. You just can’t. If you try to skip this step, you’re just rearranging garbage. I spent years shuffling expired cans around because I was too lazy to purge. Don’t be like old me. Clear it all out, scrub the wood, and start with a blank slate.
2. Establish Clear Zones for Your Groceries

Treat your tiny cabinet like a mini grocery store. The Home Edit ladies always preach about grouping similar items, and I finally listened. I used to just shove boxes wherever they fit on grocery day. Now, I set up specific zones. I created a breakfast zone, a snack zone, a baking supplies area, canned goods, and a pasta and grains section. When my kids are screaming for a snack after school, I know exactly where to point them. I bought a set of clear mDesign Plastic Storage Bins from Amazon for $22.99 to corral the different categories. The baking zone holds my 5-pound bags of flour, sugar, and baking powder. The snack zone holds the Goldfish and pretzels. When you group things, you instantly know what you have. If the snack bin is empty, it’s time to hit Kroger. If it’s full, I don’t buy more. It stops the mindless overbuying. I tried doing this without bins for a month, but everything just migrated back into a giant jumbled mess of cardboard boxes. The physical boundary of the bin keeps the zone intact. It’s like drawing invisible property lines in your cabinet. Everyone respects the boundaries, and the cereal stops mixing with the canned tuna. My husband used to complain he couldn’t find the protein powder. Now it lives permanently in the breakfast zone, and I don’t have to play detective every morning.
3. Decant Dry Goods (And Keep the Expiration Dates)

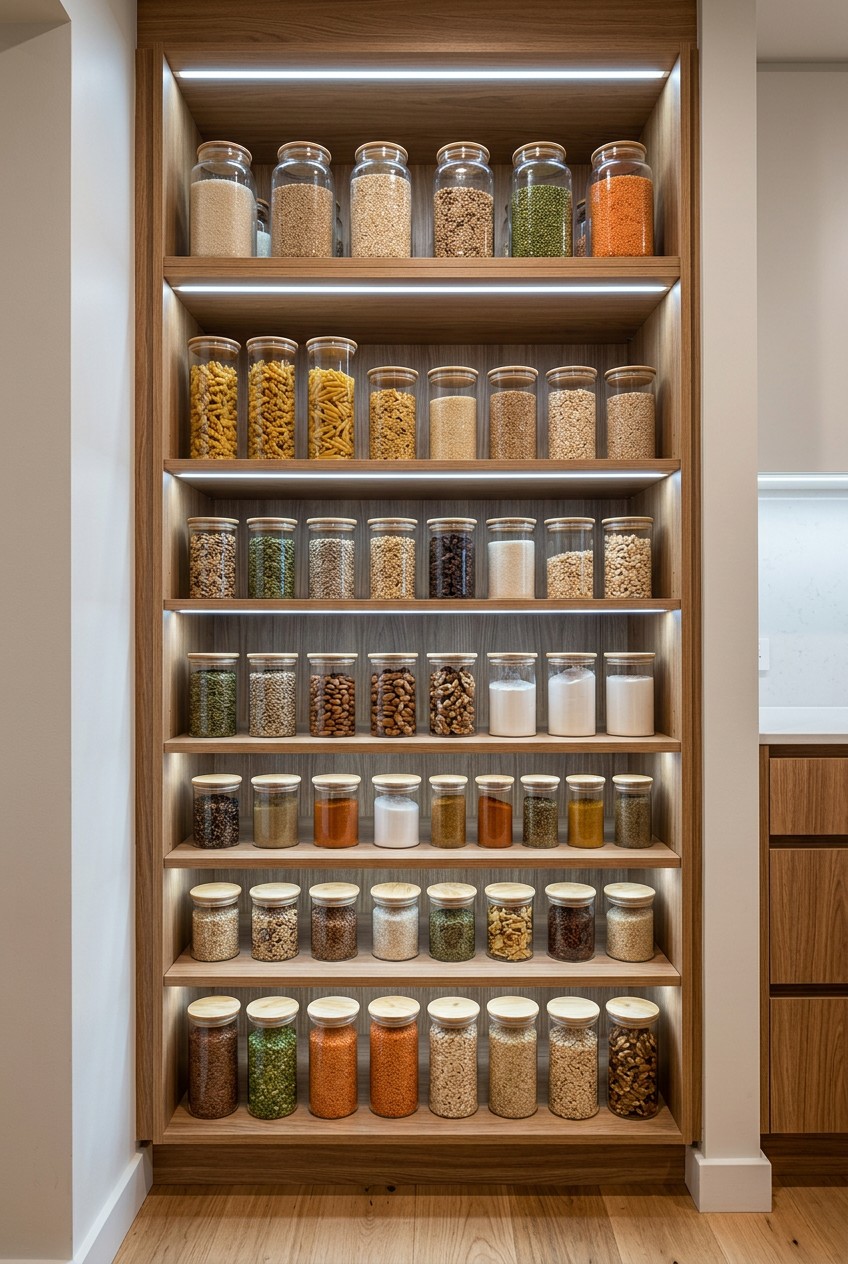
I used to think decanting was just for Instagram influencers with too much time. Then I got pantry moths. Let me tell you, finding a moth fluttering out of your Quaker Oats is a visceral nightmare. I threw away fifty dollars worth of dry goods that day. Now, I decant everything. Transferring your flour, sugar, pasta, and cereal into clear, airtight containers extends their freshness and keeps pests out. I swear by OXO Good Grips POP Containers. They cost between $10 and $30 each depending on the size, which adds up, but they’re completely worth the investment. I buy them at The Container Store or Costco when they have a bulk set. I use the tall 4.4-quart size ($22.99) for my favorite 365 Everyday Value organic flour from Whole Foods. The satisfying click of the airtight seal is the best sound. Plus, seeing exactly how much penne pasta I have left stops me from buying redundant boxes. When you line up five matching OXO containers filled with different pastas, it looks like a high-end boutique. It brings a weird sense of calm to my chaotic mornings. But here is the critical part most people forget. The expiration dates. When I first started decanting, I threw away all the boxes and had no idea when my almond flour expired. Now, I take a piece of blue painter’s tape, write the best by date with a Sharpie, and stick it to the bottom of the OXO container. Food safety over aesthetics, always.

3-Tier Hanging Laundry Basket Organizer:Foldable Wire Shelf
A dependable everyday pick — 3-Tier Hanging Laundry Basket Organizer:Foldable Wire Shelf Laundry Ro pulls in 518 ratings at 4.5 stars. Not flashy, just solid.
4. Label Everything with a Minimalist Vibe

Skipping labels is a rookie mistake I made for years. I once accidentally put powdered sugar into a batch of savory biscuits instead of flour because I didn’t label my glass jars. They tasted horrible. My husband still teases me about it. Now, I label everything clearly and consistently. For 2026, the trend is moving toward a Quiet Luxury aesthetic. Think minimalist, waterproof labels instead of those giant, loopy chalkboard fonts from five years ago. I use my Cricut Joy machine (around $149 at Michaels) to print simple, clean black text on white waterproof vinyl. I tried using a cheap label maker from Amazon once, but the tape peeled off after two weeks. The Cricut vinyl stays put even when I wash the jars by hand. If you don’t want to buy a machine, you can use a white Sharpie oil-based paint pen (about $3.99 at Walmart) directly on the glass. It looks custom and wipes off with rubbing alcohol if you make a mistake. Clear labels keep the visual noise down in a small cabinet. When you open the door, your brain isn’t overwhelmed by competing fonts and bright colors. It just looks serene and intentional. Even if you know what’s in the jar, label it anyway. It helps your partner or kids put things back in the correct spot, which is half the battle of maintaining the organization. You might also like: 20 Beautiful Aesthetic Home Makeover You Can Try Today
5. Maximize Vertical Space with Tiered Risers

Most pantry cabinets have way too much vertical space between shelves. You end up stacking cans on top of each other until they inevitably fall over and crush your fingers. I stopped playing Jenga with my diced tomatoes and started using tiered risers. I bought The Home Edit 3-Tier Expandable Shelf for $27.99 at Walmart. It expands to fit the exact width of your cabinet. I use it for all my canned black beans, coconut milk, and chicken broth. I organize my cans by type on the risers. Beans on the bottom tier, tomatoes in the middle, and coconut milk on top. It looks like a tiny supermarket aisle. Suddenly, I can see the cans all the way in the back. No more finding a rusty can of soup from three years ago. This simple addition essentially doubled my storage capacity on that specific shelf. I also use simple wire under-shelf baskets (around $15.99 for a two-pack on Amazon) that slide onto the existing shelf to hold flat items like tortillas or foil packets. Don’t let that empty air above your short jars go to waste. If you have a tall shelf, you need to break it up. You can also buy stackable acrylic bins. I use the STORi clear stackable drawers (around $24.99) for my tea bags and coffee pods. They act like mini dresser drawers right on the shelf. You might also like: 20 Charming Aesthetic Closet Organization Ideas You Need to See
6. Combat Deep Shelves with Turntables

Deep shelves are where good food goes to die. If you have to reach past four bottles of vinegar to get to your olive oil, you’re going to knock something over. My old apartment had incredibly deep cabinets, and I hated them. The solution is lazy Susans. I use The Home Edit 9-inch Turntable ($15.99 at Target) for my sticky bottles like honey, maple syrup, and soy sauce. I also grabbed The Home Edit Divided Turntable ($27.99) for my kids’ apple sauce pouches and small snack bars. A quick spin, and exactly what I need is right in front of me. I keep one turntable dedicated entirely to oils and vinegars. The smooth plastic is super easy to wipe clean when the olive oil inevitably drips down the side of the bottle. I take my turntables out once a month and wash them in the sink with Dawn dish soap. The sticky honey rings come right off. Don’t put them in the dishwasher though, the heat warps the plastic. If you have corners in your pantry, a turntable is the only way to make that space actually functional. Before I bought these, I tried using a long, narrow bin for my oils, but the bottles just rattled around and fell over when I pulled it out. Turntables are sturdy, reliable, and keep the heavy bottles upright while giving you access to the very back of the shelf. You might also like: 15 Brilliant Home Organization Ideas to Transform Your Space

Rubbermaid Configurations Deluxe Custom Closet Kit 4-8 Ft.
Honestly, Rubbermaid Configurations Deluxe Custom Closet Kit 4-8 Ft. Adjustable surprised me — sturdier than it looks in the photos, and over 81 buyers gave it 4.5 stars.
7. Embrace the 2026 Soft Pantry Trend

I’m officially tired of seeing pantries that look like sterile plastic factories. The new 2026 Soft Pantry trend is all about incorporating natural materials to hide the ugly, messy packaging. It adds a high-end, organic feel that makes me actually want to keep the space clean. I swapped out half of my clear plastic bins for Honey-Can-Do Banana Leaf Storage Baskets. They are about $18.99 each at Sprouts or online. I use them to hide the visually chaotic stuff, like crinkly bags of chips, extra paper towels, and bulky bags of dog treats. The woven texture brings a much-needed warmth to the kitchen. Plus, they smell faintly like dried grass, which is surprisingly pleasant. I also added a few small bamboo bins for my loose tea bags. The mix of bamboo, woven seagrass, and clear acrylic looks incredibly chic. Moving away from excessive plastic isn’t just an aesthetic choice. It feels better to handle natural materials every day. I mix these woven baskets on the bottom shelves with my clear OXO containers on the middle shelves for a balanced, grounded look. It stops the cabinet from feeling like a sterile laboratory. Just be careful not to put anything that might leak, like oils or syrups, into a woven basket. I ruined a beautiful seagrass bin last year when a bottle of agave nectar cracked and seeped into the fibers.
8. Implement the First-In, First-Out Rule

I used to just shove new groceries right at the front of the shelf. It was lazy, and it cost me money. I’d constantly find stale crackers and expired peanut butter hiding in the back. Now, I strictly follow the First-In, First-Out rule. When I come home from a Costco run with a massive flat of diced tomatoes, I pull the older cans forward and put the new ones in the back. When you buy in bulk, it’s so tempting to just shove the new heavy box in the front. Resist the urge. Take everything out, put the new stuff in the back, and replace the old stuff in front. It takes an extra sixty seconds, but it drastically minimizes food waste. You force yourself to consume the older items first. I started doing this after I threw away three unopened jars of marinara sauce that had gone bad. I was so mad at myself. If you want your pantry cabinet organization to actually save you money, you have to manage your inventory like a store manager. It’s a tiny habit shift that pays off immensely. I even do this with my kids’ snacks. The newer boxes of fruit snacks go behind the half-empty box. It teaches them to finish what is already open before tearing into a brand new package. It completely changes how your kitchen functions. Skip the fat-free stuff while you’re at it. It tastes like wet cardboard. Buy the real snacks and organize them properly.
9. Optimize Your Spice Storage for Quick Cooking

My spice collection used to be a chaotic jumble of mismatched plastic bottles crammed into a dark corner. I could never find the cumin when I needed it, and my dinners would burn while I searched. Spices need to be kept in a cool, dark area away from the heat of the stove, which makes the pantry cabinet ideal. I finally bought a set of 24 uniform 4-ounce square glass spice jars from Amazon for $25.99. I spent a Sunday afternoon pouring all my mismatched Trader Joe’s and Kroger spices into these identical jars. I used my label maker to put the names on the lids. Then, I placed them in a bamboo drawer organizer (about $19.99 from Target). If you don’t have a drawer, use a tiered riser on a pantry shelf. The square jars sit flush against each other, saving a ton of space compared to round bottles. I used to hate making chili because it required finding eight different spices. Now I just pull my bamboo organizer out, grab the chili powder, cumin, and oregano, and put them right back. Cooking is actually fun now because I can grab the garlic powder instantly. Skip the pre-filled spice racks they sell at department stores. The spices are usually stale by the time you buy them. Buy the empty jars and fill them with the fresh spices you actually cook with.

AMKUFO 6 Pack-Closet-Organizers-and-Storage
Honestly, AMKUFO 6 Pack-Closet-Organizers-and-Storage surprised me — sturdier than it looks in the photos, and over 52 buyers gave it 4.5 stars.
10. Utilize the Back of Your Pantry Door

If you’re sitting on a traditional swinging door on your pantry cabinet, you have a goldmine of unused real estate. I ignored the back of my door for years. Then, I bought a simple over-the-door shoe organizer. I’m talking about the cheap clear plastic ones you can get for $12.99 at Walmart. I didn’t put shoes in it, obviously. I hung it on the inside of the pantry door and filled the pockets with all the tiny, annoying items that usually get lost on shelves. It holds my taco seasoning packets, hot cocoa mix, gravy packets, and small boxes of raisins. I also use the bottom row of pockets for my dog’s medication and extra rolls of waste bags. It keeps them away from the food but still easily accessible. It completely freed up an entire shelf inside the cabinet. You can also buy fancy metal over-the-door rack systems, like the Elfa Utility Door Rack from The Container Store (which runs around $130), but the cheap shoe organizer works just as well if you’re on a tight budget. Just make sure the door can still close fully once it’s loaded up. I once overstuffed the pockets with heavy 16-ounce jars of jam, and the door wouldn’t latch. Keep the heavy stuff on the wooden shelves and the lightweight packets on the door.
11. Prioritize Accessibility for the Whole Family

An organized pantry is useless if nobody else in your house can maintain it. I used to put the kids’ snacks on the top shelf to keep them out of reach. But that meant I was constantly acting as the snack servant, fetching fruit snacks ten times a day. I changed my strategy. I created a dedicated kids’ snack zone on the absolute lowest shelf. I bought two large open-front plastic bins (the mDesign ones, $16.99 for a two-pack) and filled them with applesauce, granola bars, and small bags of popcorn. Now, my kids can grab their own snacks after school. They don’t have to ask me for permission to grab an apple sauce pouch anymore. It gives them a sense of autonomy and saves me from interrupting my work. I put the heavy baking supplies and rarely used appliances on the highest shelves. The items I use every single day, like my coffee beans and oatmeal, sit exactly at eye level. You have to design the space around how your body actually moves in the kitchen. If you have to grab a step stool just to reach the salt, your setup is wrong. Put the heavy, bulky items down low, the everyday stuff in the middle, and the seasonal or rarely used items up high. It’s common sense, but most of us ignore it.
12. Add Intentional Lighting to Dark Corners

Most pantry cabinets are essentially dark caves. You can have the most beautiful bins in the world, but if you can’t see them, it doesn’t matter. The 2026 trend of adding intentional lighting to pantries is brilliant. It turns the space from a dark hole into a functional mini-room. I didn’t want to hire an electrician to hardwire fixtures, so I bought a pack of GE Wireless LED Puck Lights from Home Depot for $24.99. They run on batteries and stick right underneath the shelves with heavy-duty adhesive tape. Make sure you clean the underside of the shelf with rubbing alcohol before you stick the lights on. If the wood is dusty, the adhesive will fail and the lights will crash down onto your cans. When I open the cabinet door, I just tap the puck lights, and the entire space illuminates. I can actually read the labels on my cans without squinting. The bright, cool-toned light makes the whole cabinet look cleaner and more expensive. If you have a slightly larger pantry closet, a battery-operated flush mount motion sensor light on the ceiling is an absolute lifesaver. I used to rely on the ambient kitchen light, which cast terrible shadows into the back of the deep shelves. Adding these cheap LED lights completely eliminated the dark corners where expired food used to hide.

4 Pack Laundry Pods Container
4 Pack Laundry Pods Container has been one of the most consistently praised picks in this category. 473 reviewers averaged 4.5/5.
13. Use Rolling Solutions and Set Hard Limits

This is a surprising trick I learned, and it completely changed my bottom-shelf setup. Storing heavy items like a Crock-Pot, a massive bag of rice, or a KitchenAid stand mixer on the floor of your pantry cabinet is a recipe for back pain. Trying to drag a heavy appliance out from the back corner is awful. I scratched my hardwood floors doing exactly that. Now, I use rolling solutions. I bought a heavy-duty wooden rolling plant stand from Lowe’s for $14.98. I placed my massive 15-pound bag of Jasmine rice (the giant one from Costco) right on top of it. Now, I just roll the whole bag out with one finger, scoop what I need, and roll it back. I also use a narrow rolling cart squeezed between the cabinet wall and my trash can to hold heavy bottles of soda. It glides out effortlessly. This pairs perfectly with professional organizer Stephanie Treantos’s advice on setting limits. She says that once the container is full, it’s full. No more cramming. I use my bins and rolling stands as physical boundaries. My rolling stand holds exactly one bulk bag of rice. If I try to buy a second one, it won’t fit. So, I don’t buy it. The container dictates the inventory. This forces me to consume what I already own before spending more money.
Honestly, tackling your pantry cabinet organization doesn’t have to be a miserable weekend project. Start small. Empty one shelf at a time if you have to. But once you implement these systems, like the clear zones, the turntables, and the rolling stands, your kitchen will feel entirely different. You’ll stop wasting money on duplicate groceries, and cooking dinner won’t feel like a scavenger hunt. I personally swear by the decanting method and the first-in, first-out rule. They changed everything for me. If you found these tips helpful, definitely save this post or pin it to your kitchen inspiration board on Pinterest so you can reference the product prices and sizes later. You’ve got this. Now go throw away that expired salsa.
Frequently Asked Questions
How do you organize a deep pantry cabinet?
Use lazy Susans and pull-out bins. Turntables keep sticky bottles accessible, while clear acrylic bins act like drawers so you can reach items hidden in the very back without knocking things over.
What should go on the bottom shelf of a pantry?
Heavy, bulky items belong on the bottom. Store large appliances, bulk bags of rice on rolling stands, and heavy boxes of drinks down low to prevent back strain and shelf bowing.
Are clear pantry containers actually worth the money?
Yes. Decanting dry goods into airtight clear containers keeps pests out, extends freshness, and lets you see your inventory at a glance. It prevents overbuying and saves money in the long run.
How do I organize spices in a small cabinet?
Transfer spices to uniform square glass jars and store them in a bamboo drawer organizer or on a tiered shelf riser. Keep them in a cool, dark area away from the stove for maximum freshness.
