What’s Inside
- 1. Prioritize Ergonomics with an Adjustable Standing Desk
- 2. Cable Management Hacks That Actually Work for Home Office Organization
- 3. Ditch the Bulky Filing Cabinet for Wall-Mounted Bins
- 4. Repurpose Kitchen Organizers for Desk Drawers
- 5. Create a Printing Station Inside a Closet
- 6. Use Tension Rods for Vertical Binder Storage
- 7. The Mason Jar Trick for Pens and Markers
- 8. Zone Your Desk with a Monitor Stand
- 9. Floating Shelves to Get Books Off Your Desk
- 10. Tame the Paper Clutter with a Daily Processing Tray
- 11. Lighting Upgrades for Better Home Office Organization
- 12. Rolling Carts for Mobile Storage
- 13. Label Everything with Washi Tape
- 14. Use Pegboards for Visual Supply Storage
Last Tuesday at Whole Foods, I dropped my debit card at the register because my purse was packed with crumpled work receipts, loose paperclips, and a half-eaten granola bar. I realized right then that my home office mess was leaking into my real life. I’d spent months pretending my dining room table was a functional workspace. It wasn’t. My lower back ached constantly. My laptop sat on three dusty, heavy cookbooks. My coffee mugs left sticky brown rings on important tax documents. I needed a cheap fix. I’m Hannah, and I’ve made every mistake possible when setting up a workspace. I tried buying those expensive acrylic matching sets from fancy boutiques. They scratch easily and show every single greasy fingerprint. Skip them. You’re better off using cheap, functional items from regular stores. Let’s fix your workspace without blowing your paycheck. It’s totally possible to create a beautiful, functional desk area using clever hacks and basic supplies.
1. Prioritize Ergonomics with an Adjustable Standing Desk
I spent my first two years working from home sitting on a cheap metal folding chair. My lower back throbbed by 2 PM every single day. I thought standing desks were just for tech bros. I was so wrong. Your home office setup starts with your actual desk. If your desk is a mess, your brain is a mess. I finally bought a FlexiSpot essential standing desk for exactly $199.99. It has a 48×24 inch wooden top. It completely fixed my posture. Here’s the science. For seated work, you need your desk height between 28 and 30 inches for most average-height people. If you’re taller, aim for 30 to 32 inches. Your elbows must form a perfect 90-degree angle when you type. Most people get this wrong. They sit too low and hunch over like a gargoyle. I did it wrong for months before figuring it out. It took me years to get it right. I’d end up with horrible neck cramps. If you have more budget, the UPLIFT Desk V2 costs around $599.00 and is incredibly sturdy. But honestly, the cheaper FlexiSpot works perfectly for a budget setup. Don’t buy a desk without measuring your space first. I once bought a massive 60-inch desk and it blocked my closet door for a year. Just measure. Grab a tape measure right now. It takes two minutes.

2. Cable Management Hacks That Actually Work for Home Office Organization
Look under your desk. If it looks like a pit of black snakes, we’ve got a problem. Cable clutter destroys your mental peace. It’s impossible to feel productive when your feet keep getting tangled in your laptop charger. I used to just shove all my cords behind a fake plastic plant. The plant collected so much dust it turned gray. Typical. Good home office organization means hiding the ugly stuff. I went to Target last week and grabbed a 2-pack of Command Cord Bundlers for exactly $4.99. These are little white plastic hooks with a rubber loop. You stick them to the underside of your desk. No drilling required. You just bundle your cords, loop the rubber strap around them, and hook it. I also bought a 100-pack of black 8-inch zip ties for $2.50 at Walmart. I spent twenty minutes wrapping every loose wire together. It completely cleared the visual clutter. Pro tip: don’t zip-tie your mouse cable too tight. Learned that the hard way. I did this and couldn’t move my mouse more than three inches. I had to cut the zip tie with kitchen scissors and almost sliced my actual mouse cord in half. Leave some slack. Also, label your plugs. I use a piece of white masking tape and a black Sharpie. Write ‘Monitor’ or ‘Printer’ on the tape and wrap it around the plug. You won’t accidentally unplug your router during a Zoom call ever again.

3. Ditch the Bulky Filing Cabinet for Wall-Mounted Bins
Filing cabinets are heavy, ugly, and take up way too much floor space. I bought a huge metal one from a thrift store thinking it’d make me feel like a real business owner. It just smelled like old rust and trapped dust bunnies underneath. I stubbed my toe on it daily. I finally dragged it out to the curb. Instead, use your vertical wall space. I found these black mesh wall organizers at Walmart. They’re the Pen+Gear brand and cost exactly $14.88 each. They measure 12 by 10 inches. I bought three of them and screwed them directly into the wall above my desk. I use one for incoming mail, one for bills to pay, and one for receipts I need to scan. It keeps the paper off my desk surface. If you let paper pile up on your desk, it’ll eventually take over your keyboard. You’ll end up working on a tiny four-inch square of clear space. It’s miserable. Wall bins force you to look at your tasks. You can’t hide them in a dark drawer. I recommend using drywall anchors when you hang them. I skipped the anchors on my first try. The bin ripped right out of the wall under the weight of a 400-page tax document. It left a huge hole. Use the anchors. They cost two dollars and save your walls.

4 Tier Storage Bins with Lids
Honestly, 4 Tier Storage Bins with Lids surprised me — sturdier than it looks in the photos, and over 63 buyers gave it 4.5 stars.

4. Repurpose Kitchen Organizers for Desk Drawers
Desk drawer organizers sold at office supply stores are a total rip-off. They charge thirty bucks for a flimsy piece of black plastic. Don’t buy them. Kitchen organizers are cheaper, sturdier, and look way better. I was walking down the household aisle at Costco last month and spotted a 4-pack of Seville Classics bamboo drawer dividers. They were $19.99. They’re spring-loaded and expand up to 17.5 inches long. I bought them for my kitchen but realized they fit perfectly in my deep desk drawer. I used them to create custom sections for my highlighters, sticky notes, and phone chargers. Bamboo looks so much warmer than cheap plastic. It makes opening my drawer feel like a tiny luxury. I also use small 4 oz glass ramekins from my kitchen to hold paperclips and pushpins. I bought a set of four at Kroger for $5.99. They have a nice heavy weight. They don’t slide around when you open the drawer. A common mistake people make is dumping all their pens into one giant bin. You end up digging around for a black pen while your client waits on the phone. Divide and conquer. Give every tiny item a specific home. If it doesn’t have a home, throw it in the trash. You don’t need seven dried-out blue markers. Throw them away right now. You might also like: 20 Inspiring Organizing Storage Home Hacks Ideas for Any Style

5. Create a Printing Station Inside a Closet
Printers are the ugliest pieces of technology we own. They’re bulky, loud, and constantly covered in a thin layer of dust. I hate looking at mine. For a long time, it sat right on the corner of my desk, taking up prime real estate. Every time it printed, my entire desk shook. My coffee spilled twice. I finally decided to banish it to the guest room closet. I bought a cheap wooden stool from Target for $15.00 and set the printer on it inside the closet. Then I bought a Sterilite 15-quart plastic tub with a latching lid for $8.99. I keep all my extra printer paper, ink cartridges, and a 2-inch roll of packing tape in that tub. It sits on the floor right under the stool. Now, my desk is totally clear. When I need to print, I just send it over Wi-Fi. I do have to walk to the closet to get the paper, but honestly, the extra ten steps are good for my legs. One negative to this setup: make sure your closet has an outlet. I had to run a heavy-duty 10-foot extension cord under the baseboard. It took me an hour to secure it so nobody would trip. Always use a surge protector. A power surge fried my old Canon printer last summer because I plugged it directly into the wall. Lesson learned. You might also like: 15 Inspiring Cozy Home Hacks That Changed Everything

6. Use Tension Rods for Vertical Binder Storage
Binders are annoying. If you stack them flat, you have to move five of them to get to the bottom one. If you stand them up on a shelf, they constantly fall over like dominoes. I used to use heavy bookends, but they took up too much space. Then I discovered the tension rod trick. It’s brilliant. I went to Target and bought four Room Essentials white tension rods. They were only $3.00 each. They adjust from 24 to 36 inches. I installed them vertically between two shelves in my bookcase. I spaced them about four inches apart. Now I just slide my binders into the slots. They stand perfectly upright. They never fall over. I also use this trick for my 9×12 inch manila envelopes and my extra clipboards. It’s like building custom cubbies for three bucks. You have to twist them really tight, though. I didn’t tighten one enough last week. I grabbed a heavy binder, the rod slipped, and a stack of folders crashed onto my foot. It hurt. Make sure you twist the rod until it won’t budge. This trick completely transformed my shelving unit. It looks like a custom-built piece of furniture now. It’s the cheapest storage hack I know. Skip the expensive wooden dividers and just use tension rods. You might also like: 15 Clever Kitchen Small Space Ideas That Changed Everything
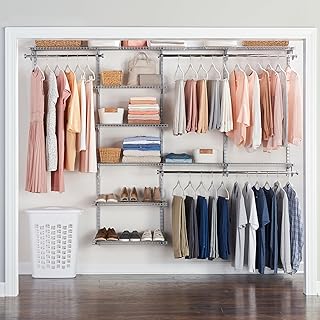
Rubbermaid Configurations Deluxe Custom Closet Kit 4-8 Ft.
Honestly, Rubbermaid Configurations Deluxe Custom Closet Kit 4-8 Ft. Adjustable surprised me — sturdier than it looks in the photos, and over 81 buyers gave it 4.5 stars.

7. The Mason Jar Trick for Pens and Markers
I’m obsessed with glass jars. They’re cheap, easy to clean, and look surprisingly chic on a desk. I used to buy those expensive ceramic pen holders from boutique stationery shops. I spent $25 on one that shattered into a million pieces when my cat knocked it off my desk. Never again. Now I just use mason jars. I buy the 16 oz wide-mouth Ball mason jars at Sprouts. They cost about $1.50 each when you buy a case. The wide mouth is crucial. If you buy the regular mouth jars, your pens will get stuck. You won’t be able to reach the short pencils at the bottom. I line up three of these jars on my windowsill. One holds my black Pilot G2 gel pens. One holds my yellow Sharpie highlighters. One holds my metal scissors and a 6-inch plastic ruler. It looks so clean and uniform. Plus, I can see exactly what I have. I wash them out with hot soapy water once a month because dust settles at the bottom. Be careful not to drop heavy metal scissors into the glass jar too hard. I cracked the bottom of one jar doing that. Place a small 2-inch circle of felt at the bottom of the jar. It absorbs the shock and stops the annoying clinking sound every time you drop a pen inside. It’s a tiny detail that makes a huge difference.

8. Zone Your Desk with a Monitor Stand
If your computer monitor sits flat on your desk, you’re wasting valuable space. You’re also probably hurting your neck. Your screen should be at eye level. I needed a monitor stand, but the ones online were either ugly black plastic or cost fifty dollars. I improvised. I was buying groceries at Whole Foods and saw a beautiful bamboo cutting board in the home goods aisle. It was 14 by 11 inches and cost $12.99. I bought it, took it home, and glued four cheap 2-inch wooden blocks to the bottom corners. I used Gorilla Wood Glue. It cost me maybe fifteen bucks total. It looks like a high-end designer piece. I set my monitor on top of it. Now I have a perfect little garage underneath my screen. I slide my wireless keyboard under there at the end of the day. I also keep a 3×3 inch pad of yellow sticky notes tucked underneath. It creates a specific zone for my computer. Zoning is vital for keeping a desk clean. When your keyboard is tucked away, you suddenly have room to eat lunch or review a printed document. Don’t use a cardboard box as a monitor stand. I tried that in 2020. The box slowly collapsed over three weeks. My monitor tilted forward and almost smashed onto my keyboard. Build something sturdy.
9. Floating Shelves to Get Books Off Your Desk
I love reading business books. I used to keep a stack of five or six books right on the corner of my desk. I thought it made me look smart. In reality, it just blocked my natural light and gave me less room to work. My coffee mug was constantly in danger of being knocked over by a falling hardcover. You have to get the books off your desk. I went to Walmart and bought a Mainstays 24-inch white floating shelf for exactly $16.48. It came with the hidden metal bracket. I mounted it on the wall right next to my window. Now my favorite reference books live up there. I added a tiny 4 oz fake succulent from Target ($5.00) to the end of the shelf to make it look cute. It instantly made my desk feel twice as big. Installing floating shelves can be frustrating. You must use a level. I eyeballed my first shelf. I stepped back and it looked like a sinking ship. My pens literally rolled off the edge. I had to spackle the holes, repaint, and start over. Buy a cheap 9-inch bubble level at the hardware store. It will save your sanity. Also, check the weight limit. Most cheap floating shelves can only hold about ten pounds. Don’t load them up with heavy encyclopedias. Stick to a few paperbacks and decorative items.
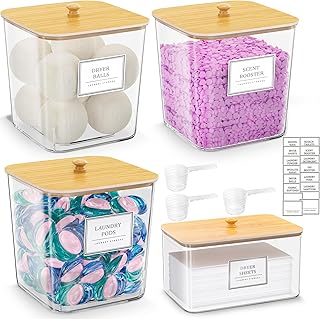
HomePekite Laundry Pods Storage Container
If you want something that just works, HomePekite Laundry Pods Storage Container is a safe bet (15 reviews, 4.5 stars).

10. Tame the Paper Clutter with a Daily Processing Tray
Paper clutter is the enemy of productivity. Mail, receipts, school flyers, and meeting notes pile up faster than you can blink. I used to just toss everything into a giant pile on my chair. Then I’d have to move the pile to the floor just to sit down. It was embarrassing. You need a daily processing tray. I use a simple 10×13 inch clear acrylic tray I found on clearance at Target for $8.00. Every single piece of paper that enters my office goes into that tray. Nothing goes straight to the desk. At 4:30 PM every day, I spend five minutes processing the tray. I trash the junk mail. I file the bills. For business receipts, I use a totally weird trick. I bought a pack of reusable silicone food bags from Trader Joe’s for $4.99. They’re meant for sandwiches, but they’re incredibly durable and zip completely shut. I shove all my small paper receipts into one of these silicone bags. It keeps them dry and prevents the ink from fading. I keep the bag right inside my acrylic tray. If you skip your daily processing, the tray will overflow by Friday. I skipped it for a week last month when I was sick. I spent two hours on Sunday sorting through crinkled envelopes. Do it daily. It takes five minutes.
11. Lighting Upgrades for Better Home Office Organization
Bad lighting makes your office feel like a dungeon. If you rely on a single overhead ceiling fan light, you’re doing it wrong. It casts weird shadows on your desk and strains your eyes. I suffered from terrible afternoon headaches for a year before I realized my lighting was the problem. I was squinting at my screen in the dark. Good lighting makes your organized space actually look organized. I bought a Threshold brass task lamp from Target for $35.00. It has an adjustable arm. I positioned it on the left side of my desk because I’m right-handed. This prevents my hand from casting a shadow over my notebook when I write. I put a 60-watt equivalent LED daylight bulb in it. The bright, cool white light keeps me awake and focused. Skip the warm, yellow bulbs for a workspace. They make you feel sleepy. They belong in your bedroom, not your office. One warning about metal task lamps: the shade gets incredibly hot if you use an old incandescent bulb. I accidentally brushed my wrist against my lamp shade last year and burned myself. It left a red mark for a week. Always use LED bulbs. They stay cool to the touch and use way less electricity. It’s a cheap upgrade that changes the entire mood of the room.
12. Rolling Carts for Mobile Storage
I don’t have a lot of built-in cabinets in my house. My office is technically just a corner of my guest bedroom. I needed storage that I could move out of the way when my mother-in-law visits. Enter the rolling cart. I bought a 3-tier metal rolling cart at Costco for $29.99. It’s almost identical to the famous IKEA Raskog cart, but cheaper. It has three metal mesh baskets and four caster wheels. It’s exactly 31 inches tall. I use the top tier for my daily planners and a 16 oz water bottle. The middle tier holds my label maker and extra rolls of packing tape. The bottom tier holds heavy reams of printer paper. I can roll this cart right next to my desk when I’m working. When I’m done, I push it into the closet. It’s mobile organization. It’s brilliant. I made a huge mistake when I first assembled it, though. I didn’t tighten the bolts on the wheels with the little metal wrench they provided. I just hand-tightened them. I pushed the cart across my thick carpet, a wheel popped off, and my label maker crashed to the floor. Use the wrench. Tighten everything. I also recommend buying a cart made of metal, not plastic. The plastic ones bend and warp if you put anything heavier than a notebook in them.

Lifewit 6 Pack Clothes Storage Bins with Lids
Honestly, Lifewit 6 Pack Clothes Storage Bins with Lids surprised me — sturdier than it looks in the photos, and over 1,073 buyers gave it 4.5 stars.
13. Label Everything with Washi Tape
I love label makers, but the refill tape is ridiculously expensive. I was spending twenty bucks a month just on plastic label tape. That’s not budget-friendly. I switched to washi tape and a fine-tip Sharpie. It’s cheaper, looks cuter, and peels off without leaving a sticky residue. I bought a 5-pack of pastel washi tape from the craft aisle at Walmart for $4.50. Each roll is 15mm wide. I use the mint green tape to label my file folders. I use the pale pink tape to label my laptop charger and phone cords. I even put a strip of yellow tape on the edge of my desk exactly 28 inches from the floor to mark where my chair height should be. It’s a visual reminder to fix my posture. Washi tape is basically decorative masking tape. It has a slight paper texture. It holds ink perfectly. Just don’t use a gel pen on it. I tried using a wet gel pen to write a label for my tax folder. I swiped my thumb across it five minutes later and smeared black ink all over the folder and my white shirt. It ruined the shirt. Only use a permanent marker. Let it dry for ten seconds before you touch it. It’s the cheapest, most colorful way to organize your supplies.

14. Use Pegboards for Visual Supply Storage
My favorite trick for a tiny workspace is a pegboard. Garages use them for tools, but they’re perfect for office supplies. I bought a white plastic pegboard kit from Target for $20.00. It measures 22 by 22 inches and came with a little bag of plastic hooks and cups. I mounted it on the wall to the right of my monitor. I hang my scissors, my rolls of washi tape, and my noise-canceling headphones on the hooks. I use the little plastic cups to hold my USB thumb drives and binder clips. Having my supplies hanging on the wall feels like I’m working in a cool design studio. It frees up my entire desk drawer. You can see exactly what you have at a glance. You won’t buy a third pair of scissors because you can clearly see the two pairs hanging on the wall. I will warn you: mounting a pegboard requires wall spacers. You can’t screw it flat against the drywall, or the hooks won’t fit through the holes. I learned this the hard way. I screwed a cheap wooden pegboard directly into my wall. I tried to insert a metal hook and just gouged a hole in my drywall behind it. The Target plastic kit comes with the spacers included. Use them. It’s a fun, modular system you can rearrange whenever you get bored.
You don’t need a massive budget to create a beautiful workspace. You just need a little creativity and a trip to a few basic stores. I personally swear by the rolling cart and the mason jar tricks. They saved my sanity, no exaggeration. Start small. Pick one drawer or one messy pile of cords today. Don’t try to reorganize your entire room in one afternoon. You’ll just get overwhelmed and end up crying on the floor surrounded by empty Amazon boxes. I’ve been there. Take it one step at a time. If you found these tips helpful, please pin this article to your favorite Pinterest board or save it to your bookmarks. Share it with that one friend who always complains about their messy desk. Let’s get to work.
Frequently Asked Questions
What is the best desk height for home office organization?
For optimal ergonomics, your desk height should be between 28-30 inches for average-height individuals, or 30-32 inches if you are taller. Your elbows should form a 90-degree angle when typing to prevent neck and back strain.
How can I hide cords on a budget?
Use cheap plastic cord bundlers attached under your desk to loop and hide thick cables. For smaller wires, use 8-inch black zip ties to group them together. Always leave a little slack so you don’t damage the cords.
Are expensive acrylic desk organizers worth it?
Usually, no. They scratch easily and show dust and fingerprints. You are better off repurposing cheap bamboo kitchen drawer dividers or using glass mason jars for a durable, budget-friendly setup.
How do I organize heavy binders without a filing cabinet?
Install adjustable tension rods vertically between two bookshelf shelves. Space them a few inches apart to create custom slots. This keeps binders standing perfectly upright without taking up floor space.