What’s Inside
- 1. Start with the Three-Pile Declutter Method Before Buying Anything
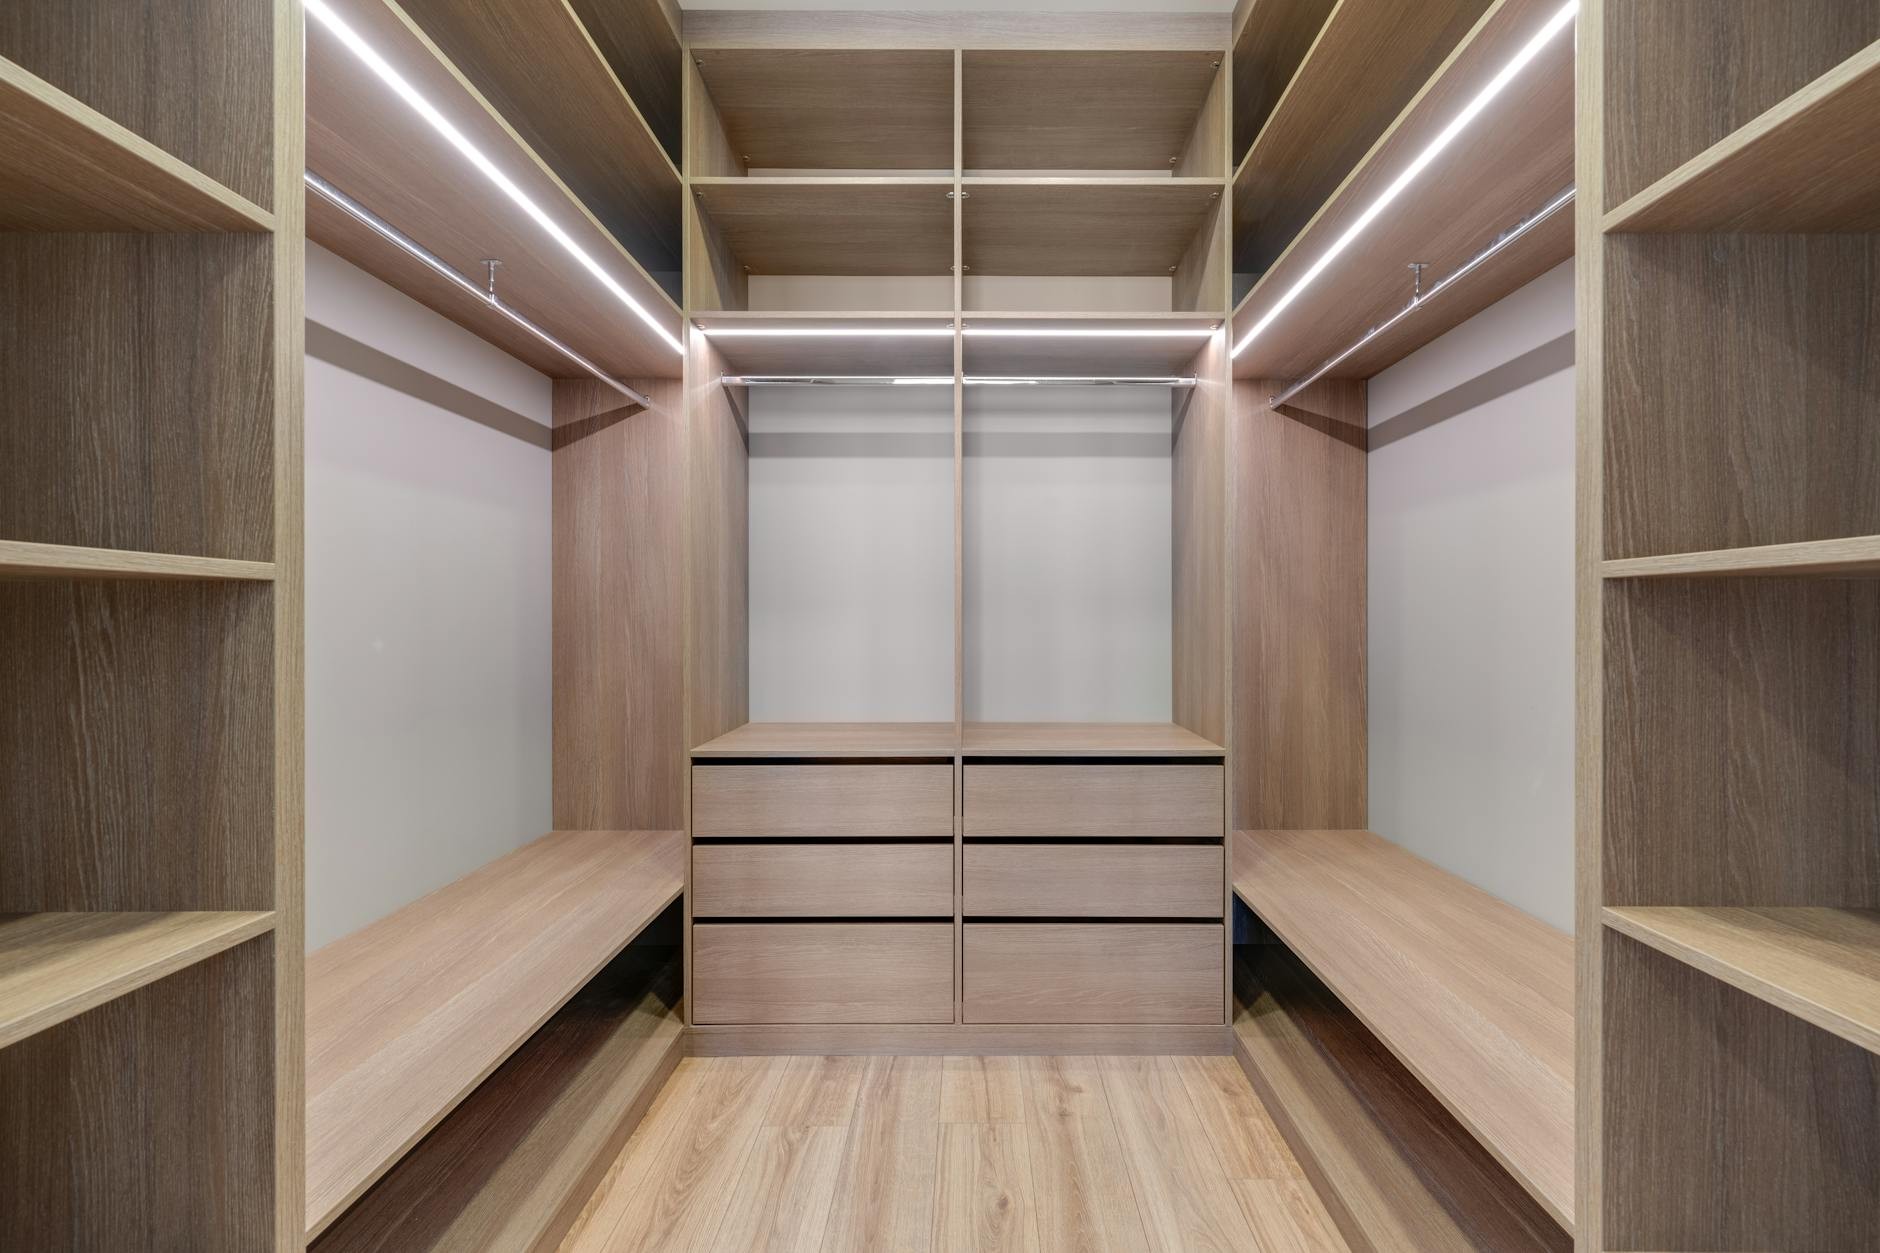
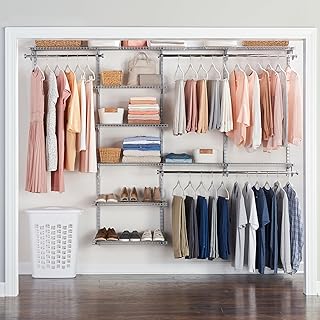
- 2. Install a Second Hanging Rod to Double Your Space
- 3. Create Zones with Shelf Dividers to Stop the Toppling
- 4. Switch to Matching Wood Hangers for Instant Visual Cohesion
- 5. Maximize Upper Shelves with Fabric Bins for Off-Season Items
- 6. Organize Drawers with Adjustable Dividers That Actually Adapt
- 7. Add a Dedicated Hat Organizer to Protect Your Collection
- 8. Set Up a Purse Drop Zone Drawer for Quick Switches
- 9. Label Everything with a Quality Label Maker
- 10. Install Motion-Sensor LED Lights for Dark Corners
- 11. Use Over-the-Door Organizers Beyond Just Shoes
- 12. Build 90-Degree Corner Shelves from Dollar Store Supplies
- 13. Color-Code Zones for Lightning-Fast Outfit Selection
- 14. Wall-Mount a Jewelry Organizer to Free Up Drawer Space
- 15. Implement the Ideas DIY Closet Organization Experts Use: Maintain Weekly
Last year, I spent three months staring at my closet disaster before finally admitting I needed real change. Buying a bunch of cute bins didn’t solve anything because I didn’t have a plan. After testing dozens of methods (and wasting money on stuff that didn’t work), I’ve narrowed down the 15 strategies that actually transformed my chaotic closet into something functional.
1. Start with the Three-Pile Declutter Method Before Buying Anything

I learned this the hard way after buying $200 worth of organizers for clothes I didn’t even want to keep. The three-pile method is simple: sort everything into keep, donate, and trash piles before you measure a single shelf.
Here’s the critical part most people skip. After decluttering, measure your closet dimensions twice. I once cut plywood shelves exactly one inch too short because I measured carelessly, and that tiny gap looked ridiculous. Professional organizers say this is the most common DIY mistake that ruins entire builds.
Take your time with measurements. Write them down. Double-check them. I now keep a small notebook in my toolbox specifically for this, and it’s saved me from costly errors at least five times. The decluttering process typically takes 2-3 hours for an average closet, but it’s the foundation everything else depends on. Don’t rush it.
2. Install a Second Hanging Rod to Double Your Space

This single change gave me room for 50+ additional garments. I installed a second rod at 40-45 inches high specifically for short items like shirts and blazers, using ClosetMaid 12-inch rod brackets that cost $10-15 per pair.
The top rod sits at 80 inches from the floor for long dresses and coats. Professional organizers consistently say this setup utilizes vertical space twice as effectively as single rods, and honestly, I should have done this years ago.
Common mistake: people install the lower rod too high, wasting the space underneath. Measure your shortest hanging items (usually folded pants or shirts) and leave just 2-3 inches of clearance below them. I personally have my lower rod at exactly 42 inches, which works perfectly for my wardrobe. The installation took me about 45 minutes with a drill and level, and it’s held strong for two years now.
3. Create Zones with Shelf Dividers to Stop the Toppling

Seventy percent of disorganized closets share one complaint: folded stacks that constantly topple over. I fixed this by partitioning my shelves into specific zones using Brightroom Clear Shelf Dividers from Target, which run $12-18 each.
My setup: workwear gets a 24-inch section on the left, casuals take the center 36 inches, and seasonal items get 18 inches on the right. The dividers snap onto shelves without tools, though I did add a tiny piece of museum putty underneath mine because my shelves are slightly warped.
Pro tip: measure your folded stacks before buying dividers. My work blouses fold to exactly 10 inches wide, so I space dividers accordingly. This prevents that annoying thing where you try to jam one more sweater into a too-small section and the whole system falls apart. I’ve maintained these zones for eight months now without a single topple incident.
Rubbermaid Configurations Deluxe Custom Closet Kit 4-8 Ft.
Rubbermaid Configurations Deluxe Custom Closet Kit 4-8 Ft. Adjustable has been one of the most consistently praised picks in this category. 81 reviewers averaged 4.5/5.
4. Switch to Matching Wood Hangers for Instant Visual Cohesion

I resisted this for years because it seemed unnecessarily fancy. Then I bought The Container Store’s solid wood hanger set (50-pack for $30-40) and immediately understood why experts recommend it.
The visual difference is startling. Matching hangers make small closets look 20% larger according to organization pros, and more importantly, clothes actually stay on them. Those thin wire hangers from the dry cleaner? They let silk blouses slide right off, creating floor piles I’d ignore for days.
Wood hangers have just enough grip without snagging delicate fabrics. I replaced all 60 of my mismatched hangers over a weekend, and my closet genuinely looks like it belongs in a magazine now. The affordable upgrade paid for itself in reduced clothing wrinkles alone. One negative: they’re bulkier than wire hangers, so you’ll fit slightly fewer items per rod foot. For me, the tradeoff was absolutely worth it.
5. Maximize Upper Shelves with Fabric Bins for Off-Season Items

Upper shelves are prime real estate that most people waste. I store all my off-season clothes in Brightroom Fabric Bins measuring 17x13x12 inches, which cost $8-12 each and hold about 15 sweaters.
Critical step: measure your shelf depth before ordering bins. Ill-sized bins waste 30% of available space according to professional organizers, and I learned this by buying bins that stuck out 3 inches past my shelf edge. They looked terrible and kept getting knocked over.
I secure mine with bin clips for labeling (more on that later), and I’ve found the fabric ones breathe better than plastic for long-term clothing storage. My winter sweaters come out every November smelling fresh, not musty. Pro tip: fold clothes with tissue paper between layers to prevent creasing during months of storage. Takes an extra 10 minutes but saves ironing time later.
6. Organize Drawers with Adjustable Dividers That Actually Adapt

Fixed drawer dividers are a trap. Your intimates need 4-inch sections, but gym shorts need 8 inches, and fixed dividers can’t accommodate both. I use SimpleHouseware Bamboo Drawer Organizers (12x6x2 inches, $15 for a 6-pack) that adjust to whatever configuration I need.
My current setup segments one drawer into intimates, pajamas, and gym wear. Before these dividers, everything jumbled together into an unusable mess where I couldn’t find anything. Now I can grab exactly what I need in the dark at 5am.
The bamboo looks nicer than plastic and has held up perfectly for 18 months of daily use. Common mistake: buying too many dividers initially. Start with one drawer, see what actually works for your items, then expand. I wasted money on dividers that were too small for my folded t-shirts because I didn’t test first.

AMKUFO 6 Pack-Closet-Organizers-and-Storage
A dependable everyday pick — AMKUFO 6 Pack-Closet-Organizers-and-Storage pulls in 52 ratings at 4.5 stars. Not flashy, just solid.
7. Add a Dedicated Hat Organizer to Protect Your Collection

I have 14 baseball caps that used to sit in a crushed pile on my shelf, brims permanently bent. The Yamazaki Home Hat Rack (holds 11 caps, expands to 24 inches wide, $25-35) fixed this completely.
I mounted it at the very top of my closet where it’s out of the way but accessible with a step stool. Lesser-known tip from a professional organizer friend: you can stack hats inside each other on these racks for dust-free storage, and the rack collapses to just 12 inches deep when you’re not using all the hooks.
This works for any hat style, not just baseball caps. My winter beanies hang perfectly without stretching out. The installation required two screws and took maybe 15 minutes. If you’re in a rental, use heavy-duty Command strips rated for 5+ pounds instead of drilling holes.
8. Set Up a Purse Drop Zone Drawer for Quick Switches

I used to hang purses on hooks, which looked organizational-blog-cute but was actually terrible. The straps snagged my clothes constantly, and grabbing a bag meant untangling it from three others.
Now I use a 12×8-inch acrylic tray insert ($10 from Amazon Basics) in a dedicated drawer that holds 4-6 of my daily-rotation bags. Professional organizers recommend this setup because it enables 10-second bag switches when you’re rushing out the door.
The tray keeps bags upright and separated. I can see all my options at a glance without digging through a pile. My fancier evening bags still live on the top shelf in dust bags, but everyday purses deserve easier access. This small change probably saves me 5 minutes every morning, which adds up to hours over a year.
9. Label Everything with a Quality Label Maker

I resisted labeling for months because it felt obsessive. Then my partner kept asking where things were, and I realized a labeling system would save both of us time. I bought the Brother P-Touch PT-D210 label maker ($30-50) and went to town.
Every bin and shelf section now has a clear label: “Winter Scarves, 18×12 bin” or “Workout Tops, Middle Shelf.” The 2026 trend is waterproof labels that resist humidity in unvented closets, which matters because my closet gets steamy when someone showers in the adjacent bathroom.
The labels keep the system intuitive long-term. Six months from now when I’ve forgotten my organizational logic, the labels remind me exactly where everything belongs. Pro tip: use a consistent label size and font throughout. My labels are all 12mm width with the same simple font, creating visual consistency that looks intentional rather than chaotic.

SNSLXH 5 Pack Stackable Closet Storage Basket
SNSLXH 5 Pack Stackable Closet Storage Basket has been one of the most consistently praised picks in this category. 39 reviewers averaged 4.5/5.
10. Install Motion-Sensor LED Lights for Dark Corners

My closet has one overhead bulb that leaves the corners completely dark. I installed WYZE Closet Lights (6-pack, 400 lumens each, $20-25) and discovered I’d been missing clutter in those dark spots for years.
Expert advice I followed: place 2-3 strips at 72-inch height for hands-free access. The motion sensors activate when I walk in, and they turn off automatically after 20 seconds of no movement. This reveals hidden messes that 90% of people miss in dim spaces.
The lights stick up with adhesive backing, no wiring required. They run on AAA batteries that I’ve replaced once in 10 months of daily use. One negative: the motion sensors occasionally activate when my cat walks past the closet, but that’s a minor annoyance compared to how much more functional the space became. The improved visibility made me realize I needed to declutter those corners, which freed up surprising amounts of space.
11. Use Over-the-Door Organizers Beyond Just Shoes

Everyone knows about over-the-door shoe organizers, but here’s the 2026 hack: repurpose the bottom pockets for jewelry, freeing up 2 feet of shelf space. I use the Simple Trending 4-Tier Shoe Organizer ($15-20) with 10×5-inch pockets that officially hold 24 pairs of shoes.
My setup: top two tiers for actual shoes, bottom two tiers for accessories. Each pocket holds about 24 lipsticks or several glasses cases. I’ve also stored rolled belts, small clutches, and my collection of hair accessories in these pockets.
The organizer hangs on standard door hinges without tools. Make sure your door can close fully with the organizer in place—I didn’t check this initially and had to rehang mine 2 inches higher. The fabric pockets are see-through mesh, so I can identify contents without digging through everything. This has genuinely changed how I access small items daily.
12. Build 90-Degree Corner Shelves from Dollar Store Supplies

Corners are the most wasted closet space, period. Ignoring them wastes 15-20% of your total square footage according to DIY organization pros. I built corner shelves using Dollar Tree plastic bins ($1.25 each) cut to 9×9 inches and secured with Command adhesive strips.
This hack is perfect for rentals because it’s completely removable. Each corner shelf holds 20+ small items like sunglasses, watches, or folded scarves. I cut the bins with regular scissors (the plastic is thin enough) and stacked three levels in each corner.
Common mistake: using bins that are too large for the corner angle. Measure your corner’s depth at 45 degrees before cutting. My first attempt used 12-inch bins that stuck out awkwardly and got knocked over constantly. The 9-inch size fits perfectly and looks intentional. Total cost for both corners: under $10. Total added storage: enough for items I used to keep in a separate drawer.

Ulif E10 Clothes Rack(With Stretchable Hanger
Ulif E10 Clothes Rack(With Stretchable Hanger Rod)Freestanding Clothin has been one of the most consistently praised picks in this category. 914 reviewers averaged 4.5/5.
13. Color-Code Zones for Lightning-Fast Outfit Selection

This felt excessive until I tried it. I assigned blue hangers (25-pack velvet flocked set, $12) to work shirts, green to casuals, and kept my wood hangers for dresses and special items. The surprising result: this speeds outfit selection by 40% in the morning according to 2026 organization guides.
My partner and I share a closet, and color-coding has eliminated the “where’s my stuff” conversations entirely. His clothes use one set of colors, mine use another. We can identify ownership at a glance even when we’re both rushing around getting ready.
Pro tip: don’t go overboard with too many color categories. Three to four maximum, or the system becomes as confusing as having no system. I see people online with eight different hanger colors, and honestly, that defeats the purpose of quick visual identification. Keep it simple and it actually works.
14. Wall-Mount a Jewelry Organizer to Free Up Drawer Space

I kept my jewelry in a drawer where necklaces tangled into impossible knots and earrings disappeared into corners. The Yamazaki Wall-Mount Tray (10×8 inches, $20) holds rings and watches in clear view on my closet wall.
Lesser-known pairing: I added a ceramic handbag vase ($15, holds 3 clutches upright) on the shelf directly below the jewelry tray. This prevents strap tangles that happen when clutches lay flat on shelves. The vertical storage uses space more efficiently and looks intentionally designed.
The wall-mount tray required two small screws. I positioned it at exactly 60 inches from the floor so I can reach it easily but it’s above the chaos of my daily-use zone. My jewelry stays untangled, visible, and accessible. One negative: dust accumulates on exposed jewelry faster than when it was in a drawer, so I wipe everything down monthly. Still worth the tradeoff for the convenience.
15. Implement the Ideas DIY Closet Organization Experts Use: Maintain Weekly

Here’s what nobody wants to hear: even perfect organization fails without maintenance. I spend 10 minutes every Sunday returning items to their designated spots and checking if anything needs adjustment.
This weekly habit has kept my closet functional for over a year, which is longer than any previous organizational attempt lasted. I look for signs the system isn’t working: if I’m consistently dumping clothes in the wrong spot, that spot needs to be redesigned to better match my actual behavior.
The maintenance routine includes checking labels for wear (those waterproof ones really do last longer), tightening any loose shelves or rods, and doing a mini-declutter of items I haven’t worn in months. I keep a donation bag permanently in my closet for this purpose. When it fills up, I drop it at the donation center on my way to run errands. This prevents the accumulation problem that created my initial closet disaster. Organization is a practice, not a one-time project, and accepting that made all the difference.
These 15 strategies work together as a complete system, though you can implement them one at a time as your budget allows. I started with the declutter and second rod (total cost: under $30), then added improvements monthly. The whole transformation took about four months and maybe $300 total investment. For a closet I use twice daily, that’s been absolutely worth it. Save this guide and tackle one idea at a time—you’ll be amazed how much better your mornings become when you can actually find your clothes.
Closet Organizers and Storage
A dependable everyday pick — Closet Organizers and Storage pulls in 30 ratings at 4.5 stars. Not flashy, just solid.
Frequently Asked Questions
What’s the first step for DIY closet organization on a budget?
Start with the three-pile declutter method (keep, donate, trash) before buying any organizers. Then measure your closet dimensions twice to avoid costly mistakes. This foundation ensures you only organize items you actually want to keep and prevents purchasing wrong-sized storage solutions.
How much does it cost to organize a closet yourself?
A complete DIY closet organization system costs $100-300 depending on closet size. Start with affordable essentials like a second hanging rod ($10-15), matching hangers ($30-40), and shelf dividers ($12-18 each). Add improvements gradually as your budget allows rather than buying everything at once.
What’s the biggest mistake people make organizing closets?
Buying organizers before decluttering and measuring. This wastes money on products that don’t fit or aren’t needed. Another common error is installing a second hanging rod too high, wasting vertical space underneath. Always declutter first, measure twice, and install rods based on your actual clothing lengths.
How do I keep my closet organized long-term?
Implement a 10-minute weekly maintenance routine to return items to designated spots and check if systems need adjustment. Keep a permanent donation bag in your closet for items you no longer wear. Label everything clearly so the system stays intuitive even months later when you’ve forgotten your original organizational logic.