What’s Inside
- Start Your Makeup Drawer Organization With A Ruthless Declutter
- Measure Your Drawer Dimensions Precisely (Don’t Guess)
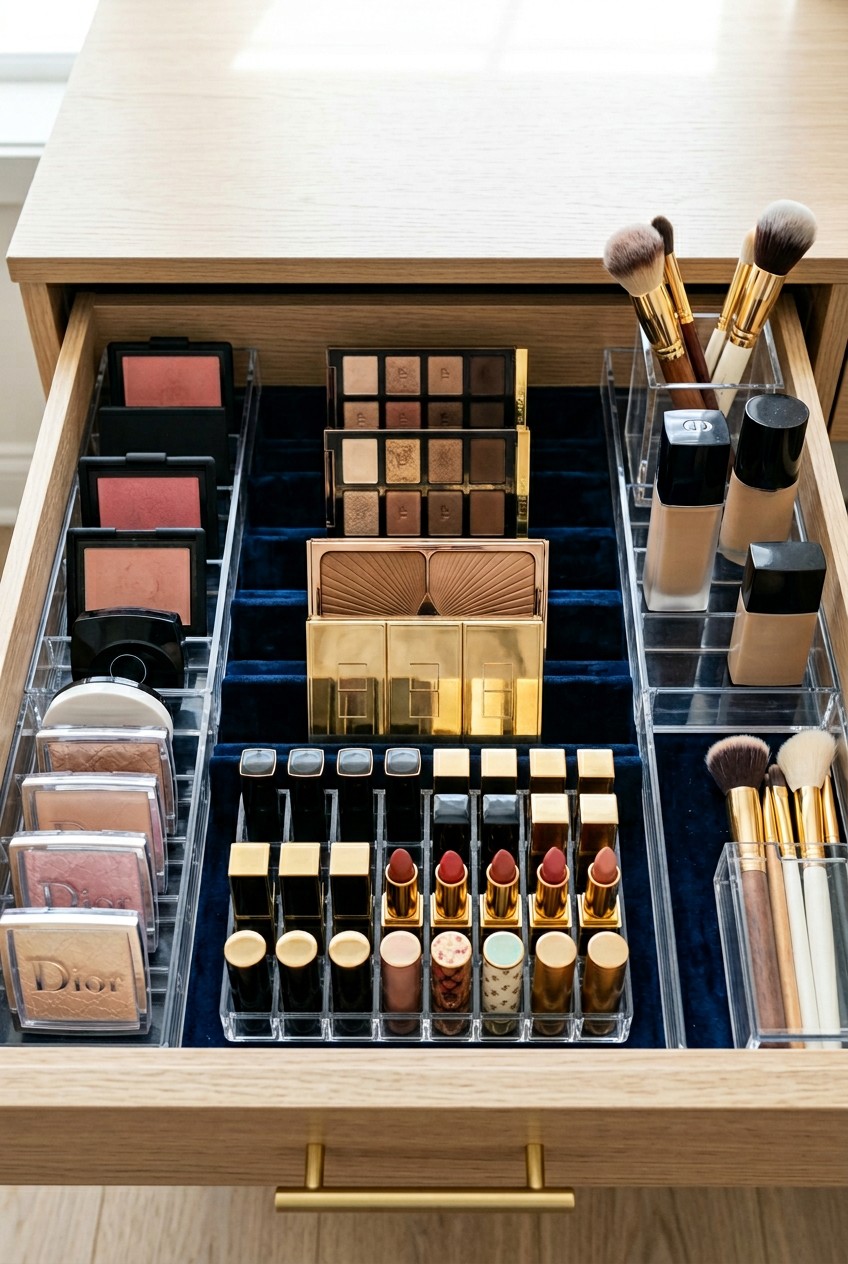
- Invest In Modular, Clear Acrylic Organizers
- Categorize And Sub-Categorize For Maximum Efficiency
- Maximize Vertical Space With Stackable Solutions
- Embrace Sustainable Storage For A Greener Routine
- Use Dedicated Holders For Specific Product Types
- Create A Daily Essentials Zone In Your Makeup Drawer Organization
- Maintain Impeccable Cleanliness (Wash Those Brushes)
- Avoid Heat And Humidity In Your Storage Setup
- Utilize Digital Inventory Apps Like Peeknest Or BeautiStics
- Repurpose Household Items Creatively (And Cheaply)
- Line Your Drawers With Non-Adhesive Grip Liner
Last Tuesday, standing in my cramped master bathroom, I dropped a brand-new, $39.00 bottle of NARS Light Reflecting foundation. It hit the tile hard. The thick glass shattered. Expensive beige liquid splattered across my fuzzy white bath mat and up the cabinets. Why? My makeup drawer was a sticky, chaotic nightmare. I’d shoved one too many bulky palettes into a shallow space, the drawer jammed, I yanked it, and my foundation went flying. It’s a gutting feeling to watch your hard-earned money soak into a rug because you can’t keep your space tidy. I learned that the hard way. If your morning routine feels like digging through a trash bin of cracked powders and leaking glosses, I get it. I’ve been exactly where you’re standing.
I tried fixing this for months before it clicked. I bought cheap plastic bins that slid around, hoarded expired mascaras for “special occasions,” and wasted hours hunting for my favorite lip liner while running late. Proper organization isn’t just about looking pretty. It’s about saving your sanity, protecting your products, and reclaiming those lost ten minutes. Skip the generic, one-size-fits-all plastic trays from the dollar store. They crack and turn into cloudy, scratched messes in a week. We’re going to build a system that actually works for your collection. Grab a trash bag and a tape measure. Let’s fix this disaster.
1. Start Your Makeup Drawer Organization With A Ruthless Declutter

Before you buy a single tray, dump everything out. Everything. Empty the entire drawer onto your bed or a large towel. Professional organizers preach keeping only what you use, but with cosmetics, it’s also a health issue. I was buying brush cleaner at Whole Foods last month and realized I hadn’t sanitized my own kit in ages. When I got home and opened my drawer, the smell of rancid foundation oils hit me like a brick. It was gross. You can’t organize garbage.
Check your expiration dates. Toss mascara every 3 to 6 months. Liquid eyeliner is done after 3. That expensive MAC lipstick ($23.00) you’re saving? It’s bad after a year. Oil-free foundations expire in a year, and powders max out at 2. I used to hoard a crusty, 4-year-old Urban Decay Naked palette because I spent $54.00 on it. The shadows were chalky, the fallout irritated my eyes, and it hogged space. I finally tossed it. It hurt, but the relief was incredible.
Create three piles: keep, toss, and relocate. The relocate pile is for stray hair ties, safety pins, and random receipts. Wipe the empty drawer with a damp microfiber cloth and a mix of 1 tablespoon white vinegar and 1 cup warm water. The smell fades fast, and it cuts through old makeup grease. Don’t skip this. Putting fresh organizers into a dusty drawer is a mistake.
2. Measure Your Drawer Dimensions Precisely (Don’t Guess)

The biggest mistake I’ve made is eyeballing measurements. I once stood in the aisles of Target, sure I knew how deep my vanity was. I bought four acrylic trays for $15.00 each. I got home, loaded them up, and tried to close the drawer. It caught on the frame. The trays were 0.5 inches too tall. The sound of plastic gouging wood still haunts me. I had to unpack everything and drive back to the store. Don’t be a rookie.
Grab a standard Stanley 25-foot tape measure ($11.97 at Home Depot) and measure the exact length, width, and depth. Write these numbers in your phone. A typical vanity drawer might be 10 to 12 inches wide, 14 to 18 inches deep, and 3 to 5 inches high. That height is critical. You need to account for the organizer plus the products. A standing lipstick adds 3 inches right there.
When shopping, leave 1/4 inch of breathing room on the sides so you can lift trays out for cleaning. If they fit too tightly, they create a vacuum seal against the wood, making them impossible to remove without spilling everything. I’ve broken a nail trying to pry a wedged bin out of a desk. Measure twice, buy once.
3. Invest In Modular, Clear Acrylic Organizers

Modular systems are best because your collection changes. You might buy a bulky palette tomorrow that ruins a rigid, pre-molded setup. Clear acrylic is the standard because if you can’t see a product, you won’t use it. It’ll just rot in the back of the drawer. I swear by The Container Store’s Luxe Acrylic Modular Makeup System. Pieces range from $6.74 to $24.74, and they feel heavy and luxurious. No cheap, cloudy look here.
Last fall, I tried saving money with a $12.99 single-piece organizer. It was a disaster. The compartments were weird. My square NARS blushes wouldn’t fit in the round slots, and my eyeliner pencils jammed the drawer. I tossed it. With modular pieces, you’re playing Tetris. Buy a long 12-inch tray for brushes and a 3-inch square for your beauty blenders.
If you’re on Amazon, the STORi Audrey Stackable Cosmetic Organizer ($14.99) is a solid option. The plastic is thick, edges are smooth, and they stack securely. When you open the drawer, the clear acrylic reflects light, looking like a department store counter. It’s functional and stunning. Just check those height measurements before stacking them two tiers high.

A-LuGei 【Military Grade】 Drawer Organizer
If you want something that just works, A-LuGei 【Military Grade】 Drawer Organizer is a safe bet (35 reviews, 4.5 stars).
4. Categorize And Sub-Categorize For Maximum Efficiency

Dumping makeup into bins is just contained hoarding. You have to group items. Foundations in one tray, blushes in another. To save time, you need to sub-categorize. I used to keep all lip products in one bin. Every morning, I’d dig through a sea of pinks and reds trying to find my Charlotte Tilbury Pillow Talk liner ($25.00). The clicking sound of plastic tubes while I was running late drove my husband crazy.
Now, I group by color and finish. Matte nudes in one section, bold reds and glosses in another. For eyeshadows, I separate everyday mattes from glittery weekend palettes. I bought a 4-pack of drawer dividers at Walmart for $4.88 to create these zones. It changed everything. I don’t have to think. My hands just go to the right spot. You might also like: 15 Cozy Room Cleaning Tips Organizing Ideas to Steal Right Now
This also forces you to face your shopping habits. When you see 14 identical shades of champagne shimmer, it’s a reality check. Next time you’re at Sephora holding a $40.00 highlighter, you’ll remember that overflowing tray at home and put it back. Categorizing saves time and serious money. You might also like: 20 Inspiring Garage Organization Ideas That Are Totally Worth It
5. Maximize Vertical Space With Stackable Solutions

If you have deep drawers (over 4 inches), you’re wasting space if you only use one layer. Things pile up, get crushed, and disappear. I found a shattered $32.00 Fenty Beauty bronzer buried under a bottle of setting spray. The powder had exploded everywhere. It was a miserable cleanup. You might also like: 15 Clever Kitchen Small Space Ideas That Changed Everything
You need stackable solutions. I’m obsessed with Muji’s Polypropylene Makeup Boxes. They have a frosted texture that hides smudges, and they’re cheap, ranging from $1.90 to $6.90. They come in 1/4, 1/2, and horizontal half sizes that stack perfectly. The sliding action when you lift the top tray is satisfying.
Put everyday items on the top layer. Put backups, lashes, and seasonal palettes on the bottom. If the drawer is really deep, buy hanging organizers from The Container Store ($12.99). They rest on the side tracks, suspending tweezers and brow gels at the top, leaving the deep space below open for large tubs. It creates two layers without drilling a single hole.
6. Embrace Sustainable Storage For A Greener Routine

The beauty industry creates massive plastic waste, and our organization habits often add to it. I used to buy flimsy bins that cracked under glass bottles. I’d throw them out and buy more. It was a terrible cycle. Last month, at Sprouts, I saw solid bamboo drawer dividers for $14.99. The earthy smell and texture won me over.
Bamboo is renewable, durable, and looks gorgeous. Many trays feature spring-loaded dividers, perfect for varying product sizes. If you want something softer, look into vegan cork. Brands like Corkor make eco-friendly bags. I bought their 11.8″ x 6.7″ x 3.3″ bag ($49.00) to store oversized palettes. The cork is water-resistant and has a squishy, protective feel.
If you prefer a clear look but hate virgin plastic, check out Greenside Co., Ltd. for recycled PET Modular Interlocking Drawer Storage Boxes. You can also repurpose. I wash out glass jam jars, soak off labels with 2 tablespoons of baking soda and warm water, and use them to hold bamboo cotton rounds. It costs zero dollars and keeps glass out of the landfill.
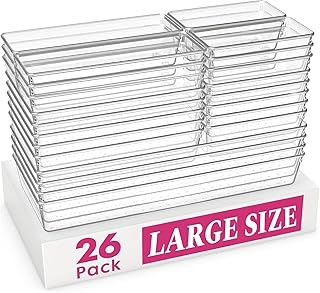
Criusia Large Drawer Organizer Bins 26 Pack | Complete 5
Criusia Large Drawer Organizer Bins 26 Pack | Complete 5 Size Clear Pl punches above its price — 24 buyers rated it 4.5 stars. I would buy it again.
7. Use Dedicated Holders For Specific Product Types

Square bins are great for bulky items, but they’re terrible for lipsticks, brushes, and flat palettes. If you toss lipsticks loosely into a tray, they roll around and caps pop off, leaving red smears on your acrylic. I ruined a $38.00 Yves Saint Laurent lipstick this way. The cap slipped off, and the bullet smashed against the drawer. It was heartbreaking.
You need specialized organizers. For lipsticks, buy a 24-section acrylic organizer. The Container Store sells one for $9.99. It keeps every tube upright. The feeling of sliding a square lipstick into its slot is unmatched. You can see the color labels on the bottom of MAC lipsticks instantly. No more guessing.
For eyeshadow palettes, never stack them flat. They get heavy, and pulling the bottom one out often drops the top ones. Buy a standing file divider. Store them vertically, like books. For brushes, I use Muji’s Polypropylene Makeup Stand ($2.90). It keeps bristles pointing up so they don’t fray. Storing brushes flat destroys the delicate hairs of expensive tools.
8. Create A Daily Essentials Zone In Your Makeup Drawer Organization

This tip saves time when you’re rushing. Designate a “Daily Essentials” zone. This is a small area at the very front of your drawer that holds only what you use for your 5-minute face. One primer, one foundation, one concealer, one blush, one brow pencil. Nothing else allowed.
I used to keep my daily NARS concealer ($32.00) mixed with five dramatic, full-coverage concealers I only wear to weddings. I’d grab the wrong tube in the dark and look like a ghost. Now, I use The Container Store’s Everything Organizer Small Divided Organizer ($5.99) at the front. It holds exactly what I need.
Having this zone means I don’t have to turn on bright overhead lights and wake my husband at 6 AM. I do my makeup by muscle memory because those five products are always in the same spot. Quiet, stress-free mornings are worth the effort. If you travel, keep these in a structured bag inside the drawer. When it’s time to pack, you just zip and go.
9. Maintain Impeccable Cleanliness (Wash Those Brushes)

You can buy the most expensive organizers, but if they’re covered in spilled foundation and powder, your drawer looks terrible. Regular cleaning is non-negotiable. I used to be lazy. I’d toss damp sponges back into clean trays. Within weeks, the plastic was coated in sticky residue, and I developed a skin breakout. Dirty tools spread bacteria.
You need a cleaning routine. Once a month, take the trays out. Wipe them with a microfiber cloth. I mix 1/2 cup warm water with 1 tablespoon of Dawn dish soap. It cuts through silicone primers. Never use harsh glass cleaners on acrylic; it strips the finish and leaves it permanently cloudy.
Wash brushes weekly. I use a solid soap like the Beautyblender cleanser ($16.50 at Sephora). The sudsy water turning brown is gross but satisfying. Let brushes dry flat on a clean towel overnight before putting them back. If you put damp brushes in an enclosed space, they will grow mold. The smell of a mildewed foundation brush is something you’ll never forget. Keep tools pristine, and your drawer will look high-end.
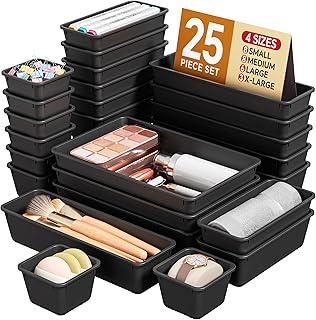
KEMETHY 25 PCS Plastic Drawer Organizers Set
KEMETHY 25 PCS Plastic Drawer Organizers Set punches above its price — 310 buyers rated it 4.5 stars. I would buy it again.
10. Avoid Heat And Humidity In Your Storage Setup

Most people get this wrong. We store cosmetics in the bathroom because the mirror is there. But bathrooms are the worst environment for chemical formulas. Every hot shower fills the room with steam. That heat and humidity seep into drawers, breaking down active ingredients and shortening shelf life.
I learned this last summer. I left a $34.00 Charlotte Tilbury lipstick in my top bathroom drawer. After a week of steamy showers, I opened the tube, and it had melted. It leaned sideways, snapped off, and left a waxy, pink smear everywhere. Powders also absorb moisture, causing “hard pan”—a shiny film that makes them impossible to use.
If you have space, store your collection in a cool, dry place like a bedroom vanity. I bought a portable dehumidifier at Costco for $39.99 for my bedroom. If bathroom storage is unavoidable, ensure every lid is screwed on tight. Keep products inside covered acrylic boxes rather than open trays. It provides a barrier against moisture.
11. Utilize Digital Inventory Apps Like Peeknest Or BeautiStics

This sounds intense, but it’s a huge trend, and it changed how I shop. If you have a large collection, you own duplicates without realizing it. I used to buy a new black eyeliner every time I went to Target. I ended up with six identical NYX Epic Ink liners ($9.00 each) drying out. It’s a waste.
Digital inventory apps fix this. Peeknest or BeautiStics let you track your collection. You can log expiration dates, when you opened a product, and create “Project Pan” goals. BeautiStics offers notifications. I love the ping on my phone telling me my mascara is hitting the 6-month mark and needs to be tossed.
It takes an hour to set up. You sit on the floor, scan barcodes, and input dates. But once it’s done, your drawer is mapped on your phone. When you’re standing in Sephora, tempted by a new peach blush, you can check the app and see you already own three open ones. It kills impulse buys. It’s the ultimate tool for a curated, clutter-free space.
12. Repurpose Household Items Creatively (And Cheaply)

You don’t have to spend hundreds at container stores. Some of the best organizers are things you already own or can buy cheaply from the kitchen section. Don’t overlook candle jars. When I finish a 6.5 oz Diptyque candle ($74.00), I refuse to throw the glass away. I pour boiling water in to melt the last bit of wax, wipe it clean, and use it for brushes. The heavy glass doesn’t tip, and the lingering sandalwood smell is amazing.
IKEA is a goldmine. Their GODMORGON boxes with lids ($14.99 for 5) are designed for bathrooms but fit perfectly in vanity drawers. They have a frosted, high-quality look. I’ve also used the IKEA RATIONELL VARIERA bamboo cutlery trays ($24.99). They’re meant for forks, but the long, narrow slots are perfect for tall foundation bottles, setting sprays, and eyeshadow palettes.
Old, hard-shell sunglasses cases are another hack. I use them to store delicate brushes when I travel, or to keep backup lipsticks separated. Repurposing gives your space a unique look without blowing your budget on plain plastic.
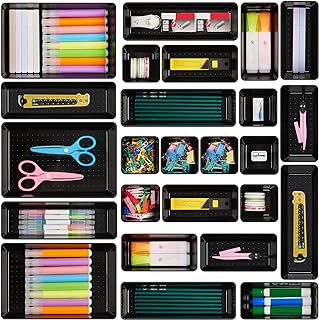
Vtopmart 25 PCS Office Desk Drawer Organizers Set
If you want something that just works, Vtopmart 25 PCS Office Desk Drawer Organizers Set is a safe bet (412 reviews, 4.5 stars).
13. Line Your Drawers With Non-Adhesive Grip Liner

This is my favorite secret tip. Lining the bottom of your drawers before putting organizers inside is highly effective. I used to skip this, and my acrylic trays would slide backward every time I opened the drawer, crashing into the back panel with a loud clack. Over time, the sliding scratched the wood.
I tried adhesive contact paper. Huge mistake. The adhesive melted in the heat and ripped the wood finish off when I tried to remove it. Never use adhesive liners on nice furniture. Instead, buy a roll of non-adhesive grip liner. I use the Gorilla Grip drawer liner from Amazon ($14.99 for a 12-inch by 10-foot roll). It has a rubbery, squishy texture.
Cut it to size with scissors and lay it flat. It provides a soft, grippy base. When you place your organizers on top, they lock into place. They won’t shift a millimeter, no matter how hard you yank the drawer. The liner also protects wood from spills. If a bottle leaks, it pools on the rubber instead of soaking into the wood. You just pull the liner out, wash it, and put it back. It’s a cheap upgrade that makes your setup feel custom.
Organizing your vanity shouldn’t be a stressful chore. It’s about creating a quiet, efficient space that serves you during those chaotic early mornings. I’ve tried all the shortcuts, and taking the time to measure, declutter, and invest in modular pieces is the only way to make it stick. You’ll feel a wave of relief the first time you open that drawer and see every single lipstick perfectly aligned. If you found these tips helpful, pin this article to your favorite Pinterest board so you can reference the measurements later. You’ve got this. Go tackle that messy drawer!
Frequently Asked Questions
How do I start my makeup drawer organization?
Start by completely emptying the drawer and throwing away expired products. Group the remaining items by category (like foundations, blushes, and lipsticks) before measuring your drawer dimensions to buy the correct modular acrylic organizers.
What are the best organizers for deep makeup drawers?
For deep drawers, stackable solutions are essential. Use translucent frosted bins, like Muji Polypropylene boxes, to create multiple vertical layers. You can also use hanging drawer organizers that suspend smaller items near the top.
How often should I clean my makeup drawer organizers?
You should wipe down your acrylic trays at least once a month using a microfiber cloth and a mix of warm water and mild dish soap. Avoid harsh glass cleaners, as they can permanently cloud and scratch the plastic.
Is it bad to store my makeup in the bathroom?
Yes, storing cosmetics in a humid, warm bathroom can break down active ingredients and melt products like lipsticks. It’s best to store your makeup drawer organization setup in a cool, dry bedroom vanity or closet.