What’s Inside
- Prioritize Decluttering Before Buying Bins
- Invest In Heavy-Duty Systems For Pull Out Pantry Organization
- Create Zones With Clear Stackable Bins
- Decant Dry Goods Into Airtight Containers
- Maximize Vertical Space With Expandable Risers
- Swap Plastic For Sustainable Natural Fiber Bins
- Use Minimalist Waterproof Labels
- Add Door-Mounted Racks For Narrow Items
- Stop Putting Flimsy Bags On Bare Shelves
- Upgrade To Soft-Close Hardware For Pull Out Pantry Organization
- Install Integrated LED Strip Lighting
- Dedicate A “Use First” Bin To Stop Food Waste
- Install Vertical Units In Ultra-Narrow Spaces
- Upcycle Sturdy Cardboard As Temporary Dividers
- Fix Wire Shelving With The Poster Board Hack
Last Tuesday at Costco, I made a massive mistake. I bought a 3-pound bag of organic chia seeds for $14.99, brought it home, and confidently opened my kitchen cabinet. That’s when I found three more identical, half-empty bags of chia seeds rotting in the dark corners of my bottom shelf. The smell of rancid chia seeds is aggressively awful, like old oil paint mixed with dust. My pull out pantry organization was a total disaster. I tried fixing it by just shoving the new bag in front of the old ones, which obviously failed when the whole pile collapsed onto my kitchen floor. I spent twenty minutes sweeping up tiny black seeds while my dog tried to eat them. If you’re constantly buying duplicates because you can’t see what you actually own, you’re wasting money and losing your mind. I’m going to show you exactly how I fixed my chaotic shelves. I’ve tested dozens of expensive systems and cheap hacks, and I’ve made every embarrassing mistake you can imagine. Let’s fix your kitchen storage right now with practical steps that actually work.
1. Prioritize Decluttering Before Buying Bins

You can’t organize garbage. I tried this wrong for months before figuring it out. I used to go straight to Target, buy a bunch of cute plastic bins, and try to stuff expired boxes of Kraft mac and cheese into them. It’s a huge waste of time and money. Before you buy a single organizing product, you need to completely empty your pantry. Pull every single item out and put it on your kitchen counter. You’re going to find things that shock you. Learned that the hard way. Last year, I found a 4-ounce jar of generic nutmeg that expired in 2018 hidden in the back of my cabinet. Grab a box of Target up&up heavy-duty trash bags ($11.99 for a 120-count box) and start tossing anything expired, stale, or gross. Donate the unopened cans of soup you know you won’t ever eat. Wipe down the bare shelves with warm soapy water to remove those sticky syrup rings and weird crumb piles. Once you have a blank slate, you can accurately see how much space you have. You won’t know what kind of pull out pantry organization you actually need until you get rid of the junk.
2. Invest In Heavy-Duty Systems For Pull Out Pantry Organization

If you’re upgrading your cabinets, you absolutely must spend the money on high-quality hardware. I’m telling you right now, cheap wire sliding shelves are a nightmare. I bought a flimsy $15 wire rack from Walmart a few years ago. I loaded it up with six 28-ounce cans of crushed tomatoes. The metal tracks immediately warped, the shelf sagged in the middle, and it got permanently stuck halfway out of the cabinet. Skip the cheap stuff. You need commercial-grade steel construction and smooth ball-bearing glides. I personally swear by the Lynk Professional Select Slide Out Wood Cabinet Organizer. The 20-inch wide by 21-inch deep version costs exactly $89.99 at Home Depot. It features a sturdy wood base and heavy-duty metal glides that can support heavy items like 5-pound bags of flour or cast iron Dutch ovens without buckling. Rev-A-Shelf is another excellent brand I’ve used in client homes. Yes, spending $90 on a single shelf insert feels painful at first. But when you can effortlessly slide out forty pounds of canned goods with one finger, you’ll realize it’s worth every single penny.
3. Create Zones With Clear Stackable Bins

Without boundaries, small items will migrate to the back of your deep shelves and disappear forever. I’ve lost countless bags of Trader Joe’s peanut butter pretzels to the dark void of my bottom cabinet. You need to implement strict zone-based organization. Create dedicated categories like baking supplies, salty snacks, or breakfast items. To keep these zones intact, use clear, stackable plastic bins. I highly recommend the iDesign Linus Bins. The 10-inch by 8-inch by 5-inch size is perfect and costs $14.99 at The Container Store. Because they are completely transparent, you can take a visual inventory of your snacks in three seconds flat. You won’t have to rummage around blindly. I group all my 1.5-ounce snack bars into one bin, and all my 4-ounce fruit pouches into another. The clear walls prevent smaller items from falling off the sides of your sliding shelves when you pull them out quickly. Just make sure you measure the height of your shelves before buying stackable bins, because I’ve definitely bought bins that were half an inch too tall and got jammed against the top of the cabinet frame. Trust me on this.

3-Tier Hanging Laundry Basket Organizer:Foldable Wire Shelf
Honestly, 3-Tier Hanging Laundry Basket Organizer:Foldable Wire Shelf Laundry Ro surprised me — sturdier than it looks in the photos, and over 527 buyers gave it 4.5 stars.
4. Decant Dry Goods Into Airtight Containers

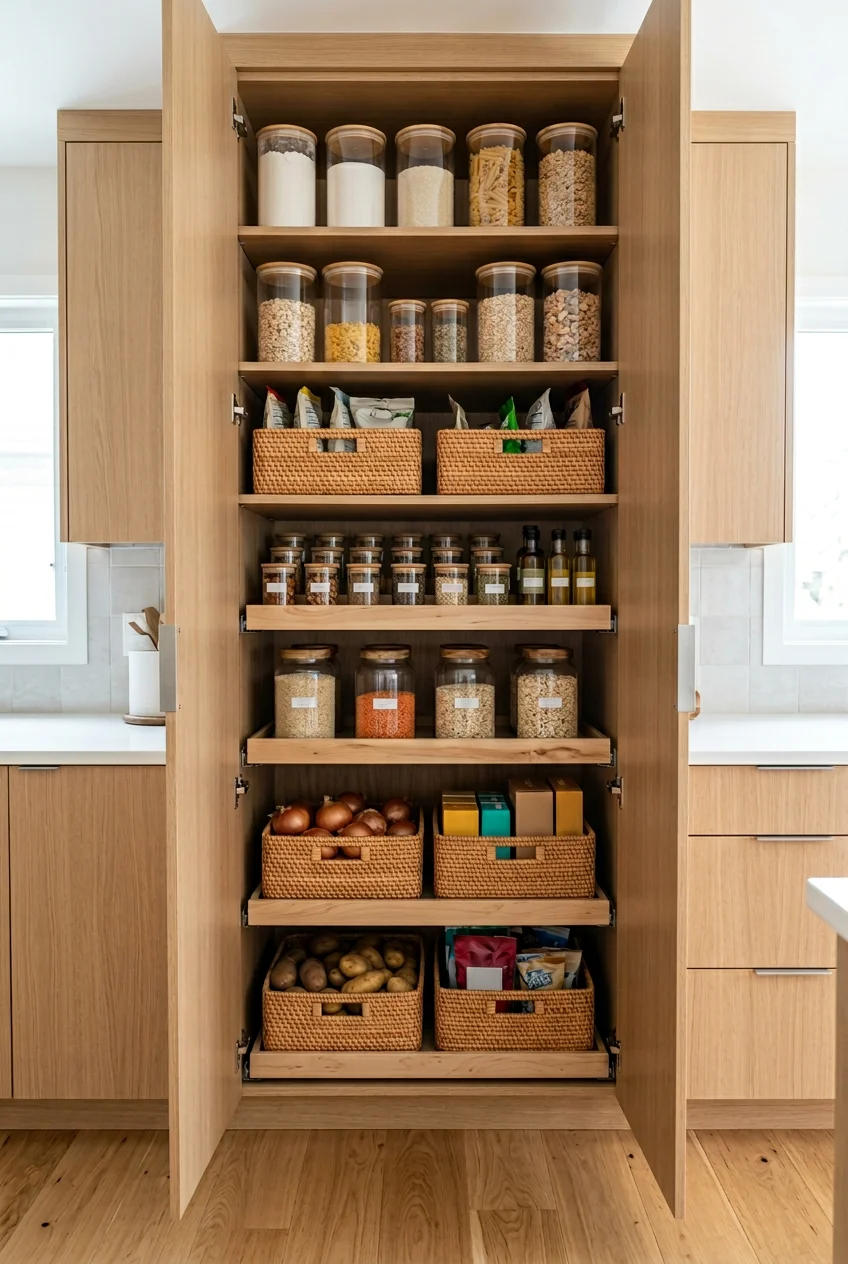
If you want that gorgeous, high-end 2026 aesthetic, you need to get rid of the ugly cardboard packaging. But it’s not just about looks. Keeping dry goods in their original paper bags is a recipe for disaster. When I lived in my old apartment, I kept a 5-pound paper bag of flour on my shelf. It leaked white powder everywhere and eventually attracted pantry moths. Decanting your dry goods into uniform, airtight containers is mandatory. I’ve tested dozens of brands, and OXO Good Grips POP Containers are still the best. A standard 5-piece set costs $54.95 at Target. I use the large 4.4-quart container for a standard 5-pound bag of flour, and the smaller 1.1-quart size for a 12-ounce bag of raw almonds. The push-button airtight seal actually keeps brown sugar soft for months. Skip the cheap dollar store plastic containers. I tried those once, and the lids warped in the dishwasher after a single cycle, making them completely useless. Decanting takes ten extra minutes after a grocery run, but it keeps your food fresh and makes your pull out pantry organization look incredibly neat.
5. Maximize Vertical Space With Expandable Risers

Most sliding shelves have way too much empty air space above the food. If you just line up your cans in a flat row, you’re wasting half your cabinet. I used to do this, and I couldn’t see anything past the first row. I’d end up buying three jars of Whole Foods organic ground cumin because I couldn’t see the ones hiding in the back. You need to lift things up. Expandable tiered risers are the easiest fix for this. I use the Seville Classics 3-Tier Bamboo Step Rack, which costs $24.99 on Amazon. It expands from 8.75 inches to 15.5 inches wide. I place this right in the middle of my sliding shelf. I put my 15-ounce cans of black beans on the bottom tier, and my tiny 2-ounce glass spice jars on the top tier. Suddenly, I can clearly read every single label at a glance. It completely eliminates the need to dig around. Don’t buy flat lazy susans for deep sliding shelves. They just take up valuable horizontal space and leave the vertical space completely empty. You might also like: 15 Stunning Organizing Kitchen Home Hacks Ideas You Haven’t Thought Of
6. Swap Plastic For Sustainable Natural Fiber Bins

While clear plastic is great for tiny snacks, you don’t want your entire kitchen to look like a sterile plastic factory. The massive trend for 2026 is moving toward sustainable, natural materials. It brings a really warm, textured look to your cabinets. I love using natural fiber bins for bulky items that don’t need to be perfectly visible, like extra bags of chips or loaves of bread. I buy the Threshold Water Hyacinth Storage Bins from Target. The medium size is 13 inches by 11 inches and costs $16.00. The rough, woven texture of the water hyacinth feels so much nicer than cheap, static-filled plastic. It smells faintly earthy and clean. I can easily fit three 16-ounce bags of tortilla chips into one basket. When I pull the shelf out, the basket contains the messy, crinkly bags perfectly. One quick warning though. Don’t use woven baskets for anything that might leak, like bottles of olive oil or sticky maple syrup. I ruined a beautiful $20 seagrass basket last year when a bottle of soy sauce tipped over inside it. Stick to dry, sealed items. You might also like: 20 Inspiring Garage Organization Ideas That Are Totally Worth It

Rubbermaid Configurations Deluxe Custom Closet Kit 4-8 Ft.
Rubbermaid Configurations Deluxe Custom Closet Kit 4-8 Ft. Adjustable has been one of the most consistently praised picks in this category. 81 reviewers averaged 4.5/5.
7. Use Minimalist Waterproof Labels

If you decant your food into clear jars without labeling them, you’re going to accidentally put salt in your coffee. I’ve done it, and it’s disgusting. You need a labeling system, but please don’t use masking tape and a Sharpie. I tried that trick to save money, and the ink smudged all over my hands every time I grabbed a container. It looked incredibly messy. You need sleek, waterproof labels. I bought a Phomemo Mini Bluetooth Label Maker on Amazon for $36.99, and it comes with waterproof thermal tape. The battery lasts forever. Here’s a crucial tip. Label your containers by broad category, not by the specific item. Print a label that says “Grains” instead of “Quinoa.” That way, when you run out of quinoa and decide to buy a 16-ounce bag of farro instead, you don’t have to print a brand new label. I also suggest writing the expiration date on a small piece of tape and sticking it to the very bottom of the OXO container. It keeps the front looking clean and minimalist while preventing you from eating ancient food. You might also like: 20 Beautiful Aesthetic Home Makeover You Can Try Today
8. Add Door-Mounted Racks For Narrow Items

If your pull out pantry organization includes a solid swinging cabinet door, you are probably wasting a massive amount of storage space. The back of the door is prime real estate. I ignored my cabinet doors for years, leaving them completely blank while my interior shelves were overflowing. I finally installed a Rev-A-Shelf 565-14-52 14-Inch Door Mount Spice Rack. It costs $45.99 and is made of gorgeous maple wood. It completely changed how I store narrow, annoying items. I use it to hold my 75-square-foot rolls of aluminum foil, boxes of parchment paper, and all those tiny 1-ounce taco seasoning packets that always get lost. Because these items are so shallow, the door still closes perfectly flush against the interior shelves. Before you buy a door rack, you absolutely must measure the clearance gap between your closed door and the front edge of your sliding shelves. If you only have two inches of clearance, you can’t install a four-inch deep rack. I made that exact measuring mistake in my bathroom once and couldn’t close the door for a week. No exaggeration.
9. Stop Putting Flimsy Bags On Bare Shelves

This is the most common mistake I see when I visit a client’s house. People buy expensive sliding hardware, and then they just toss a half-empty, flimsy bag of Sprouts organic white cheddar puffs right onto the bare wood. When you pull the shelf out quickly, that bag is going to topple over. It will fall backward, slip behind the drawer, and jam the metal sliding mechanism. I’ve spent twenty minutes on my hands and knees trying to fish a crushed bag of marshmallows out from behind a stuck drawer. Topple-prone items absolutely require rigid containment. You need to put those bags inside a sturdy bin before putting them on the sliding shelf. I use the mDesign Plastic Storage Bins, which are $22.99 for a 2-pack on Amazon. They have high, straight sides that keep floppy bags perfectly upright. Reserve the bare, flat surface of your sliding shelves strictly for heavy, sturdy items that won’t tip over. Think 32-ounce cans, heavy glass jars of pasta sauce, or small kitchen appliances like a blender.

HomePekite Laundry Pods Storage Container
If you want something that just works, HomePekite Laundry Pods Storage Container is a safe bet (16 reviews, 4.5 stars).
10. Upgrade To Soft-Close Hardware For Pull Out Pantry Organization

If you’re currently dealing with old, sticky cabinet tracks that require a hard shove to close, you need to upgrade to soft-close hardware immediately. In my old house, I had cheap metal slides. Every morning at 6 AM, I’d grab my coffee beans and push the shelf shut. It would slam with a loud, aggressive metallic CLANG that echoed through the kitchen and woke up my dog. It drove me crazy. When I remodeled, I installed Rev-A-Shelf Soft-Close slides. A full kit costs about $129.99, but the difference is staggering. You just give the shelf a gentle nudge, and a hydraulic mechanism catches it, pulling it shut silently and smoothly. It feels like pure luxury. More importantly, soft-close hardware protects your food. When a drawer slams shut violently, all your glass jars violently crash into each other. I’ve actually shattered a 24-ounce glass jar of marinara sauce because I slammed a cheap sliding drawer too hard. The soft-close feature prevents that sudden impact, protecting both your expensive cabinetry and your groceries.
11. Install Integrated LED Strip Lighting

Even the most organized cabinet is useless if you can’t see what’s inside it. Deep cabinets are notoriously dark. I used to rely on my overhead kitchen lights, but my own body would cast a dark shadow directly into the cabinet. I was basically feeling around in the dark for my groceries. Intentional cabinet lighting is a massive trend right now, and it’s surprisingly cheap to do yourself. I bought a roll of Govee 16.4-foot LED Strip Lights for $22.99 on Amazon. I peeled off the adhesive backing and stuck the strip directly along the inside vertical frame of my cabinet doors. I chose the bright white 4000K light setting. The difference is unbelievable. When I open the door, the bright light illuminates every single dark corner and completely eliminates blind spots. I can clearly see the dust motes floating in the air and every tiny crumb on the wood shelves. It makes keeping things clean so much easier. Don’t bother with those cheap, battery-operated puck lights. They burn through AA batteries in a week and barely cast enough light to read a label.
12. Dedicate A “Use First” Bin To Stop Food Waste

Food waste is incredibly expensive and deeply frustrating. I used to buy fresh produce, shove it into my sliding shelves, and completely forget about it. Last month, I pulled out a drawer and found a plastic clamshell of Kroger strawberries that had grown a thick coat of gray fuzzy mold. It smelled like damp basement walls. To stop doing this, you need to create a dedicated “Use First” bin. I placed a clear iDesign Linus Bin ($14.99) at the very front of my most accessible shelf, right at eye level. Anytime I have a 15-ounce can of beans expiring this month, or a half-eaten bag of pita chips that’s going stale, I drop it directly into this bin. When I’m hungry for a snack or planning dinner, I force myself to look in this specific bin first. Professional organizers call this an outlier bin, and it actively forces you to consume older items before opening new ones. It has easily saved me $40 a month in wasted, spoiled groceries.

4 Pack Laundry Pods Container
Honestly, 4 Pack Laundry Pods Container surprised me — sturdier than it looks in the photos, and over 509 buyers gave it 4.5 stars.
13. Install Vertical Units In Ultra-Narrow Spaces

Not all kitchens have massive, walk-in storage spaces. Sometimes you’re stuck with a weird, ultra-narrow gap between your refrigerator and the wall. I had a client with a bizarre 9-inch wide gap in her kitchen. She was trying to stack boxes of cereal in there, and they kept falling out every time she opened the fridge. Narrow spaces are completely useless without a specialized pull-out unit. I helped her install the 8-3/4-inch 3-Shelf Pullout Organizer with BLUMOTION from Wurth Louis and Company. It costs around $249.00. This is a tall, vertical wooden unit that slides out as one solid piece. It is an absolute lifesaver for tight spaces. We used it to store tall, skinny items like 32-ounce bottles of olive oil, 16-ounce bottles of balsamic vinegar, and tall boxes of spaghetti. Because the entire vertical unit pulls out all at once, you can access items from both the left and right sides. It turns a frustrating, dead gap into the most functional storage spot in the entire kitchen.
14. Upcycle Sturdy Cardboard As Temporary Dividers

Before you drop three hundred dollars on a perfectly matching set of acrylic bins, you need to test your layout. I learned this the hard way. I once bought $200 worth of beautiful plastic bins at The Container Store, brought them home, and realized they were half an inch too long for my 18-inch deep shelves. I had to drive all the way back and return every single one. It was humiliating. Now, I use a trick I learned from the editors at Food52. Upcycle heavy-duty corrugated cardboard boxes as temporary bins. I take my leftover Amazon delivery boxes, cut the top flaps off with a box cutter, and arrange them on my shelves. They are completely free. I use these temporary cardboard bins for two weeks to see if the layout actually makes sense for my daily cooking habits. Once I’m sure the zones work and the sizes are correct, I measure the cardboard boxes and buy the permanent plastic or woven bins to match those exact dimensions. It saves so much money and frustration.
15. Fix Wire Shelving With The Poster Board Hack

If you rent your home, you might be stuck with cheap, builder-grade wire shelves. I absolutely hate wire shelving. Nothing sits flat. I used to store 24-ounce glass jars of pasta sauce on wire racks, and they would constantly tilt and clink against each other. Smaller items like 1-ounce boxes of food coloring would just slip right through the gaps and fall to the floor. You don’t have to rip out the shelves to fix this. You can create a flat, stable surface for under $15. Go to Michaels and buy a large sheet of Elmer’s Foam Board for $4.99. Cut the rigid foam board to match the exact depth and width of your wire shelf. Then, go to Walmart and buy a roll of Con-Tact Brand Shelf Liner for $7.99. I prefer the faux white marble pattern. Wrap the foam board tightly in the sticky contact paper, just like wrapping a birthday present, and lay it flat on top of the wire rack. It instantly creates a smooth, solid, wipeable surface. Your jars won’t wobble, and you won’t lose tiny items through the cracks ever again.
Fixing your kitchen storage doesn’t require a massive renovation or a reality TV show budget. It just takes a weekend, a few heavy-duty trash bags, and a strategic plan. I honestly think that once you stop blindly shoving groceries into dark corners, cooking becomes fun again instead of a stressful chore. You’ll actually know what you own, and you won’t ever buy a fourth bag of rancid chia seeds. If you found these tips helpful, I’d love it if you saved this guide or pinned it to your favorite kitchen inspiration board. Let’s get those cabinets sorted out today!

iDesign Laundry Detergent Holder
If you want something that just works, iDesign Laundry Detergent Holder is a safe bet (12 reviews, 4.5 stars).
Frequently Asked Questions
What is the best depth for a pull out pantry?
The ideal depth for a pull out pantry is typically between 18 to 22 inches. This depth allows for ample storage while ensuring the sliding hardware can smoothly support the weight of heavy canned goods and glass jars.
How do you organize a deep pull out pantry?
Organize a deep pull out pantry by using clear, stackable bins to create distinct zones. Place taller, heavier items in the back and shorter, frequently used items in the front. Use tiered risers to maximize vertical space.
Are pull out pantry shelves worth the money?
Yes, high-quality pull out pantry shelves are absolutely worth the investment. They eliminate blind spots, prevent food waste by making all items visible, and save you from straining to reach items hidden in the back of deep cabinets.
How do you keep items from falling off pull out shelves?
To prevent items from falling, use sturdy plastic or woven bins with high sides to contain floppy bags and small snacks. Avoid placing tall, topple-prone items directly on the bare wood, and ensure your sliding hardware has a soft-close mechanism.
