What’s Inside
- Start with a Strategic Declutter and Zone Plan
- Maximize Vertical Space with Customizable Slatwall Systems
- Utilize Overhead Racks for Infrequently Used Bulky Items
- Invest in Modular Cabinetry for a Clean, Enclosed Look
- Install Magnetic Tool Bars for Instant Access to Metal Tools
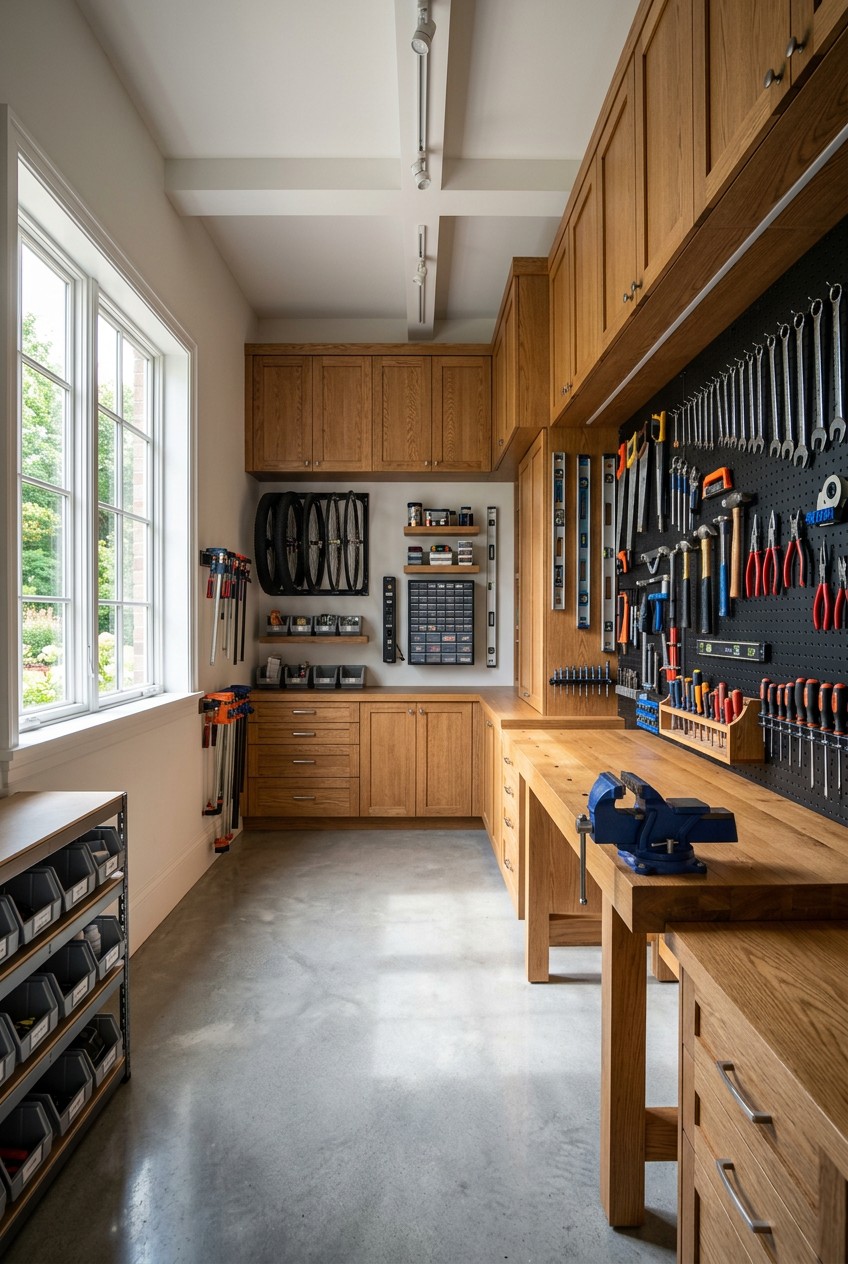
- Optimize Wall Space with Pegboards for Small Tools
- Implement Vertical Bike Storage to Free Up Floor Space
- Standardize with Clear, Labeled Storage Bins
- Upgrade Your Garage Flooring with Polyaspartic Coating
- Enhance Task Lighting with High-Lumen LED Fixtures
- Embrace Smart Inventory Management with QR Codes
- Create a Dedicated Power Tool Charging Station
- Build a Custom DIY Mudroom Zone
- Set Up a Folding Workbench for Small Spaces
- Store Sports Equipment in Bungee Cord Towers
- Master Garage Organization DIY with Ceiling Track Bins
Last Tuesday at Costco, I bought a 12-pack of Bounty paper towels for $22.99 and drove home. I couldn’t even walk into my garage without tripping over my kids’ rusty Razor scooters. If you’re tired of parking in the driveway because your indoor storage is a disaster, tackling a garage organization DIY project is the only way out. I stood there smelling stale potting soil and dripping motor oil, holding my bulk paper towels like an idiot. That was my breaking point. I’ve spent the last three years figuring out what actually works and what just looks cute on social media. I’ve wasted money on flimsy plastic shelves that bowed in the middle and bought cheap cardboard boxes that completely dissolved in the humid summer air. Let’s get into the nitty-gritty of making this space functional. Forget the generic advice. I’m going to give you exact measurements, real product names, and the honest truth about what holds up to cold concrete floors and heavy power tools. You don’t need a massive budget to fix this mess, but you do need a solid plan.
1. Start with a Strategic Declutter and Zone Plan

Before you buy a single storage bin at Target, you need to empty the space. I’m serious. Pull everything out into the driveway. Last April, I tried to organize my garage while everything was still inside. It smelled like damp cardboard and old grass clippings. I just shuffled piles of junk from the left wall to the right wall. It was a complete disaster. Expert organizers always recommend the empty and sort method. Clear one wall at a time. Sort your stuff into four distinct piles: Keep, Donate, Recycle, and Toss. Apply the ruthless 12-month rule. If you haven’t touched that 10-pound bag of organic fertilizer from Sprouts in a year, throw it out. It’s probably solid as a rock anyway. Once you declutter, map out specific zones. Put your heavy gardening tools near the garage door. Put your holiday decorations in the back corners. I bought a roll of blue painter’s tape for $4.98 at Lowe’s and literally taped off boxes on the floor to visualize my zones. The tape peeled up a week later, but it gave me a physical blueprint. I highly recommend drawing it out on a piece of grid paper first. I used a standard 8.5 by 11 pad and sketched my 400 square foot garage to scale. This prevents the common mistake of organizing pure clutter. You can’t organize garbage. You just have to throw it away.
2. Maximize Vertical Space with Customizable Slatwall Systems

Slatwall systems are popular for their sleek look and extreme customizability. Brands like Gladiator Garageworks or Flow Wall offer thick PVC panels that typically cost between $10 and $30 per square foot. I personally swear by the Gladiator GearWall panels. I bought a two-pack of 8-foot panels for $99.99 at Home Depot. The texture is slightly ribbed, and they feel incredibly sturdy in your hands. You must install these directly into your wall studs for maximum weight capacity. I tried using standard drywall anchors for a heavy steel rake once. It ripped out of the wall with a loud crunch, leaving a fist-sized hole and powdery drywall dust everywhere. Don’t do that. Find your studs using a magnetic stud finder, mark them with a pencil, and drive 2.5-inch wood screws straight through the slatwall channels. Once anchored properly, you can accessorize with specialized hooks, deep wire baskets, and heavy-duty shelves for items ranging from muddy gardening tools to bulky sports equipment. The beauty of slatwalls is that you aren’t locked into one layout. If you buy a new weed whacker next summer, you just unclip the hook and move it three inches to the left.
3. Utilize Overhead Racks for Infrequently Used Bulky Items

You have to reclaim that wasted ceiling space with overhead storage racks. Look up right now. That massive empty void above your garage door tracks is prime real estate. Products like the FLEXIMOUNTS overhead racks are highly rated and can safely hold up to 750 lbs of dead weight. I bought their classic 4×8 foot unit in black for $229.99. These are ideal for seasonal decorations, giant plastic holiday bins, or bulky camping gear that you only touch twice a year. Look for models with an adjustable height range. The FLEXIMOUNTS drop down anywhere from 22 to 40 inches, which allowed me to customize the clearance so my husband’s truck wouldn’t scrape the bottom. A standard 4×8 foot unit can add approximately 105 cubic feet of storage. Prices generally range from $150 to $400 per unit depending on the steel gauge. You’ll need a tall A-frame ladder and a socket wrench set to put this together. The steel beams make a loud clanking sound during assembly, so wear earplugs if you’re sensitive to noise. I’d highly suggest having a second person hold the crossbars while you tighten the lag bolts into the ceiling joists. Learned that the hard way.

AMKUFO 6 Pack-Closet-Organizers-and-Storage
AMKUFO 6 Pack-Closet-Organizers-and-Storage punches above its price — 52 buyers rated it 4.5 stars. I would buy it again.
4. Invest in Modular Cabinetry for a Clean, Enclosed Look

For a polished aesthetic and to protect your expensive items from thick dust and creepy garage pests, opt for modular garage cabinets. You can purchase pre-made metal units from brands like Yizosh, or you can undertake a weekend DIY project. If you’re building them yourself, you must use 3/4-inch cabinet-grade hardwood plywood. I bought three sheets of birch plywood for $55.00 each at Lowe’s. Do not use cheap MDF or particleboard. I made that mistake in my old house, and the particleboard swelled up like a wet sponge after one humid August. It crumbled into sawdust. Birch plywood offers incredible durability against extreme temperature fluctuations. Design your base cabinets in standard 30-inch wide modules for easy expansion. I painted mine with a gallon of Rust-Oleum Cabinet Transformations in a dark slate grey ($42.98). The paint has a thick, almost rubbery texture that resists scratches from heavy metal toolboxes. Add soft-close hinges so the doors don’t slam shut and wake up the whole house. Having closed doors hides the visual chaos of mismatched paint cans and greasy automotive fluids.
5. Install Magnetic Tool Bars for Instant Access to Metal Tools

Keep frequently used metal tools totally visible and within arm’s reach by installing strong magnetic tool holder bars directly above your main workbench. This simple ten-minute solution completely prevents rummaging through dark, messy drawers looking for a single Phillips head screwdriver. I bought a set of three 18-inch magnetic bars from Harbor Freight for $17.50. They have a sleek black powder-coated finish and incredibly strong neodymium magnets inside. Mount these bars at a comfortable ergonomic height, approximately 12 to 18 inches above your flat work surface, to avoid shoulder strain. Just hold the bar level, mark the two screw holes, and drill them into the studs. The sound of a heavy steel wrench snapping onto the magnetic bar with a sharp click is deeply satisfying. I use mine for pliers, screwdrivers, scissors, and my favorite metal putty knife. The only negative is that aluminum or brass tools won’t stick to it. I spent ten minutes trying to attach an expensive brass caliper before I realized I was fighting basic physics. Stick to steel and iron tools for this specific hack. You might also like: 15 Gorgeous Hacks Home Organization to Inspire Your Next Project
6. Optimize Wall Space with Pegboards for Small Tools

Pegboards remain a classic, effective solution for organizing smaller, lighter tools. While traditional brown fiberboard works fine for a craft room, it’s terrible for a damp garage. Consider upgrading to metal pegboards from brands like Wall Control for serious durability. I bought a two-panel galvanized steel set for $64.99 on Amazon. The metal panels are rigid, cold to the touch, and they won’t warp when the humidity hits 90 percent. A common mistake most people make is overloading pegboards with massive power tools. They are best suited for lightweight items like screwdrivers, rolls of masking tape, small hand tools, and zip ties. Utilize a variety of specialized metal hooks, small plastic bins, and narrow shelves designed specifically for the Wall Control slots. Their proprietary hooks have a flat back that locks into place, so the hook doesn’t fall off every time you grab a hammer. I’d recommend mapping out your tool placement on the floor first. Group your painting supplies in one corner and your automotive wrenches in another. It makes finding the right tool a totally visual process. You might also like: 20 Stunning Tool Storage Organizing Ideas for a Fresh New Look

iDesign Laundry Detergent Holder
iDesign Laundry Detergent Holder punches above its price — 13 buyers rated it 4.5 stars. I would buy it again.
7. Implement Vertical Bike Storage to Free Up Floor Space

Bicycles are notorious garage floor hogs. They constantly tip over, tangle their pedals together, and scratch the paint on your car doors. Free up valuable concrete real estate by installing vertical bike storage. Options range from simple heavy-duty rubberized ceiling hooks (usually under $10 at any hardware store) to much more elaborate pulley hoist systems from brands like Racor or Saris. The hoist systems typically run $30 to $100. I bought a Racor ceiling bike lift for $39.98. It uses a thick black nylon rope and a set of metal pulleys to haul my heavy mountain bike up to the 10-foot ceiling. You absolutely must mount the brackets directly into solid ceiling joists. I once tried to mount a cheap bike hook into just the drywall. My husband’s 30-pound Trek bicycle came crashing down onto the hood of my Honda Civic at two in the morning. The loud crash nearly gave me a heart attack, and the dent cost $400 to fix. Find the wood joists. Pre-drill the holes. Drive the heavy lag screws in tight. Your car’s hood will thank you. You might also like: 15 Inspiring Aesthetic DIY Home Decor You Can Try Today
8. Standardize with Clear, Labeled Storage Bins

A surprising but effective tip is to use clear, uniform storage bins for absolutely everything on your shelves. This allows you to see the contents at a quick glance, drastically reducing the need to open every single bin just to find a hot glue gun. Expert organizers recommend products like the Sterilite 56-quart Clear Plastic Storage Bins for larger, lightweight items. I bought a six-pack at Walmart for $54.00. For items that need a secure, moisture-resistant seal, like old photographs or baby clothes, step up to the Iris Weathertight Storage Boxes. They have a thick polyurethane foam gasket inside the lid that locks out moisture and spiders. The common mistake of not labeling your bins, or using vague, lazy labels like “Miscellaneous,” will lead to future disorganization. I bought a Brother P-Touch label maker for $34.99 and printed large, bold, waterproof vinyl labels. Label your bins on multiple sides, specifically the front face and the top lid, so you can read them from any angle. The vinyl tape withstands extreme garage heat without peeling off like masking tape does.
9. Upgrade Your Garage Flooring with Polyaspartic Coating

If you really want to clean up the space, you have to address the stained, dusty concrete floor. Polyaspartic and polyurea systems are the superior choice for garage flooring over traditional DIY epoxy kits. While the initial investment is much higher (usually $7 to $10 per square foot professionally installed, or $2,500 to $7,000 for a standard two-car garage), polyaspartic offers a massive 20 to 25-plus year lifespan. It is completely UV stable. I used a cheap water-based epoxy kit from Home Depot five years ago. Within six months, the area where the sun hit the floor turned a gross, sickly yellow color, and the hot tires from my car peeled the epoxy right off the concrete in giant, brittle flakes. Polyaspartic cures in a matter of hours and creates a thick, glossy, impenetrable shell. The texture is slightly grippy if you add the decorative vinyl flakes, which prevents slipping when the floor is wet. This long-term durability makes it a much more cost-effective solution despite the higher upfront price tag. It totally changes how the room feels.

Sakugi Storage Shelves – 5 Tier Shelf Organizer
Honestly, Sakugi Storage Shelves – 5 Tier Shelf Organizer surprised me — sturdier than it looks in the photos, and over 31 buyers gave it 4.5 stars.
10. Enhance Task Lighting with High-Lumen LED Fixtures

Good lighting is crucial for safety and functionality. Most builder-grade garages come with one pathetic 60-watt incandescent bulb hanging in the center of the room. It casts terrible shadows and makes the space feel like a creepy dungeon. Upgrade your garage with high-lumen LED fixtures. For a standard two-car garage, you should aim for a minimum of 5,000 to 10,000 lumens total. Budget-friendly options include the Barrina T5 LED Integrated Shop Lights. I bought a 6-pack of these 4-foot lightweight tubes on Amazon for $45.99. They offer 2,200 lumens per linkable fixture. You just plug them into each other like a daisy chain and mount them to the ceiling with two tiny metal clips. The bright 5000K daylight color instantly wakes up the room. For comprehensive, shadow-free illumination, the LZHOME Hexagon LED Garage Light system provides an impressive 26,400 lumens. I helped my neighbor install the hexagon grid system last month. It took us three hours of clicking plastic tubes together, but the end result looks like a high-end automotive showroom. You can’t organize what you can’t see.
11. Embrace Smart Inventory Management with QR Codes

A surprising and nerdy tip is to use smart inventory management for your opaque storage bins. While professional warehouse management software exists, for home use, you can implement a simple system using QR code tracking labels. I bought a 45-piece set of heavy-duty QR labels on Amazon for $11.99. You just peel the sticky label off and slap it onto the side of your black plastic tote. Then, use a corresponding app on your phone. I adapted an asset tracking app called itemit. You scan the QR code with your phone’s camera, type in a quick list of the contents, and even snap a few photos of what’s inside. Last Tuesday at Whole Foods, I saw a gorgeous set of discounted patio string lights. I couldn’t remember if I already had extra lights at home. I opened my app, scanned through my digital bins, and confirmed I already owned three boxes of lights. It saved me $40. This allows you to quickly locate items without ripping open sealed boxes and digging through packing peanuts.
12. Create a Dedicated Power Tool Charging Station

Prevent the common mistake of scattered chargers and dead batteries by building a centralized charging station. There is nothing worse than grabbing your DeWalt 20V Max drill to hang a picture frame, pulling the trigger, and hearing a sad, slow whine because the battery is completely dead. I built a simple wooden shelf out of scrap 3/4-inch plywood specifically for my chargers. I bought a Belkin 12-outlet heavy-duty surge protector for $24.99 at Best Buy and mounted it directly to the wall behind the shelf. I plugged in my DeWalt, Milwaukee, and Ryobi chargers in a neat row. I used 4-inch black zip ties to bundle the excess cords together so they don’t look like a rat’s nest. When all the batteries are charging, there’s a faint, warm smell of ozone and hot plastic in the air. Add a small fire extinguisher to this zone just to be safe. Keeping all your batteries in one dedicated spot ensures you’re always ready for a weekend project, and it frees up your main workbench surface.

Rubbermaid Configurations Deluxe Custom Closet Kit 4-8 Ft.
If you want something that just works, Rubbermaid Configurations Deluxe Custom Closet Kit 4-8 Ft. Adjustable is a safe bet (81 reviews, 4.5 stars).
13. Build a Custom DIY Mudroom Zone

If your house lacks a formal entryway, you need to build a mudroom zone right next to the interior door. I used to trip over my kids’ muddy soccer cleats every single time I walked down the stairs. I finally bought a heavy wooden Threshold bench from Target for $110.00 and placed it against the drywall. Above the bench, I mounted a 1×4 pine board painted bright white. I attached five heavy-duty matte black coat hooks from Kroger (they cost $4.99 each in the hardware aisle). Now, there is a strict rule: backpacks, wet raincoats, and muddy shoes do not cross the threshold into the kitchen. I placed a thick rubber boot tray from L.L.Bean ($34.95) under the bench to catch the melting snow and dirt. The rubber tray smells a bit like tire rubber when you first unbox it, but it saves my kitchen hardwood floors from getting destroyed. This small designated drop zone completely stops the daily clutter from migrating inside the main house.
14. Set Up a Folding Workbench for Small Spaces

If you want a dedicated workspace but can’t sacrifice the floor space for a permanent table, a folding workbench is the perfect solution. I initially bought a massive steel workbench that stuck out 30 inches from the wall. I banged my hip on the sharp metal corner every time I squeezed past my car. It left a horrible purple bruise. I sold it on Facebook Marketplace and built a custom folding table instead. I used a solid core wooden door I found at a salvage yard for $40 as the tabletop. I attached it to the wall studs using two heavy-duty Kreg folding shelf brackets ($39.99 for the pair). These steel brackets lock into place with a loud, reassuring click and can hold up to 500 pounds. When I’m done sanding a piece of wood or repotting a plant, I just pull the two release levers under the table, and the whole surface drops flat against the wall. It takes up exactly two inches of depth when folded down. It gives you a massive workspace when you need it and disappears when you don’t.
15. Store Sports Equipment in Bungee Cord Towers

Sports balls are the absolute worst items to store on standard flat shelves. They constantly roll off and bounce under the car tires. To fix this, build a custom bungee cord tower. I built a tall, narrow wooden frame using three standard 2×4 pine studs from Home Depot ($3.48 per stud). I cut them to 6 feet tall and built a simple rectangular box. Along the front opening, I drilled 1/2-inch holes every four inches down the sides. I threaded 36-inch heavy-duty bungee cords ($9.99 for a 4-pack at Walmart) vertically through the holes, tying tight knots at the ends to secure them. This creates a flexible, stretchy cage. The kids can just shove a dirty basketball or a slick volleyball right through the rubber cords to put it away. They can easily pull a ball out from the very bottom without emptying the entire bin. The bungee cords make a funny twanging sound when you snap them back into place. It’s a cheap, brilliant hack that keeps round objects contained.

4 Pack Laundry Pods Container
A dependable everyday pick — 4 Pack Laundry Pods Container pulls in 473 ratings at 4.5 stars. Not flashy, just solid.
16. Master Garage Organization DIY with Ceiling Track Bins

For the ultimate DIY project, build a custom wooden ceiling track system to hold lightweight storage totes. This is perfect for holiday decor or sleeping bags. I used basic 2×2 pine wood rails and 1×4 wooden flanges to create a sliding track system attached to the ceiling joists. You space the tracks exactly 15 inches apart, which perfectly fits the lip of the standard 27-gallon black and yellow heavy-duty storage totes from Home Depot ($10.98 each). You just slide the plastic lip of the bin into the wooden rails. I spent about $45 on lumber and a box of 3-inch wood screws. The plastic bins make a loud scraping noise against the raw wood when you slide them in, so I rubbed a plain white wax candle along the wooden tracks to lubricate them. Now they glide perfectly. I wouldn’t put anything heavier than 35 pounds in these hanging bins, just to be safe. It completely eliminates the need for bulky metal shelving units on the floor.
Honestly, you won’t believe how much peace of mind a clean garage brings until you actually do it. I highly recommend picking just one small zone this weekend, grabbing a roll of trash bags, and starting the purge. Pin this guide to your favorite home organization board so you have all these exact measurements and product names handy when you head to the hardware store. You’ve got this!
Frequently Asked Questions
What is the first step in a garage organization diy project?
You must completely empty the garage first. Pull everything into the driveway, sort it into Keep, Donate, Recycle, and Toss piles, and throw away anything you haven’t used in 12 months before buying new bins.
How much does a slatwall organization system cost?
High-quality PVC slatwall panels from brands like Gladiator usually cost between $10 and $30 per square foot. You must anchor them directly into the wall studs with heavy-duty wood screws to hold heavy tools safely.
Are clear plastic storage bins better for the garage?
Yes. Clear bins let you see the contents immediately, saving you from opening multiple boxes. For items sensitive to moisture, upgrade to clear bins with thick polyurethane foam gaskets inside the lids.
What is the best type of garage flooring?
Polyaspartic coating is vastly superior to traditional DIY epoxy. It costs around $7 to $10 per square foot professionally installed, but it is totally UV stable and won’t peel or turn yellow under hot car tires.
