What’s Inside
- Use Clear Plastic Bins for Loose Snacks
- Hang an Over-The-Door Rack for Jars
- Decant Baking Supplies into Airtight Containers
- Add Turntables to Deep Dark Corners
- Install Tiered Shelf Risers for Canned Goods
- Repurpose Magazine Holders for Water Bottles
- Clip Under-Shelf Baskets for Bread
- Use Tension Rods to Separate Baking Sheets
- Label Bins with Oil-Based Paint Pens
- Stack Wire Baskets for Fresh Produce
- Mount Magnetic Spice Tins on the Wall
- Slide a Slim Rolling Cart in Tight Gaps
- Mount a Pegboard for Cleaning Supplies
- Group Items by Zone in Fabric Bins
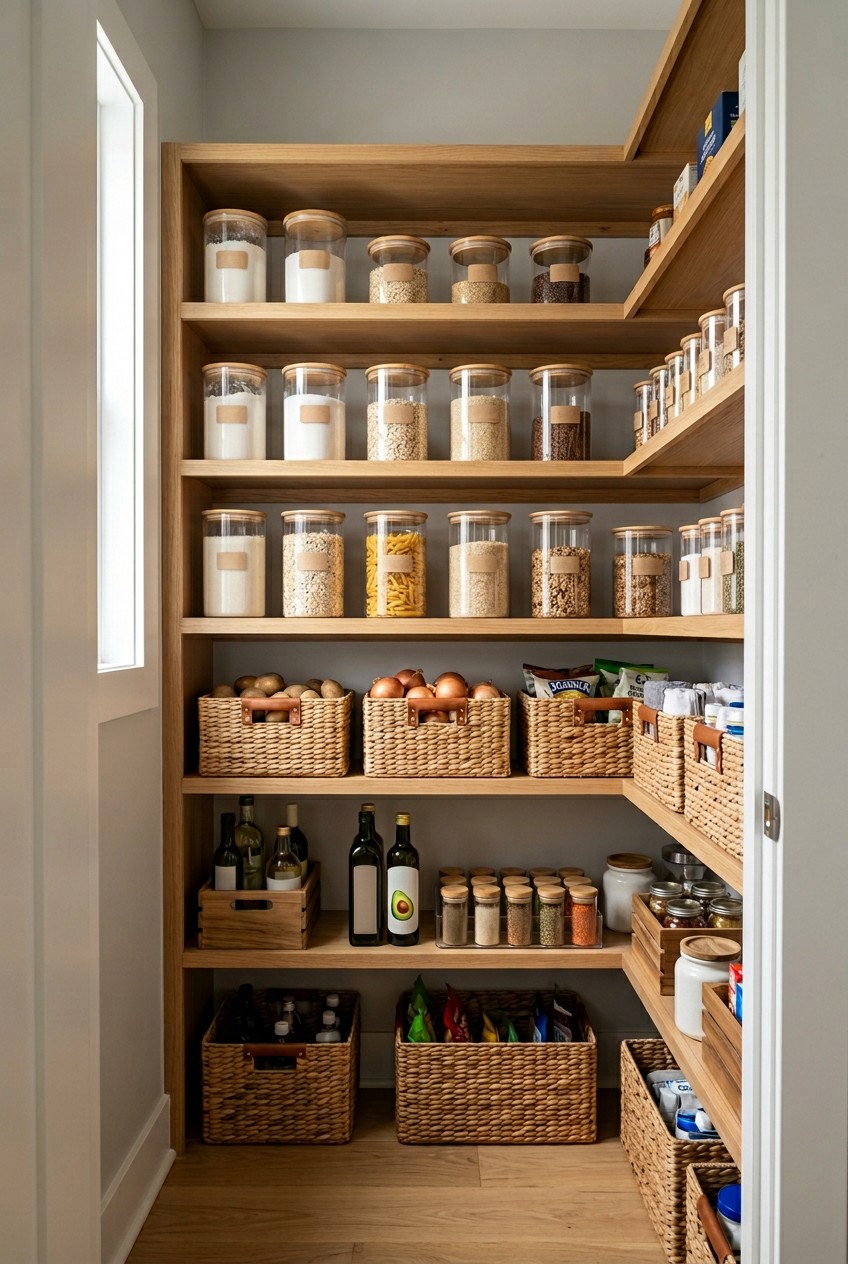
Last Tuesday at Whole Foods, I grabbed a $9.99 jar of artisanal marinara. I got home only to find three identical jars hidden behind a massive bag of Costco flour. The frustration of buying duplicates is real. If you’re tired of losing food in the dark corners of your kitchen, you need these small pantry organization ideas. I’ve spent the last four years wrestling with a closet-sized pantry in my 1920s bungalow. It’s basically a glorified shoebox. When I moved in, my shelves were a chaotic mess of torn cardboard and spilled rice. The smell of stale crackers haunted me. I did it wrong for months before figuring it out. I’d buy random baskets without measuring, stuff them full, and wonder why I still couldn’t find anything. It’s not fun cooking in a space that stresses you out. Let’s fix that. I’m sharing the absolute best small pantry organization ideas I’ve tested. I’ll give you the brand names, the prices I paid, and the mistakes I made. Grab a tape measure and a coffee. You won’t believe how much space you can create in a tiny kitchen with the right plan.
1. Use Clear Plastic Bins for Loose Snacks

Cardboard boxes are the enemy. Last Thursday, I stared at a massive box of granola bars taking up half a shelf. It was mostly empty air. That’s a waste of real estate. I drove to Target and bought mDesign clear plastic bins. They cost $14.99 for a 4-pack. I took every single 1.5 oz granola bar and 6 oz bag of chips out of their original packaging. The crinkle of the wrappers was satisfying as I lined them up. Now, I see exactly what I have. The smooth acrylic is easy to wipe down when a bag of pretzels spills salt everywhere. I did this wrong for months. I used to buy opaque woven baskets. Huge mistake. If you can’t see the snacks, you won’t eat them, or you’ll tear the basket apart looking for your favorite flavor. Trust me. Clear bins end the guessing game. You won’t believe how much space you save by ditching the bulky cardboard. Just measure your shelf depth first. My shelves are 11 inches deep, so the 10-inch bins fit perfectly.
2. Hang an Over-The-Door Rack for Jars

If you’re ignoring the back of your pantry door, you’re missing out on storage. I used to cram heavy glass jars on my main shelves, leaving zero room for larger items. I finally decided to use the door. I looked at the Elfa utility door rack, a gorgeous system costing $129.00 at The Container Store. But I was on a budget. I went to Walmart and bought the Mainstays over-the-door wire rack for $16.88. I loaded it with heavy jars of peanut butter, jelly, and pasta sauce. Here’s the catch. Every time I opened the door, the metal rattled against the wood. The heavy jars made the whole thing swing. I fixed it by sticking heavy-duty Command Strips to the back of the metal bars and pressing them into the door. Now it’s silent. This single addition gave me back an entire shelf. I keep all my 16 oz jars of salsa and 12 oz bottles of hot sauce at eye level. It’s easy to grab what I need without digging.
3. Decant Baking Supplies into Airtight Containers

Nothing is worse than reaching for powdered sugar and having a white cloud of dust explode all over your black shirt. Paper baking bags are messy, they tear, and they don’t stack. I finally invested in OXO Good Grips POP Containers. I bought the 5-piece set for $59.99 at Costco. The moment I poured my 5 lb bag of King Arthur flour into the largest container, I felt peace. The pop of the airtight seal is the best sound in the kitchen. Decanting isn’t just about looking pretty. It’s about keeping bugs out and food fresh. I’ve had brown sugar turn into a rock-hard brick because I left it in the original bag. Now, it stays soft. A quick tip. Always cut out the expiration date and baking instructions from the original package and tape them to the back of the container. I didn’t do this at first, and I threw away a whole batch of pancakes because I used expired baking powder. Learn from my mistake and keep those dates visible.

3-Tier Hanging Laundry Basket Organizer:Foldable Wire Shelf
3-Tier Hanging Laundry Basket Organizer:Foldable Wire Shelf Laundry Ro has been one of the most consistently praised picks in this category. 518 reviewers averaged 4.5/5.
4. Add Turntables to Deep Dark Corners

Corners are where good condiments go to die. My pantry has this awful blind corner. For a long time, I just shoved bottles back there. One day I reached into the shadows and knocked over an open 10 oz bottle of soy sauce. The sticky puddle ruined the wood, and the smell lingered for a week. I went to Target and bought a Copco 12-inch non-skid turntable for $9.99. This simple piece of plastic fixed my corner. I loaded it with tall bottles of olive oil, vinegar, and syrups. Now, with one spin, the bottle I need comes to the front. The non-skid rubber surface is crucial. I tried a cheaper, smooth plastic turntable once, and the bottles slid off and crashed. Don’t cheap out on the grip. I use a smaller 9-inch turntable for honey bears and agave nectar. If they drip, I just take the whole thing to the sink. It’s easier than scrubbing a shelf. You might also like: 15 Stunning Home Storage Ideas to Transform Your Space
5. Install Tiered Shelf Risers for Canned Goods

Canned goods are hard to organize. I used to stack them. Every time I tried to pull a can of diced tomatoes from the bottom, the whole tower would collapse. I was constantly buying duplicate cans of black beans because I couldn’t see what was in the back. I solved this by ordering YouCopia ShelfSteps from Amazon for $19.99. It’s a three-tiered riser that acts like stadium seating for cans. I placed it on my middle shelf and lined up all my 15 oz cans of Kroger brand black beans, corn, and coconut milk. The visual difference is stunning. I can read every label at a glance. No more digging. I highly recommend measuring the height between your shelves before buying a riser. I didn’t measure the first time, and the cans on the top tier hit the shelf above. I had to adjust my shelf pegs. Give yourself at least 10 inches of vertical clearance for standard cans. You might also like: 20 Gorgeous DIY Waste Materials Home Decor Ideas for Any Style
6. Repurpose Magazine Holders for Water Bottles

Reusable water bottles are a nightmare. They are tall, top-heavy, and fall over. I used to stand my heavy stainless steel Yeti cups on a wire shelf. Every time I bumped the shelf, they would tip and roll, denting the metal. I found a hack that costs almost nothing. I went to IKEA and bought a 2-pack of Tjena magazine files for $4.99. These are sturdy cardboard, but they are the perfect size for water bottles. I lay the magazine holder on its back so the open part faces out. Then, I slide my water bottles horizontally into the slots. They stack perfectly, they don’t roll, and I can fit four large bottles in one holder. I also use these to store root vegetables. I keep one on the bottom shelf for my 3 lb bags of yellow onions from Sprouts. The dark, dry environment is perfect for onions. Just don’t put potatoes in the same holder as onions. The gases they release will cause both to rot faster. I learned that the hard way. You might also like: 20 Inspiring Garage Organization Ideas That Are Totally Worth It
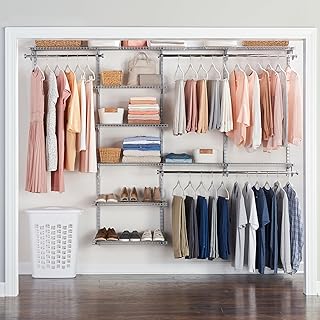
Rubbermaid Configurations Deluxe Custom Closet Kit 4-8 Ft.
A dependable everyday pick — Rubbermaid Configurations Deluxe Custom Closet Kit 4-8 Ft. Adjustable pulls in 81 ratings at 4.5 stars. Not flashy, just solid.
7. Clip Under-Shelf Baskets for Bread

In a small pantry, you can’t afford to waste vertical space. I noticed I had six inches of empty air above my cereal boxes. I also had a problem with squished bread. I’d set a loaf of Whole Foods brioche on the shelf, and someone would toss a bag of apples right on top of it. To fix both, I bought the York Lyra Under-Shelf Basket by iDesign for $17.99. It has two metal arms that slide onto your existing shelf, creating a floating basket. No tools required. I use this exclusively as my bread zone. It holds two standard loaves or a pack of bagels perfectly. The bread stays safe, and I’m utilizing space that was previously empty. A warning. Pay attention to the thickness of your shelves. My shelves are standard 3/4-inch wood, and the clips fit perfectly. If you have custom thick shelves, the metal arms might not slide on. Always check the dimensions. This little basket has saved countless loaves from being flattened.
8. Use Tension Rods to Separate Baking Sheets

Baking sheets and cutting boards are awkward to store flat. When I kept them stacked, I had to lift five heavy pans just to get the one at the bottom. The scraping sound was awful, and it scratched the non-stick coating. I needed to store them vertically, but I didn’t want to spend $40 on a divider. The cheapest solution is tension rods. I went to Target and bought four Room Essentials tension rods for $4.00 each. I found a narrow cabinet space above my fridge. I installed the rods vertically, twisting them tightly between the top and bottom of the shelf. I spaced them about three inches apart. Now, I slide my baking sheets, muffin tins, and cutting boards into the slots. They stand up straight. I can pull one out with one hand. It’s cheap and effective. The only negative is that if you don’t tighten the rods enough, a heavy cutting board can knock them out of place. Twist them until they are painfully tight.
9. Label Bins with Oil-Based Paint Pens

Labels are crucial, but finding the right kind is difficult. I tried black chalkboard stickers. They looked great on day one. But the moment my hand was damp from dishes, the chalk marker smeared into a smudge. The stickers also started peeling after a month. I threw them away and switched to writing directly on my clear bins and glass jars. I use a Sharpie oil-based medium point paint pen, which I grab at Walmart for $3.48. The paint dries in seconds, doesn’t smudge when wet, and looks modern. The bright white ink pops against dark pantry items like coffee beans and brown sugar. When you want to change the contents, the paint won’t wash off with water. You have to use a paper towel with a bit of rubbing alcohol. One swipe, and the glass is clean. The chemical smell of the pen is intense, so open a window while you’re labeling.
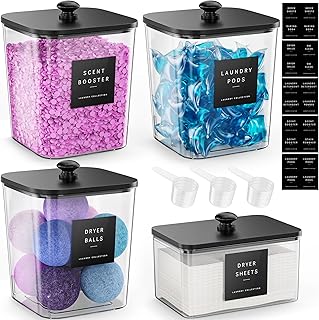
4 Pack Laundry Pods Container
Honestly, 4 Pack Laundry Pods Container surprised me — sturdier than it looks in the photos, and over 473 buyers gave it 4.5 stars.
10. Stack Wire Baskets for Fresh Produce

Produce like potatoes, onions, and garlic need air circulation. I used to keep my 5 lb bags of russet potatoes in a closed plastic bin on the floor. Bad idea. Moisture got trapped, and within two weeks, the potatoes sprouted and started rotting. The smell of a rotten potato is something you never forget. I had to scrub the floor with bleach. To fix this, I invested in breathable storage. I bought the mDesign metal wire stackable baskets for $34.99. You get two, and they lock securely. The open wire grid allows airflow, keeping my vegetables dry. I placed them on the floor. The top basket holds onions and garlic, and the bottom one holds potatoes. The bronze metal looks high-end, and the wide opening makes it easy to grab a potato without unstacking. If you shop at Sprouts and buy lots of loose produce, these baskets are essential for making food last longer.
11. Mount Magnetic Spice Tins on the Wall

Spices are the biggest clutter culprits. I used to keep all my tiny McCormick bottles crammed into a drawer. Every time I opened it, the bottles rolled around, and I could never read the labels. I’d end up buying a third jar of cinnamon because I couldn’t find the first two. If you have an empty wall inside your pantry, try magnetic spice tins. I splurged on the Gneiss Spice magnetic jars. A set of 10 empty hexagonal glass jars costs $45.00. I mounted a flat steel wall plate on the inside wall of my pantry, at eye level. I poured all my spices into the jars, including my favorite 2.3 oz Trader Joe’s Everything But The Bagel seasoning. The heavy-duty magnets stick firmly to the plate. The hexagonal shape allows the jars to nestle tightly like a honeycomb. It’s visually stunning and practical. I see the vibrant colors of the paprika and turmeric, and I know exactly when I’m running low. Just keep the steel plate away from heat or sunlight, as heat ruins the flavor.
12. Slide a Slim Rolling Cart in Tight Gaps

Take a hard look at your kitchen. Do you have a weird, narrow gap between your refrigerator and the wall? I had a 5-inch gap that just collected dust bunnies and dog hair. It felt like wasted space until I discovered slim rolling carts. I ordered the SpaceKeeper 4-tier slim storage cart on Amazon for $23.99. It is exactly 5.1 inches wide and fits perfectly into that awkward gap. The squeaky wheels aren’t the highest quality, but they glide across my tile floor. I use this hidden cart to store heavy liquid items that take up too much room in the main pantry. It holds 32 oz bottles of chicken broth, heavy jugs of cooking oil, and backup dish soap. When I need something, I just pull the cart out, grab my item, and slide it back. It gave me an invisible extra pantry. The shelves are plastic and easy to wipe clean if an oil bottle leaves a greasy ring. Don’t let those tiny gaps go to waste.

AMKUFO 6 Pack-Closet-Organizers-and-Storage
Honestly, AMKUFO 6 Pack-Closet-Organizers-and-Storage surprised me — sturdier than it looks in the photos, and over 52 buyers gave it 4.5 stars.
13. Mount a Pegboard for Cleaning Supplies

My pantry isn’t just for food. It also holds my broom, dustpan, and a mess of reusable grocery bags. Leaning a broom against the wall is annoying because it constantly falls over when you’re trying to grab pasta. I decided to use the blank wall space on the left side of my pantry by installing a pegboard. I bought the IKEA Skadis pegboard for $22.99. It’s a smooth white fiberboard that looks much cleaner than the rough brown ones at hardware stores. I bought a pack of the matching metal hooks and elastic cords. Now, my broom, dustpan, and duster hang neatly. I even use the elastic cords to pin up my canvas grocery bags so they aren’t wadded up on the floor. The installation was frustrating because the included drywall anchors were cheap and bent. I had to use my own heavy-duty anchors to make sure it wouldn’t rip out. Once secured, it cleared the floor space, making the whole closet feel twice as big.
14. Group Items by Zone in Fabric Bins

The final step to maintaining a small pantry is creating zones. If you mix your breakfast oatmeal with your dinner pasta, you’ll constantly be digging through unrelated items. I organized my shelves into distinct zones: Breakfast, Baking, Dinner Prep, and Snacks. To keep these contained, I use Target Brightroom 11-inch fabric bins. They cost $10.00 each and come in a neutral gray canvas. I love the soft fabric because it won’t scratch my wooden shelves. The heavy weight of a full bin feels substantial. In my Breakfast bin, I keep coffee beans, tea, and oatmeal. When it’s morning, I just pull out that one bin. I don’t have to search the whole pantry. Here is my strong opinion on pantry snacks. Skip the fat-free stuff. It tastes like wet cardboard. Fill your snack bin with the good stuff your family will actually eat. Label the front of each fabric bin with a clip-on metal label holder. By grouping items into zones, you’re not just organizing food. You’re organizing your routines. It saves me time every single day.
Tackling a messy kitchen closet can feel overwhelming, especially with limited square footage. But you don’t need a massive walk-in space to have a beautifully organized home. You just need to be smart about how you use every inch. By adding clear bins, using your door space, and decanting bulky bags into sleek containers, you’ll change how your kitchen functions. I swear by the clear acrylic bins and the slim rolling cart. Those two additions alone doubled my usable storage. Remember, you don’t have to buy everything at once. Pick two or three of these ideas and try them out this weekend. Start by throwing away expired food and measuring your shelves. If you found these tips helpful, please pin this article to your favorite Pinterest organization board so you can find it later when you’re standing in the aisle at Target trying to remember which bins to buy. You’ve got this. Happy organizing!
Frequently Asked Questions
How do you organize a very small pantry?
Maximize vertical space by using tiered shelf risers for cans and adding under-shelf baskets. Utilize the back of the door with a wire rack for heavy jars, and decant bulky bags into stackable, airtight clear containers.
What are the best containers for small pantry organization ideas?
Clear acrylic bins and airtight containers like OXO Good Grips are ideal. They let you see exactly what you have, eliminating duplicate purchases, and they stack neatly to save precious shelf space.
How can I store spices in a tiny kitchen?
If shelf space is limited, mount a magnetic steel plate on an empty wall or inside the pantry door. Use magnetic hexagonal glass jars to store spices vertically, keeping them visible and off your main shelves.
What should I put on the floor of a small pantry?
Use the floor for heavy, bulky items. Stackable wire baskets are perfect for storing root vegetables like potatoes and onions because they allow airflow. You can also slide a slim rolling cart into narrow floor gaps.