What’s Inside
- Prioritize Decluttering with the 4-Box Purge Method
- Maximize Ceiling Space with Heavy-Duty Overhead Racks
- Install Modular Wall Systems for Flexible Tool Storage
- Utilize Magnetic Strips for Small Metal Tools
- Build a Folding Workbench to Save Floor Space
- Sort Tiny Hardware in Clear Plastic Organizers
- Create a Dedicated Charging Station for Power Tools
- Repurpose Kitchen Jars for Paint Brush Storage
- Hang Bulky Cords and Hoses on Heavy-Duty Hooks
- Label Everything with a Real Label Maker
- Store Scrap Wood Vertically in a Mobile Cart
- Maintain Your Garage Workshop Organization with a Weekly Sweep
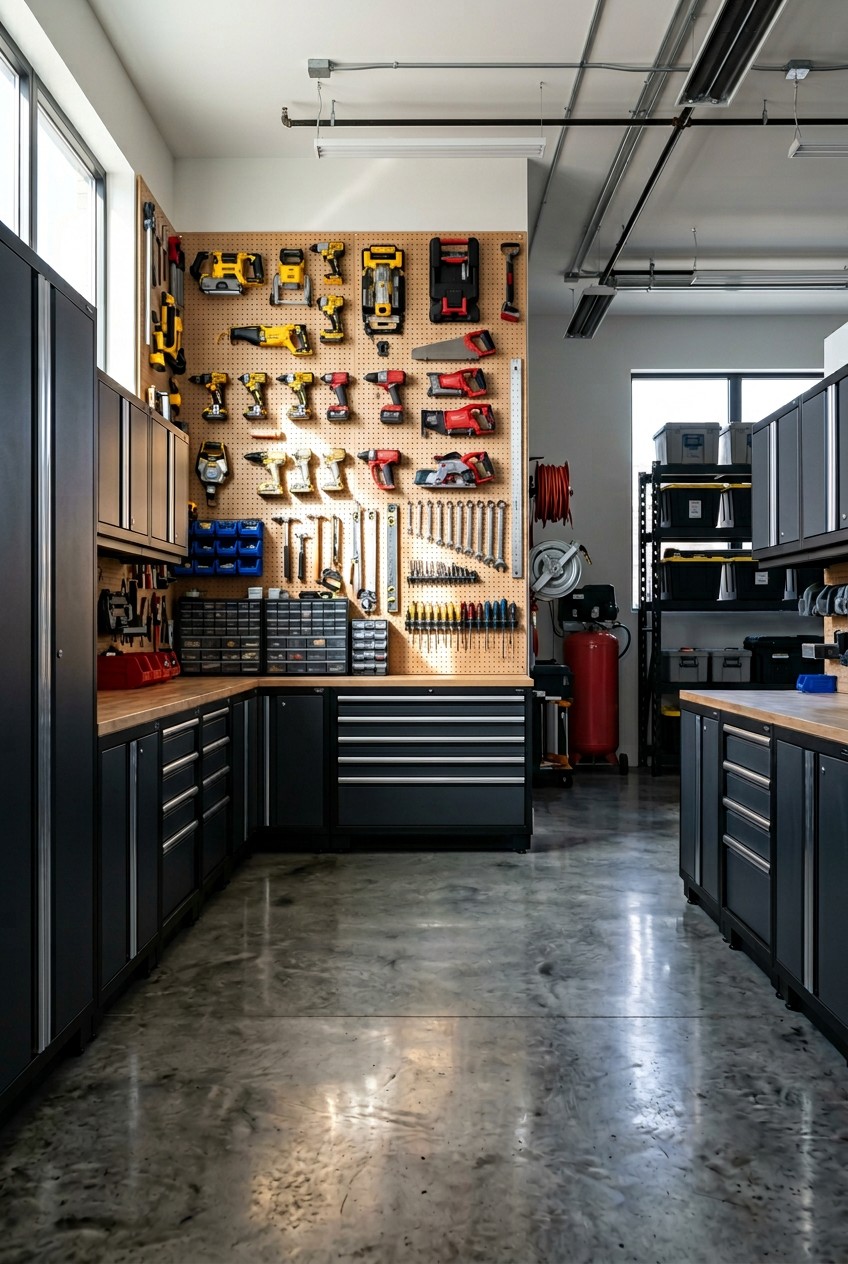
Last Tuesday, I stood in my freezing workspace holding a rusted hammer while a half-empty can of WD-40 leaked onto my favorite canvas sneakers. The sharp, metallic smell of aerosol and damp concrete hung in the air. Right then, I realized my garage workshop was a complete disaster. I couldn’t find a 2-inch wood screw to save my life. Warped pine lumber leaned against the drywall, casting jagged shadows under the flickering fluorescent light. I’ve spent years helping clients sort kitchen pantries and bedroom closets, yet my own workspace looked like a tornado hit a hardware store. I ignored the mess for months before finally snapping. It was honestly embarrassing. I grabbed a giant iced coffee from Target, tied my hair up, and decided to fix the chaos for good. If you’re tired of tripping over extension cords and losing drill bits, you’re in the right place. I’m sharing the exact steps and products I used to reclaim my space. Forget those fancy showroom setups that cost a fortune. These are practical, real-world solutions that work for normal people who actually build things. Let’s get into the methods I used.
1. Prioritize Decluttering with the 4-Box Purge Method

Before you buy a single plastic bin or tool rack, you need to clear out the junk. I did this wrong for months. I used to shuffle piles of rusty wrenches from one side of my workbench to the other. It was exhausting. You need the 4-Box Purge method. Get four massive 27-gallon Sterilite plastic bins. You can get them for $11.98 each at Walmart. Label them with a thick black Sharpie: Keep in Garage, Keep Elsewhere, Donate or Sell, and Trash. This is a brutal process. Last October, I spent three hours sitting on the cold, damp concrete floor sorting through a soggy cardboard box of mixed hardware. The smell of old motor oil and mildew was giving me a headache. But no system works if you don’t reduce the number of items competing for space. You have to be ruthless. Do you really need three broken tape measures? No. Toss them. I found an old rusty handsaw I hadn’t touched since 2018. It went straight into the donate bin. Most people get this wrong by trying to organize literal trash. Don’t buy a $50 rack to hold broken tools. Once you sort everything, load the trash bags into your trunk immediately. Drive them to the dump. If you leave them sitting there, you’re just creating a new pile of garbage. I learned that the hard way when a family of field mice decided my donation bag of old shop rags was a luxury hotel.
2. Maximize Ceiling Space with Heavy-Duty Overhead Racks

Look up. Your ceiling is wasted real estate. I swear by heavy-duty overhead storage racks for fixing a terrible garage. I used to stack plastic bins on the floor until they tipped over and spilled holiday decorations everywhere. Now, I use the ceiling. Install heavy-duty overhead storage racks from brands like Fleximounts or SafeRacks. A 4-foot by 6-foot Fleximounts rack, for instance, supports up to 450 pounds and provides 80 cubic feet of storage. The height is adjustable from 22 to 40 inches. You can grab one for $189.99 on Amazon. These are perfect for seasonal items, bulky camping equipment, and rarely accessed belongings. It frees up floor space for your actual tools. Simple overhead storage usually costs under $500, while custom systems can hit $10,000. I stuck to the $189 rack. Installing it was a sweaty, frustrating Saturday afternoon. My arms ached from holding the heavy steel brackets above my head while trying to find ceiling joists with a cheap stud finder. But the moment I hoisted my huge artificial Christmas tree and three heavy bins of winter coats up there, it felt amazing. The floor was finally clear. Just use a socket wrench to tighten those lag bolts securely. You definitely don’t want 400 pounds of plastic bins crashing onto your car hood. Trust me.
3. Install Modular Wall Systems for Flexible Tool Storage

Stop throwing your hammers and pliers into a dark, dusty drawer. Invest in versatile wall-mounted systems like slatwall or pegboard panels. Brands like Gladiator, Husky, or IKEA are great for this. I bought Gladiator GearWall panels. A 2-pack of 45-inch by 12-inch panels costs $54.99 at Lowe’s. I used to buy that cheap brown pressed-wood pegboard. Big mistake. It warps when the garage gets humid in July, and the holes strip out after a few months. The heavy white plastic Gladiator panels are different. I spent a Friday night snapping the metal hooks into place. The solid click of the steel hooks locking into the plastic track is satisfying. I hung my heavy 24-ounce framing hammer, my rubber mallets, and my entire collection of screwdrivers. Everything is visible. Everything is exactly where I need it. When my hands are covered in sticky wood glue, I don’t want to be opening heavy metal drawers. I just reach up and grab a clamp off the wall. Pro tip: plan your layout on the floor first. I didn’t do this the first time and ended up moving twenty hooks because my long level bumped into my hand saw. Lay the tools out on a clean towel, arrange them by size, and then copy that layout onto your new wall system.

REIBII 55.5" W Storage Shelves 3200LBS Metal Shelving 5
REIBII 55.5″ W Storage Shelves 3200LBS Metal Shelving 5 Tier Wire Shel has been one of the most consistently praised picks in this category. 544 reviewers averaged 4.5/5.
4. Utilize Magnetic Strips for Small Metal Tools

I underestimated the power of magnets in a workspace. For years, I kept my drill bits, small wrenches, and tiny metal rulers in a cracked plastic Tupperware container. Every time I needed a 1/4-inch drill bit, I had to dump the entire container onto my workbench. It sounded like a handful of coins dropping onto a tin roof. It was chaotic. Then, while buying snacks at Kroger, I had an idea. I drove to Harbor Freight and bought three US General 18-inch magnetic tool holders for $4.99 each. I screwed them directly into the exposed wooden studs above my workbench. Now, my most-used pliers, wire strippers, and metal rulers slap right onto the wall. The loud metal clack when a heavy steel wrench hits the magnet is oddly comforting. It holds them tight. They won’t slide off even when I bump the wall with a heavy piece of lumber. I honestly can’t believe I worked without these for so long. One common mistake is buying weak magnetic strips meant for kitchen knives. Those won’t hold a heavy pair of vice grips. Buy the thick, industrial ones. They look tough, they feel heavy, and they keep your smallest, most annoying tools organized. You might also like: 20 Stunning Tool Storage Organizing Ideas for a Fresh New Look
5. Build a Folding Workbench to Save Floor Space

If your garage is tight, a massive stationary workbench is a bad idea. I used to have a huge, heavy wooden desk in the middle of my space. I was constantly hitting my shin on the corner. The bruise lasted three weeks. I couldn’t even park my sedan inside. The solution is a wall-mounted folding workbench. I bought the Kreg folding workbench hardware kit for $49.00. Then, I went to Home Depot and bought a thick piece of 3/4-inch sanded pine plywood. It cost about $45.00. I sanded it until it was perfectly smooth and coated it with three layers of polyurethane. It smells terrible while it dries, but it creates a hard surface that glue won’t stick to. Now, when I’m building a birdhouse, I pop the bench up. It clicks into place. When I’m done, I pull the release levers, and the whole thing folds flat against the wall. I can actually park my car inside when it snows. It’s brilliant. Just make sure you anchor the hinges directly into the wooden wall studs. If you use dry-wall anchors, the whole thing will rip out the second you put a heavy miter saw on it. You might also like: 15 Clever Kitchen Small Space Ideas That Changed Everything
6. Sort Tiny Hardware in Clear Plastic Organizers

Stop keeping your screws in old coffee cans. I did this for years. My dad did it, so I thought it was normal. My workbench was littered with Folgers cans filled with a messy mix of rusty nails, drywall screws, and washers. It smelled like stale coffee and rust. Finding a matching set of 1-inch wood screws took twenty minutes of digging, usually resulting in a sharp wire poking under my fingernail. You need a dedicated hardware sorter. I bought the Akro-Mils 44-drawer plastic parts storage cabinet for $38.50 on Amazon. It has a mix of large and small drawers. I spent a Sunday afternoon dumping every coffee can onto a white towel. I sorted everything by size and type. I put 2-inch exterior screws in one drawer, 1/2-inch washers in another. I even printed tiny labels. The visual difference is staggering. Now, I see exactly what I have. No more digging. No more bleeding fingers. If you’re tackling your garage organization this weekend, buy one of these. Just don’t drop the cabinet while carrying it. I tripped over a broom handle once and sent 44 drawers of sorted hardware flying across the concrete. I almost cried. No exaggeration. You might also like: 20 Brilliant Indian Home Makeover Ideas for Any Style

3-Tier Hanging Laundry Basket Organizer:Foldable Wire Shelf
A dependable everyday pick — 3-Tier Hanging Laundry Basket Organizer:Foldable Wire Shelf Laundry Ro pulls in 518 ratings at 4.5 stars. Not flashy, just solid.
7. Create a Dedicated Charging Station for Power Tools

Power tool chargers are the enemy of a clean workbench. They have thick, stiff cords that tangle around everything. I used to have three chargers plugged into a cheap extension cord, sitting in a pile of sawdust. It was a massive fire hazard. The blinking lights were buried under scrap wood. I finally bought a Sunix Power Tool Organizer for $45.99. It’s a wooden shelf system designed to hold heavy power drills upside down by their handles, with a top shelf for the bulky battery chargers. I mounted it next to a wall outlet. I bought a heavy-duty black power strip at Target for $12.99 and mounted it to the side. Now, the cords are zip-tied neatly out of the way. I can see the bright green blinking light of a fully charged 20-volt battery from across the room. The drills slide in and out of the wooden slots smoothly. It keeps the heavy batteries off my primary work surface. Don’t skip the zip ties. If you leave the cords dangling, they’ll catch on a piece of wood and pull your expensive charger right off the shelf.
8. Repurpose Kitchen Jars for Paint Brush Storage

Paintbrushes are difficult to store. If you toss them in a drawer, the bristles get bent and ruined. I used to lay them flat on a dirty shelf, and they’d get covered in sticky sawdust. I ruined a $20 Purdy brush that way. To fix this, I went to Sprouts and bought a 12-pack of Ball 32-ounce Wide Mouth Mason Jars for $14.49. I originally bought them for pickling cucumbers, but I failed at that. So, I brought the jars out to the garage. I filled the bottom of each with two inches of cheap glass marbles from the dollar store. Now, I stand my clean, dry paintbrushes handle-down in the jars. The heavy marbles keep the jars from tipping over, and the bristles point straight up, keeping their shape. I organize them by type: one jar for oil brushes, one for water-based, and one for foam. It looks incredibly neat. The smooth glass is easy to wipe clean when I inevitably drip blue paint on it. Plus, seeing all the wooden handles lined up makes me feel like a professional artist instead of a messy DIYer.
9. Hang Bulky Cords and Hoses on Heavy-Duty Hooks

Extension cords and air compressor hoses are the worst trip hazards. I used to leave my bright orange 100-foot extension cord coiled in a messy pile on the floor. Last spring, I tripped over it while carrying a bucket of primer. I spilled thick, sticky paint all over my jeans and the concrete floor. I was furious. You can’t just throw these things in a corner. You need heavy-duty wall hooks. I went to Lowe’s and bought four Tornado U-Hooks for $6.48 each. These aren’t flimsy wire hooks; they’re thick steel coated in grippy rubber. I screwed them into the wall studs using 3-inch lag screws. Now, I wrap my thick orange cord around my elbow and hand, creating a neat loop, and hang it on the rubber-coated hook. The rubber prevents the cord from sliding off. I did the same for my stiff yellow air compressor hose. Getting those bulky items off the floor made the room feel twice as large. A common mistake is buying hooks that are too small. A 100-foot heavy-duty cord needs a hook with at least a 4-inch depth, or the loops will spill over the edge and fall back onto the floor.
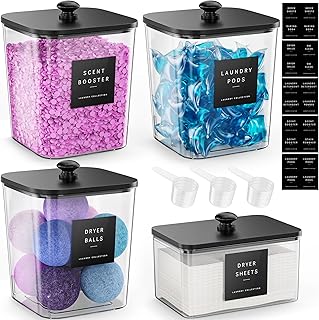
4 Pack Laundry Pods Container
A dependable everyday pick — 4 Pack Laundry Pods Container pulls in 473 ratings at 4.5 stars. Not flashy, just solid.
10. Label Everything with a Real Label Maker

Masking tape and a messy Sharpie won’t cut it if you want a truly organized space. I used to tear off strips of blue painter’s tape and scribble on them. After a few weeks of humidity and dust, the tape would peel off and curl up like dead leaves. I’d find random pieces of tape stuck to the bottom of my shoes. I finally upgraded. I bought the Brother P-Touch PT-H110 label maker for $34.99 at Walmart. I also bought a cartridge of 12mm black-on-white laminated tape. This little machine is incredible. The whirring sound of the plastic label printing out is addictive. Peeling the backing off and pressing the crisp, printed label onto a bin is the best feeling. I labeled everything. The screw drawers, the paint jars, the shelves, the bins. The laminated tape is waterproof and wipes clean if I get greasy fingerprints on it. When my husband goes out to look for a specific wrench, he doesn’t have to ask me where it is. He just reads the labels. It saves so much time. Don’t skip this. A beautifully organized shelf means nothing if you can’t remember what’s inside the opaque plastic boxes.
11. Store Scrap Wood Vertically in a Mobile Cart

Scrap wood is the hardest thing to keep tidy. You never want to throw away a perfectly good 2-foot piece of oak, but piling it in the corner looks terrible. I used to have a massive, chaotic pile of wood leaning against the back wall. Spiders loved it. I’d reach in to grab a piece of pine and pull my hand back covered in cobwebs. It was gross. I was eating an overpriced salad at Whole Foods when I sketched a design for a wood cart on a napkin. Instead of building one, I found the Bora Wood Organizer Rack for $49.00 online. It has levels of steel bars for storing boards horizontally, and a wide base for standing shorter scraps vertically. I mounted it to a piece of heavy plywood and added four locking caster wheels from Home Depot. Now, my scrap wood is sorted by length and type. I can smell the fresh pine and cedar instead of dusty cobwebs. Because it’s on wheels, I can roll the rack out to the driveway when I’m cutting wood, then roll it back into the corner. Keeping the short scraps vertical means I can see the exact piece I need without digging through a splintery pile.
12. Maintain Your Garage Workshop Organization with a Weekly Sweep

You can buy all the fancy racks and clear bins in the world, but if you don’t maintain the space, it will turn back into a disaster zone in two weeks. I know this because I’ve done it. I spent an entire weekend organizing, then immediately destroyed it by leaving sawdust and empty boxes everywhere after a quick project. You need a strict cleaning routine. I bought an O-Cedar Heavy Duty Commercial Push Broom for $29.98 at Home Depot. The stiff red bristles are perfect for sweeping up sawdust and metal shavings. Every Sunday evening, I spend fifteen minutes resetting the space. I put every screwdriver back on its magnetic strip. I empty the shop vacuum. I push the broom across the concrete, watching the dust gather into a neat pile. I throw away the small, useless wood scraps. It smells clean and feels calm. If you don’t commit to this weekly fifteen-minute reset, your organization system will fail. It’s that simple. Treat your workspace with respect. Put on some music, sweep the floor, and lock up. You’ll thank yourself on Monday morning when you walk into a clean, ready-to-use shop.
Tackling your garage workshop organization doesn’t have to be a miserable, expensive chore. It just takes a few smart products, a ruthless decluttering session, and a weekend of hard work. I’m so glad I finally stopped making excuses and fixed my space. I actually want to build things now instead of avoiding the mess. If you found these tips helpful, pin this article to your favorite home improvement board on Pinterest so you can find it later when you’re standing in the hardware store aisle. I’d love to hear which of these tricks worked best for your messy space!

Amazon Basics 5-Shelf Adjustable Heavy Duty Steel Wire
Honestly, Amazon Basics 5-Shelf Adjustable Heavy Duty Steel Wire Storage Shelves surprised me — sturdier than it looks in the photos, and over 321 buyers gave it 4.5 stars.
Frequently Asked Questions
What is the best way to start organizing a messy garage workshop?
Start with the 4-Box Purge method. Get four large bins labeled Keep, Keep Elsewhere, Donate, and Trash. You can’t organize effectively until you ruthlessly declutter broken tools and useless scraps.
How can I store heavy power tools in a small garage?
Use a dedicated wall-mounted power tool organizer to hold drills and chargers. This keeps heavy items off your workbench and frees up valuable floor space while keeping cords tidy.
Are overhead garage storage racks worth the money?
Yes, absolutely. Heavy-duty overhead racks utilize wasted ceiling space for bulky, seasonal items. They typically hold up to 450 pounds, instantly clearing your floor for actual workshop activities.
What is the best way to store screws and nails?
Ditch the old coffee cans and use a multi-drawer clear plastic parts cabinet. Sorting hardware by exact size and type saves you from digging through rusty, mixed piles.