What’s Inside
- Start With A Ruthless Purge Before You Buy Anything
- Create Specific Zones For Your Daily Flow
- Invest In Clear, Airtight Containers For Dry Goods
- Label Everything So Your Family Stops Asking Questions
- Maximize Vertical Space With Sturdy Shelf Risers
- Use Turntables For The Sticky, Dark Corners
- Install Pull-Out Drawers In Deep Lower Cabinets
- Slap Command Hooks On The Inside Doors
- Switch To Sustainable Bamboo And Woven Baskets
- Use Modular Bins To Wrangle The Loose Snacks
- Stop Cramming The Shelves Full Of Backups
- Repurpose Pot Lid Organizers For Cutting Boards
Last Tuesday at Whole Foods, I bought my fourth 16 oz jar of $6.99 organic tahini because I couldn’t find the other three buried in the dark, sticky abyss of my own cabinets. That expensive, frustrating mistake was the final straw that forced me to rethink my entire approach to kitchen pantry organization. I’ve spent years helping clients sort their homes, but my own snack shelves smelled like stale corn chips and looked like a tornado hit them. It’s embarrassing to admit. You’re probably dealing with the exact same mountain of half-eaten cereal boxes and expired cans of black beans right now. I’m going to walk you through exactly how I fixed it. No fluff. Just the raw, messy truth about getting your food storage under control.
We aren’t going to build a museum display that falls apart the second your kids want a snack. We’re going to build a system that actually survives real, chaotic daily life. I’ll show you the exact bins I buy, the exact prices I pay, and the stupid mistakes I made so you don’t have to repeat them. Let’s get into the dirt.
1. Start With A Ruthless Purge Before You Buy Anything

You can’t organize clutter. I tried this wrong for months before figuring it out. I’d buy pretty baskets and just shove expired junk into them. Don’t do that. Before you buy a single acrylic bin, you need to pull every single item off those shelves and dump it onto your kitchen island. Professional organizer Simcha Peretz of Joyful Nest Home Organizing says it best. When people don’t know where something belongs, it ends up in the pantry. You need to physically touch every single 15 oz can of diced tomatoes and every crinkly, half-empty bag of potato chips.
Last month, I found a bag of walnuts from 2022 tucked behind my baking supplies. The smell was sharp, bitter, and instantly made my stomach turn. I threw it straight into a Hefty 13-gallon trash bag ($11.49 for a box of 40 at Target). You’re going to need a few of those heavy-duty bags. Be brutal. If you haven’t eaten that 12 oz box of lentil pasta in six months, you won’t eat it tomorrow. Skip the guilt. Throw out the stale stuff. Donate the unopened cans you won’t use. Wiping down the bare wooden shelves with a wet microfiber cloth and 2 tablespoons of Mrs. Meyer’s Lemon Dish Soap ($4.88) mixed in warm water feels incredibly satisfying. Get down to the literal bare bones before you even think about putting things back.
2. Create Specific Zones For Your Daily Flow

Once your shelves are naked and smelling like fresh lemon, don’t just shove things back inside randomly. Group similar items together to create dedicated zones. This is a core trick I learned from studying experts like Li McGinnis of The Organizing Genius. Think about how you actually cook and move in your kitchen. I used to keep my heavy 5 lb bags of King Arthur flour on the very top shelf. Every time I tried to bake, I’d end up covered in a fine white dust because the heavy paper bag would slip from my fingers. Learned that the hard way.
Now, I’ve got a dedicated baking zone right at waist height. Keep your snacks, canned goods, breakfast items, and dinner prep ingredients in their own distinct neighborhoods. I use standard 3×3 inch Post-it Notes ($5.29 for a 5-pad pack) to temporarily label the bare shelves while I’m planning the layout. Put the stuff you grab every morning, like your 12 oz bags of Trader Joe’s organic coffee beans, right at eye level. Put the heavy, bulky 32 oz boxes of chicken broth down low. Creating logical zones stops the frantic digging when you’re trying to make dinner at 6 PM while the kids are screaming. It just makes your daily life easier.
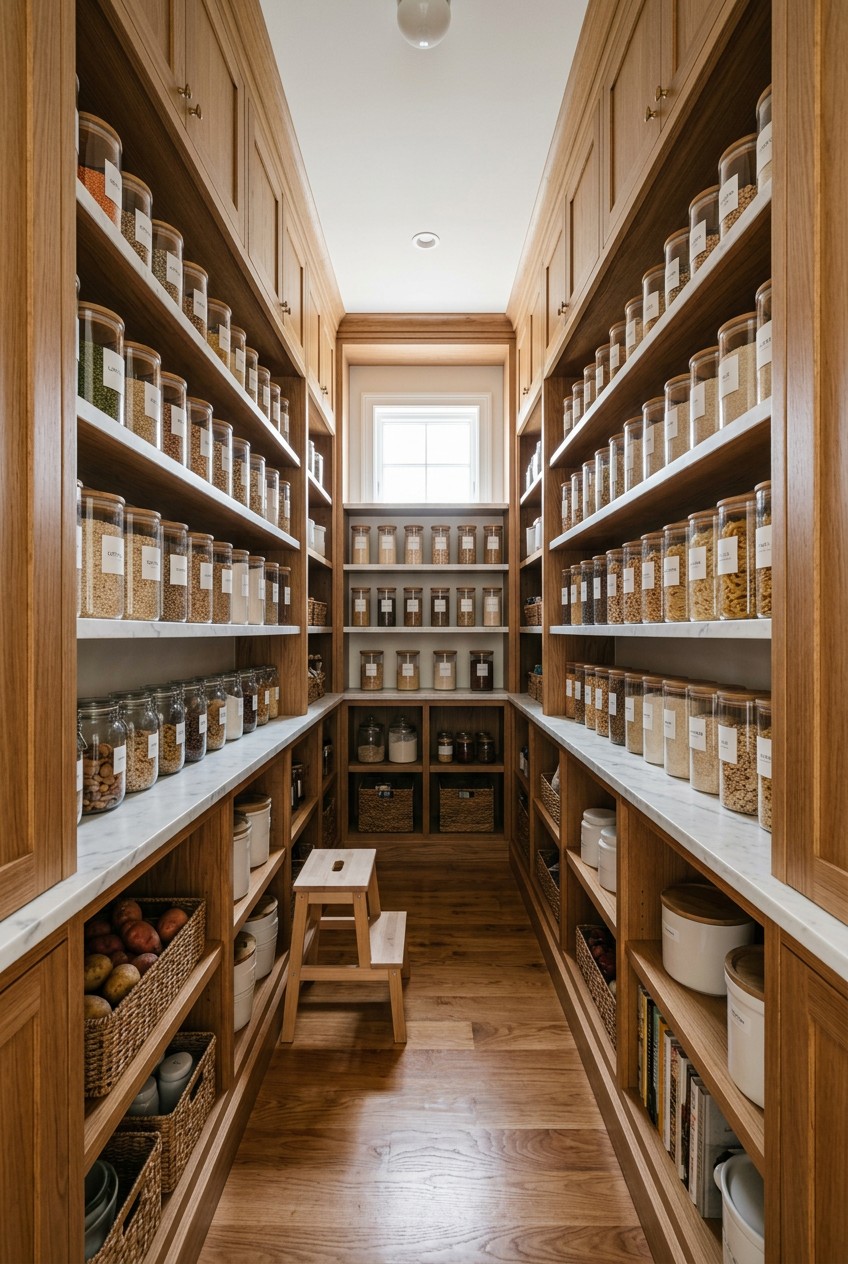
3. Invest In Clear, Airtight Containers For Dry Goods

I’m a massive fan of decanting dry goods. Leaving things in their original flimsy cardboard packaging is a recipe for stale food and disgusting pantry moths. I once bit into a cracker that had been sitting in an open box for three weeks. It tasted like wet cardboard and crumbled into a sad, soft mush in my mouth. The 2026 trend for kitchen pantry organization is using transparent acrylic or glass containers. You can instantly see exactly how much you’ve got left without opening a lid.
I personally swear by OXO POP Containers. You can get a 4.4 Qt square container for about $21.99 at Costco, which perfectly holds a standard 5 lb bag of flour. For your morning routine, you absolutely need The Home Edit by iDesign Cereal Canisters. They run about $26.99 each. Yes, it’s a steep upfront investment. But buying bulk 40 oz bags of rolled oats and keeping them fresh for eight months actually saves you serious cash. Plus, the satisfying little popping sound the OXO lids make when you press the button is strangely addicting. Just make sure you wash and completely dry the containers before filling them. A single drop of trapped water will turn your 2 lbs of granulated sugar into a solid, unusable brick.

3-Tier Hanging Laundry Basket Organizer:Foldable Wire Shelf
3-Tier Hanging Laundry Basket Organizer:Foldable Wire Shelf Laundry Ro punches above its price — 518 buyers rated it 4.5 stars. I would buy it again.
4. Label Everything So Your Family Stops Asking Questions

If you don’t label your beautiful clear containers, you’re setting yourself up for a culinary disaster. Last Thanksgiving, I accidentally poured 1/2 cup of fine sea salt into my pumpkin pie filling instead of white sugar. The textures looked identical in the glass jars under the dim kitchen lights. The pie was completely inedible, and my family still won’t let me live it down. You must label everything clearly. It stops your partner or kids from constantly yelling across the house to ask where the pretzels are. You might also like: 15 Creative Dollar Tree Hacks Organizing Ideas for a Fresh New Look
I love using a Brother P-Touch Label Maker ($34.99 at Walmart) with black-on-clear 12mm tape for a crisp, clean look. If you want a more uniform, stylized aesthetic, The Home Edit by iDesign Labels are fantastic. But honestly, if you’re on a tight budget, a simple black Sharpie Peel-Off China Marker ($1.99) works perfectly on glass. It writes smoothly like a crayon and wipes off easily with a damp paper towel when you need to switch out the contents. Labeling ensures the 16 oz bag of organic quinoa actually gets returned to its rightful home instead of being shoved next to the chocolate chips. It’s the only way to maintain the expensive system you just built. You might also like: 20 Inspiring Organizing Storage Home Hacks Ideas for Any Style
5. Maximize Vertical Space With Sturdy Shelf Risers

Most builder-grade pantry shelves are spaced way too far apart. You end up with ten inches of empty, useless air above your short 15 oz cans of black beans. Don’t waste that vertical space. You need shelf risers to create extra tiers. I used to just stack slippery cans directly on top of each other. They’d inevitably topple over with a loud, metallic crash the second I bumped the shelf. It was maddening and occasionally bruised my toes. You might also like: 20 Stunning Tool Storage Organizing Ideas for a Fresh New Look
Now, I strictly use IKEA VARIERA Shelf Inserts. They cost exactly $7.99, and they are incredibly sturdy white metal racks. You just slide them in, and instantly you’ve got two levels of storage instead of one. For your spices, you absolutely need stadium seating. The Home Edit by iDesign 3-Tier Shelf ($32.99) is perfect for this. It steps up like bleachers, so you can clearly read the label on the 2 oz jar of cumin sitting in the back row without knocking over the 1.5 oz jar of paprika in the front. Seeing all your little jars at a single glance stops you from buying duplicate spices. I currently own three identical jars of ground ginger because I refused to buy a proper riser sooner.
6. Use Turntables For The Sticky, Dark Corners

Corner cabinets are where good condiments go to die. Before I discovered turntables, the back corners of my pantry were a sticky, terrifying wasteland. I once reached deep into the back to grab a 12 oz bottle of molasses and my hand came out covered in a thick, brown, sugary sludge because a neighboring bottle of soy sauce had leaked months prior. Turntables, commonly known as Lazy Susans, completely fix this nightmare. You just give it a quick spin, and the exact bottle you need rotates right to the front.
The smooth, quiet gliding sound of a high-quality turntable is basically ASMR for organizers. You’ve got to measure the diagonal depth of your shelf before buying one. The Home Edit by iDesign Turntables are my absolute favorite. The 9-inch version is $15.99 at Target and fits perfectly in standard upper cabinets for holding small 4 oz bottles of vanilla extract and hot sauce. If you’ve got deep pantry shelves, splurge on the massive 18-inch version for $39.99. I use the large one to corral all my heavy 16 oz bottles of olive oil, avocado oil, and vinegar. It keeps the oily rings off my wooden shelves and makes cooking so much faster.
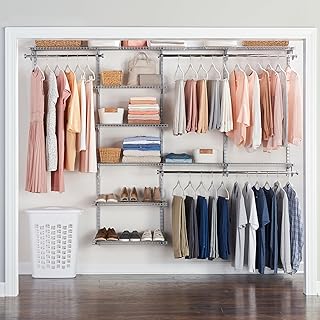
Rubbermaid Configurations Deluxe Custom Closet Kit 4-8 Ft.
A dependable everyday pick — Rubbermaid Configurations Deluxe Custom Closet Kit 4-8 Ft. Adjustable pulls in 81 ratings at 4.5 stars. Not flashy, just solid.
7. Install Pull-Out Drawers In Deep Lower Cabinets

If your pantry is just a series of deep, dark shelves, you’re fighting a losing battle. Stuff inevitably gets shoved to the back, forming a hidden graveyard of expired 28 oz cans of crushed tomatoes. I used to physically crawl halfway into my lower cabinet, scraping my shoulders against the rough wood, just to find my 5 lb bag of russet potatoes. It’s exhausting. The biggest upgrade you can make for your kitchen pantry organization is installing pull-out solutions. This is a 2026 design trend because it completely eliminates hidden clutter.
If you’ve got the budget, a Rev-a-Shelf Swing-Out Cabinet Pantry Kit (around $250 depending on your exact cabinet size) is incredible. It pulls the entire contents of the cabinet out into the light. For a slightly more budget-friendly but still premium option, the IKEA UTRUSTA pull-out pantry organizers run about $400 for a full tall cabinet system. You just pull the handle, and the heavy metal wire baskets glide out smoothly. If you rent and can’t drill into the cabinets, just buy long, deep plastic bins that act like makeshift drawers. You can grab 16-inch deep clear bins at Target for about $14 each. Just pull the whole bin out to see exactly what’s hiding in the back.
8. Slap Command Hooks On The Inside Doors

Most people completely ignore the inside of their pantry doors. That’s premium, unused real estate staring you right in the face. I used to throw my dirty, flour-covered aprons onto the bottom floor of the pantry. The long cotton strings would get tangled around my 1-gallon water jugs, creating a frustrating knot every time I tried to pull one out. The fix is stupidly simple and costs almost nothing. Add heavy-duty hooks to the interior walls and doors.
Command Medium Wire Hooks ($8.48 for a 6-pack at Kroger) are perfect for this. I use them to hang my silicone oven mitts, linen tea towels, and lightweight reusable grocery bags. Here’s the trick most people get wrong. You’ve got to clean the door surface with a cotton ball soaked in 70% isopropyl rubbing alcohol ($2.50) before sticking the hook on. If you just slap it onto a greasy, dusty cabinet door, the adhesive will fail in three days, and your stuff will crash to the floor. Wait exactly one hour after applying the hook before hanging anything on it. It’s a tiny detail, but it guarantees the hook won’t budge for years.
9. Switch To Sustainable Bamboo And Woven Baskets

We need to talk about the plastic problem. A few years ago, my entire pantry was a sea of cheap, flimsy, neon-colored plastic bins I bought at a discount store. They cracked easily, looked chaotic, and honestly, they off-gassed a weird chemical smell when I first opened them. The 2026 shift is moving toward sustainable, natural materials. It creates a calm, earthy aesthetic that genuinely makes me breathe a little easier when I open the door.
I’ve slowly been replacing my cracked plastic with bamboo and woven wood. The IKEA UPPDATERA bamboo boxes ($14.99 for the 9×11 inch size) are incredibly sturdy and have a gorgeous, smooth finish. I use them to hold my 10 oz bags of organic dried mango and pumpkin seeds I pick up from Sprouts. For larger, bulky items like 16 oz bags of tortilla chips, I use thick woven water hyacinth baskets (around $16.99 each). The rough, natural texture of the woven reeds hides crumbs beautifully and brings warmth to the cold white shelves. Plus, natural fibers allow air to circulate around your root vegetables like onions and garlic, keeping them fresh much longer than a sealed plastic tub ever could.
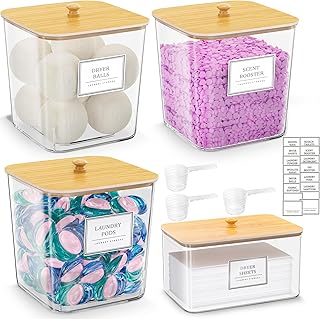
HomePekite Laundry Pods Storage Container
HomePekite Laundry Pods Storage Container has been one of the most consistently praised picks in this category. 15 reviewers averaged 4.5/5.
10. Use Modular Bins To Wrangle The Loose Snacks

Loose, individually wrapped snacks are the absolute enemy of a clean pantry. If you just toss a 12-count box of granola bars onto a shelf, the flimsy cardboard box will inevitably rip, and the shiny foil wrappers will spill everywhere like a waterfall of junk food. You need modular bins for strict containment. Bins act like physical boundaries for your categories. I use The Home Edit by iDesign All-Purpose Bins (the medium size is $16.49). They are perfectly clear, straight-sided acrylic bins that sit flush against each other without wasting a single millimeter of space.
I dump all my kids’ 1 oz fruit snack pouches into one bin, and all my 1.5 oz protein bars into another. If you’re organizing on a tighter budget, the IKEA VARIERA plastic bins ($3.99) are fantastic. They aren’t clear, but they have a nice cutout handle that makes them easy to grab off a high shelf. The key is to take the snacks out of their original cardboard packaging immediately after you get home from Walmart. Tossing the bulky cardboard saves an insane amount of space. Just drop the individual wrappers into the designated bin. It looks cleaner, and you can instantly see when you’re running low on your favorite peanut butter crackers.
11. Stop Cramming The Shelves Full Of Backups

This is the hardest pill to swallow. You can’t fill every single square inch of your pantry. A common mistake I see constantly is people cramming so much onto a shelf that they have to forcefully shove items backward just to close the door. I used to do this. I’d try to jam a 32 oz jar of Rao’s Marinara ($8.49 at Target) into a gap that was clearly too small, scraping the label off and nearly shattering the glass against a can of soup. No exaggeration.
Professional organizer Cynthia Kienzle preaches the gospel of visual breathing room. If your shelves are packed edge-to-edge, it creates visual chaos and spikes your anxiety the second you open the door. You need negative space. I highly recommend putting all your heavy backup items and bulky baking supplies on the very lowest shelf. If you buy three extra 32 oz cartons of almond milk, they belong on the floor level, not crowding your prime eye-level real estate. Keep your active, daily-use shelves only 80% full. That extra 20% of empty space allows you to actually slide your hand in and grab a 15 oz can of chickpeas without knocking over a precarious tower of tuna cans.
12. Repurpose Pot Lid Organizers For Cutting Boards

I’m going to end with my absolute favorite weird trick. You don’t always have to buy products specifically labeled for the pantry. Think outside the box. Storing flat, awkward items like heavy wooden cutting boards and 18×13 inch aluminum baking sheets is notoriously annoying. If you stack them flat on top of each other, you’ve got to lift the entire heavy pile just to get the one sheet pan at the bottom. The loud, clattering sound of metal pans crashing together used to drive me insane. Took me years to figure out.
The solution? Store them vertically. I use the stainless steel IKEA VARIERA pot lid organizer for this. It costs $8.99 and expands like an accordion. It’s meant for pot lids in deep drawers, but it’s the perfect heavy-duty rack for standing your baking sheets and cutting boards upright on a pantry shelf. I even use one to file my reusable fabric grocery bags so they don’t turn into a crumpled mountain on the floor. Just stretch the metal rack out to fit your shelf depth, and slot your flat items into the grooves. It’s ridiculously helpful and saves you from fighting a metal avalanche every time you want to roast some broccoli.
I really hope these tips save you from buying a fourth jar of tahini like I did. Kitchen pantry organization isn’t about perfection. It’s about setting up a space that works with your messy, real life. Start with the purge, grab a few clear bins, and take it one shelf at a time. If you found this helpful, I’d love it if you saved or pinned this article for your next weekend project!

iDesign Laundry Detergent Holder
A dependable everyday pick — iDesign Laundry Detergent Holder pulls in 13 ratings at 4.5 stars. Not flashy, just solid.
Frequently Asked Questions
How do I start kitchen pantry organization without getting overwhelmed?
Pull everything out first. Don’t try to organize around existing clutter. Empty the shelves completely, throw away expired items, wipe down the bare wood, and only put back the food you actually eat.
What are the best containers for kitchen pantry organization?
Clear, airtight acrylic or glass containers are the absolute best. They keep pests out and let you see your inventory instantly. OXO POP containers and The Home Edit canisters are my top choices for dry goods.
How do I organize deep pantry shelves?
Deep shelves hide food in the back. You need to install pull-out wire drawers or use long, deep plastic bins that act like makeshift drawers. This lets you access the very back without knocking things over.
Is decanting food necessary for kitchen pantry organization?
It’s not mandatory, but getting rid of bulky cardboard packaging saves a massive amount of space. Decanting dry goods into clear bins keeps food fresher longer and stops the visual chaos of clashing brand colors.